Table of Contents
Advertisement
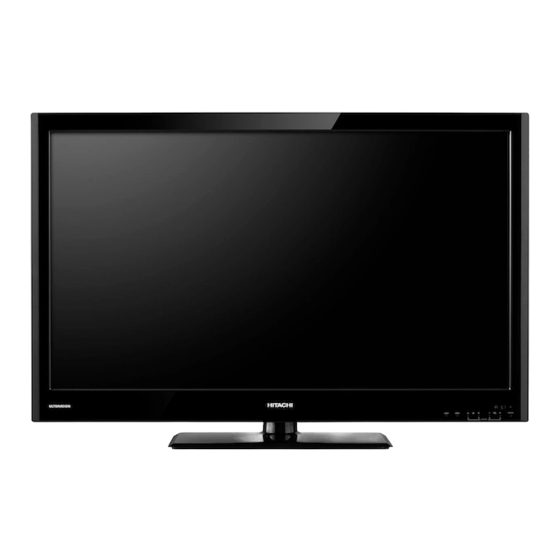
LE42S704
LE46S704
Thank you for purchasing this Hitachi product. Please read these instructions carefully.
For additional assistance please call 800.HITACHI (800.448.2244) or visit our website at www.hitachi.us/tv.
IMPORTANT SAFETY INSTRUCTIONS .................................................................................. 2-5
FIRST TIME USE .................................................................................................................... 6-17
THE REMOTE CONTROL .................................................................................................... 18-27
ON-SCREEN DISPLAY ......................................................................................................... 28-41
USEFUL INFORMATION ...................................................................................................... 42-48
LIMITED WARRANTY ................................................................................................................ 49
END USER LICENSE AGREEMENT FOR HITACHI DTV SOFTWARE ............................... 50-54
APPENDIXES ............................................................................................................................ 55
INDEX ........................................................................................................................................ 56
Revision 042810
Keep this owners guide for future reference.
Record the model name and serial number of your LCD Television for future reference.
This information is located on the back and right side of the television.
MODEL NAME. ________________________ SERIAL NO. ___________________________
TABLE OF CONTENTS
HDMI, the HDMI logo and High-Definition Multimedia Interface
are trademarks or registered trademarks of HDMI Licensing LLC.
Manufactured under license from Dolby Laboratories. Dolby and
the double-D symbol are trademarks of Dolby Laboratories.
Advertisement
Table of Contents

Related Manuals for Hitachi UltraThin LE42S704


Summary of Contents for Hitachi UltraThin LE42S704
-
Page 1: Table Of Contents
LE46S704 Thank you for purchasing this Hitachi product. Please read these instructions carefully. For additional assistance please call 800.HITACHI (800.448.2244) or visit our website at www.hitachi.us/tv. Record the model name and serial number of your LCD Television for future reference. -
Page 2: Important Safety Instructions
Safety is also foremost in our minds in the design of these units. To help you operate these products properly, this section illustrates safety tips which will be of benefit to you. Please read it carefully and apply the knowledge you obtain from it to the proper operation of your Hitachi LCD television. - Page 3 Consult the dealer or an experienced radio/television technician for help. Modifications The FCC requires the user to be notified that any changes or modifications made to this device that are not expressly approved by Hitachi America, Ltd. may void the user’s authority to operate the equipment.
- Page 4 If you are unsure, contact a professional installer. • A minimum of two people are required for installation. Flat panel displays can be heavy. Congratulations on your purchase! HITACHI CARES! • The consumer electronics industry is commited to making home entertainment enjoyable and safe. •...
- Page 5 Do not place the unit on uneven surfaces, this may drop or damage the unit, it may also cause personal injury. Unplug immediately if there is a malfunction on the TV like no picture, no video/audio or if there is smoke and bad odor coming from the TV.
-
Page 6: First Time Use
LE46S704 Thank you for purchasing this Hitachi product. Please read these instructions carefully. For additional assistance please call 800.HITACHI (800.448.2244) or visit our website at www.hitachi.us/tv. Keep this owners guide for future reference. Record the model name and serial number of your LCD Television for future reference. - Page 7 How To Install Your New Hitachi LCD Television Take the following precautions to prevent the LCD Television from tipping over and possibly causing injury. It is important to mount the unit on a stable and flat surface. ASSEMBLY OF THE BASE IMPORTANT: The base of the LCD TV must be assembled prior to use.
- Page 8 Wall Mount Unit. Insertion length (B) of the screws must be (i) within 8.5~10.5 mm for LE42S704, or (ii) within 9.5~11.5 mm for LE46S704. If the length is less than specifed, the TV's weight cannot be maintained. If the length is more CAUTION than specified, a space is created between the Wall Mount Bracket and the LCD Television.This insertion...
-
Page 9: Front Controls
(Stand-by) state. • Your Hitachi LCD TV will not show any picture if there is no video input when HDMI 1/DVI, HDMI 2 ~ HDMI 4, Component, or AV is selected. Instead, a message will indicate “No Signal”, and the Power Light will remain Blue until the TV is turned off or in Stand-by mode (lights red) when not in use. - Page 10 DIGITAL OUT (Optical Digital Audio) This jack provides Digital Audio Output for your audio device that is RAW and PCM compatible, such as an audio amplifier. The Digital Output option will grayout with all input NOTE sources, except with a digital program channel on the AIR/CABLE input source.
- Page 11 Quick Reference Remote Control Buttons And Functions In addition to controlling all of the functions on your Hitachi LCD TV, the new remote control is designed to operate different types of devices, such as, DVD Players, cable boxes (CBL), set top boxes, satellite receivers (SAT), VCRs and compatible HDMI CEC DVD Players.
- Page 12 To outdoor Antenna Cable TV (CATV) System 2. CONNECT YOUR NEW HITACHI LCD TV TO THE POWER SOURCE a). Secure it with the Wire Clamp (see page 7) b). Connect the power cord to the AC outlet. 3. POWER ON/OFF YOUR NEW HITACHI LCD TV Press the POWER button on the remote control or the POWER button on the Front Control Panel to power on/off the LCD TV.
- Page 13 TV Setup Wizard Your Hitachi LCD television has a TV Setup Wizard feature which has the ability to help you easily setup the first time you turn on your TV and find the channels available in your area. Please follow the instructions below.
- Page 14 The following connection diagrams are offered as suggestions. However, you may need to modify them to accommodate your particular assortment of devices and features. For best performance, video and audio cables should be made from coaxial shielded wire. There are four SIDE panel HDMI jacks provided as a convenience to allow you to easily connect HDMI or DVI signals from a DVD, set top box, Video Game as shown in the following examples (When a DVI product is connected, the use of a separate audio device is necessary for audio, use an Audio Amplifier and connect to the Audio In jacks).
-
Page 15: Side Panel Connections
Side Panel Connections CONNECTING A DEVICE WITH HDMI OR DVI CAPABILITY TO HDMI 1/DVI, HDMI 2 ~ HDMI 4 Connect the HDMI or DVI to HDMI connection cable from the output of the HDTV set top box or DVD player to the HDMI input as shown near the side panel at right. - Page 16 Before Operating External Video Devices Connect an external device to one of the input jacks, then press the INPUT button to show the Inputs List. Use the CURSORS ( to select the input of your choice. Then press the SELECT button to confirm your choice (see page 19). OUTPUT Video DVD PLAYER...
-
Page 17: Rear Panel Connections
Rear Panel Connections The REAR panel VIDEO and L/R AUDIO jacks are provided as a convenience to allow you to easily connect a Camcorder, DVD, Video Game and a VCR as shown in the following examples. REAR INPUT PANEL VIDEO (Yellow) L (White) •... -
Page 18: The Remote Control
Press this button to turn the TV set on or off. DEVICE Buttons In addition to controlling all the functions on your Hitachi LCD TV, the new remote control is designed to operate different types of VCRs, cable boxes, set top boxes, satellite receivers, DVD players, and other audio/video device with one touch. - Page 19 How To Use The Remote Control To Control Your TV Closed Captioning will display automatically when MUTE is on and Closed Caption is set to With Mute (see page 37). When the TV power is turned off at a volume level 21 or greater, the volume level will default to 20 when the TV is turned on.
-
Page 20: Aspect Button
ASPECT button Press this button to quickly change the picture format ASPECT ratio. Depending on the picture format, ASPECT allows you to adjust the image through the following options. Auto Use this aspect mode to have the aspect mode change automatically by signal detector. - Page 21 How To Use The Remote Control To Control Your TV ENERGY SAVE (E.SAVE) Button Use this button to choose power consumption reduction settings based on 3 levels (Min, Medium, Max). See page 37 for further details. CLOSED CAPTIONS (C.C.) Button Use this button to display the dialogue, narration, and/or sound effects of a television program or home video which are displayed on the TV screen when available.
- Page 22 If done correctly, the device LED indicator will blink 3 times to confirm proper setup. The remote control will now control the desired device. SETUP EXAMPLE (Hitachi Cable Box with precode 0003) Turn ON your cable box. Select cable mode by using your SAT/CBL button to position the LED indicator on SAT/CBL.
- Page 23 How To Use The Remote Control To Control Your AV Device CLU-49101S MY CABLE BOX CODE IS:_____________________ Refer to the instruction manual of the cable box NOTE for operation of the buttons exclusively for the cable box. PRECODED CABLE BOX Buttons These buttons transmit...
- Page 24 CLU-49101S MY DVD PLAYER CODE IS:_____________________ Refer to the instruction manual of the DVD NOTE Player for operation of the buttons exclusively for the DVD Player. PRECODED DVD Buttons These buttons transmit the chosen precoded DVD codes : -Power -Number PAD -Menu -Info -Channel Up &...
- Page 25 How To Use The Remote Control To Control Your AV Device CLU-49101S MY AUDIO/VIDEO RECEIVER (AVR) CODE IS:______________________ Device Button Refer to the instruction manual of the AVR for NOTE operation of the buttons exclusively for the AVR. PRECODED AVR Buttons These buttons transmit the chosen precoded AVR codes : -Power...
- Page 26 0008 EXPRESSVU DIGEO 1187,2187 FORTEC STAR 1821 DIGI 0637 FUNAI DIRECTOR 0476 DUMONT 0637 GENERAL FOSGATE 0276 INSTRUMENTS 0144 GENERAL 0476,0810,0276 HITACHI INSTRUMENT 0003 HOUSTON GIBRALTER 0003 GOLDSTAR 0144 HUGHES HITACHI 0003,0008 NETWORK INSIGHT 0476,0810 SYSTEMS JERROLD 0476,0810,0276 INNOVA 0003...
-
Page 27: Remote Control Codes
0739 GOODMANS NETWORK SYSTEMS GRADIENTE PHILIPS 0739 SAMSUNG 0739 GRUNDIG TIVO 0739 HARMAN/ KARDON DVD/PVR CODES HELLO KITTY 0831 COMBO HITACHI 0573,0664,1919 HUMAX 1797,1988 HITEKER 0672 INSIGNIA 2095 PIONEER 1337 INTEGRA 0571,0627 0880 SYLVANIA 0000 0783 TIVO 1337 0702 TOSHIBA... -
Page 28: On-Screen Display
The On Screen Display (OSD) for the different submenus shown in the following pages are for illustration purposes NOTE only, there may be slight differences from the actual appearance of the OSD of your Hitachi LCD TV. Video Picture Mode Select between 7 pictures modes;... - Page 29 On-Screen Display Audio Sound Mode Selects 4 audio presets (Custom, Standard, Movie, News). Bass Adjust the intensity of low frequencies. Treble Adjust the intensity of high frequencies. Balance Adjust the balance. Bass Boost Enhances the depth of the sound from the TV speakers. CONEQ Select sound equalizing mode.
-
Page 30: Picture Mode
Pro Mode This Hitachi LCD TV includes a picture quality mode called “Pro Mode” designed to customize the picture settings and is protected by a password in order to keep your settings as you want it. This option will give a couple extra picture modes (Pro-Day and Pro- Night) on your LCD TV for your viewing pleasure. -
Page 31: Noise Reduction
This involves a process known as 3:2 pull down. When Auto Movie is set to Auto your Hitachi LCD Television will activate the circuitry for this special feature to improve video performance when watching interlaced format film based sources. - Page 32 Aspect Ratio reference Input Signal Display Screen When W (Cine When W Reset This function allows you to reset the Video Menu Settings of the present input source and return it to the Standard video mode Video Gamma Dynamic Gamma Audio Backlight Setup...
-
Page 33: Audio Language
Audio Select Audio to adjust the sound to your preference. Video Sound Mode Bass Audio Treble Setup Balance Bass Boost Channels CONEQ Multimedia CONEQ Surround Adjust the sound to your preference. Move Select Return Sound Mode This function has four sound modes that are preset according to the type of program. -
Page 34: Sleep Timer
Select Setup when setting your TV up for the first time. Video Menu Language Time Audio Sleep Timer Setup Day / Night Timer Set Password Channels Parental Controls Multimedia Closed Captions Select Setup for your first time or to change your TV’s configuration. Move Select Return... -
Page 35: Parental Controls
Setup Parental Controls This function will block out the picture and sound of the selected rating levels. The password to enter the Locks feature is a four digit number. The factory preset password is 0000. Use the NUMERIC buttons to enter the password. Video Panel Lock Block Unrated TV... - Page 36 Canadian Ratings English Table Programming intended for children under age 8 - Violence Guidelines; Careful attention is paid to themes, which could threaten children’s sense of security and well-being. There will be no realistic scenes of violence. Depictions of aggressive behavior will be infrequent and limited to portrayals that are clearly imaginary, comedic or unrealistic in nature.
-
Page 37: Closed Captions
TV program guide. This information covers the entire screen and viewing the TV program is not possible. Text may not be available with every Energy Options Use this feature to save energy when watching your Hitachi LCD TV. English Exit EXIT on when Mute is on. -
Page 38: Input Labels
HDMI - CEC Set to On and this feature will enable the HDMI-CEC signal bus to allow your Hitachi LCD TV to discover and communicate automatically with other compatible HDMI-interfaced Audio/Video device. The CEC signal bus makes global controls possible, based on “plug &... -
Page 39: Rgb Options
Setup Component Options This function allows you to adjust the phase between your TV and the Device with component output. Video Energy Options Light Control Audio HDMI - CEC Setup Input Labels Component Options Channels RGB Options Multimedia Reset AV & Setup Adjust the Phase or Reset the Component settings. -
Page 40: Channel List
Select Channels to set your signal source options, run New Channel Scan, Check Signal Meter and Set Channel List (Add channels to List, Channel/Labels and Favorite Channels). Video Source Signal Strength Audio New Channel Scan Setup Add Channels to List Channel List Channels Channel Labels... -
Page 41: Favorite Channels
This feature is useful for viewing digital still pictures from USB Exit EXIT Drives using the USB slot in the side panel of your Hitachi LCD television. Upon inserting a USB drive into the USB slot, you will be prompted to view these photos with the JPEG viewer feature or you can ac- cess them via the OSD Main Menu under Multimedia. -
Page 42: Useful Information
Dust the screen and cabinet with a soft cloth. Clean the screen with a soft cloth moistened in warm water and dry with a soft cloth. A mild soap may be used if the screen is extremely dirty. Place your LCD Television away from extreme heat, humidity and extremely dusty places. -
Page 43: Troubleshooting
HDMI set top boxes Picture is blurry or fuzzy Pixelization noise or loss connection (“No Signal” message display) If the problem cannot be solved with the suggested procedures, contact 800.HITACHI. For your safety, never try to repair the product yourself. CHECKLIST •... - Page 44 IGNITION NOISE: Black spots or horizontal streaks may appear, picture may flutter or drift. Usually caused by interference from automobile ignition systems, neon lamps, electrical drills, and other electrical appliances. GHOSTS: Ghosts are caused by the television signal following two paths. One is the direct path and the other is reflected from tall buildings, hills or some other objects.
-
Page 45: Supplied Accessories
Power Consumption Maximum Power LE42S704 ....135 W, 1.20A Maximum Power LE46S704 ....160 W, 1.35A •... -
Page 46: Rear View
LE42S704 model (Includes Table Top Stand) Weight (lbs./kg): 38.6/17.5 CENTER OF THE SCREEN HOLE FOR WALL MOUNT (4 PLACES) LOCATION OF THE POWER CORD Use as Reference for Wall Mount Bracket 40 (1015.0) 36 3/4 (933.3) (ACTIVE AREA) 18 7/8 (479.7) 7 7/8 (200.0) - Page 47 Set Dimensions LE46S704 model (Includes Table Top Stand) Weight (lbs./kg): 44.2/20.1 CENTER OF THE SCREEN HOLE FOR WALL MOUNT (4 PLACES) LOCATION OF THE POWER CORD Use as Reference for Wall Mount Bracket 43 5/8 (1108.8) 40 3/16 (1020.9) (ACTIVE AREA) 18 7/8 (479.7) 15 3/4 (400.0) Rear View...
- Page 48 HITACHI AMERICA, LTD. HITACHI has made every effort to assure you hours of trouble free operation from your Hitachi product. Should you require service assistance with OPERATIONAL, HOOK UP, TECHNICAL ASSISTANCE OR WARRANTY SERVICE SUPPORT, please contact one of our knowledgeable Customer Service Representatives at (800.448.2244).
-
Page 49: Limited Warranty
G. Any Product used for purposes or applications, or subjected to operating conditions, other than those identified as acceptable in the Product’s Owners Guide. H. Product repairs (including any product whose case has been opened), or part replacements provided or installed, by any person other than an Authorized Hitachi Service Facility Representative. -
Page 50: End User License Agreement For Hitachi Dtv Software
IMPORTANT – READ CAREFULLY: This End User License Agreement for HITACHI DTV Software (this “Agreement”) is a legal agreement between you (“you” or “your”), in your capacity as the owner of a HITACHI brand digital television (the “DTV”), and HITACHI America, Ltd., Home Electronics Division (“HITACHI”). By using the DTV or the digital television software installed on the DTV (the “DTV Software”) or any... - Page 51 End User License Agreement For Open Source Software OPEN SOURCE SOFTWARE LICENSE INFORMATION This Hitachi TV incorporates open source software modules distributed under certain licenses, including the GNU General Public License Version 3 (as defined by the Free Software Foundation, Inc.).
- Page 52 TERMS AND CONDITIONS 0. Definitions. “This License” refers to version 3 of the GNU General Public License. “Copyright” also means copyright-like laws that apply to other kinds of works, such as semiconductor masks. “The Program” refers to any copyrightable work licensed under this License. Each licensee is addressed as “you”.
- Page 53 End User License Agreement For Operating System Software • e) Convey the object code using peer-to-peer transmission, provided you inform other peers where the object code and Corresponding Source of the work are being offered to the general public at no charge under subsection A separable portion of the object code, whose source code is excluded from the Corresponding Source as a System Library, need not be included in conveying the object code work.
- Page 54 If you convey a covered work, knowingly relying on a patent license, and the Corresponding Source of the work is not available for anyone to copy, free of charge and under the terms of this License, through a publicly available network server or other readily accessible means, then you must either (1) cause the Corresponding Source to be so available, or (2) arrange to deprive yourself of the benefit of the patent license for this particular work, or (3) arrange, in a manner consistent with the...
-
Page 55: Appendixes
Appendixes Appendix A: Picture Format for Each Input Source Aspect Specifications Input Signal AIR / CABLE Air / Cable 1080p, 1080i, 720p, 480p, 480i 640x480, 800x600, 1024x768, HDMI 1 HDMI / DVI 1280x720, 1280x768, 1280x1024, 1440x900, 1680x1050 1080p, 1080i, 720p, 480p, 480i HDMI 2 HDMI 1080p, 1080i, 720p, 480p, 480i... -
Page 56: Index
Accessories .........6 Add Channels to List . - Page 57 Notes...
- Page 58 Notes...
- Page 59 Notes...
- Page 60 Notes...
Need help?
Do you have a question about the UltraThin LE42S704 and is the answer not in the manual?
Questions and answers