Advertisement
Quick Links
CONGRATULATIONS
Thank you for purchasing this Hitachi product.
Please read these instructions carefully.
For additional assistance please call Toll Free
800.HITACHI (800.448.2244)
or visit our website at www.hitachi.us/tv.
Keep this Owner's Guide for future reference.
Record the model name and serial number of your LCD
Television for future reference.This information is located
on the back of the television.
OG_M4S9_03242016
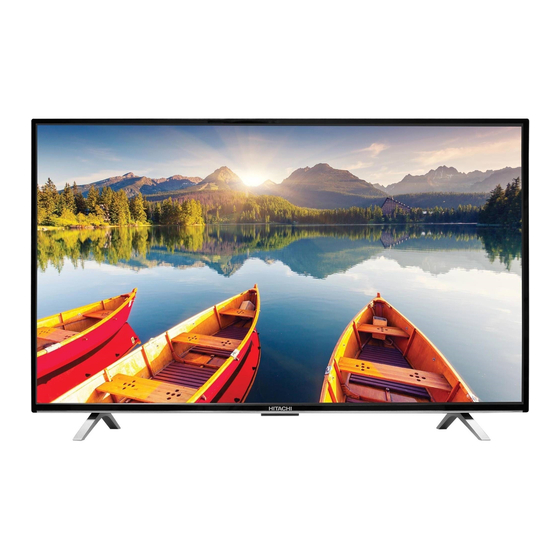
LE48M4S9
Model:
48" Class (47.61" Diagonal)
Serial No.
TABLE OF CONTENTS
2-6
IMPORTANT SAFETY INSTRUCTIONS
7
HOW TO ATTACH / REMOVE THE STAND
8-12
FIRST TIME USE
14-18
TV OPERATION
19-21
RECEPTION DISTURBANCES
22
SPECIFICATIONS
24
LIMITED WARRANTY
Advertisement

Summary of Contents for Hitachi LE48M4S9
- Page 1 LE48M4S9 Model: 48” Class (47.61” Diagonal) Serial No. CONGRATULATIONS TABLE OF CONTENTS Thank you for purchasing this Hitachi product. IMPORTANT SAFETY INSTRUCTIONS Please read these instructions carefully. HOW TO ATTACH / REMOVE THE STAND 8-12 FIRST TIME USE For additional assistance please call Toll Free...
- Page 2 CAUTION: TO REDUCE THE RISK OF ELECTRIC WARNING: CAUTION: AD NOTICE WARNING: CAUTION: Location of the required Marking eclaration of Conformity...
- Page 3 IMPORTANT SAFETY INSTRUCTIONS...
- Page 4 IMPORTANT SAFETY INSTRUCTIONS (continued) CONDENSATION HOW TO HANDLE THE LCD PANEL • • • • The following symptoms are not signs of malfunction but technical limitation. Therefore we disclaim any responsibility for these symptoms. • • • Power source Warning Caution...
- Page 6 CHILD SAFETY NOTICE...
- Page 7 FETY PRECAUTIONS 4 i n c h e s 4 i n c h e s Notes when mounting the TV on a wall Securing to a Wall Clamp Screw CE FOR TV CABINET YES !! NO !!
- Page 8 How to attach the stand NOTE: • Assure the AC cord is not connected to an AC outlet. • Before beginning this process, make sure that you have a clean, safe, and cushioned space to work at to avoid any damage to the unit.
- Page 9 Contents hapter 1: Introduction hapter 2: TV Operation hapter 3: Addition Information...
- Page 10 Chapter 1 Introduction TV Control Keys Inputs / Outputs Digital Audio Out HDMI 1/2/3 NOTE: AIR/CABLE...
- Page 11 Remote control Color buttons FREEZE...
- Page 12 Important Note Network Connection • • Connecting to a wired network INTERNET • • • Network onnecting to a wireless network • • Network...
- Page 13 BATTERY PRECAUTIONS • • • • • • HOW TO INSTALL BATTERIES CONNECTING POWER...
- Page 14 Antenna connections If you are using an indoor or outdoor antenna, follow the instructions below that correspond to your antenna system. If you are using a Cable TV service, see Cable TV connections. Combination VHF/UHF Antenna (Single 75 ohm cable) Antenna Jack Coaxial...
- Page 15 hapter 2 TV Operation Display Archivos itial Setup omponent DMI1 DMI2 DMI3...
- Page 16 Menu Operation Channel Manager CHANNEL > Channel Manager CHANNEL VIDEO AUDIO TIME, SETUP LOCK CHANNEL MENU CHANNEL MENU EXIT Tuner VIDEO Auto Channel Scan CHANNEL > Auto Channel Scan MENU VIDEO Scan all channels Picture Mode MENU EXIT Color Temperature Note: DTV Manual Tuning Aspect Ratio...
- Page 17 AUDIO Time Zone MENU AUDIO Sound Mode Daylight Saving Balance SETUP Perfect Volume MENU SETUP Menu Language Digital Output TV Location Audio Language Closed Captions Note: Note: MTS/SAP CC Mode CC On TIME CC on Mute Analog Captions Time Mode Digital Captions Reset Note:...
- Page 18 Network LOCK Wired Lock Manual Note: Auto Parental Control: MAC Address Change Password Wireless US Rating Canada Rating Base Station Region 5 Reset Region 5 Multimedia (USB) MAC Address HDMI-CEC My Picture Multimedia > My Picture Software Update Setup > Software Update Software Version MENU USB Update...
- Page 19 Featured APPs Opera TV Browser Facebook YouTube Picasa File Share Twitter Opera TV Store Wireless Display Note:...
- Page 20 Chapter 3 Addition Information Problem & Solutions 1. Failed to connect to network 2. Videos do not play smoothly. 3. USB hard drives are not recognized when multiple hard drives are connected. 4. There are no distinct changes of TV interface after SW updating.
- Page 21 Reception disturbances ON NOISE: OSTS: DIO FREQUENCY INTERFERENCE: • • • • • LOCK NOISE or FREEZE (DIGITAL INPUT): NOTE: •...
- Page 22 Troubleshooting SYMPTOMS POSSIBLE SOLUTIONS SYMPTOMS POSSIBLE SOLUTIONS • • • • • • • • • • • • • • • • • • • • • • • • • • • • • • • • • •...
- Page 23 Model LE48M4S9 • • For information on our other products, please visit our website at www.hitachi.us...
- Page 24 HITACHI AMERICA, LTD., DIGITAL MEDIA DIVISION HITACHI has made every effort to assure you enjoy trouble free operation from your Hitachi product. Should you require service assistance with OPERATIONAL, HOOK UP, TECHNICAL ASSISTANCE OR WARRANTY SERVICE SUPPORT, please contact one of our knowledgeable Customer Service Advocates at 800.HITACHI (800.448.2244).
- Page 25 LIMITED WARRANTY: Conditions of Hitachi Limited Warranty: The original owner must notify Hitachi of a defect claim by calling 800-HITACHI PARTS LABOR SERVICE LOCATION IMPORTANT: Wa rranty Limitations. , or any third party's branded hardware or peripheral devices, including any software incorporated therein, whether or not included within the Product's original packaging...
- Page 26 This Limited Warranty is the only guarantee for this Product, and covers residential use only. COVERAGE At the discretion of Hitachi, Hitachi will repair, replace, or refund the purchase price of the Product should the Product fail due to a manufacturing defect during the 12 month period following the date of original purchase.


Need help?
Do you have a question about the LE48M4S9 and is the answer not in the manual?
Questions and answers