Yamaha THR10 Service Manual
Hide thumbs
Also See for THR10:
- Owner's manual (23 pages) ,
- Manual (14 pages) ,
- Owner's manual (21 pages)
Advertisement
GA
012035
THR10: 20111120 オープンプライス
THR5: 20111120 オープンプライス
THR10/THR5
■ CONTENTS (目次)
WIRING DIAGRAM
BLOCK DIAGRAM
CIRCUIT DIAGRAM
GUITAR AMPLIFIER
SERVICE MANUAL
..........................................................................3/4
(仕様)
................................................................................5
(寸法図)
...........................................................6
................................................................8
(基板結線図)
(ブロックダイアグラム)
.............................................................18
................................................................................27
(検査)
Copyright (c) Yamaha Corporation. All rights reserved. RN YBS ´11.11
THR10
THR5
........................................7
.................................................9
............................................... 10
........................34
HAMAMATSU, JAPAN
Advertisement
Table of Contents

Related Manuals for Yamaha THR10


Summary of Contents for Yamaha THR10
-
Page 1: Table Of Contents
(ブロックダイアグラム) DISASSEMBLY PROCEDURES ..........10 (分解手順) CIRCUIT BOARDS .............18 (シート基板図) INSPECTIONS ................27 (検査) UPDATING FIRMWARE ......34 (ファームウェアのアップデート) PARTS LIST CIRCUIT DIAGRAM 012035 HAMAMATSU, JAPAN THR10: 20111120 オープンプライス Copyright (c) Yamaha Corporation. All rights reserved. RN YBS ´11.11 THR5: 20111120 オープンプライス... - Page 2 IMPORTANT NOTICE This manual has been provided for the use of authorized Yamaha Retailers and their service personnel. It has been assumed that basic service procedures inherent to the industry, and more specifically Yamaha Products, are already known and understood by the users, and have there- fore not been restated.
-
Page 3: Specifications
THR10/THR5 THR10 THR5 ■ SPECIFICATIONS... - Page 4 THR10/THR5 THR10 THR5 ■ 仕様...
-
Page 5: Dimensions (寸法図
THR10/THR5 ■ DIMENSIONS (寸法図) THR10 Top view Unit: mm (inch) 単位:mm(インチ) 360 (14-1/8") Front view Side view 135 (5-3/8") (1/8") 140 (5-1/2") THR5 Top view Unit: mm (inch) 単位:mm(インチ) 271 (10-5/8") Front view Side view 115 (4-1/2") 120 (4-3/4") (1/8") -
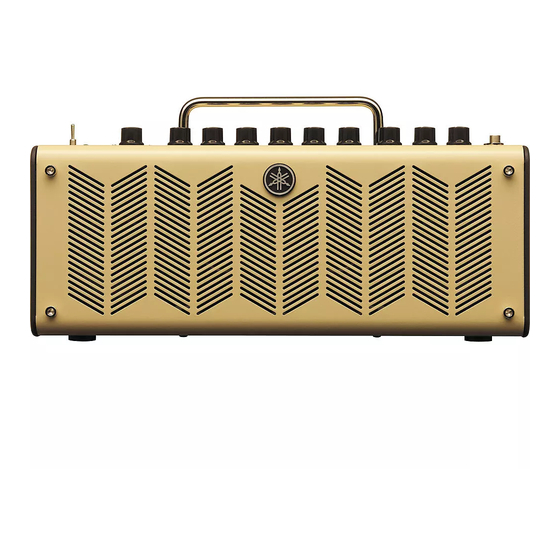
Page 6: Panel Layout (パネルレイアウト
❸ TAP/TUNER ⓮ VOLUME (THR5 only) ❸ TAP / TUNER ⓮ VOLUME(THR5 のみ) ❹ AMP ⓯ USB/AUX OUTPUT (THR10 only) ❹ AMP ⓯ USB / AUX OUTPUT (THR10 のみ) ❺ GAIN ⓰ INPUT ❺ GAIN ⓰ INPUT ❻ MASTER ⓱ PHONES ❻... -
Page 7: Circuit Board Layout (ユニットレイアウト
THR10/THR5 ■ CIRCUIT BOARD LAYOUT (ユニットレイアウト) THR10 Top view OPERATION (1) OPERATION (2) MAIN Front view OPERATION (3) Bottom view OPERATION (4) THR5 Top view OPERATION (1) OPERATION (2) MAIN Front view OPERATION (3) Rear view OPERATION (4) - Page 8 THR10 THR5 OPERATION (4) (BATTERY) W606 OPERATION (3) OPERATION (1) THR10 MAIN JK603 JK501 CB501 W603A CB502 CB603 W605 JK602 W603B IC10 IC22 JK601 MODERN BASS BRIT HI LEAD CRUNCH FLAT CLEAN TAP:TIME HOLD:TUNER OPERATION (2) THR10 THR5 OUTPUT VR11...
- Page 9 -8.5dB AMP IC301 FLASH ROM IC11 D607(DISPLAY) 16M (F,WARE) EEPROM D609,613,614,616,619, SSP2A13 620,621,623 (LED) SW602 (ENCODER) SW606-611(TACT SW) POWER CUT POWER SW IC504 SW612 (THR10) IC10 SW606 (THR5) +15V ±7V IC505(LDO) VR3-8 Q509,510 D626,627 (LED) +3.3D +3.3D/+3.3D1 THR5 IC506 +3.3D1 D606(DISPLAY) +1.5D...
-
Page 10: Disassembly Procedures (分解手順
THR10/THR5 THR10 ■ DISASSEMBLY PROCEDURES (分解手順) Top Cover Assembly 1. メタルグリル Ass'y(所要時間:約 2 分) (Time required: About 2 minutes) Using an Allen hex socket screw driver (size: 4 mm), 1-1 六角レンチ(4mm)で[50]のネジ 4 本を外します。 remove the four (4) screws marked [50]. Remove the [54A]のネジ... - Page 11 THR10/THR5 THR10 MAIN Circuit Board 2. メインシート(所要時間:約 3 分) (Time required: About 3 minutes) Remove the top cover assembly. (See procedure 1.) 2-1 トップカバー Ass'y を外します。 (1 項参照) Remove the two (2) screws marked [16A], the two (2) 2-2 [16A]のネジ 2 本、 [17A]のネジ 2 本、 [18]のネ...
- Page 12 THR10/THR5 THR10 OPERATION (2) Circuit Board 4. OPERATION(2)シート(所要時間:約 5 分) (Time required: About 5 minutes) Remove the top cover assembly. (See procedure 1.) 4-1 トップカバー Ass'y を外します。 (1 項参照) Remove the MAIN circuit board. (See procedure 2.) 4-2 MAIN シートを外します。 (2 項参照)...
- Page 13 THR10/THR5 THR10 SPEAKERS 6. スピーカー( (所要時間:各約 3 分) (Time required: About 3 minutes per each) The left and right speakers can be removed in the ※ 左右のスピーカーは同じ方法で取り外すことがで same manner. きます。 Remove the top cover assembly. (See procedure 1.) 6-1 トップカバー Ass'y を外します。 (1 項参照)...
- Page 14 THR10/THR5 THR5 Top Cover Assembly 1. メタルグリル Ass'y(所要時間:約 2 分) (Time required: About 2 minutes) Using an Allen hex socket screw driver (size: 4 mm), 1-1 六角レンチ(4mm)で[50]のネジ 4 本を外します。 remove the four (4) screws marked [50]. Remove the [52A]のネジ 3 本、 [52B]のネジ 2 本を外します。...
- Page 15 THR10/THR5 THR5 MAIN Circuit Board 2. メインシート(所要時間:約 3 分) (Time required: About 3 minutes) Remove the top cover assembly. (See procedure 1.) 2-1 トップカバー Ass'y を外します。 (1 項参照) Remove the two (2) screws marked [16A], the two (2) 2-2 [16A]のネジ 2 本、 [17A]のネジ 2 本、 [18]のネ...
- Page 16 THR10/THR5 THR5 OPERATION (2) Circuit Board 4. OPERATION(2)シート(所要時間:約 5 分) (Time required: About 5 minutes) Remove the top cover assembly. (See procedure 1.) 4-1 トップカバー Ass'y を外します。 (1 項参照) Remove the MAIN circuit board. (See procedure 2.) 4-2 MAIN シートを外します。 (2 項参照)...
- Page 17 THR10/THR5 THR5 SPEAKERS 6. スピーカー(所要時間:各約 3 分) (Time required: About 3 minutes per each) The left and right speakers can be removed in the ※ 左右のスピーカーは同じ方法で取り外すことがで same manner. きます。 Remove the top cover assembly. (See procedure 1.) 6-1 トップカバー Ass'y を外します。 (1 項参照)...
-
Page 18: Circuit Boards (シート基板図
THR10/THR5 ■ CIRCUIT BOARDS (シート基板図) CONTENTS (目次) • MAIN Circuit Board THR10 THR5 (YD788B0) ....... 22/23 • OPERATION (1) Circuit Board THR10 (YD789B0) ......19 • OPERATION (2) Circuit Board THR10 (YD789B0) ......20 • OPERATION (3) Circuit Board THR10 (YD789B0) ...... - Page 19 THR10/THR5 THR10 • OPERATION (1) Circuit Board to MAIN-CB7 to MAIN-CB501 Component side (部品側) Pattern side (パターン側) 2NA-WZ25910...
- Page 20 THR10/THR5 THR10 • OPERATION (2) Circuit Board Component side (部品側) Pattern side (パターン側) 2NA-WZ25910...
- Page 21 THR10/THR5 THR10 • OPERATION (3) Circuit Board to MAIN-CB5 to MAIN-CB5 Component side (部品側) Pattern side (パターン側) • OPERATION (4) Circuit Board to MAIN-CB502 Component side (部品側) Pattern side (パターン側) 2NA-WZ25910...
- Page 22 OPERATION (3)- W603A, W603B to OPERATION (2)-W601 (THR10) to OPERATION (2)-W602 (THR5) A’ to OPERATION (1)-W605 DC IN 15V to OPERATION (1)-CB603 (THR10) to OPERATION (1)-CB602 (THR5) to OPERATION (4)-W606 A’ Component side (部品側) 2NA-WZ25890 (THR10) / 2NA-WZ25900 (THR5)
- Page 23 THR10/THR5 THR10 THR5 • MAIN Circuit Board A’ A’ Pattern side (パターン側) 2NA-WZ25890 (THR10) / 2NA-WZ25900 (THR5)
- Page 24 THR10/THR5 THR5 • OPERATION (1) Circuit Board to MAIN-CB501 to MAIN-CB7 Component side (部品側) Pattern side (パターン側) 2NA-WZ25920...
- Page 25 THR10/THR5 THR5 • OPERATION (2) Circuit Board to MAIN-CB8 Component side (部品側) Pattern side (パターン側) 2NA-WZ25920...
- Page 26 THR10/THR5 THR5 • OPERATION (3) Circuit Board to MAIN-CB5 to MAIN-CB5 Component side (部品側) Pattern side (パターン側) • OPERATION (4) Circuit Board to MAIN-CB502 Component side (部品側) Pattern side (パターン側) 2NA-WZ25920...
-
Page 27: Inspections (検査
・ オシロスコープ • Oscilloscope ● Preparation ● 準備 Install the Yamaha Steinberg USB driver to the PC. Yamaha Steinberg USB ドライバーを PC にインストー ルします。 For details, refer to “Preparation 2. Installing YAMAHA Steinberg USB Driver” of “UPDATING FIRMWARE” on 詳しくは、34 ページ「ファームウェアのアップデート」... - Page 28 After this test is completed, “0” is shown on the LED 本検査終了後、 LED ディスプレイに 0 が表示され、 display, and all the LEDs other than that turn off. それ以外の LED はすべて消灯します。 TAP key THR10 only THR10 のみ Fig. 1 (図 1) Memory Test 2. メモリー検査...
- Page 29 THR10/THR5 THR10 THR5 Switch Test (THR10 only) 3. スイッチ検査(THR10 のみ) When this test is started, “1” is shown on the LED 本検査スタート時、LED ディスプレイには 1 display and the “CLEAN” LED lights. が表示され、 CLEAN LED が点灯しています。 Press the USER MEMORY switches 1 through 5 in USER ...
- Page 30 THR10/THR5 THR10 THR5 THR10 THR5 Table 1 (表 1) Table 1 (表 1) Order Volume Operation LED Display Order Volume Operation LED Display Initial Sate Initial Sate MIN. MIN. GAIN MAX. GAIN MAX. CENTER CENTER MIN. MIN. MASTER MAX. MASTER MAX.
- Page 31 LED ディスプレイに d が表示されていることを 確認します。 Input the 20 Hz to 20 kHz sweep signal (sweep time 2 sec/one way), 0.15 V (THR5)/0.12 V (THR10) AUX 端子に、 20 Hz 〜 20 kHz スイープ信号 (スイー sine wave to the AUX jack. プ片道 2 秒) 、0.15 V(THR5)/0.12 V(THR10)...
- Page 32 スピーカーから再生音が出力されることを確認し from the speakers. ます。 Turn the “USB/AUX” knob clockwise, and confirm USB/AUX ツマミを時計周りに回転し、出力音 that the output sounds increase. (THR10 only) が大きくなることを確認します。 (THR10 のみ) Tur n the “USB/AUX” knob counterclockwise, USB/AUX ツマミを反時計周りに回転し、出力 confirm that the output sounds decrease. (THR10 音が小さくなることを確認します。 (THR10 のみ)...
- Page 33 THR10/THR5 THR10 THR5 13. Output Test with GUITAR Input 13. INPUT 入出力検査 Set the volume knobs as shown below. 下記のようにボリュームツマミを設定します。 THR10 THR5 Input the music signal to the INPUT jack and INPUT 端子に音楽信号を入力し、スピーカーから confirm that the music signal is output from the その音楽信号が出力されることを確認します。...
-
Page 34: Updating Firmware (ファームウェアのアップデート
2-1 Access the following website and download the 2-1 以下の URL から、最新の YAMAHA Steinberg latest version of the YAMAHA Steinberg USB USB ドライバーをダウンロードします。 Driver. http://download.yamaha.com http://download.yamaha.com 2-2 Install the Yamaha Steinberg USB Driver to the PC. 2-2 Yamaha.Steinberg.USB ドライバーを PC にイン ストールします。 Double Click... - Page 35 THR10/THR5 THR10 THR5 Connect the USB cable to the PC and click “NEXT > ” Click Click Click Click Click...
- Page 36 THR5 Installing YAMAHA MidRadio Player 3. YAMAHA MidRadio Player のインストール Note: 注: The YAMAHA MidRadio Player is only in YAMAHA MidRadio Player は日本語版のみで Japanese, not in English. 英語版はありません。 3-1 Access the following website and download the 3-1 以下の URL から、最新の YAMAHA MidRadio ...
- Page 37 THR10/THR5 THR10 THR5 3-2 Install the YAMAHA MidRadio Player to the PC. 3-2 Yamaha.MidRadio Player を PC にインストール します。 Double Click Click Click Means “Next” Click Click Means “Next” Means “Completion”...
- Page 38 Japanese meaning is as follows. 1-1 Double Click Cooperation in quality improvement To help improve the quality of software and services of Yamaha, do you transmit setting information of your player to Yamaha? (Data to be transmitted does not contain personal information.
- Page 39 3-2 MIDI 出力先の選択 をクリックします。 3-3 Click “ 再生 ” tag. 3-3 再生 タグをクリックします。 3-4 Click “ MIDI デバイスを使う ” 3-4 MIDI デバイスを使う をクリックします。 3-5 Select “THR10-1” . 3-5 THR10-1 を選択します。 3-6 Click “OK” . 3-6 OK をクリックします。 3-7 Click “ ” .
- Page 40 THR10/THR5 THR10 THR5 <Operation on this unit> 4. <本機の操作> After writing of the firmware starts, the followings ファームウェアの書き込み開始後、LED ディスプ are shown on the LED display. レイに以下のように表示されます。 Writing of the firmware is ファームウエア being executed 書き込み中 Blinks green 緑色点滅 Writing of the firmware is ファームウエア...
-
Page 41: Parts List
THR10/THR5 GUITAR AMPLIFIER THR10/THR5 PARTS LIST ■ CONTENTS (目次) OVERALL ASSEMBLY (総組立) THR10 ....................2 THR5 ....................4 BATTERY BOX ASSEMBLY ....... 6 (バッテリーボックス Ass'y) ELECTRICAL PARTS ..............7 (電気部品) Notes: DESTINATION ABBREVIATIONS A : Australian model K : Korean model... - Page 42 THR10/THR5 ■ OVERALL ASSEMBLY (総組立) THR10 7 (2) Top cover assembly トップカバーAss'y...
- Page 43 THR10/THR5 THR10 The seventh letter of the shaded ( ) part number is I, not one. ● 網掛けの付いた PART NO. の 7 番目の文字は「イチ」ではなく、 「アイ」です。 ● PART NO. DESCRIPTION 部 品 名 REMARKS REF NO. QTY RANK OVERALL ASSEMBLY 総 組 立...
- Page 44 THR10/THR5 THR5 7 (1) 7 (2) Top cover assembly ト ップカバーAss'y...
- Page 45 THR10/THR5 THR5 The seventh letter of the shaded ( ) part number is I, not one. ● 網掛けの付いた PART NO. の 7 番目の文字は「イチ」ではなく、 「アイ」です。 ● OVERALL ASSEMBLY THR5 総 組 立 GUITAR AMP F.ASSY WZ260600 ギ タ ー ア ン プ 総 組 立...
- Page 46 THR10/THR5 ■ BATTERY BOX ASSEMBLY (バッテリーボックス Ass'y) THR10 THR5 The seventh letter of the shaded ( ) part number is I, not one. ● 網掛けの付いた PART NO. の 7 番目の文字は「イチ」ではなく、 「アイ」です。 ● PART NO. DESCRIPTION REMARKS 部 品 名 REF NO.
- Page 47 THR10/THR5 THR10 THR5 ■ ELECTRICAL PARTS (電気部品) PART NO. DESCRIPTION 部 品 名 REMARKS REF NO. QTY RANK ELECTRICAL PARTS 電 気 部 品 THR10,THR5 W Z 2 5 8 9 0 0 CIRCUIT BOARD MAIN M A I N...
- Page 48 THR10/THR5 THR10 THR5 MAIN PART NO. DESCRIPTION 部 品 名 REMARKS REF NO. QTY RANK U S 1 2 6 10 0 CERAMIC CAPACITOR-F (CHIP) 1.0uF 10V Z チ ッ プ セ ラ( F ) U S 1 3 5 10 0 CERAMIC CAPACITOR-F (CHIP) 0.1uF 16V Z...
- Page 49 THR10/THR5 THR10 THR5 MAIN PART NO. DESCRIPTION 部 品 名 REMARKS REF NO. QTY RANK -164 U S 1 3 5 10 0 CERAMIC CAPACITOR-F (CHIP) 0.1uF 16V Z チ ッ プ セ ラ( F ) C165 WQ28660 0 CERAMIC CAPACITOR (CHIP) 0.22uF 50V K...
- Page 50 THR10/THR5 THR10 THR5 MAIN PART NO. DESCRIPTION 部 品 名 REMARKS REF NO. QTY RANK C501 U S 0 6 5 10 0 CERAMIC CAPACITOR-F (CHIP) 0.1uF 50V Z チ ッ プ セ ラ( F ) C502 WG86370 0 CERAMIC CAPACITOR (CHIP) 1.0uF 25V K...
- Page 51 IC22 X 8 9 6 9 A 0 0 IC YDA147-SZE2 DIGITAL POWER AMPLIFIER I C * IC301 Y D 7 9 5 B 0 0 IC WRITTEN BY YAMAHA WRITTEN FLASH ROM I C IC302 X 5 6 6 5 C 0 0 IC M12L64164A-7TG2M S I...
- Page 52 抗 R D 3 5 4 4 7 0 CARBON RESISTOR (CHIP) 1/16W J チ ッ プ 抵 抗 THR10 only R D 3 5 7 10 0 CARBON RESISTOR (CHIP) 10K 1/16W J チ ッ プ 抵 抗 R D 3 5 4 4 7 0 CARBON RESISTOR (CHIP) 1/16W J チ...
- Page 53 THR10/THR5 THR10 THR5 MAIN PART NO. DESCRIPTION 部 品 名 REMARKS REF NO. QTY RANK R111 R F 4 5 7 1 2 0 CARBON RESISTOR (CHIP) 12K 1/16W D チ ッ プ 抵 抗 R112 R F 4 5 7 1 2 0 CARBON RESISTOR (CHIP) 12K 1/16W D チ...
- Page 54 THR10/THR5 THR10 THR5 THR10 MAIN and OPERATION PART NO. DESCRIPTION 部 品 名 REMARKS REF NO. QTY RANK R304 R D 3 5 4 4 7 0 CARBON RESISTOR (CHIP) 1/16W J チ ッ プ 抵 抗 -306 R D 3 5 4 4 7 0 CARBON RESISTOR (CHIP) 1/16W J チ...
- Page 55 THR10/THR5 THR10 OPERATION PART NO. DESCRIPTION 部 品 名 REMARKS REF NO. QTY RANK -605 V 9 5 9 9 2 0 R DIODE (CHIP) HSU119 TRF-E チ ッ プ ダ イ オ ー ド D603 V T 3 3 2 9 0 0 DIODE (CHIP) 1SS355 TE-17 チ...
- Page 56 THR10/THR5 THR10 THR5 OPERATION PART NO. DESCRIPTION 部 品 名 REMARKS REF NO. QTY RANK SW607 V 4 7 5 7 1 0 0 TACT SWITCH EVQ 11A 04M タ ク ト ス イ ッ チ USER MEMORY 1 SW607 WD48310 0 TACT SWITCH SKRGAAD010 タ...
- Page 57 THR10/THR5 THR5 OPERATION PART NO. DESCRIPTION 部 品 名 REMARKS REF NO. QTY RANK R604 R D 3 5 5 12 0 CARBON RESISTOR (CHIP) 120 1/16W J チ ッ プ 抵 抗 R606 R D 3 5 5 12 0 CARBON RESISTOR (CHIP) 120 1/16W J チ...
- Page 58 THR10/THR5 GUITAR AMPLIFIER THR10/THR5 CIRCUIT DIAGRAM ■ CONTENTS (目次) CIRCUIT DIAGRAM (回路図) MAIN 1/2 ................1 THR10 MAIN 2/2 ................3 OPERATION (1), (2), (3), (4) ..........5 MAIN 1/2 ................2 THR5 MAIN 2/2 ................4 OPERATION (1), (2), (3), (4) ..........6 Notation for Circuit Diagrams (回路図表記上の注意)...
- Page 59 <P.1> THR10/THR5 THR10/THR5 OVERALL CIRCUIT DIAGRAM 1/6 (総回路図 1/6) (MAIN 1/2) to OPERATION (3)_W603A, W603B <P. 5: D6> MAIN L=MUTE +3.3D HP_MUTE HP_DET no_use no_use +3.3D R148 HP_DET R145 HP_DET no_use HP_R no_use C111 Max0.45Vrms R161 R162 no_use R217 10UH R115 R121 4.7K...
- Page 60 <P.2> THR10/THR5 THR10/THR5 OVERALL CIRCUIT DIAGRAM 2/6 (総回路図 2/6) (MAIN 1/2) THR5 to OPERATION (3)_W603A, W603B <P. 6: D6> MAIN L=MUTE +3.3D HP_MUTE HP_DET no_use no_use +3.3D R148 HP_DET R145 HP_DET no_use HP_R no_use C111 Max0.45Vrms R161 R162 no_use R217 10UH...
- Page 61 <P.3> THR10/THR5 THR10/THR5 OVERALL CIRCUIT DIAGRAM 3/6 (総回路図 3/6) (MAIN 2/2) UPD800500F1-011 R307 47X4 MA21 MA21 MA20 MA20 +3.3D1 +3.3D1 BLM21PG600SN1D MA19 IC10 L301 R329 MA19 MA18 C362 C321 MA17 SDRAM 16M MA18 100P(CH) R308 47X4 SSP2 MA17 FLASH ROM 16M...
- Page 62 <P.4> THR10/THR5 THR10/THR5 OVERALL CIRCUIT DIAGRAM 4/6 (総回路図 4/6) (MAIN 2/2) THR5 UPD800500F1-011 R307 47X4 MA21 MA21 MA20 MA20 +3.3D1 +3.3D1 BLM21PG600SN1D MA19 IC10 L301 R329 MA19 MA18 SSP2 C321 MA18 MA17 SDRAM 16M 100P(CH) R308 47X4 C362 MA17 FLASH ROM 16M...
- Page 63 <P.5> THR10/THR5 THR10/THR5 OVERALL CIRCUIT DIAGRAM 5/6 (総回路図 5/6) (OPERATION) THR10_OPE[1] POWER SWITCH THR10_OPE[2] SW612 8A1012-2-Z W605 TO_MAIN_BOARD W601 to MAIN_CB501 R645 <P. 1: E8> VR3/9 VR4/10 SCN-XH VR5/11 TO_MAIN_BOARD to MAIN_CB8 IC601 <P. 1: E8> C618 10/6.3 +3.3D TC74HC4053AF DTA113ZKA...
- Page 64 <P.6> THR10/THR5 THR10/THR5 OVERALL CIRCUIT DIAGRAM 6/6 (総回路図 6/6) (OPERATION) THR5 THR5_OPE[1] THR5_OPE[2] POWER SWITCH SW606 8A1012-2-Z W604 W602 GAIN to MAIN_CB501 <P. 2: E8> 10KB 10KB SCN-XH GAIN VOLUME TO_MAIN_BOARD C615 10/6.3 to MAIN_CB8 <P. 2: E8> DTA113ZKA USB/AUX DLY/REV +3.3D...
Need help?
Do you have a question about the THR10 and is the answer not in the manual?
Questions and answers