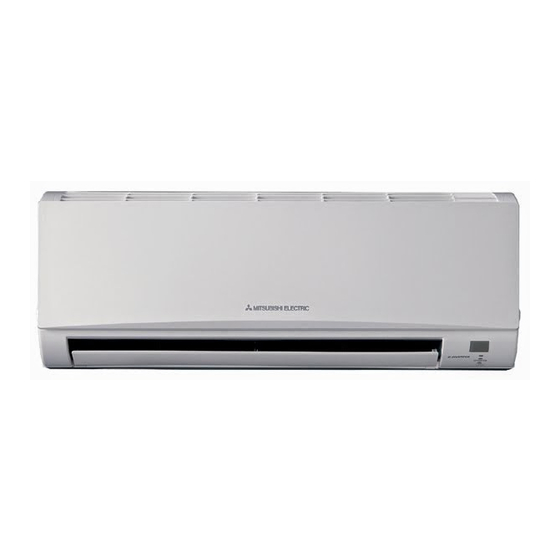
Mitsubishi Electric MSZ-GC22VA Installation Manual
Hide thumbs
Also See for MSZ-GC22VA:
- Service manual (28 pages) ,
- Operating instructions manual (10 pages) ,
- Operating instructions manual (12 pages)
Advertisement
SPLIT-TYPE AIR CONDITIONERS
INSTALLATION MANUAL
1. BEFORE INSTALLATION
1-1. THE FOLLOWING SHOULD ALWAYS BE OBSERVED FOR SAFETY
• Be sure to read "THE FOLLOWING SHOULD ALWAYS BE OBSERVED FOR SAFETY" before installing the air conditioner.
• After reading this manual, be sure to keep it together with the OPERATING INSTRUCTIONS for future reference.
Do not install the unit by yourself (user).
Incomplete installation could cause fire or electric
shock, injury due to the unit falling, or leakage of water.
Consult the dealer from whom you purchased the unit
Perform the installation securely referring to the
installation manual.
Incomplete installation could cause fire or electric
shock, injury due to the unit falling, or leakage of water.
Install the unit securely in a place which can bear
the weight of the unit.
If the installation location cannot bear the weight of the
unit, the unit could fall causing injury.
Perform electrical work according to the installation
manual and be sure to use an exclusive circuit. Do
not connect other electrical appliances to the circuit.
an electric shock.
Do not damage the wires by applying excessive
pressure with parts or screws.
Be sure to cut off the main power in case of setting
up the indoor P.C. board or wiring works.
Failure to do so could cause electric shock.
to the terminal block connecting sections so the
stress of the wires is not applied to the sections.
gas may leak.
If gas leaks and accumulates in the area around the
Earth the unit correctly.
Do not connect the earth to a gas pipe, water pipe, light-
ning rod or telephone earth. Defective earthing could
cause electric shock.
Install an earth leakage breaker depending on the
installation place.
If an earth leakage breaker is not installed, it could
cause electric shock.
1-2. SELECTING THE INSTALLATION LOCATION
INDOOR UNIT
• Where cool air spreads over the entire room.
• Rigid wall without vibration.
• Where easily drained.
• At a distance 1 m or more away from your TV and radio.
Operation of the air conditioner may interfere with radio
fected device.
incandescent lights (so the infrared remote control can
operate the air conditioner normally).
REMOTE CONTROLLER
• Where it is easy to operate and easily visible.
• Where children cannot touch it.
that signals from the remote controller are surely re-
ceived by the indoor unit from that position ('beep' or
'beep beep' receiving tone sounds). After that, attach re-
mote controller holder to a pillar or wall and install wire-
less remote controller.
1-3. SPECIFICATIONS
Power supply *1
Model
Rated
Frequency
Voltage
MSZ-GC22VA
MSZ-GC25VA
230 V
50 Hz
MSZ-GC35VA
*1 Connect to the power switch which has a gap of 3 mm or
more when open to interrupt the source power phase. (When
the power switch is shut off, it must interrupt all phases.)
*2 Use wires in conformity with design 60245 IEC 57.
*3 Never use pipes with thickness less than specified. The
Model names are indicated in 1-3.
When installing multi units, refer to
the installation manual of the multi
unit for outdoor unit installation.
Do not use intermediate connection of the power
cord or the extension cord and do not connect
many devices to one AC outlet.
sible current, etc.
for the installation work.
The use of defective parts could cause an injury or leak-
falling, etc.
When plugging the power supply plug into the
outlet, make sure that there is no dust, clogging,
or loose parts in both the outlet and the plug. Make
sure that the power supply plug is pushed com-
pletely into the outlet.
If there is dust, clogging, or loose parts on the power
supply plug or the outlet, it could cause electric shock or
replace it.
Attach the electrical cover to the indoor unit and the
service panel to the outdoor unit securely.
If the electrical cover of the indoor unit and/or the serv-
ice panel of the outdoor unit are not attached securely,
water, etc.
When installing or relocating the unit, make sure
ant (R410A) enters the refrigerant circuit.
Any presence of foreign substance such as air can
Do not discharge the refrigerant into the atmos-
phere. If refrigerant leaks during installation, venti-
late the room.
Perform the drainage/piping work securely accord-
ing to the installation manual.
If there is defect in the drainage/piping work, water
could drop from the unit, soaking and damaging house-
hold goods.
the outdoor unit.
This could cause injury.
Note:
the signal from the wireless remote controller may not be
received.
OUTDOOR UNIT
• Where rain or direct sunlight can be avoided as much as
-
possible.
• Where neighbours are not annoyed by operation sound
or hot air.
• Where rigid wall or support is available to prevent the
increase of operation sound or vibration.
• Where there is no risk of combustible gas leakage.
• When installing the unit at a high level, be sure to secure
the unit legs.
• Where it is at least 3 m away from the antenna of TV set
or radio. Operation of the air conditioner may interfere with
radio or TV reception in areas where reception is weak.
• Install the unit horizontally.
• Please install it in an area not affected by snowfall or
blowing snow. In areas with heavy snow, please install a
Breaker
Indoor/outdoor
Power supply
capacity
connecting wire
3-core
4-core
10 A
2
1.0 mm
1.0 mm
*4 Use a copper pipe or a copper-alloy seamless pipe.
*5 Be careful not to crush or bend the pipe during pipe bending.
*6 Refrigerant pipe bending radius must be 100 mm or more.
charge is required. (No additional charge is required for
pipe length less than 7 m.)
SG79Y762H04
Phillips screwdriver
Level
Scale
Utility knife or scissors
65 mm hole saw
Torque wrench
Wrench (or spanner)
WARNING
(Could lead to death, serious injury, etc.)
CAUTION
(Could lead to serious injury in particular environments when operated incorrectly.)
Pipe size
(thickness *3, *4)
Gas
Liquid
length
ø9.52 mm
ø6.35 mm
20 m
2
(0.8 mm)
(0.8 mm)
Required Tools for Installation
Flare tool for R410A
Gauge manifold for R410A
Vacuum pump for R410A
Charge hose for R410A
Pipe cutter with reamer
could be generated.
Check that the refrigerant gas does not leak after
-
installation has been completed.
-
If refrigerant gas leaks indoors, and comes into contact
harmful substances will be generated.
Use appropriate tools and piping materials for
installation.
The pressure of R410A is 1.6 times more than R22.
Not using appropriate tools or materials and incomplete
installation could cause the pipes to burst or injury.
When pumping down the refrigerant, stop the com-
pressor before disconnecting the refrigerant pipes.
If the refrigerant pipes are disconnected while the com-
pressor is running and the stop valve is open, air could
be drawn in and the pressure in the refrigeration cycle
could become abnormally high. This could cause the
pipes to burst or injury.
When installing the unit, securely connect the re-
frigerant pipes before starting the compressor.
If the compressor is started before the refrigerant pipes
are connected and when the stop valve is open, air
could be drawn in and the pressure in the refrigeration
cycle could become abnormally high. This could cause
the pipes to burst or injury.
-
in this manual.
period and cause refrigerant leakage.
The unit shall be installed in accordance with na-
tional wiring regulations.
Do not install the outdoor unit where small animals
may live.
If small animals enter and touch the electric parts inside
the unit, it could cause a malfunction, smoke emission,
unit clean.
Note:
It is advisable to make a piping loop near outdoor unit so as
to reduce vibration transmitted from there.
Note:
When operating the air conditioner in low outside tempera-
ture, be sure to follow the instructions described below.
• Never install the outdoor unit in a place where its air
with its air inlet side facing the wall.
•
Avoid the following places for installation where air condi-
tioner trouble is liable to occur.
• Where there is much machine oil.
• Salty places such as the seaside.
• Where there is high-frequency or wireless equipment.
Pipe length and height difference
Refrigerant
difference
of bends *5, *6
adjustment A *7
12 m
10
30 g/m
Additional refrigerant = A × (pipe length (m) - 5)
*8 Insulation material : Heat resisting foam plastic 0.045
sive thickness may cause incorrect installation of the indoor
Insulation
thickness *8, *9
8 mm
-
Advertisement
Table of Contents

Subscribe to Our Youtube Channel
Related Manuals for Mitsubishi Electric MSZ-GC22VA


Summary of Contents for Mitsubishi Electric MSZ-GC22VA
- Page 1 Frequency Power supply Liquid Voltage capacity connecting wire length difference of bends *5, *6 adjustment A *7 thickness *8, *9 MSZ-GC22VA 3-core 4-core ø9.52 mm ø6.35 mm MSZ-GC25VA 230 V 50 Hz 10 A 20 m 12 m 30 g/m 8 mm 1.0 mm...
-
Page 2: Indoor Unit Installation
1-4. INSTALLATION DIAGRAM Wall hole cover (D) Be sure to use wall hole sleeve (C) to prevent Indoor unit ACCESSORIES Seal the wall hole indoor/outdoor connecting Check the following parts before installation. gap with putty (H). wire (A) from contacting <Indoor unit>... -
Page 3: Outdoor Unit Installation
Left or left-rear piping Rear, right, or downward piping Cut off in case of Note: 1) Put the refrigerant piping and the drain hose right piping. Be sure to reattach the drain together, then firmly apply piping tape (G) Cut off in case of left Piping tape (G) hose and the drain cap in case from the end. -
Page 4: Purging Procedures, Leak Test, And Test Run
Push HEAD OFFICE: TOKYO BLDG., 2-7-3, MARUNOUCHI, CHIYODA-KU, TOKYO 100-8310, JAPAN AUTHORIZED REPRESENTATIVE IN EU: Lower MITSUBISHI ELECTRIC EUROPE B.V. HARMAN HOUSE, 1 GEORGE STREET, UXBRIDGE, MIDDLESEX UB8 1QQ, U.K. Square hole... - Page 5 Related Links Model Number: MSZ-GC22VA MSZ-GC22-35_Installation_Manual_(SG79Y762H04) MSZ-GC22-35_Instruction_Book_(SG79F225H02)
Need help?
Do you have a question about the MSZ-GC22VA and is the answer not in the manual?
Questions and answers