Advertisement
Quick Links
Advertisement

Subscribe to Our Youtube Channel
Related Manuals for PRT YJ-3020


Summary of Contents for PRT YJ-3020
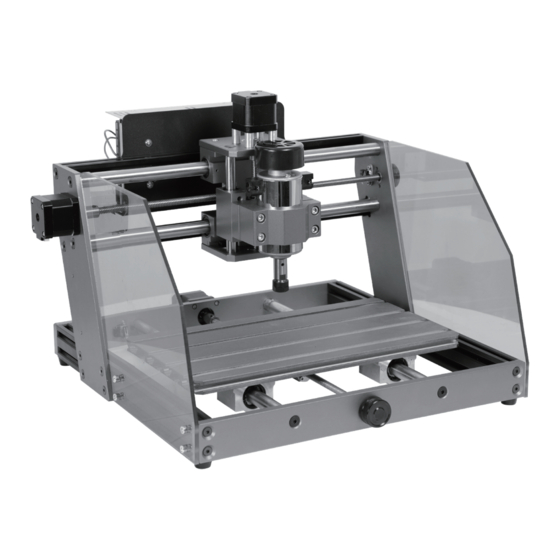
- Page 1 P r o d u c t m a n u a l YJ engraving machine manual...
- Page 2 Part-1 Name Picture Required Base Parts Gantry Bolt M5*20 Installation Align the reserved holes in the side plates of the gantry with the Step1 Steps mounting holes in the base, then lock the screws and tighten them...
-
Page 3: Required Parts
Part-2 Name Picture Spindle motor Required Parts Motor clamp Bolt M6*55 Installation As shown in the figure, place the fixture and spindle motor to the Step1 Steps mounting hole on the gantry, then lock the nut and tighten it... - Page 4 Part-3 Name Picture Driver module Required Parts Bolt M5*6 Installation As shown, align the driver module mounting hole with the Step1 Steps preloaded nut, then lock the screw and tighten it...
- Page 5 Part-4 Name Picture Plexiglass baffle Required Parts Bolt M5*10 Installation Step1 As shown, align the plexiglass baffle mounting hole with the Steps preloaded nut, then lock the screw and tighten it.
-
Page 6: Control Board Wiring
Installation instructions of mechanical engraving control software Control Board Wiring 1. Install the driver (Download from U disk): Laser X-axis Z axis Spindle External Spindle External Power Supply USB Port 2.Open the control software Power on/off Offline 12V 5A Module Power Supply Water... - Page 7 3.To Determine your Machine's COM port: 4.Select port and baud rate •For Windows XP: Right click "My Computer"→ Select "Manage"→ Select "Device Manager". For Windows 7: Right click "Computer"→ Select "Manage" → Select "Device Manager" from left pane. •For Windows 10: Right click “This PC"→ Select "Manage" → Select "Device Manager" from left pane.
-
Page 8: Software Operation
5.Show idle, connection successful Software operation 1.Open, select G code and import,Clamp the tool. - Page 9 2. Move to the starting point of the code and clear the X, Y, Z origin 3. Click send to run the code...
- Page 10 4. Move to the starting point of the code and clear the X, Y, Z origin This Limited Warranty covers a period of 12 months from delivery to Recipient. This Limited Warranty covers any defects in material or workmanship under normal use during the Warranty Period.
- Page 11 Y J - 3 0 2 0 Inherit the spirit of craftsman, focus on CNC engraving machine...
Need help?
Do you have a question about the YJ-3020 and is the answer not in the manual?
Questions and answers