Table of Contents
Advertisement
Quick Links
Advertisement
Table of Contents

Related Manuals for Critikon DINAMAP PRO 1000


Summary of Contents for Critikon DINAMAP PRO 1000
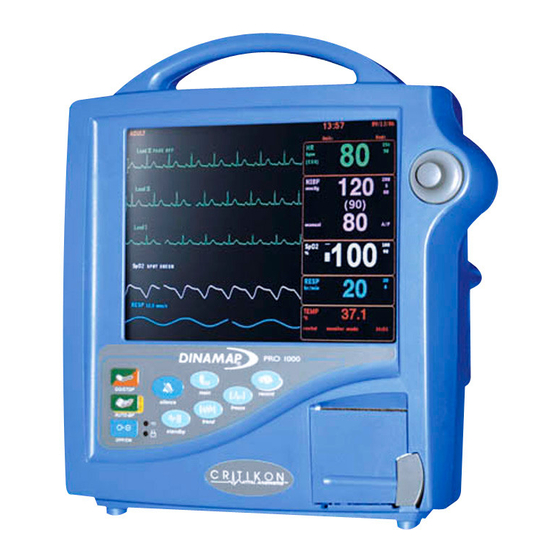
- Page 2 DINAMAP PRO 1000 Monitor Pre-Service & Calibration Manual...
- Page 3 List of Effective Pages Part No./Rev. Page No. Date of Latest Revision 2008384 Original (Oct. 2001) U.S. Patent 5,170,795 U.S. Patent 4,349,034 U.S. Patent 5,052,397 U.S. Patent 4,360,029 U.S. Patent 4,754,761 U.S. Patent 4,501,280 U.S. Patent 4,638,810 U.S. Patent 4,546,775 U.S.
-
Page 4: Table Of Contents
SECTION 4. GENERAL MAINTENANCE Contents 4.1. Introduction ......................4-3 4.2. Configuring the PRO 1000 Monitor for the First Time ........4-3 4.2.1 Unpacking and Preparation for Installation..........4-3 4.2.2 Set the Date and the Clock ................. 4-5 4.2.3 Parameter Level Functional Testing............4-6 4.3. - Page 5 This page intentionally left blank.
-
Page 6: Introduction
SECTION 4. GENERAL MAINTENANCE 4.1 INTRODUCTION This section contains general Monitor service procedures, including alarm code interpretation, service mode operation, and periodic maintenance and battery care. Refer to Section 5 for disassembly and reassembly procedures and related component service information. 4.2 Configuring the PRO 1000 Monitor for the First Time 4.2.1 Unpacking and Preparation for Installation 1. -
Page 8: Set The Date And The Clock
4.2.2 Set the Date and the Clock ® The DINAMAP PRO 1000 monitor uses a rotor knob to navigate through the menu systems. Rotating the rotor moves the arrow cursor, and pressing the rotor makes the selection. 1. Power on the PRO monitor using the OFF/ON key 2. -
Page 9: Parameter Level Functional Testing
4.2.3 Parameter Level Functional Testing After the initial configuration is complete, perform functional testing of each of the parameters. Using the accessories supplied with the PRO Monitor, initialize the monitor in such a way that only one parameter is functioning at a time. •... -
Page 10: Periodic Maintenance
4.3 PERIODIC MAINTENANCE 4.3.1 As Required Perform the following maintenance procedures as required. 4.3.1.1 Integrity of Hoses and Cuffs When the pneumatic integrity of any NIBP cuff and hose is in doubt, replace the cuff and hose, and discard the questionable accessories. 4.3.1.2 Cleaning of Monitor CAUTION: Do not clean Monitor with isopropyl alcohol or other solvents. -
Page 11: Long Term Storage
Dishwashing detergents such as IVORY and JOY (registered trademarks of Procter & Gamble Corp.), or PALMOLIVE (registered trademark of Colgate- Palmolive Corp.) Chlorine bleach disinfectant, 5.25%, 0.75 cup per gallon of water CAUTION: Do not apply isopropyl alcohol to the Monitor - some parts can become marred and cracked. -
Page 12: Care Of Storage Batteries
Note: An internal, 3.6V NiMh battery acts as an alarm backup and maintains the nonvolatile RAM memory when the Monitor is off or away from AC mains. A system alarm message will be generated if backup battery replacement is required. 4.4 CARE OF STORAGE BATTERIES The Monitor uses one nickel-metal-hydride (NiMH) storage battery. - Page 13 Table 4-1. Battery Alarms Alarm Type Indication Probable Cause BATT WRONG TYPE - REMOVE Message appears in Unapproved battery engaged or INTERNAL BATT - alarm message field WRONG TYPE -REMOVE BATT CHECKING Message appears in Noncommunicating battery or INTERNAL BATT - alarm message field engaged CHECKING...
- Page 14 Table 4-2. Battery Troubleshooting Trouble Probable Cause Remedy Battery inoperative Battery not fully Charge and discharge battery up or does not last very charged. to three times for optimum long. performance. Battery in long-term Remove and reinstall battery so storage or nonuse. connector is properly seated.
-
Page 15: Safety Resistance Testing
4.5 SAFETY RESISTANCE TESTING Using a safety analyzer (Dynatech Nevada Model 235A or equivalent), check the ground resistance of the PRO 1000 Monitor; refer to the Rear View graphic for locations of test points. Earth-To-Secondary Continuity Verify that the resistance between the AC Mains ground pole and the External DC connector ground is less than or equal to 1Ω. - Page 16 Rear View of Monitor with safety connection exposed 4-13...
-
Page 17: Alarm Code Interpretation
4.6 ALARM CODE INTERPRETATION Refer to Table 4-1 for information about procedural alarms that involve battery operation. If any other alarms appear that are not listed in the paragraphs that follow, record the error message and report the failure to Customer Support. Refer to the Operation Manual for information about patient alarms and general procedural alarms. -
Page 18: Hardware Errors
4.6.2 Hardware Errors These error codes, which are common to all parameters, indicate some internal self-check test of the hardware has failed, and service is required. Error Code Description 8193 HW, Time base failure 8202 HW, Power supply, System 8222 HW, RAM test failure 8232 HW, ROM checksum failure... -
Page 19: Temperature Messages
Fail Code Description Commands out of sequence OVP setpoint not found Pump stuck on during idle Valve in illegal state Pressure too high for too long 4.6.3.3 Temperature Messages Fail Code Description Temp data line out of sync with clock Temp date frames out of sync 4.6.3.4 SpO2 Messages In operate mode, the Fail Code is reported as described in section... - Page 20 Select go to service mode. Rotate and press the knob again to answer yes at the prompt. Note that the menu changes to what is shown below. 4. Observe that a row of numbers is displayed at the bottom of the screen. Turn the rotor and press to select after each numeral is selected.
- Page 21 Main Service Menu For each parameter, there are one or more service screens that display operating values and tests that are applicable to the parameter type. Refer to the following paragraphs for information about each parameter. At the conclusion of the tests, select go to service menu at the top of the screen to return to the Service Menu main screen.
-
Page 22: Spo2 Tests
4.7.1 SpO2 Tests 1. Disconnect all sensor cables from the SpO2 Parameter, and ensure that the SpO2 parameter is listed within the main Service menu. 2. From the Service Menu, Turn and press the rotor to select the SpO2 service parameter. -
Page 23: Nibp Tests
4. After a few seconds, the two red LEDs should light on the pocket tester. The SpO2 service menu should soon display a saturation of 80±1 and also displaying the heart rate as set on the SRC-2 pocket tester. Cycle through the 3 RATE settings and verify that the monitor responds accordingly. -
Page 24: Leak Test
Perform the following tests to determine that the NIBP parameter is functioning normally. 4.7.2.1 Leak Test 1. Using the calibration kit (part number 320-246), an adult cuff and air hose, and a manometer, set up the equipment as shown in Figure 3-1. Connect the hose to the NIBP Parameter. - Page 25 5. Turn and press the rotor to select start leak test. Observe that the Leak Test Status message on the menu indicates Busy. 6. Observe that the pump begins inflating the system to 200 ~ 210 mmHg, at which point the pump operation will cease. The Monitor will begin to calculate system pressure loss rate.
-
Page 26: Nibp Calibration Check
11. Verify the pressure indicated on the manometer remains within 5 mmHg of 200 mmHg for 60 seconds. If not, either the cuff or hose or both may be defective. If the cuff and hose pass this test, repeat steps 1 through 7 to try to isolate the leak. -
Page 27: Pressure Recalibration
9. Allow the pressure to stabilize for at least a minute. Then open the pressure release valve on the manometer inflation bulb and carefully bleed off pressure until the manometer indicates 200 mmHg. 10. Observe that the values of PT1 Pressure and PT2 Pressure on the menu indicate within 1 mmHg of the pressure shown on the manometer. -
Page 28: Overpressure Test
10. Fold the adult cuff so the index line is aligned with the inner range mark on the inside of the cuff. Make sure all fittings are tight, and that valve on inflation bulb is closed tightly. If there is doubt about the integrity of the system, perform the leak test (paragraph 4.7.2.1) before continuing. - Page 29 150 to 165 mmHg. Observe that the menu displays Service Error: None. 13. If the overpressure test results in an “out of tolerance” condition, contact Critikon Technical Support at 877-274-8456 for assistance. 4-26...
-
Page 30: Ecg Tests
4.7.3 ECG Tests Connect the ECG leads to the ECG trunk cable prior to connection to the monitor. The simplest way to function test the ECG circuitry is through the usage of an ECG simulator with the monitor in normal monitoring mode. 1. -
Page 31: Temp Tests
4.7.4 TEMP Tests 1. Disconnect the all sensor cables from the Alaris temperature connections. 2. From the Service Menu, Turn and press the rotor to select the TEMP service parameter. The TEMP service menu should appear as shown below. Temperature Service Menu 4-28... - Page 32 3. Connect both the Oral and Rectal Temp probes to their respective connections, reference the graphic below. 4. Perform the following test to verify the integrity of the temperature parameter: • Verify top probe IN/OUT • Verify top probe warmer ON. Observe that the temperature reading rises to 105.0º...
-
Page 33: Recorder Tests
4.7.5 RECORDER tests (if fitted) 1. Ensure that paper has been loaded into the Recorder Parameter, and you are presently in the Service Mode. 2. From the Service Menu, Turn and press the rotor to select the RECORDER test option. Turn and press the rotor to choose the 3 waveforms option. -
Page 34: Battery Tests
4.7.6 Battery Tests From within the Service Menu, battery status information is displayed on the right upper 1/4th of the display. Battery/ Power Supply menu 1. Battery Health: the Monitor’s software approximates the true status of the battery’s health. The value indicated is displayed as both a number (in percentage) and as an icon on the bottom-left area of the display. -
Page 35: Test Failsafe Logic
6. Charger Supply Enabled: Should always be TRUE as the monitor consistently attempts to keep the battery at its’ fullest capacity. A FALSE indicates the battery may be faulty or not installed, or the charge circuit may have failed. Also, if no external source of power is available, the monitor will register a FALSE result. -
Page 36: Keypad Led Test
4.7.8 Keypad LED Test 1. From the Service Menu, rotate and press the rotor to select keypad LED test. Observe that each of the keys on the PRO 1000 monitor-face, illuminate one key at a time. With the exception of the ON/OFF key, observe whether any of the keys fail to illuminate. - Page 37 This page intentionally left blank. 4-34...
- Page 38 TEST RECORD (Appendix A) Model# Serial# Step Description Min Max Actual Pass Fail N/A Tests 4.7.1 Verify Pleth waveform 4.7.1 reading at 100% Saturation 96 100 4.7.1 reading at 90% Saturation 86 94 Internal Tests (Perform in Service Mode) 4.7.2.1 Leakage Test 4.7.2.2 UUT Pressure - 50 mmHg 46 54 4.7.2.2 UUT Pressure - 150 mmHg...
- Page 39 Appendix A (continued) Temperature Test (service or monitor mode - requires Alaris Temp Simulator) Measured top Temp in ºF (98.6º nominal) 98.4 98.8 Measured top Temp in ºF (80.2º nominal) 79.9 80.5 Measured top Temp in ºF (107.8º nominal) 107.5 108.1 Measured bottom Temp in ºF (107.8º...
-
Page 40: Appendix B - Monitor Configuration Log
MONITOR CONFIGURATION LOG - Appendix B DINAMAP PRO 1000 Monitor Series Note: Please refer to the PRO 1000 Pre-Service and Calibration Procedures for instructions. Date: City: Hospital: Serial Numbers: How to Enter Configuration Mode 1. Choose other system settings from the Main Menu.
Need help?
Do you have a question about the DINAMAP PRO 1000 and is the answer not in the manual?
Questions and answers
How do I open and change battery in critikon pro 1000 moniuor