
Related Manuals for Daikin EWLQ014KCW1N


Summary of Contents for Daikin EWLQ014KCW1N
- Page 1 Date 01/2022 Supersedes Installation, Operation and Maintenance Manual D-EIMHP01601-22_00EN CONDENSERLESS WATER-COOLED WATER CHILLERS EWLQ014KCW1N EWLQ025KCW1N EWLQ033KCW1N EWLQ049KCW1N EWLQ064KCW1N...
-
Page 2: Table Of Contents
Index INTRODUCTION ..............................4 Options and features (1) ..........................5 Features ............................... 5 OPERATION RANGE ............................6 SELECTION OF LOCATION ..........................7 MAIN COMPONENTS ............................7 INSPECTING AND HANDLING THE UNIT ......................8 UNPACKING AND PLACING THE UNIT ......................8 IMPORTANT INFORMATION REGARDING THE REFRIGERANT USED ............ - Page 3 Be sure only to use accessories, optional equipment and spare parts made by Daikin which are specifically designed for use with the equipment and have them installed by a professional. If unsure of installation procedures or use, always contact your Daikin dealer for advice and information.
-
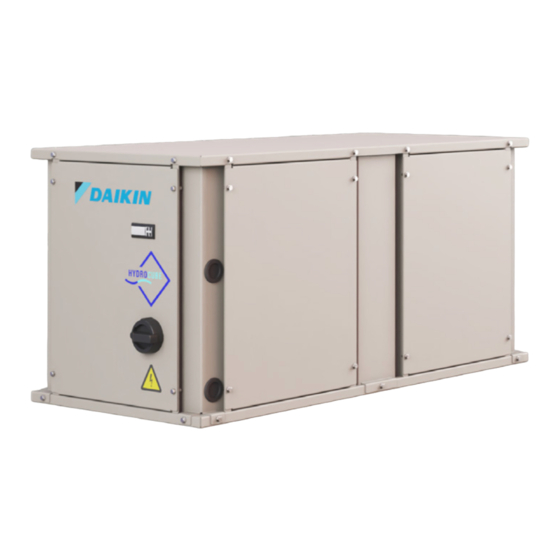
Page 4: Table 1-Technical Specifications
Pay attention to the selection of your remote condenser. Make sure to select a remote condenser developed for use with R410A. The EWLQ units can be combined with Daikin fan coil units or air handling units for air conditioning purposes. They can also be used for supplying chilled water for process cooling. - Page 5 • Low noise operation kit (field installation) • Entering water temperature kit • Master/slave water temperature kit • Modem for Daikin On Site Features • Glycol application for chilled water temperature down to -10°C • Voltage free contacts general operation alarm •...
-
Page 6: Operation Range
OPERATION RANGE Figure 1- Operation range EWLQ014-033KC Figure 2-EWLQ049-064KC • ELWT: Evaporator leaving water temperature • Tc: Saturated condensing temperature • 1: Operation with water • 2: Operation with glycol (below ELWT=4°C) D-EIMHP01601-22_00EN 6/25... -
Page 7: Selection Of Location
SELECTION OF LOCATION The units are designed for indoor installation and should be installed in a location that meets the following requirements: The foundation is strong enough to support the weight of the unit and the floor is flat to prevent vibration and noise generation. The space around the unit is adequate for servicing. -
Page 8: Inspecting And Handling The Unit
INSPECTING AND HANDLING THE UNIT At delivery, the unit should be checked, and any damage should be reported immediately to the carrier claims agent. UNPACKING AND PLACING THE UNIT 1. Cut the straps and remove the cardboard box from the unit. 2. -
Page 9: Selection Of Piping Material
SELECTION OF PIPING MATERIAL 1. Foreign materials inside pipes (including oils for fabrication) must be 30 mg/10 m or less. 2. Use the following material specification for refrigerant piping: - construction material: Phosphoric acid deoxidized seamless copper for refrigerant. - size: Determine the proper size referring to "Technical specifications”. - the pipe thickness of the refrigerant piping must comply with relevant local and national regulations. -
Page 10: Table 3- Flare Nut Spaces Dimensions And Appropriate Tightening Torque
Connecting the refrigerant circuit • Use a pipe cutter and flare suitable for R410A. Make sure to use installation tools (gauge manifold charge hose, etc.) that are exclusively used for R410A installations to withstand the pressure and to prevent foreign materials (e.g., mineral oils such as SUNISO and moisture) from mixing into the system. Figure 3-Connecting the refrigerant circuit (1) 1 remote condenser 2 indoor water chiller... -
Page 11: Leak Test And Vacuum Drying
• When connecting the flare nut, coat the flare inner surface with ether oil or ester oil and initially tighten 3 or 4 turns by hand before tightening firmly. Figure 5-Connecting the refrigerant circuit (3) • Check the pipe connector for gas leaks. WARNING When inserting the refrigerant piping in the wall hole, take care not to let dust or moisture come into the piping. -
Page 12: Next Perform A Fine-Tuning
WARNING Take care for contamination of the remote condenser in order to avoid blocking of the system. It is impossible for Daikin to control the contamination of the "foreign" condenser of the installer. The Daikin unit has a strict contamination level. -
Page 13: Checking The Water Circuit
CHECKING THE WATER CIRCUIT The units are equipped with a water inlet and water outlet for connection to a chilled water circuit. This circuit must be provided by a licensed technician and must comply with all relevant European and national regulations. WARNING The unit is only to be used in a closed water system. -
Page 14: Connecting The Water Circuit
A flow switch must be installed in the water outlet pipe of the evaporator to prevent the unit from operating at a water flow which is too low. WARNING It is very important to install the flow switch as shown in the figure. Observe the position of the flow switch in relation to the direction of the water flow. -
Page 15: Water Charge, Flow And Quality
Make sure that appropriate antifreeze protection is always maintained. Failing to follow the instructions above could result in unit damage. WARNING Damage caused by freezing is excluded from the warranty, therefore Daikin Applied Europe S.p.A. declines all responsibility. D-EIMHP01601-22_00EN 15/25... -
Page 16: Field Wiring
FIELD WIRING WARNING All field wiring and components must be installed by a licensed electrician and must comply with relevant European and national regulations. The field wiring must be carried out in accordance with the wiring diagram supplied with the unit and the instructions given below. Be sure to use a dedicated power circuit. -
Page 17: Operator's Reponsibilities
OPERATOR’S REPONSIBILITIES It is essential that the operator is appropriately trained and becomes familiar with the system before operating the unit. In addition to reading this manual, the operator must study the microprocessor operating manual and the wiring diagram to understand start-up sequence, operation, shutdown sequence and operation of all the safety devices. -
Page 18: Routine Maintenance
MAINTENANCE Table 8-R410A Pressure / temperature table °C °C °C 5.22 12.30 24.95 5.41 12.65 25.56 5.60 13.02 26.18 5.79 13.39 26.81 6.00 13.77 27.45 6.20 14.15 28.10 6.42 14.55 28.77 6.63 14.95 29.44 6.86 15.37 30.13 7.09 15.79 30.84 7.32 16.22 31.55... -
Page 19: Maintenance
13.2 Electrical Installation WARNING All electrical maintenance activities must be followed by qualified personnel. Make sure the system is switched off and the main switch of the unit open. Failure to observe this rule could result in serious personal injury. When the unit is turned off, but the disconnection switch is in the closed position, the unused circuits will still be active. -
Page 20: Table 10- Routine Maintenance Plan For Critical Application And/Or Highly Aggressive Environment
for water exchangers pay attention if water rich in calcium carbonate is used. An increase in pressure drops or a decrease in thermal efficiency means that the heat exchangers are clogged. In environments with a high concentration of airborne particles, it might be necessary to clean the condenser bank more often. Units placed or stored in a Highly Aggressive Environment for long time without operation are still subject to those routine maintenance steps. -
Page 21: Figure 11- Ewlq 049 - 064 Kcw1N Refrigerant Circuit Scheme
Figure 11- EWLQ 014 - 033 KCW1N Refrigerant circuit scheme Figure 1212- EWLQ 049 - 064 KCW1N Refrigerant circuit scheme LEGEND Compressor Compressor-Condenser Condenser (BPHE) L1-1 Condenser-Therm.Exp. Valve Drier filter L1-2 Therm.Exp Valve-Evaporator Thermostatic expansion valve Evaporator-Compressor Evaporator (BPHE) S1-1 Evaporator-Accumulator Ball valve (optional) S1-2... -
Page 22: Before Starting
BEFORE STARTING The unit should not be started, not even for a very short period, before the following pre-commissioning checklist is filled out completely. Table 11-Pre-commissioning checklist Tick/when Standard stops to go through before starting the unit checked Check for external damage. Install main fuses, earth leak detector and main switch. - Page 23 NOTES D-EIMHP01601-22_00EN 23/25...
- Page 24 D-EIMHP01601-22_00EN 24/25...
- Page 25 All the data and specifications contained herein are liable to change without notice. Refer to the data communicated at the time of the order. Daikin Applied Europe S.p.A. cannot be held liable for direct or indirect damage, in the broadest sense of the term, arising from or related to the use and/or interpretation of this publication.
Need help?
Do you have a question about the EWLQ014KCW1N and is the answer not in the manual?
Questions and answers