Advertisement
R900 Installation Guide
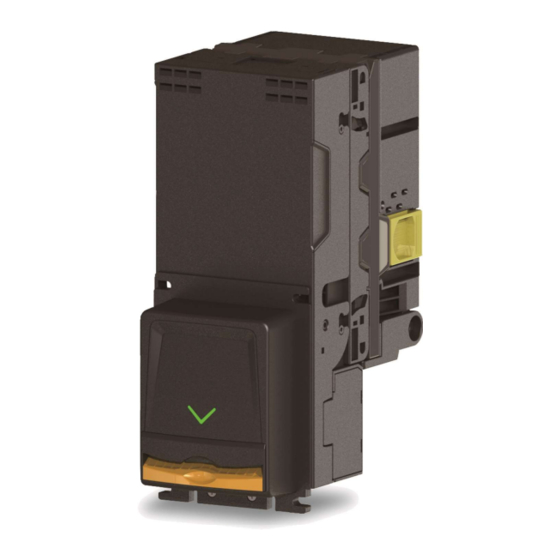
The R900 bill validator is designed to fit into the standard bill acceptor opening
in most vending machines and can be mounted on existing studs or a mounting
bracket
Features
- Four way bill acceptance
- Multi-width bill handling mechanism
- Lockable security cashbox (lockable) available
Interface
- The R900 bill validator operates via MDB interface
- PC base; RS232C interface CCNET protocol is also available
Operating Voltage
- 34VDC/24VDC for MDB interface
- 12VDC for CCNET interface (RS232C base)
INSTALLATION
Before installation, remove the R900 bill validator from the packaging and inspect for any physical damage. If damaged, contact
technical support
1. Turn off power from the vending machine.
2. Remove the bill magazine. Press forward on the yellow latch on the bill magazine and pull to remove.
3. Mount the R900 bill validator on the mounting studs, through the opening in the front of the vendor and secure using the included
hardware.
4. Connect the R900 bill validator to the appropriate interface harness. Apply gentle pressure to connect; the pins will bend if forced.
5. Turn on power to the vending machine.
6. Check the arrow LED on the front of R900. The LED should be flashing. In some cases, the machine door must be closed first.
7. Once the LED is flashing, test the validator with a bill.
a. Insert a bill and confirm that it stacks and credit is given
b. Repeat this process for any other enabled bills.
8. When your test is completed, remove the test bills from the bill magazine.
The installation is now complete. Refer to the other sections of this guide to configure the device, if necessary.
[Document Title Name Goes Here]
Advertisement
Table of Contents

Summary of Contents for CPI R900
- Page 1 5. Turn on power to the vending machine. 6. Check the arrow LED on the front of R900. The LED should be flashing. In some cases, the machine door must be closed first. 7. Once the LED is flashing, test the validator with a bill.
- Page 2 Bill acceptance The R900 ships from the factory with all bills enabled by default, but acceptance can be customized using the DIP switches. Slide the clear door up to access the DIP switches. Details of DIP switch setting should be referred to “Quick Reference Guide”...
- Page 3 Bezel LED Error flash code The Bezel LED indicates the state of the bill validator by using lighting patterns. Bezel Lamp State Description Bezel LED Ready to accept Stand-by The inserted bills Flashing in Green Every 0.3s, 2 times, Repetition Upon power-on, when the initial cycle is completed, Active...
- Page 4 Flash >3 Cashbox is Opened Cashbox Out of Position Close Cashbox Flash 1 Check Cashbox Cashbox Full Collect Bills Flash 2 Sensor Errors Check the Sensor Status Flash >3 Hard Failure Contact ASC Flash Phase1 - R900 Installation Guide (V2.5 2020-04-16).docx...
- Page 5 troubleshooting Use this chart to troubleshoot common errors. If you are unable to resolve the problem, visit cranepi.com/support for more help, or to locate a service center near you. Problem Check Remedy Is the machine turned on? Turn on power to the machine Is the interface harness connected Connect the interface harness correctly?
- Page 6 The R900 bill validator will not need to be cleaned as often as magnetic sensing bill acceptors. However, regular cleaning is recommended to maintain high acceptance rates. We recommend a regular cleaning maintenance once every 3-6 months. If cleaning is required, use cleaning sheet under the cleaning mode or use a soft damp cloth. Do not use abrasive cleaning products.
- Page 7 C O N T A C T U S Crane Payment Innovations CPI Corporate Headquarters 3222 Phoenixville Pike Suite 200 Malvern, PA 19355 CranePI.com...

Need help?
Do you have a question about the R900 and is the answer not in the manual?
Questions and answers