Advertisement
Quick Links
Advertisement

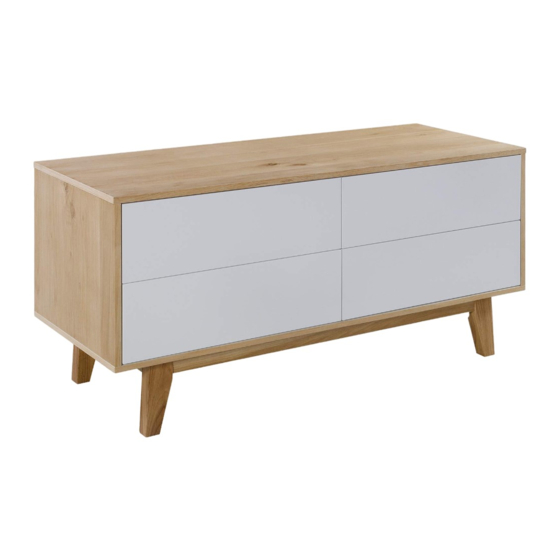
Summary of Contents for Elle Decor FSDGSLOAKR01
- Page 1 Sideboard ASSEMBLY INSTRUCTIONS...
- Page 2 Guidelines FAILURE TO FOLLOW THESE WARNINGS Thank you for selecting an Elle Decor Collection piece! WHEN IN USE COULD RESULT IN INJURY Our primary objective is to provide fast, friendly customer service to all of our customers. We are here •...
- Page 3 Pre-Assembly Preparation: Please read through this instruction booklet before beginning assembly of this item. WARNING: DO NOT LET Two adults are recommended for assembly. CHILDREN PLAY IN OR Clear out the space for assembly and lay out all • AROUND THE UNIT DUE parts on Parts List, extra room will allow you to TO THE POSSIBLE RISK easily determine if all the pieces are present.
-
Page 4: Parts List
Parts List Central Panel X 1 Side panel X 1 Side panel X 1 Top Panel X 1 Legs X 2 Legs X 2 Back panel X 1 Bottom Panel X 1 Drawer Front Panels X 1 Drawer Front Panels X 1 Drawer Front Panels X 1 Drawer Front Panels X 1... - Page 5 Parts List Drawer Bottom Panels X 4 Drawer back panels X 4 Drawer Side Panels X4 Drawer Side Panels X4 Cambolts X 6 Camlocks X 6 Screws X 6 Allen Key (M4) X1 Bolts X 8 Wood Dowels X 12 (M6X40MM) (35 MM) (14 MM)
- Page 6 Step 1-- 1. Remove all parts from the carton and place them on a protected surface or carpet. 2. Insert Cambolts (Q) into Panel (A) & insert Wooden Dowels (S) into Top Panel (A).
- Page 7 Step 2-- 1. Insert the Camlocks ( R) into Side Panels ( B ), ( C) & Central Panel (D) ensuring the open indicator is pointing towards the panel edge before tightening with a screwdriver. 2. Attach Side Panels ( B ), ( C) & Central Panel (D) to Top Panel (A). 3.
- Page 8 Step 3-- Slide Back Panel (E) into the grooves of the unit as shown.
- Page 9 Step 4-- Insert Wood Dowel (S) into Side Panel (B), (C) & Central Panel (D)
- Page 10 Step 5-- Attach Bottom Panel(F) to assembly unit with Screws (T) and tighten with Allen key (U).
- Page 11 Step 6-- 1. Align Legs (G) top to label (G) on the base of Bottom panel (F) & Legs (H) top to label (H) on the base of Bottom panel (F) as shown. Connected by Bolts (V) with Flat Washers (W) and securely with Allen Key (U).
- Page 12 Step 7-- Insert Cambolts (Y) into Drawer Front panels(I), (J), (L) & (K) by a screwdriver (not provided) until tight.
- Page 13 Step 8-- Insert the Camlocks (Z) into Drawer Side Panels (M) & (N). Ensuring the open indicator is pointing towards the panel edge before tightening with a screwdriver .
- Page 14 Step 9-- Attached Side Panel (M) & (N) to drawer front panels (I), ( J), (L) & (K) as shown then use the screwdriver (not provided) turn clockwise to fasten the Camlocks (Z). Ensuring the open indicator is pointing towards the panel edge before tightening with a screwdriver...
- Page 15 Step 10-- Slide Drawer Bottom Panels (O) into the grooves of the drawer frame (I), (J), (K) and (L).
- Page 16 Step 11-- Attach Drawer Back Panel (P) to assembly unit (I), (J), (K) & (L) by Screws (AA) and securely with Allen Key (AB).
- Page 17 Step 12-- Click the plastic bracket inside the runner and install the drawer as shown. Note: If you want to disassemble the unit, please follow the steps as the brief to push the drawer out.
- Page 18 Warning: Step 13-- Always ensure intended wall area to be drilled is free from hidden electrical wires, water and gas pipes. 1. Secure the other end of the strap to the wall with an appropriate screw and wall plug for your wall type (not provided).
-
Page 19: Product Dimension
Product Dimension... - Page 20 The exceptions or exclusions to this warranty are: Limited Warranty • Upholstery material and foam cushion material is warranted against defects in material and workmanship for a period of one year, beginning on the date of The product you have purchased is warranted against purchase as shown on the original sales receipt.


Need help?
Do you have a question about the FSDGSLOAKR01 and is the answer not in the manual?
Questions and answers