Table of Contents
Advertisement
Advertisement
Table of Contents

Subscribe to Our Youtube Channel
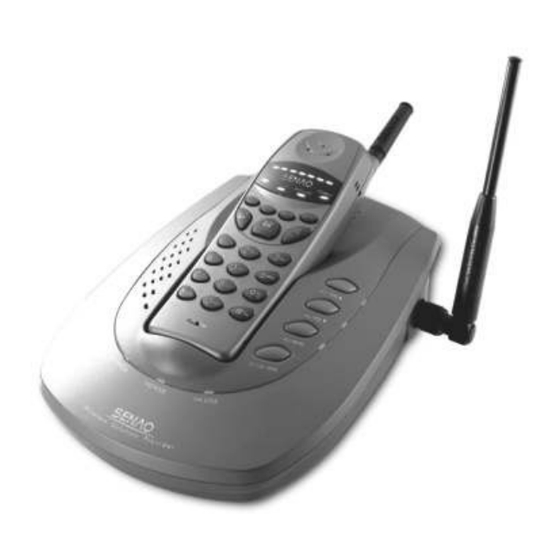
Related Manuals for SENAO SN-258 PLUS


Summary of Contents for SENAO SN-258 PLUS
- Page 1 SN-258 PLUS Instruction Manual Before operating the unit, please read this manual thoroughly, and retain it for future reference. This product is prohibited to be used without permission from the government authorities in the relevant jurisdictions Manufactured by ISO-9001 Certified Facturies...
- Page 2 SENAO. To obtain optimum performance, please be sure to read this manual carefully before starting operation and keep it for future reference. Before Initial Use For the efficient and safe operation of your SN-258 PLUS, please read the page 34~35 before use. Accessories 1 book...
- Page 3 For Best Performance Battery Charge To power the handset, install the battery (p.9) and charge it for about 12 hours before initial use (p.10). POWER POWER Operating Distance/Noise Calls are transmitted between the base unit and the handset using wireless radio waves. For maximum distance and noise free operation, the recommended base unit location is: Away from electronic appliances At a HIGH and CENTRAL...
-
Page 4: Table Of Contents
Contents Features .....5 Location of Controls ....6 A. - Page 5 Advanced Operation....23 A. Adjusting Ringer Volume....23 B. Adjusting Voice Volume ....24 C.
-
Page 6: Features
Features Multi-channel access with auto-scan. Multi-handset system (up to 15). * Multi-base system (up to 4). Walkie-talkie between handsets (up to 15 handsets). Half-Duplex group call. Two-way paging and hands-free intercom. 10-set memory dial for each handset (20 digits). Last number redial. Tone/Pulse dialling mode selectable. -
Page 7: Location Of Controls
Location of Controls A. Base Unit Antenna DC IN jack Line jack TONE/PULSE switch TEL. jack Speaker H1: Paging handset 1/ voice volume up H2: Paging handset 2 / voice volume down H3: Paging handset 3/ Ringer volume adjustable key INT-COM: Paging all of the handsets / Memo key POWER... -
Page 8: Handset
B. Handset Antenna Car Antenna Indicators jack KEY LOCK: Lock Keypad IN USE: In use indicator Receiver BATT. LOW: Low battery indicator PTT KEY: Lock Keypad SCRAMBLER: Scrambler / Push To Talk indicator Scan LED array SCRAMBLER KEY LOCK IN USE BATT.LOW Function keys Operation keys... -
Page 9: Installation
(5) Set the dialling mode to TONE. If you can not dial, set it to PULSE. (6) Please use only the SENAO AC adaptor supplied with the base unit, and connect the AC adaptor to the DC IN jack. -
Page 10: Handset
It becomes green while the battery is fully charged. It takes around 2 hrs. to fully charge Ni-Mh battery pack. Spare battery indicator Power indicator Note: Please use only the SENAO AC adaptor supplied with this charger. 9-EN... -
Page 11: Charging Battery
D. Charging Battery Charge The handset can be charged on the base unit or the charger. (1) Place the handset on the base unit with facing up. CHARGE indicator will light up. (2) Place the handset on the charger with standing up. The scan LED array will run up. -
Page 12: Ear-Microphone (Optional)
F. Ear-Microphone (Optional) You can answer and end calls by pressing the button on the microphone part of the ear-microphone. It also could be used as the Walkie-Talkie function. You can press button to talk, then release it to listen. Answer / End / Push to Talk Note: To end calls, please keep pressing button for more than 2 sec. -
Page 13: Outdoor Antenna (Optional)
H. Outdoor Antenna (Optional) Installation of the outdoor antenna is very important for communication range and quality. Be sure to follow the following procedures. 1. The tops of the base unit should be matched with the marks on the antenna, as illustrated in Figure 1. NOTE: Use the screw driver to screw the antenna tight. - Page 14 3. Assemble cable jack with the base part as illustrated in Figure 3. 4. Find a pole which is over 5 M long and 22~39 mm in diameter and connect it Cable cord with the base tube as indicated in connector Figure 4.
- Page 15 NOTES (1) Make sure that the cable is tied to the cable connector in order to maintain the radio frequency transmission performance. (2) The ground plane should be at least 3 meters above the ground. (3) No obstruction can be present within 3 meters from the antenna (as shown in Fig 7~9).
-
Page 16: Basic Operation
Basic Operation A. Turn On / Off the Handset 1. Turn on the handset When the handset is power off, press to turn it on. A power on tone "DO-MI-SO-DO" sounds. "DO-MI-SO-DO" Power off Power on 2. Turn off the handset When the handset is in stand-by mode, press and hold about 2 seconds until a power off tone "SO-MI-DO"... -
Page 17: Automatic Dialling
D. Automatic Dialling 1. Storing phone numbers in memory (10 sets of 20-digit number maximum) (in stand-by mode) MEMO MEMO stand-by) Phone No. Store Location (N: 0~9) 2. If the base unit is connected to a PBX We recommend you press P/VOL (PAUSE) between the access number 0 or 9 for an outside line and the phone number. -
Page 18: Intercom
F. Intercom 1. Paging the base unit from the handset (1) Handset: Press and the intercom is automatically established. (2) Base unit: When the other party's voice is heard, answer through the microphone. (3) Handset: To end the intercom, press or place the handset on the base unit or on the charger. -
Page 19: Intercom During A Call
4. Paging the desired handset which number is over 3 from the base unit For example: Page the handset No.5 through the handset No. 2. (1) Base unit: Press INT-COM or H2 . (2) Handset No. 2: Press any key except to answer. -
Page 20: Call Waiting
H. Call Waiting You can answer another incoming call by using call waiting service. During a call, press (FLASH) on handset if you hear a call waiting tone. The first call is put on hold and you can answer the second call. To return to the first caller, press (FLASH) again. -
Page 21: Group Call (Walkie-Talkie Mode)
NOTE: During the Walkie-Talkie: 1. While in the Walkie-Talkie mode, all of H1, H2, H3 indicators light up to show such function is working. 2. If holding a call, a warning beep sounds every 30 seconds. 3. If you keep to listening and not press PTT key to talk up to 4 minutes, warning beeps will sound. - Page 22 (4) Handset: To end the Walkie-Talkie and resume the call, press To end the Walkie-Talkie and resume the intercom, press To end the Walkie-Talkie and hang up, press 2. Walkie-Talkie among the base unit and all the handsets (paging all the handsets from the base unit) (1) Base unit: While in stand-by, press and hold INT-COM for 2 seconds and all the handsets ring for 30 seconds.
- Page 23 K. Lock Keypad of handset This function enables you to lock the keypad of handset. 1. Enable key lock: press PTT key twice within 0.8 sec. The keylock LED indicator will light up as well as keypad sound " bi " disappears to confirm this process.
-
Page 24: Advanced Operation
Advanced Operation A. Adjusting the Ringer Volume 1. Base unit The ringer volume of the base unit can only be adjusted in intercom mode. (1) Handset: Press and make sure that the intercom is established. (2) Base unit: Press to select the ringer volume. There are 4 available levels, including mute, low level, middle level, and high level. -
Page 25: Adjusting Voice Volume
B. Adjusting the Voice Volume 1. Base unit The voice volume of the base unit can only be adjusted in intercom mode. (1) Handset: Press and make sure that the intercom is established. (2) Base unit: There are 8 available levels To increase, press To decrease, press... -
Page 26: Selecting Voice Mode
C. Selecting the Voice Mode Press FUNC P/VOL ,while in use, to select the voice mode. There are 4 available modes being set in cycle. Each time you press FUNC P/VOL the voice mode will be changed FUNC P/VOL Normal (Power on default) Voice Scrambler... -
Page 27: Changing The Channel During A Conversation
2. Transferring a call from the handset No.5 to any other handset (1) Handset No. 5 : During a call, press FUNC The call is put on hold. All the handsets except No. 5 ring for 30 seconds (P . 28) To stop transferring, press any key except (2) Any other handset: Press any key except or pick it up if it is... -
Page 28: Features Setting
Setting Features A. Setting the Base Unit The parameters of base unit are set through the handset. First, press on handset and make sure that the intercom is established. 1. Setting PAUSE duration MEMO (handset) (N: 1~4) store N : PAUSE duration 1 : 2 seconds 3 : 4 seconds 2 : 3 seconds... -
Page 29: Setting Amount Of Handsets In The System
4. Setting max. amount of handsets registered to one base unit (up to 15 ). The amount of handsets registered to one base must be not more than this parameter. MEMO (handset) (N: 1~05) store N: Max. amount of handsets 1 : 1 handset(default) : 6 handsets : 11 handsets... -
Page 30: Setting The Handset
B. Setting the Handset When the setting is finished, a confirmation tone " bi-bi" sounds. When failed, an error tone "bi-bi-bi" sounds. If misdialed, press end setting, then restart. 1. Change Handset's ID (in stand-by mode) To change handset's ID, please make sure that each handset has an individual ID. -
Page 31: Setting Stand-By Time For Each Handset
3. Setting stand-by time for each handset (in stand-by mode) The longer stand-by time is set resulting in the longer response time of an incoming call. FUNC MEMO (N: 1~9) store N: Stand-by time 1 : 58 hours 4 : 80 hours 7 : 92 hours 2 : 66 hours 5 : 85 hours (default) -
Page 32: Registering Handset For Multi-Handset System
Registering handset for multi-handset system Your handset(s), if purchased with base unit, is pre-registered at the factory A. Handset Registration When purchasing a new handset, be sure to follow below steps for registering it. 1. The new handset (non-registered) (1) Install the battery (P. 9) (2) Check the handset whether it is a new one or not by pressing to turn it on. -
Page 33: Registering Handset
B. De-registering handset When a registered handset code needs to be de-registered, follow below steps. 1. If the handset is power on, press and hold about 3 seconds to turn it off. 2. Press and hold MEMO and about 3 seconds, a tone "... -
Page 34: Troubleshootings
2. Move closer to the base unit. 3. Press FUNC # to change the channel. D. How to build multi-base units system? Send all the base units and the handsets to your local SENAO service station for setting this system. 33-EN... -
Page 35: Specification
Specifications Item Base unit Handset Transmitter 262 MHz Frequency 388 MHz 350 m W Output power 55 dBc Spurious emission 55 dBc Current consumption 7~12 mA Stand-by 100 mA 350 mA Talk 600 mA Receiver Frequency 262MHz 388MHz Sensitivity at 12 dB SINAD (CCITT) -122dBm -122dBm... -
Page 36: Important Safety Instructions
Important Safety Instructions When using your telephone equipment, basic safety precautions should always be followed to reduce the risk of fire, electric shock and injury to persons, including the following: Read and understand all instructions. Follow all warnings and instructions marked on the product. Unplug this product from the wall outlet before cleaning. - Page 37 Never push objects of any kind into this product through cabinet slots as they may touch dangerous voltage points or short out parts that could result in a risk of fire or electric shock. Never spill liquid of any kind on the product.
- Page 38 SENAO INTERNATIONAL CO., LTD. http://www.senao.com P/N: 670901183000...
Need help?
Do you have a question about the SN-258 PLUS and is the answer not in the manual?
Questions and answers
تنظیمات گوشی به خورده وروشن نمیشه
To fix the SENAO SN-258 PLUS phone that won't turn on, follow these steps:
1. Check the Battery – Ensure the battery pack (Ni-Mh 750mAh) is properly installed in the handset.
2. Charge the Handset – Place the handset on the base unit or charger and allow it to charge fully. The charging indicator should light up.
3. Verify Power Supply – Ensure the AC adaptor is correctly plugged into the power outlet and the base unit.
4. Check Voltage Setting – If using the AC adaptor, make sure it is set to the correct voltage (220V or 110V) depending on your power source.
5. Try Turning It On – Press the power button. A "DO-MI-SO-DO" tone should sound if it turns on.
6. Replace Battery – If the handset still does not turn on, the battery may be faulty and need replacement.
If the problem persists, consult the instruction manual or seek professional assistance.
This answer is automatically generated