Table of Contents
Advertisement
Quick Links
Advertisement
Table of Contents

Subscribe to Our Youtube Channel
Related Manuals for Easy@Home EF-11D


Summary of Contents for Easy@Home EF-11D
- Page 1 User Manual HOME ENVIRONMENT FLAME EFFECT HEATER ID: #05007...
-
Page 2: Table Of Contents
Table of contents Scope of delivery ..............3 Components ................6 Connecting elements supplied ..........6 Required tools (not included) ..........6 General information ............7 Reading and storing the user manual ........7 Proper use ..................7 Explanation of symbols ............7 Safety ...................8 Signal symbol/word definitions .......... -
Page 3: Scope Of Delivery
Scope of delivery Scope of delivery... - Page 4 Scope of delivery...
- Page 5 Scope of delivery SUN MON TUE WED THU FRI SAT...
-
Page 6: Components
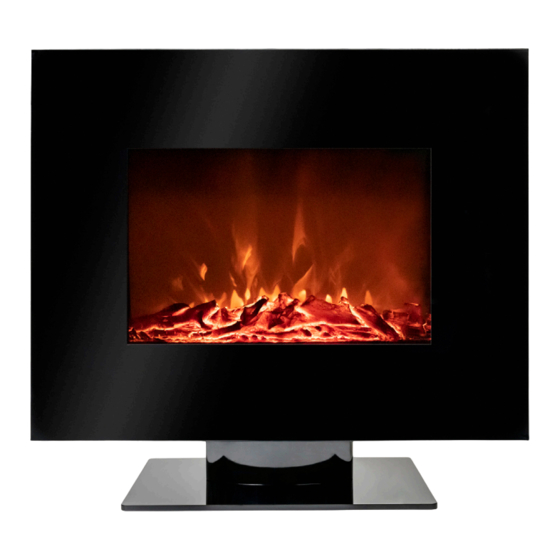
Scope of delivery Components Main unit Base Day button Control panel Remote control Heating mode button Main power switch On/off button + and – buttons Display + and – buttons Battery tray Flame effect Flame effect button Heating mode icons Mains cord Time button Temperature display area... -
Page 7: General Information
General information General information Reading and storing the user manual This user manual accompanies this flame effect heater (hereafter referred to as the “product”), and contains important information on setup and handling. Before using the product, read the user manual carefully. This particularly applies to the safety instructions. -
Page 8: Safety
Safety Safety Signal symbol/word definitions The following symbols and signal words are used in this user manual. This signal symbol/word designates a hazard WARNING! with moderate risk, which may result in death or severe injury if not avoided. This signal word warns of possible damage to NOTICE! property. - Page 9 Safety − Only connect the product to an easily accessible socket so that you can quickly disconnect it from the power supply in the event of a problem. − Do not use the product if it is damaged or if the mains cord or plug is defective.
- Page 10 Safety − Do not place the product such that there is a risk of it falling into a tub or sink. − Never reach to retrieve an electrical device if it has fallen into water. In such a case, immediately disconnect the mains plug. −...
- Page 11 Safety WARNING! Risk of fire and injury! Improper handling of the product may result in a fire or injury. − WARNING: In order to avoid overheating, do not cover the heater. − WARNING: Fire risk exists if the heater is covered by or positioned close to curtains or other combustible materials.
- Page 12 Safety WARNING! Risk of explosion, leakage or health hazard! Improper handling of the batteries may result in explosion, leakage or personal injury. − WARNING: Do not ingest batteries – Chemical burn hazard! Keep batteries away from children. − The remote control supplied with this product contains a coin/ button cell battery.
- Page 13 Safety − If the product is to be stored unused for a long period, the battery should be removed. NOTICE! Risk of damage! Improper handling of the product may result in damage to the product. − When mounting the product on a wall, make sure that no cables, lines and pipes are damaged.
-
Page 14: First Use
First use First use Checking the product and package contents NOTICE! Risk of damage! If you are not cautious when opening the packaging with a sharp knife or other pointed object, you may quickly damage the product. − For this reason, be very careful when opening it. 1. -
Page 15: Placing The Product On The Floor
Installation 2. Line up the upper bracket with the desired installation location and mark the positions of the four screw holes found on the upper bracket on the wall. The upper bracket must be installed horizontally and the mains cord routed to the bottom right of the product. -
Page 16: Inserting And Changing The Battery
Operation Inserting and changing the battery The remote control requires one CR2025, 3 V button cell battery (provided). 1. Turn the remote control over. 2. Pull the battery tray out from the remote control while pushing the tab of the battery tray to the right (see step 1 in Fig. - Page 17 Operation 1. Set the main power switch to the “I” position. The product emits a beep sound and the power on icon lights up in the display when the product is connected to mains supply. 2. Press the on/off button to turn the product on.
-
Page 18: Timer
Timer Timer You can set up a timer so that the product will automatically turn on or off at the desired time of the week. Before setting a timer, the current day (of the week) and time must be first set. Setting the current day and time You can set the day and time either with the remote control or the control... -
Page 19: Setting Up A Timer
Overheat protection Setting up a timer Timers can only be set on the remote control 1. Make sure the current day (of the week) and time are set (see chapter “Setting the current day and time”). 2. Press the week/time button 3. -
Page 20: Troubleshooting
Troubleshooting Troubleshooting Some problems may be caused by minor faults that you can fix yourself. To do so, follow the instructions in the following table. If it is still not possible to resolve the problem, contact customer service. Do not repair the product yourself. Problem Possible reason and solution The product... -
Page 21: Storage
− Always store the product in a dry area. − Protect the product from direct sunlight. − Store the product so that it is not accessible to children. Technical data Model: EF-11D Rated voltage: 220–240 V~ 50 Hz Power: 1,750–2,000 W... -
Page 22: Disposal
Disposal Disposal Disposing of the packaging Sort the packaging before you dispose of it. Dispose of Foam Carton paperboard and cardboard with the recycled paper service and wrappings with the appropriate collection service. Disposing of the product − Should the product no longer be capable of being used at some point in time, dispose of it in accordance with the regulations in force in your city or county. -
Page 23: Warranty Details
HOME ENVIRONMENT Flame Effect Heater Warranty Details REGISTER YOUR PURCHASE AT www.aldi.com.au/en/about-aldi/product-registration/ TO KEEP UP-TO-DATE WITH IMPORTANT PRODUCT INFORMATION The product is guaranteed to be free from defects in workmanship and parts for a period of 12 months from the date of purchase. Defects that occur within this warranty period, under normal use and care, will be repaired, replaced or refunded at our discretion. -
Page 24: Repair And Refurbished Goods Or Parts Notice
HOME ENVIRONMENT Flame Effect Heater Repair and Refurbished Goods or Parts Notice REGISTER YOUR PURCHASE AT www.aldi.com.au/en/about-aldi/product-registration/ TO KEEP UP-TO-DATE WITH IMPORTANT PRODUCT INFORMATION Unfortunately, from time to time, faulty products are manufactured which need to be returned to the Supplier for repair. Please be aware that if your product is capable of retaining user-generated data (such as files stored on a computer hard drive, telephone numbers stored on a mobile telephone, songs stored on a portable media player, games saved on a games... - Page 25 Customer Service Hotline. Made in China EASY HOME® is a registered trademark of ALDI Stores DISTRIBUTED BY: ALDI STORES 1 SARGENTS ROAD MINCHINBURY NSW 2770 www.aldi.com.au AFTER SALES SUPPORT 805409 1800 898 750 service@wkfe.com.hk YEAR MODEL: WARRANTY EF-11D 05/2021...
Need help?
Do you have a question about the EF-11D and is the answer not in the manual?
Questions and answers
Can I operate the “flame only” part as I am using it for ambience only, not the heat.. I want to affix it to an open fireplace so it will not have the air circulation to use the heater.. I just want the look of a fireplace…