Advertisement
Quick Links
Advertisement

Related Manuals for Johnson Controls Tyco Illustra PRO Body Worn Camera


Summary of Contents for Johnson Controls Tyco Illustra PRO Body Worn Camera
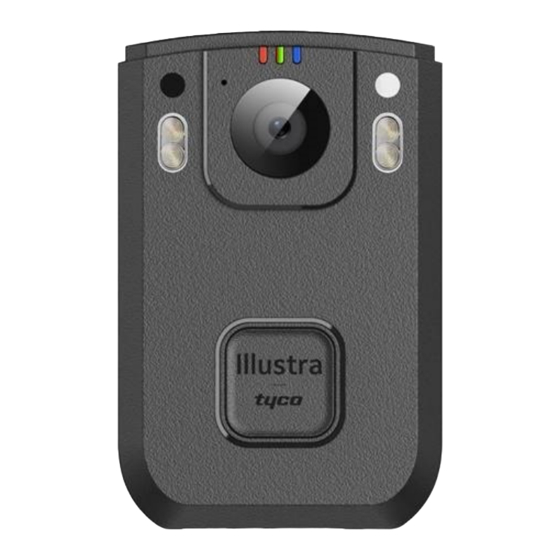
- Page 1 Illustra Body Worn Camera Application Configuration Guide...
- Page 2 All specifications are therefore subject to change without notice. Copyright © 2022 Johnson Controls. All rights reserved. JOHNSON CONTROLS, TYCO and ILLUSTRA are trademarks and/or registered trademarks. Unauthorized use is strictly prohibited. Tyco Security Products 6600 Congress Avenue Boca Raton, FL 33487 U.S.A.
-
Page 3: Table Of Contents
Table of Contents Installing the body worn camera software Body worn camera kiosk application Users Checking out a camera for use Firmware update Configuring the camera settings Camera profile settings Appendix A: Technical Specifications... -
Page 4: Installing The Body Worn Camera Software
Illustra Body Worn Camera Kiosk ApplicationConfiguration Guide Installing the body worn camera software To begin, you must install the Illustra body worn camera software onto your computer. Procedure 1 Installing the body worn camera software on your computer Step Action Download the software at https://illustracameras.com/software-downloads/ and save it to your machine. - Page 5 Figure 2 Illustra Body Worn Camera additional settings Expand the Illustra Body Worn Camera drop down icon and select one of the following application credentials options: Local System Account (Recommended) Select the Kiosk Password text box and enter a password. Note:The Kiosk Password that you enter here is the password that you use to log into the Kiosk application.
- Page 6 Illustra Body Worn Camera Kiosk ApplicationConfiguration Guide Expand the JCI Dock Controller drop down icon and select the Password text box and enter a password. Note:The JCI Doc Controller password is required when connecting the Kiosk Application to the Dock Controller. Note:Passwords must be at least 8 characters and contain a combination of uppercase and lowercase letters, numbers or symbols.
- Page 7 Figure 3 Folder location In the pop up window select the Add User or Group button. Select the Enter the object names to select text box and enter the name of the win- dows user who will be running the service. Select the Check Names button and then OK.
-
Page 8: Body Worn Camera Kiosk Application
Illustra Body Worn Camera Kiosk ApplicationConfiguration Guide Body worn camera kiosk application You can configure the body-worn camera through the JCI kiosk application. To access the Kiosk application you must enter the IP address of your computer into a web browser. Include after the IP address the following ':5000'. - Page 9 are two types of removed cameras, ones with a wearer assigned and ones which are unassigned. • Not Ready: This identifies the number of cameras that are currently charging (less than 90% charged) and in the camera docking station or directly connected via a USB cable.
-
Page 10: Users
Illustra Body Worn Camera Kiosk ApplicationConfiguration Guide Users You can add new users who can only check in and out cameras, or users who can have ownership of the kiosk application. You can also edit user information and delete a user. Procedure 4 Adding a new user Step Action Log in to the Kiosk application. - Page 11 Select the I certify that I have confirmed the identify of this user check box and then select SAVE to add the new user. - End - Procedure 5 Editing an existing user Step Action Log in to the Kiosk application. Select the icon and then select Users.
-
Page 12: Checking Out A Camera For Use
Illustra Body Worn Camera Kiosk ApplicationConfiguration Guide Checking out a camera for use A 'Camera Wearer' user can only login to the Kiosk application and check out a camera. A 'Kiosk Admin' user has full administrative rights within the Kiosk application. The camera check out process is different for a 'Camera Wearer' user and a 'Kiosk Admin' user. -
Page 13: Firmware Update
Firmware update The camera must be inserted into the camera docking station before you start the firmware update. When firmware is updated then that firmware is automatically applied to all cameras that are inserted into the camera docking station. Procedure 9 Updating the camera firmware Step Action Log in to the Kiosk application. -
Page 14: Configuring The Camera Settings
Illustra Body Worn Camera Kiosk ApplicationConfiguration Guide Configuring the camera settings You can view the following overview information, profile, name, password, battery percentage, status and the current camera user.You can create or edit the following basic settings, video, WiFi, server and APN (Access Point Name). You can create or edit the following advanced settings, Recording, Sound and Lights, and Location. -
Page 15: Camera Profile Settings
Camera profile settings You can create a camera profile and add a profile name. You can then edit the following 'Basic' settings, Video, Wi-Fi, Server and APN (Access Point Name). You also edit the following 'Advanced' settings, Recording, Sound and Lights, and Location. Procedure 11 Creating a camera profile Step Action Log into the kiosk application. - Page 16 Illustra Body Worn Camera Kiosk ApplicationConfiguration Guide Select Basic Settings in the menu list. Under the Video heading: Select the Resolution drop-down list and select an option. Select the Maximum FPS drop-down list and select an option. Select the Aspect ratio drop-down list and select an option. Under the WiFi heading: Select the Enable WiFi slide button to enable or diable WiFi.
- Page 17 Select the Enable audio for post recording slide button to enable or diable audio post recording. Select the Pre-recording duration drop-down list and select an option. Note:By default the camera is recording when you select the record button and pre / post recording is not enabled.
-
Page 18: Appendix A: Technical Specifications
Appendix A: Technical Specifications General Display 2.0 inch IPS touch screen (360x480) Memory 64GB Microphone Dual microphones with noise reduction USB-C. For connection to an external camera. Can also be used for charging Button Functions 3 fully configurable buttons Feedback Status LEDs, sounds and vibration Photo White Balance... - Page 19 Illustra Body Worn Camera Kiosk ApplicationConfiguration Guide Video Video Recording Up to 12 hours** Time Image Resolution 1080p up to 30 frames per second Up to 1080p over mobile network or WiFi. Integrated Illustra Mobile Video Man- Video Streaming ager video transmission with end-to-end AES-256 bit encryption* Video Record 480p, 720p or 1080p Pre/Post-Record...
Need help?
Do you have a question about the Tyco Illustra PRO Body Worn Camera and is the answer not in the manual?
Questions and answers