Advertisement
Available languages
Available languages
Quick Links
Advertisement

Related Manuals for Little Seeds 9951015EBL


Summary of Contents for Little Seeds 9951015EBL
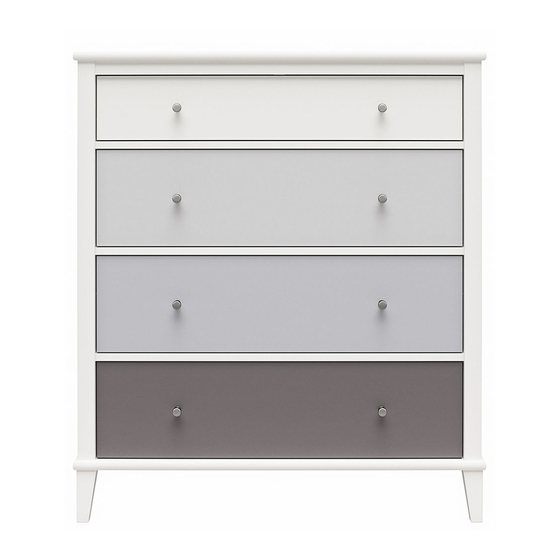
- Page 1 B349951015EBL0 Date of Purchase ___________ Lot Number _______________...
- Page 2 - Call 1-800-489-3351 Serious or fatal crushing injuries can occur from tipping furniture. Follow little seeds on WARNING: Manufacturer assumes no liability for improper installation or excessive loads placed on screws or bracket. This wall anchor is not a substitute for proper adult supervision.
-
Page 3: Helpful Hints
Do NOT return this product! Contact our friendly customer service team first for help. Call us! Assembly Tips 1-800-489-3351 Monday-Friday 9am - 5pm CST Tube Visit littleseedskids.com Helpful Hints - Open your item in the area you plan to keep it for less heavy lifting - Identify, sort and count the parts before attempting assembly - Compression dowels are tapped in with a hammer - Slides are labeled with a R (right) and L (left) for proper placement... -
Page 4: Before You Start
9951015EBL 4 Drawer Dresser Before You Start Read through each step carefully and follow the proper order Separate and count all your parts and hardware Parts are labeled on the surface or edge of the part Give yourself enough room for the assembly process... -
Page 5: Board Identification
9951015EBL 4 Drawer Dresser Board Identification 39951015030 Bottom Left Panel Right Panel 39951015040 39951015010 39951015020 Brace Apron Drawer Front A 39951015050 39951015060 39951412070 Upper Drawer Front Drawer Front B Drawer Front C 39951015100 39951321080 39951408090 littleseedskids.com... - Page 6 9951015EBL 4 Drawer Dresser Board Identification Drawer Bottom Rear Rail Front Leg 39951331110 39951015130 39951015120 BACK BACK Drawer Back Upper Drawer Back 39991167075290B 39991120075290B SIDE SIDE BACK PANEL Upper Drawer Side Drawer Side 39991120346200C 39991167346200C This piece is paperboard construction. It...
- Page 7 9951015EBL 4 Drawer Dresser Board Identification This piece is paperboard construction. It is not made from wood but is required for the assembly of your unit. BACK PANEL littleseedskids.com...
- Page 8 9951015EBL 4 Drawer Dresser Board Identification SIDE BACK Drawer Assembly Note: The only difference between the bottom 3 drawers is the color of the drawer fronts (G, H & I). SIDE SIDE BACK Upper Drawer Assembly SIDE littleseedskids.com...
-
Page 9: Parts List
9951015EBL 4 Drawer Dresser Parts List Please note: Your model may contain extra Actual Size hardware. A11080 7/16" flat head A22700 A22710 A12120 cam lock 7/16" pan head cam bolt A23030 confirmat A12800 A53510 A17400 1" flat head angle bracket 8-32 x 7/8"... - Page 10 9951015EBL 4 Drawer Dresser Parts List Please note: Your model may contain extra hardware. Not Actual Size A12420 A21110 5/8" pan head nail Actual Size A54510 A54520 drawer bracket drawer bracket 17 a 17 c 17 b 17 d A56770...
- Page 11 Step 1 11 a 11 b (x4) (x6) (x3) (x1) 11 b 11 a Do not fully tighten this strew in this step. littleseedskids.com...
- Page 12 Step 2 Proper orientation of Cam Lock (x6) (x6) Proper orientation of Cam Lock littleseedskids.com...
- Page 13 Step 3 17 a (x4) (x12) 17 a 17 a 17 a 17 a 17 a finished edge littleseedskids.com...
- Page 14 Step 4 (x2) (x1) (x3) Proper orientation of Cam Lock littleseedskids.com...
- Page 15 Step 5 (x6) finished edge littleseedskids.com...
- Page 16 Step 6 17 b (x12) (x4) 17 b 17 b 17 b 17 b 17 b finished edge littleseedskids.com...
- Page 17 Step 7 (x2) (x1) (x3) Proper orientation of Cam Lock littleseedskids.com...
- Page 18 Step 8 (x6) finished edge littleseedskids.com...
- Page 19 Step 9 (x12) (x4) (x4) Note: If needed, you may need to loosen screws if the holes in the leg do not line up with the three holes in the bottom surface. After screws are secure, retighten screws. Top Surface (Less Holes) Bottom Surface (More Holes) littleseedskids.com...
- Page 20 Step 10 finished edge littleseedskids.com...
- Page 21 Step 11 littleseedskids.com...
- Page 22 Step 12 (x4) finished edge littleseedskids.com...
- Page 23 Step 13 littleseedskids.com...
- Page 24 Step 14 Carefully turn the unit over onto its front side as shown. Assure that the unit is square. Distance from corner to corner must be equal as shown. (x24) Back panel notch location here. finished surface Align the bottom edge of the back panel with the bottom edge of the bottom shelf (D).
- Page 25 Step 15 Please Note: The smaller drawer brackets (15) will attach to the smaller drawer front (J). (x16) (x2) (x6) littleseedskids.com...
- Page 26 Step 16 Be sure the groove in the drawer sides are centered with the groove in the drawer front. If not, loosen screws in the drawer front, adjust and retighten. (x16) SIDE Large Drawer Sides SIDE SIDE SIDE Small Drawer Sides littleseedskids.com...
- Page 27 Step 17 Larger Drawer Back BACK (x16) You will need to tap with a hammer to fasten. raw surface SIDE BACK Smaller Drawer Back raw surface SIDE littleseedskids.com...
- Page 28 Step 18 17 c 17 d (x12) (x6) (x6) (x3 each) 17 d 17 c littleseedskids.com...
- Page 29 Step 19 17 c 17 d (x4) (x2) (x2) (x1 each) 17 d 17 c littleseedskids.com...
- Page 30 Step 20 (x8) (x4) littleseedskids.com...
- Page 31 Step 21 11 c For Masonry, Concrete, or other wall materials: Consult your local hardware store 11 d for appropriate anchors to securely (x1) attach the safety bracket. IMPORTANT: THIS UNIT MUST BE SECURE TO THE WALL TO HELP PREVENT TIPOVER. FOLLOW THESE INSTRUCTIONS TO INSTALL THE ANTI-TIPPING SAFETY BRACKET PROVIDED WITH THIS PRODUCT.
- Page 32 Step 22 Notice, the drawer bracket holes are slotted. Drawer fronts can be adjusted by loosening screws, making needed adjustments and retightening screws. roller cabinet member drawer runner roller littleseedskids.com...
-
Page 33: Maximum Loads
MAXIMUM LOADS This unit has been designed to support the maximum loads shown. Exceeding these load limits could cause sagging, instability, product collapse, and/or serious injury. 50 lbs. 22.6 kgs 35 lbs. 15.8 kgs each drawer Warning: Risk of injury to persons - do not place a television on this furniture. This furniture is not approved for use with a television. - Page 34 Visit your local retailer's website, rate your purchased product and leave us some feedback! We would like to extend a big "Thank You" to all of our customers for taking the time to assemble this Little Seeds product, and to give us your valuable feedback. littleseedskids.com...
- Page 35 Espa ol P gina 2: Guarde este manual de montaje para futuras referencias. Se recomiendan dos adultos para el montaje Asegure sus muebles Mantenga su hogar y a su familia seguros con el kit de anclaje de pared que se incluye con el producto. Podr an ocurrir lesiones graves o fatales por aplastamiento al volcar los muebles.
- Page 36 Espa ol Sistema de fijar el bloqueo de leva (p gina 4) Esta sistema de fijar el bloqueo de leva sera usado en todo el proceso ensamble. Paso 1. Introduzca el CAM BOLT en el orificio. Paso 2. Introduzca el CAM LOCK en el orificio. Flecha para apuntar hacia el agujero final en el borde de la pieza.
- Page 37 Espa ol Paso 1 No apriete del todo este tramo en este paso. Paso 2, 4, 7 Orientaci n adecuada del Cam Lock Paso 3, 5, 6, 8, 10, 12 Borde acabado Paso 9 Nota: Si es necesario, puede aflojar los tornillos si los agujeros en la pata no est n alineados con los tres agujeros en la superficie de abajo.
- Page 38 Espa ol Paso 16 Aseg rese de que la ranura en los lados del caj n se centran con la ranura en el frente del caj n. Si no es as , afloje los tornillos en el frente del caj n, ajuste y vuelva a apretar. lados grandes del caj n lados del caj n peque o Paso 17...
- Page 39 Espa ol Paso 21 Para mamposter a, hormig n u otros materiales de la pared: Consulte a su ferreter a local para los anclajes apropiados para fijar firmemente el soporte de seguridad. IMPORTANTE: ESTA UNIDAD DEBE SER ASEGURADA CON LA PARED PARA PREVENIR VOLQUEO. SIGA ESTAS INSTRUCCIONES PARA INSTALAR EL SOPORTE DE SEGURIDAD ANTIVOLQUEO SUMINISTRADO CON ESTE PRODUCTO.
- Page 40 Espa ol Paso 22 Tenga en cuenta los agujeros de los soportes de caj n est n ranurados. Frentes de los cajones pueden ajustarse aflojando los tornillos, hacen los ajustes necesarios y vuelva a apretar los tornillos. P gina 33 CARGA MAXIMA Esta unidad ha sido dise ada para soportar la carga m xima anotada.
-
Page 41: Astuces Utiles
Ne pas retourner ce produit. Pour les pi ces manquantes ou endommag es - Visitez littleseedskids.com - Appelez le 1-800-489-3351 Suivez Little Seeds sur : Ce produit n'est pas destin un usage commercial. Astuces Utiles (page 3) -Ouvrez votre article dans la zone que vous pr voyez de le garder pour moins de levage lourd... - Page 42 Fran ais Syst me de Fixation de Came (page 4) Ce Syst me de Fixation de Came sera utilis tout au long de l'assemblage tape 1. Enfoncez le p ne battant dans le trou. tape 2. Enfoncez la serrure batteuse dans le trou. La fl che doit pointer vers le trou d'extr mit sur le bord de la pi ce.
- Page 43 Fran ais tape 1 Ne pas serrer compl tement cette vis ce stade. tape 2, 4, 7 Orientation correcte de la serrure batteuse tape 3, 5, 6, 8, 10, 12 Rive travaill e tape 9 Note: Si d sir , vous pouvez desserrer les vis si les trous dans la patte ne s'alignent pas avec les trois trous dans la surface inf rieure.
- Page 44 Fran ais tape 16 Veillez ce que la rainure dans les c t s du tiroir sont centr es sur la rainure de la fa ade du tiroir. Sinon, desserrez les vis l'avant du tiroir, ajuster et resserrer. grand c t tiroir petit c t tiroir tape 17 Vous devrez taper avec un marteau pour les fixer.
- Page 45 Fran ais Pour la ma onnerie, b ton ou tape 21 d'autres mat riaux de mur: Consultez votre magasin local de mat riel pour les ancrages appropri s pour fixer le support de s curit . IMPORTANT: CET APPAREIL DOIT TRE FIX AU MUR POUR AIDER PR VENIR LE BASCULEMENT. SUIVRE CES INSTRUCTIONS POUR INSTALLER LE SUPPORT DE S CURIT ANTI-BASCULEMENT FOURNI AVEC CE PRODUIT.
- Page 46 Fran ais tape 22 Remarquez, les trous du support du tiroir sont fendus. Les fa ades du tiroir peuvent tre ajust es en desserrant les vis, faire les ajustements n cessaires et resserrez les vis. Page 33 CHARGES MAXIMALES Ce meuble a t con u pour supporter les charges maximales indiqu es. En exc dant ces limites de charge, le meuble pourrait devenir instable, s'effondrer, et/ou causer des blessures graves.