
Related Manuals for Newman PANTHER SE


Summary of Contents for Newman PANTHER SE
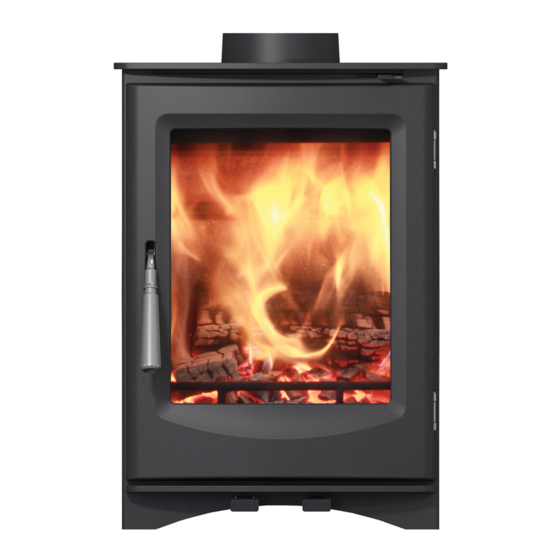
- Page 1 Smoke exempt WOOD burning stove Installation & user instructions (To be left with customer) PANTHER SE Reference: NS-20 Edition 2 Date: 14th February 2022...
- Page 2 Index Page. Section. 3 - 4 Pre-installation checks & general safety notes. Clean Air Act 1993 & smoke control areas. HETAS Ltd Approval Pre-installation checks & general safety notes 3 - 4 The Clean Air Act 1993 and Smoke Control Areas Hetas Ltd approval Technical and emission data 6 - 26...
-
Page 3: Pre-Installation Checks & General Safety Notes
Pre-installation checks & general safety notes Installation of this stove must be completed in accordance with current local codes and Regulations in each country. All local Regulations & any Rules in Force, including those which refer to National and European standards, must be observed when installing this product. ... - Page 4 The appliance must not be operated with air control, appliance dampers or door left open except as directed in the instructions. HETAS LTD approval The Panther SE appliance has been approved by HETAS Ltd as intermittent operating appliances for burning wood logs.
- Page 5 2.0 Technical and Emission data Material: Steel and Cast iron Finish: High-temp resistant paint Fuel Wood: Approved wood logs Log length: 23cm x 8cm Diameter Maximum Flue outlet: Top and rear Flue pipe dimension: Internal 125mm / 113cm2 cross section Approx.
-
Page 6: Installation
Installation Unpacking the stove After removing the outer packaging, remove the stove from the wooden pallet and place it gently on its back. The cardboard packaging can be placed underneath to prevent marring. Remove the leg pack from the stove if not assembled at manufacture, bolt each leg securely to the underside of the base on the combustion chamber, using the bolts provided (found inside the stove). - Page 7 Figure 1.1...
- Page 8 Figure 1.2 Top baffle positioning Position the top baffle through the aperture into the firebox, ensure the 2 cut outs of the top baffle are facing the front of stove and the angled lips are facing downwards. Position the top baffle into position by feeding in an upward direction and locating the front angled edge with the 2 cut outs onto the top of the top baffle support bracket, then lower the lower angled edge of the top baffle so it locates into the left- and right-hand side support brackets.
- Page 9 Figure 1.3 Lower baffle positioning Position the lower baffle through the firebox aperture; ensure the lower front lugs are to the front of the stove. Feed the lower baffle in an upward direction and locate the front left and right-hand lugs to each tab located to the left- and right-hand side of stove.
- Page 10 Figure 1.4 Rear brick positioning Position both rear fire bricks into correct position to the rear of the stove ensuring they are both firmly against the internal rear wall of the stove ensuring not to leave a gap between each rear brick where they meet.
- Page 11 Figure 1.6 Stove main grate position Position the main grate into correct position ensuring the lipped edge faces to the rear of the stove. Figure 1.6 Figure 1.7 Banking bar positioning Locate the banking bar through the aperture to the front of the stove. Locate the banking bar lower tabs into slots provided in the lower chassis ensuring the banking bar sits in front of both side cheeks.
-
Page 12: Data Plate Location
Figure 1.8 Ash pan positioning Slide the ashpan into the lower cut out to front of the stove below the main grate ensuring it is fully inserted. Figure 1.8 Data plate location (see figure 1.9) Figure 1.9 shows the position of the stove data plate which is located to the rear of the stove. This shows important information, including: Model Standard number... - Page 13 Figure 1.9 Data plate position...
-
Page 14: Stove Placement / Clearance Requirements
Laws, Building Regulations & any Rules in Force, including BS 8303 and BS EN 15287-1:2007. See: Figure 2 and 2A. Panther SE stove fixing to hearth and constructional hearth Refer to current National Laws, Building Regulations & any other Rules in Force, including British... - Page 15 Distances between stove and a conventional brick Class 1 Chimney (see figure 2A) Refer to current National Laws, Building Regulations & any other Rules in Force, including BS 8303 and BS EN 15287-1:2007. When installing this stove into a conventional class 1 non-combustible brick chimney built to building regulations and any other rules in force including BS 8303 and BS EN 15287-1:2007 the clearances to the sides and rear of stove required is 150mm, however providing all surrounding non-combustible brick walls have a minimum thickness of 200mm the clearance between the rear &...
- Page 16 Ceiling protection Refer to current National Laws, Building Regulations & any other Rules in Force, including BS 8303 and BS EN 15287-1:2007 Clearances to furniture and soft furnishings Serious consideration should be given to positioning of any furniture or soft furnishings that could be adversely affected by heat.
- Page 17 The chimney Refer to current National laws, Building Regulations, and any Rules in Force, including British standard BS EN 15287-1:2007 and BS 8303 and (Approved Document J England & Wales) The construction of the masonry chimneys, flue block chimneys and connecting flue pipe system must meet the requirements of the Current National laws, Building Regulations, and any Rules in Force.
-
Page 18: Stove Pipe Connection
diameter of 125mm can normally be used. *(This must be confirmed with HETAS or Local Authority Building Control and all Current National laws, Building regulations and any Rules in Force). An over-sized chimney is generally hard to keep warm and results in poor draft. In cases where there is an oversized masonry chimney, it is highly recommended that the chimney be lined using an appropriate and approved chimney lining system with the correct internal diameter as stated above. -
Page 19: Connecting To A Masonry Chimney
ensure the rigid stove pipe is unable to be pulled out of the stove collar. Ensure the self-tapping screw or bolt nut and washers do not obstruct the stove collar flue way and ensure the screws or bolts and locating holes are airtight. The chimney or flue way that the stove pipe is connected must be at least 125mm internal diameter. - Page 20 3.4.3 Connecting to a stainless-steel twin wall insulated flue system Refer to Current National laws, Building Regulations, & any Rules in Force, including BS 8303 and BS EN 15287-1:2007. Also refer to (Approved Document J England & Wales) If the installation is to use a suitable and approved twin walled stainless steel insulated flue system for Multifuel use then you must comply with Current National, Local Building Regulations and any Rules in Force, including referring to the flue manufacturer’s instructions concerning installation and clearances to combustible materials such as walls, floor joists and ceilings etc.
- Page 21 If there is an extraction fan fitted in adjacent rooms where this appliance is fitted, additional air vents may be required to alleviate the possibility of spillage of products of combustion from the appliance/flue while the fan is in operation. Refer to B.S. 8303 Part 1. Where such an installation exists, a test for spillage must be made with the fan or fans and other appliances using air in operation at full rate, (i.e., extraction fans, tumble dryers) with interconnecting doors fully open.
-
Page 22: Carbon Monoxide Alarm
Carbon Monoxide Alarm Refer to Current National laws, Building Regulations, & any Rules in Force, including BS 8303 and BS EN 15287-1:2007 & (Approved Document J England & Wales) An approved Carbon Monoxide alarm conforming to the latest edition of BS EN 50291 must be installed into the room into which the stove is installed. - Page 23 Stainless Steel Handle removeable, (Plug in and out) (see figure 3.5A) The optional stainless-steel handle is designed to be of plug in and plug out type, this will enable the handle to be removed when not operating the door to avoid excessive heat transfer into the handle when the stove is in operation and hot.
- Page 24 Stainless Steel Handle fixed (see figure 3.5B) (Optional configuration when stove is not in use and cold) For aesthetic purposes the stainless-steel handle can be fixed into position when the stove is not in use and cold. For this configuration unscrew the plug-in type handle and remove the spacer (part 3) and the plug- in adaptor (part 5).Pass the screw and washer (part 1 &...
-
Page 25: Commissioning And Handover
Commissioning and handover Ensure the installation of this stove is completed in accordance with Current National laws, local codes, and Regulations in each country. All local Regulations & any Rules in Force, including those which refer to National and European standards, must be observed when installing this product. ... - Page 26 Explain to the user the safe operation of the appliance, use of controls and the importance of using suitable fuels and never to exceed the maximum fuel load stated within these instructions. Explain to the user how to open and close the door and the importance of not operating the stove with the stove door open other than as explained within these instructions.
- Page 27 User Manual Warnings and Safety Important. Please read the Installation and User Instructions so that you become fully acquainted and understand how to use and operate this stove safely. Warning sign Installation of this stove must be completed in accordance with Current Local Codes and Regulations in each country.
- Page 28 Ensure the area around the stove is clear of all obstacles so as not to be a trip hazard and allowing a totally un-obstructed space whilst lighting, re fueling, adjusting the air controls, removal, and replacement of ash pan and at all other times. Ensure the area around the stove is safely clear of all people and animals whilst lighting, re fueling, adjusting the air controls, removal, and replacement of ash pan and at all other...
- Page 29 Serious consideration should be given to positioning of any furniture or soft furnishings that could be adversely affected by heat. Newman Fireplaces Ltd recommend that any furniture or soft furnishings or any combustible materials to be a minimum of 2000 mm away from the stove.
- Page 30 must be in accordance with current National laws, Building Regulations including (Approved Document J England & Wales) and alarm manufacturers instruction. Actions to take if the alarm sounds in a CO emergency If you suspect fumes are escaping from your combustion appliance into your home, or your carbon monoxide alarm goes off.
- Page 31 A conveniently located approved fire extinguisher to contend with small fires resulting from burning embers and any residue material. A practical evacuation plan. A plan to deal with a chimney fire as follows: Notify the fire department. ...
- Page 32 4.2 Maximum fuel loads and recommended fuel Maximum fuel load Stove model Wood Panther 5 SE 1 to 2 x Small sized logs maximum total weight 1.03kg Recommended fuel: Seasoned hardwood Only use seasoned hardwood logs with a moisture content of 16 % plus or minus 4 %. Never use wet wood or unseasoned wood.
- Page 33 Softwood, Used wood and Treated wood Burning softwood, previously used wood and treated wood (railway sleepers, telegraph poles, off cuts of plywood or chip board, pallets, etc.) quickly clogs and blocks the flue ways (soot, tar,) etc, pollutes the environment (pollution and smell) etc, and cause the fire to burn too quickly and overheat.
- Page 34 Never leave the appliance unattended for long periods and always ensure that the newly charged fuel is burning well before leaving the room. Do not refuel when a large amount of flame is in the firebox as this could cause smoke or flames ...
- Page 35 The stove may emit an irritating gas when used for the first time, and it may smell a little. The room should be thoroughly ventilated. Let the fire burn with a high draught (without over firing) until all traces of the gas have disappeared and no smoke or smells can be detected. Evacuate all people from the room until all odours have cleared.
-
Page 36: Use With Wood
A stove mitten and long ash pan / air control tool are supplied with this stove for your use when operating the stove, if the mitten supplied is of the incorrect size for the user, then it is recommended that the user sources a CE approved stove mitten or glove to the correct size before lighting and operating this stove. -
Page 37: Operation With Door Left Open
3) To achieve clean burning and maximize the performance and efficiency of the appliance it is important to raise the temperature of the stove and chimney as quickly as possible. Thus, when lighting the appliance, the technique is to open the door and start with a small amount of kindling with the secondary and primary air controls fully open, use a long taper to ignite the kindling and then close the stove door. - Page 38 It is highly recommended providing the ash pan is not full of residue material that the ash pan is emptied when the fire is not in use and the stove, with all residue and components are cold. Ensure the area around the stove is clear of all obstacles so as not to be a trip hazard and allowing a totally unobstructed space whilst removing the ash pan, ash, and residue material.
- Page 39 Disposal of ash and residue material Ashes and any residue material should be placed in a non-combustible leak proof metal container with a tight-fitting lid. The closed container of ashes must be placed on a suitable non-combustible floor or ground that is resistant to very high temperatures without causing any damage well away from all combustible materials.
-
Page 40: Maintenance
Maintenance (By a professional registered, and approved, stove installer) Refer to: Current National laws, Building Regulations & any Rules in Force. Also refer to: (Approved Document J England & Wales). 4.4.1 Professional Safety and service checks. The stove should be regularly serviced (At least once every year) by an approved and competent stove installer such as Hetas registered (England &... - Page 41 Check to ensure the chimney and flue system is in sound condition and working correctly and safely. Check that the chimney has been swept and inspected by a suitably qualified and registered chimney sweep to ensure that the chimney / flue is clean and free from any obstructions and to check that the chimney / flue is in sound and safe serviceable condition, also to check the chimney / flue is suitable for the stove being serviced.
- Page 42 Hetas registered (England & Wales) or equivalent for other Nations. Open the door. Remove the glass panel by removing the 4 screws and fixing tabs located to the inside of the door, the glass panel will require supporting during this process. Remove the glass panel.
- Page 43 4.4.3 Replacing the door rope seals (see Figure 7) Only change the glass panel and rope seals when the stove is not in use and completely cold. Wear suitable protective gloves, mask and goggles during this process. The fibre rope seals in the door will wear out over time and should be replaced as required and renewed at least annually by an approved and competent stove installer such as Hetas registered (England &...
- Page 44 4.5 User Cleaning and Maintenance 4.5.1 User Maintenance Safety Warnings If the user does not feel confident to undertake the user cleaning and maintenance, it is highly recommended that you use a suitably qualified stove installer regularly to ensure continued safe and efficient operation of this appliance.
- Page 45 the use of the controls, clean as necessary. Air Supply: It is essential to check any air supply ventilator in the property is fully clear and open if installed. 4.5.4 External surface cleaning (user) The steel and cast surface of the Panther 5 SE stove is painted with black heat-resistant paint. It is best maintained by simply vacuuming it with a soft brush attachment or wiping it down with a dry, dust-free cloth, but only when the stove is not in use &...
-
Page 46: Operational Problems - Troubleshooting
Operational problems – troubleshooting Seek advice from a qualified chimney & stove specialist Operation troubleshooting Problem Probable Cause Action Low flue draught Consult your stove installer Difficulty getting the fire alight Use dry seasoned hardwood. and keeping it burning well Wet wood (Less than 20% moisture (Over 20% moisture content) - Page 47 Smoke emission troubleshooting Problem Probable Cause Action Small flames and smoke Wet wood Use dry seasoned hardwood (Over 20% moisture content) (less than 20% moisture content) When appliance door is Flue draught low Consult your stove installer opened smoke spillage enters Room ventilation not correct Consult your stove installer the room...
- Page 48 Adverse weather troubleshooting Probable Cause Problem Action The flue terminal position can affect the stove and flue performance i.e. Intermittent smoke enters the nearby trees or structures. Also Down draught room when the stove door is weather conditions can contribute opened on windy days to flue down draughts.
- Page 49 Troubleshooting the stove Problem Probable Cause Action Use dry seasoned hardwood (less than 20% moisture content). To avoid a large buildup of creosote The rapid build up of creosote in operate the stove at a higher Wet wood the chimney temperature for a short period of (Over 20% moisture content) time whenever the stove is used.
- Page 50 Troubleshooting the stove (Continued) Problem Probable Cause Action Poor quality wood being used Use dry seasoned hardwood (less than 20% moisture content) Flue draught low Consult your stove installer Air control use incorrect Refer to user instructions for correct Excessive blackening of glass use of air controls Operate the stove at a higher temperature for a short period of...
- Page 51 4.13 Exploded view with part identification for: Panther SE Item Description Code Specification /hole qty Banking bar NW0120V1 Ash Pan Handle CA0105 Grate LD170114 Fire Door LD170207 Spigot Blanking Plate C125 Blanking Plate Locking Bar C125Y Handle frame CA22-LD1601-15 24×108×19mm...
- Page 52 Fiberglass rope CA0801 Φ6 Fiberglass rope CA0809 Φ13 Rivet BXGMD-2 Φ5×12 Flat counter sunk in hexagon bolts CA0273 M6×15 Flat counter sunk in hexagon bolts CA0274 M6×20 Flat counter sunk in hexagon bolts CA0276-1 M6×45 Flat counter sunk in hexagon bolts CA0293 M6×8 Spring...
- Page 53 Hexagon head bolts CA0225 M8×25 Washer CA0302 Φ6×22 CA0402 Hexagon Spanner NLFBS-004 Flat counter sunk in hexagon bolts CA0275 M6×25 Desiccant GZJ-001...
- Page 54 Declaration of Performance, Energy Labels & Product Fiche. Declaration Of Performance...
-
Page 55: Product Fiche
Commission Delegated Regulation (EU) 2015/1186 Energy Labelling of Local Space Heaters Newman Fireplaces Ltd Supplier`s Name or Trademark: Panther SE Wood Stove Suppliers Model Identifier: Energy Efficiency Class of Model: Nominal Heat Output to Room (kW): Nominal Heat Output to Water (kW): 78.7... -
Page 56: Energy Label
Energy label The energy label is affixed to the front glass of stove; this must be removed and given to the customer before lighting the stove. - Page 57 Address: Units 6 & 7, Rawreth Barns, Dollyman's Farm, Doublegate Lane, Rawreth Wickford, Essex. SS11 8UD Tel: 01268 763586 Fax: 01268 762366...
Need help?
Do you have a question about the PANTHER SE and is the answer not in the manual?
Questions and answers