Advertisement
Quick Links
Advertisement

Related Manuals for MojoDesk MojoDome


Summary of Contents for MojoDesk MojoDome
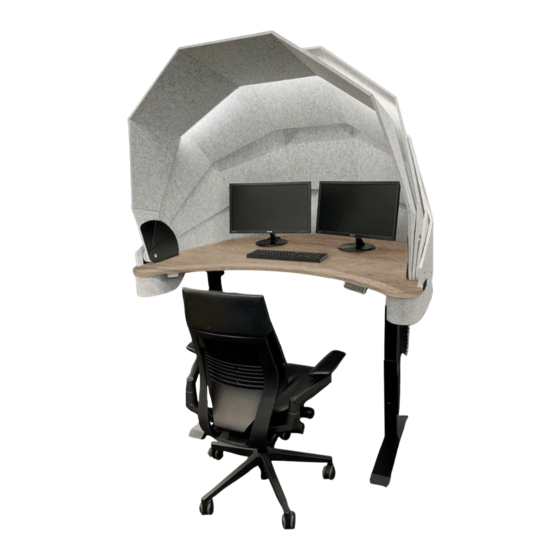
- Page 1 ASSEMBLY INSTRUCTIONS...
- Page 2 SCREW(G) such that power cord is facing front of table. ACTUATOR HAND CONTROL Secure the DOME HAND CONTROL(J) on the opposite side of worksurface from the Lift Control Panel installed in STEP 5 of the MojoDesk ASSEMBLY GUIDE. Plug hand control into ACTUATOR CONTROL BOX(I). FLIP TABLE UPRIGHT TEAM LIFT To prevent injury and damage to the worksurface, use TWO or more people and flip the workstation upright.
- Page 3 ACOUSTIC MATERIAL INSTALLATION The 6 pieces of acoustic material will APPEAR to be completely solid. This is NOT the case. Each piece will have specific holes and/or slots cut in them to enable automation and mounting. PUNCH OUT SLOTS AND HOLES Take panels and remove from plastic wrapping.
- Page 4 4. Secure PANEL(D) to J BRACKET(B ) with two SCREW(H) into the two small holes in back of J BRACKET(B 5. Slide the slot of MIDDLE BRACKET(D ) onto post of J BRACKET(B 6. Slide inner hole of PANEL(C) onto the post of MIDDLE BRACKET(D ).
- Page 5 8. Slide the slot of BRACKET(E)(without post) on the the post of MIDDLE BRACKET(D 9. Slide the slot of PANEL(B) onto the post of MIDDLE BRACKET(D 10. Secure both PANELS with BOLT(A) threaded into the post of MIDDLE BRACKET(D 11. Repeat STEPS 2 - 10 for the left side of the table.
- Page 6 ATTACH TO WORKSURFACE 1. Insert stud on PIVOT BRACKET(F) into all three panels and brackets on each side of worksur- face. Using divots on bottom of worksurface secure PIVOT BRACKET(F) onto worksurface with SCREW(G). 2. Place STICKER(L) on end of both J BRACKET(A ) &...
- Page 7 4. Place PINCH PROTECTORS(U) & (V) with the slots facing towards the outside of the DOME. Use the engraving (L & R) to identify the brackets. Align PINCH PROTECTOR (W) with PINCH PROTECTORS(U) & (V) and secure to DOME with BOLT(A).
- Page 8 LINEAR ACTUATOR INSTALLATION Cable Tray Power Bar will need to be plugged in a power source to complete actuator installation. ATTACH LINEAR ACTUATOR TO BRACKETS 1. Place back of ACTUATOR(H) into ACTUATOR BRACKET(G) and remove cotter pin from PIN(C) and insert PIN(C) through ACTUATOR BRACKET(G) and hole in ACTUATOR(H). Reinsert cotter pin into PIN(C) on the other side of ACTUATOR BRACKET(G).
- Page 9 DOME LIGHTING INSTALLATION 1. Open and place remaining ASSEMBLY COMPONENTS on the worksurface. 2. Take LED STRIP(T) and remove adhesive strip from end that doesn’t have cable. 3. Attach LED STRIP(T) to BOTTOM of panel A on the third straight section on the right. The cable on LED STRIP(T) needs to be directed towards left of table.
- Page 10 MojoDome Components...
Need help?
Do you have a question about the MojoDome and is the answer not in the manual?
Questions and answers