Table of Contents
Advertisement
Quick Links
Advertisement
Table of Contents

Related Manuals for Asus ZenBeam Latte


Summary of Contents for Asus ZenBeam Latte
- Page 1 LED projector User Manual ZenBeam Latte...
- Page 2 ASUS will only be responsible for or indemnify you for loss, damages or claims based in contract, tort or infringement under this Warranty Statement. This limit also applies to ASUS’ suppliers and its reseller. It is the maximum for which ASUS, its suppliers, and your reseller are collectively responsible.
-
Page 3: Table Of Contents
Table of Contents About this manual ......................5 Conventions used in this manual ................6 Typography ........................6 Multi-language versions ....................6 Safety precautions ......................7 Using your LED projector ....................7 Servicing and replacement of parts ................. 7 Caring for your LED projector ..................8 Battery precautions ...................... - Page 4 Using your LED projector for the first time ............36 Home page summary ....................37 Using the Mirror function ....................39 Using the ZenBeam Latte as a Bluetooth speaker ..........41 Sending YouTube links to the LED projector ............42 Using the Aptoide TV ....................43 Navigating in Aptoide TV ....................43...
-
Page 5: About This Manual
About this manual This manual provides information about the hardware and software features of your LED projector through the following chapters: Chapter 1: Knowing your LED Projector This chapter details the parts of your LED projector and its accompanying remote control. Chapter 2: Setting up This chapter shows you how to set up your LED projector and use its parts for input device connection. -
Page 6: Conventions Used In This Manual
Bold = This indicates a menu or an item that must be selected. Italic = This indicates sections that you can refer to in this manual. Multi-language versions Download other language versions of this User Manual via this website: https://www.asus.com/support LED projector User Manual... -
Page 7: Safety Precautions
Do not disassemble or attempt to service this LED projector by yourself. Contact your local ASUS service center for assistance. • When replacing parts of your LED projector, purchase items as specified by ASUS and contact your local service center for assistance. LED projector User Manual... -
Page 8: Caring For Your Led Projector
Caring for your LED projector • Switch off then unplug the LED projector from the power outlet before cleaning it. • When cleaning the LED projector’s housing, use a clean soft cloth dampened with water or a mix of water and neutral detergent. Wipe it dry using a soft dry cloth. -
Page 9: Proper Disposal
Proper disposal Do not throw your LED projector in municipal waste. This product has been designed to enable proper reuse of parts and recycling. The symbol of the crossed out wheeled bin indicates that the product (electrical, electronic equipment and mercury- containing button cell battery) should not be placed in municipal waste. - Page 10 LED projector User Manual...
-
Page 11: Chapter 1: Knowing Your Led Projector
Chapter 1: Knowing your LED projector Chapter 1: Knowing your LED projector LED projector User Manual... -
Page 12: Features
Features Top view Power button Press this power button to turn on or turn off your LED projector. This LED indicator on this button indicates the following scenarios for your LED projector: LED Color Status White The LED projector is powered on and the battery power is more than 25%. - Page 13 Menu Up button This button is used to navigate the different menus. Home button Press this Home button to return to the home page or to switch back to projector mode when the LED projector is in Bluetooth speaker mode. Menu Left / Volume Down button This button is used to navigate the different menus, and can also be used to turn the volume down when audio is playing.
-
Page 14: Front View
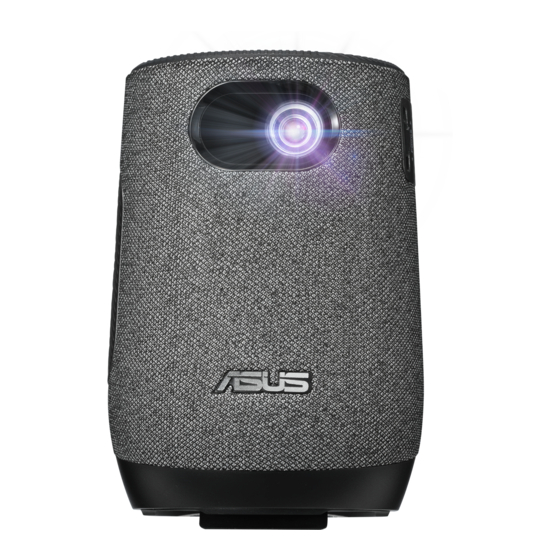
Front view Lens The lens projects video or image files onscreen from your input device. WARNING! Do not touch the lens using your hands or any sharp object. LED projector User Manual... -
Page 15: Right View
Right view Focus dial The focus dial allows you to adjust the focus of the projector lens LED projector User Manual... -
Page 16: Left View
Left view Air vents (exhaust vent) The air vents allow your LED projector to expel hot air out. IMPORTANT! For optimum heat dissipation and air ventilation, ensure that the air vents are free from obstructions. CAUTION! Be careful of the hot air expelled at the air vents as it may cause discomfort or injuries. -
Page 17: Rear View
Rear view Remote sensor The remote sensor detects signal from your LED projector’s remote control, allowing you to access the LED projector’s control panel from a distance of up to 8 meters and a receiving angle of ±30 degrees when the remote is directly behind the remote sensor. LED projector User Manual... - Page 18 Manual reset hole If your LED projector is unresponsive, insert a straightened paper clip into this hole to turn off your LED projector, then press the power button to turn on your LED projector again. Audio output jack port The audio output jack port allows you to connect your LED projector to amplified speakers or headphones.
- Page 19 Battery charge indicator This LED indicator lights up when the LED projector is plugged to a power source using its power adapter. IMPORTANT! Use only the bundled power adapter to charge the battery pack and supply power to your LED projector. LED Color Status Orange...
-
Page 20: Bottom View
Bottom view Built-in stand This LED projector comes with a built-in stand that allows you to adjust the height of the projector by ±5 degrees. Tripod socket Connect the LED projector to a tripod using this socket. NOTE: The tripod is limited to a maximum height of 1m, and fits a 1/4-20UNC screw. -
Page 21: Led Projector Remote Control
LED projector remote control NOTE: Actual appearance may vary depending on model. Battery compartment The battery compartment allows you to install two (2) 3A batteries to power your LED projector’s remote control. NOTE: For more details on using the battery compartment, refer to the Replacing the battery section in this manual. - Page 22 Remote control buttons These additional buttons allow you to navigate the LED projector’s onscreen display menu from a distance of up to 8 meters. Power - Press this button to turn your LED projector on or off. Bluetooth - Press this button to toggle between Bluetooth Speaker mode and Projector mode.
-
Page 23: Replacing The Battery
NOTE: • You may use the remote control or toggle the cursor function to navigate through the onscreen display. For more details on the onscreen display menu, refer to the Using the onscreen display menu section. • When using Aptiode TV, please use the remote control to adjust the volume. - Page 24 Remove the old batteries, then insert two (2) new 3A batteries into the battery compartment. NOTE: Take note of the direction of the batteries when installing them. Slide the battery compartment cover back onto the remote control, then push upwards to secure the battery compartment cover. LED projector User Manual...
-
Page 25: Chapter 2: Setting Up
Chapter 2: Setting up Chapter 2: Setting up... -
Page 26: Operating Your Led Projector
Operating your LED projector This portable LED projector allows you to plug and play your devices so you can easily open multimedia files and hear audio straight from its built-in Harmon Kardon speakers. You may also use it as a portable Bluetooth speaker, providing you with high quality audio whenever you might need it. - Page 27 IMPORTANT! • Use only the bundled power adapter to charge the battery pack and supply power to your LED projector. • Ensure that your LED projector is connected to the power adapter before turning it on for the first time. We strongly recommend that you use a grounded wall socket while using your LED projector on power adapter mode.
- Page 28 AC power cord requirements Use the correct AC plug type according to your current location. IMPORTANT! Contact your sales dealer if the AC power cord bundled with your LED projector does not match your local power source. NOTE: We highly recommend that you use a video source device that also uses a grounding type plug to prevent signal interference due to voltage fluctuations.
-
Page 29: Connect The Led Projector To Your Device
Connect the LED projector to your device A. Audio output jack LED projector User Manual... - Page 30 HDMI ™ input LED projector User Manual...
-
Page 31: Adjust The Height Of The Led Projector
Adjust the height of the LED projector Your LED projector comes with a built-in stand that helps adjust the image height onscreen. WARNING! Ensure that the built-in stand is fully retracted before placing the LED projector inside the projector bag. NOTE: •... - Page 32 Screen size and projection distance table Adjust the LED projector’s distance from the screen using the table below. Screen size LED projector Projection distance Screen Size Projection Distance Diagonal Horizontal Vertical inch inch inch inch 26.14 14.72 31.29 1016 34.88 19.60 41.77 1061...
-
Page 33: Press The Power Button
Press the power button LED projector User Manual... -
Page 34: Adjust The Image Focus
Adjust the image focus Slide the focus dial on the LED projector up or down to adjust the image focus. NOTE: Use a still image when adjusting the onscreen display. LED projector User Manual... -
Page 35: Chapter 3: Using The Onscreen Display Menu
Chapter 3: Using the onscreen display menu Chapter 3: Using the onscreen display menu... -
Page 36: Using Your Led Projector For The First Time
NOTE: The following screenshots are for reference only and may be updated without prior notice. Screenshots may also vary depending on the LED projector model. Using your LED projector for the first time Refer to the following steps when using your LED projector for the first time. -
Page 37: Home Page Summary
Home page summary The home page of your LED projector allows you to access all the different functions of the LED projector. You can use the remote control or buttons on your LED projector to navigate through the home page. A. - Page 38 Aptoide TV: This item allows you to access Aptoide TV. IMPORTANT! Not all apps are supported by this LED projector; some apps may require functions not supported by this LED projector, or may be limited to selected firmware versions. NOTE: •...
-
Page 39: Using The Mirror Function
Using the Mirror function The mirror function allows you to project your mobile device’s screen to the projector. The setup process may differ slightly between Android and iOS mobile devices. NOTE: You may consider installing a third-party app such as Eshare to improve your connection. - Page 40 NOTE: • The Device name you select should match the Device name shown at the top left of the home page. For more information on the location of the Device name, please refer to Home page summary. • In addition to using an Android mobile device’s Screen cast, or an iOS mobile device’s Screen mirroring function, you may also use YouTube’s YouTube cast ( ) function to project a YouTube video to the LED...
-
Page 41: Using The Zenbeam Latte As A Bluetooth Speaker
Bluetooth devices list then select it to pair your mobile device with the LED projector. NOTE: If your device cannot find ZenBeam Latte, you may also pair your LED projector with your mobile device through your LED projector by navigating to Menu > Bluetooth, then selecting your mobile device in the Available Devices list. -
Page 42: Sending Youtube Links To The Led Projector
Pair your LED projector and your mobile device through Bluetooth, for more information about pairing Bluetooth you may refer to steps 1 and 2 of the Using the ZenBeam Latte as a Bluetooth speaker section. Launch YouTube on your mobile device, then on the video you wish to share, click on Share and share the video link to the LED projector through Bluetooth. -
Page 43: Using The Aptoide Tv
Using the Aptoide TV Aptoide TV is an alternative app store providing you with various apps for use with your LED projector. IMPORTANT! Not all apps are supported by this LED projector; some apps may require functions not supported by this LED projector, or may be limited to selected firmware versions. -
Page 44: Downloading And Installing An App
Downloading and installing an app You may browse through the Discover and Categories tabs to browse through apps to download, you may also use the Search function to search for a specific app to download and install. LED projector User Manual... - Page 45 NOTE: • Some apps may require Google Services permissions and may also require use of a mouse and cursor. • Installing an unknown app requires permissions from the user. LED projector User Manual...
-
Page 46: Putting Your Led Projector In Standby Mode
Putting your LED projector in Standby mode To put your LED projector into Standby mode, press the power button on your LED projector or remote, then select the Standby option. LED projector User Manual... -
Page 47: Powering Off Your Led Projector
Powering off your LED projector Powering off by a short press on the power button You can power off the LED projector by pressing the power button on your LED projector or remote, then selecting the Power off option. Powering off by long pressing the power button Long press on the power button on your LED projector or remote to prompt a pop-up. -
Page 48: Multi-Language Versions
Multi-language versions Download other language versions of this E-Manual via this website: https://www.asus.com/support LED projector User Manual... -
Page 49: Appendices
Appendices Appendices Appendices Appendices... - Page 50 Federal Communications Commission Statement This device complies with Part 15 of the FCC Rules. Operation is subject to the following two conditions: (1) This device may not cause harmful interference, and (2) This device must accept any interference received, including interference that may cause undesired operation. Changes or modifications not expressly approved by the party responsible for compliance could void the user’s authority to operate the equipment.
- Page 51 RF Exposure Statement of Statement for CanadaThe radiated output power of the Wireless Device is below the Industry Canada (IC) radio frequency exposure limits. The Wireless Device should be used in such a manner such that the potential for human contact during normal operation is minimized.The device should be installed and operated with a minimum distance of 20 cm between the radiator and your body.
- Page 52 Compliance Statement of Innovation, Science and Economic Development Canada (ISED) This device complies with Innovation, Science and Economic Development Canada licence exempt RSS standard(s). Operation is subject to the following two conditions: (1) this device may not cause interference, and (2) this device must accept any interference, including interference that may cause undesired operation of the device.
- Page 53 ASUS follows the green design concept to design and manufacture our products, and makes sure that each stage of the product life cycle of ASUS product is in line with global environmental regulations. In addition, ASUS disclose the relevant information based on regulation requirements.
- Page 54 RED RF Output table Function Frequency Maximum Output Power (EIRP) 2412 - 2472 MHz < 20 dBm 5150 - 5250 MHz < 20 dBm WiFi 5250 - 5350 MHz < 20 dBm 5470 - 5725 MHz < 20 dBm Bluetooth 2402 - 2480 MHz <...
- Page 55 「產品之限用物質含有情況」之相關資訊,請參考下表。 設備名稱 Equipment name:微型投影儀 LED PROJECTOR, 型號(型式)Type designation (Type):L1, L1C, L1E, L1M, L1Z 限用物質及其化學符號 Restricted substances and its chemical symbols 單元 Unit 六價鉻 多溴聯苯 多溴二苯醚 鉛 Lead 汞 Mercury 鎘 Cadmium Hexavalent Polybrominated Polybrominated (Pb) (Hg) (Cd) chromium (Cr+6) biphenyls (PBB) diphenyl ethers (PBDE) 塑膠外框...
-
Page 56: Specifications For Zenbeam Latte Led Projector
Specifications for ZenBeam Latte LED projector ZenBeam Latte L1 Display Display Technology 0.23” DLP® Light Source R/G/B LED Light Source Life 30,000 hours True Resolution (native) HD 720p (1280 x 720) Light Output (Max) 300 LED Lumen Contrast Ratio 400:1 (typical) Display Colors 16.7 Million Colors... - Page 57 ZenBeam Latte L1 Power Power On Mode <36W Standby Mode <0.5 W Battery 6,000 mAh (22W/hr) up to 2.5 hrs (Eco mode) Noise Acoustic Noise (30dB/28dB) (Standard/Eco) Interface Signal Input HDMI Audio Output Earphone out (3.5mm Mini- jack) USB Port 1 x Type-A 2.0...
- Page 58 Specifications are subject to change without prior notice. ** Product availability may vary by region. *** All brand and product names mentioned are trademarks of their respective companies. LED projector User Manual...
-
Page 59: Support Pc Timings
Support PC Timings HDMI (PC) Resolution Mode Refresh rate (Hz) H-frequency (kHz) Clock (MHz) 800 x 600 SVGA_60 60.317 37.879 SVGA_75 46.875 49.5 1024 x 768 XGA_60 60.004 48.363 XGA_75 75.029 60.023 78.75 1280 x 768 1280 x 768_60 59.87 47.776 79.5 1280 x 800...
Need help?
Do you have a question about the ZenBeam Latte and is the answer not in the manual?
Questions and answers