Table of Contents
Advertisement
Quick Links
400
INSTRUCTION MANUAL
IMPORTANT: Read This Instruction Manual Completely before operating this equipment. Save this
manual and keep it handy for quick reference. Pay particular attention to the hazards and safety
precautions provided for your protection and for the protection of those in the immediate vicinity
where this device is to be used. Contact your distributor if you do not fully understand this
manual or require additional information.
Advertisement
Table of Contents

Related Manuals for GWS ARC400


Summary of Contents for GWS ARC400
- Page 1 INSTRUCTION MANUAL IMPORTANT: Read This Instruction Manual Completely before operating this equipment. Save this manual and keep it handy for quick reference. Pay particular attention to the hazards and safety precautions provided for your protection and for the protection of those in the immediate vicinity where this device is to be used.
- Page 2 The information in this manual may be reproduced for personal or in-house use without permission from GWS. Otherwise, no part of this manual may be reproduced in any material form or transmitted to any persons without permission from GWS or as permitted under the New Zealand Copyright Act 1994.
-
Page 3: Table Of Contents
5.0 Warranty Schedule ..........14 PLEASE NOTE that under no circumstances should your 6.0 Troubleshooting..........15 ARC400 be altered or changed in any way from standard factory configuration. Doing so, will void the machine 7.0 Parts & Accessories..........16 warranty. -
Page 4: Recommended Safety Precautions
IMPORTANT! Hot or moving parts can 150 to 250 amps Shade 10 cause serious injury and electric shock can kill. Use the following ARC400 operation guidelines to insure your own 250 to 300 Shade 11/12 personal safety and for those in the immediate vicinity of... - Page 5 • Use suitable clothing made from durable flame-resistant material to protect your skin and that of your assistants from the arc rays. • Protect nearby personnel with a suitable, non-flammable ROTATING PARTS MAY BE DANGEOUS: screen and/or warn them not to watch the arc, hot spatter •...
-
Page 6: Electrical Shocks
These safety features can prolong the • Read the Instructional Manual prior to using your machine’s life and greatly improve the reliability of the ARC400. welders. • Unauthorised repairs to this equipment may endanger WELDARC Arc Series welders can also perform DC TIG the technician/operator and will void your Warranty. -
Page 7: Working Principle
2.1 Working Principle 2.2 Volt-Ampere Characteristic WELDARC Arc Series welders have excellent volt-ampere The working principle of WELDARC Arc welders is shown in characteristics as displayed in the following graph. the flowchart below. With MMA welding, the relation between the rated loading The single phase 110V-220V±10% work frequency (50/60 Hz) voltage U and welding current I... -
Page 8: Installation And Adjustment
The relation between duty cycle and duty cycle, which is defined as the proportion of time that a welding current of the ARC400 machine can work continuously within a certain timeframe(10 minutes). Horizontal axis I is the output current in amperage(A). -
Page 9: Welding Polarity Connection Way
3.3 Welding polarity connection way 3.3.1 MMA ARC400 ARC400 Electrode Electrode Workpiece Workpiece DCEN DCEP Choosing the connection of DCEN or DCEP is based on the arc stable burning condition. Different electrodes need different connections. Please refer to the electrode manual. -
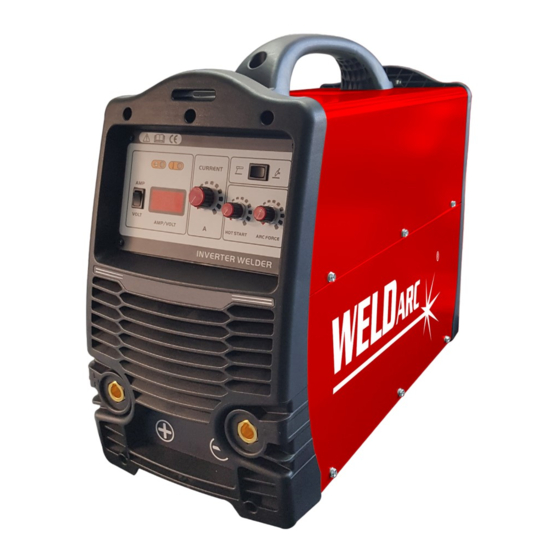
Page 10: Operation Control And Connectors
4.0 Operation control and connectors 4.1 Layout for front & rear panel 1. Power pilot lamp This pilot lamp, when lit, indicates that the machine is on. 2. Alarm pilot lamp This pilot lamp, when lit, indicates protection of the machine has been activated. 3. -
Page 11: Welding Current Adjustment
4.2 Welding Current Adjustment 4.3 Arc Force Adjustment When the ARC400 load voltage is under 20V, there is CURRENT arc force output. The arc length is shorter and the arc force is bigger. It can prevent sticking and increase the depth of penetration. -
Page 12: Adjustment Of Hot Start
4.4 Adjustment of Hot Start 4.5.2 Manipulation of Electrode The number ”0~10” on the potentiometer is not actual arc force, but a proportion concept. Electrode Turning the hot start knob clockwise increases the hot start current duration and makes for easier striking. There are no actual added current values around the knob. -
Page 13: Electrode Selection
4.6.2 Electrode Selection The electrode diameter selection is based on the workpiece thickness, welding position, joint form, welding layer, etc. Please refer to the following table. The relation between the electrode diameter & workpiece thickness Workpiece thickness/mm 6~12 >13 Electrode diameter/mm 3.2~4 The welding current reference for different electrode diameters Workpiece thickness/mm... -
Page 14: Arc Welding Defects & Preventative Measures
4.7 Arc Welding Defects & Preventative Measures Issue Cause Preventative measures Welding seam The groove angle is incorrect. Choosing the proper groove angle & assembly gap, doesn’t meet the The root face and assembly gap is not equal. improve the assembly quality. requirement Welding techniques parameters Choosing the proper welding parameters. -
Page 15: Operation Environment
4.8 Operation Environment • 0m to 1000m above sea level • Operation temperature range:-10°C~+40°C. • Relative humidity is below 90%(+20°C). • Inclination of power source not to exceed 15 degrees. • Protect the machine against heavy rain or hot direct sunlight. •... -
Page 16: Warranty Schedule
5.0 Warranty Schedule 2021 GWS welding equipment is designed and tested for professional industrial environments. As a guarantee of high quality, we offer a warranty. Valid only from the sale by GWS or an accredited distributor of the equipment or product. -
Page 17: Troubleshooting
6.0 Troubleshooting Troubles Reasons Solutions Light damaged or has a bad Test/repair the inside circuit of power When the machine is powered connection. light Pr3. on, the fan works but the power light is not on. Power PCB Failures. Repair or change power PCB Pr2. When the machine is powered There is something in the fan. -
Page 18: Parts & Accessories
Parts & Accessories Package Includes ARC ® ARC ® WSEL5004 WELD Earth Lead WSAL2504 WELD ARC Lead OKC Male 500 Amp OKC Male 500 Amp 4 Meters 35-50mm 4 Meters 35-50mm Optional Extras SAH1000F ArcOne Vision Welding WHOTBOX WELD ® 5Kg Variable Helmet Black 1000F Temperature Electrode...
Need help?
Do you have a question about the ARC400 and is the answer not in the manual?
Questions and answers