Advertisement
Quick Links
Advertisement

Related Manuals for Zupapa Fitness Trampoline


Summary of Contents for Zupapa Fitness Trampoline
- Page 1 Zupapa Fitness Trampoline User Manual Read, understand, and follow guidelines in this manual before (dis)assembling, using your trampoline. *2 models: With/Without the handlebar The Parts List varies by series. Please check which one you have. *Not for commercial use...
-
Page 2: Table Of Contents
IMPORTANT • If you have any questions, suggestions, and (or) comments, please feel free to contact us at your earliest convenience. Zupapa® Customer Happiness Executives are standing behind to help out all the time. We promise you are sure to receive a reply in 12 hours. - Page 3 Read, understand, and follow this user manual before (dis)assembling and using the fitness trampoline. Save this manual for future reference. It’s the responsibility of the owner, supervisor, and player for potential risks of injuries due to inappropriate use not obeying the safety instructions in this manual.
-
Page 4: About Zupapa
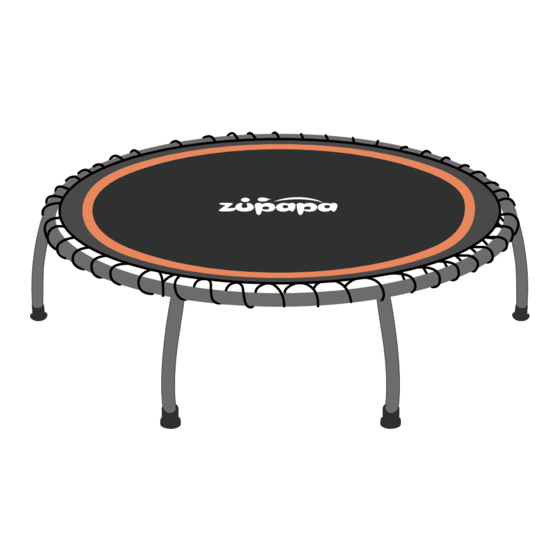
Our Product Zupapa® fitness trampolines are a great choice in terms of home workouts. Supported by six arched steel legs (with the rubber tip for each), the structure is strong enough to carry up to 330 pounds (330 lbs). The enlarged 45 inches (45") non-slip mat (in diameter) with six reinforced bungee cords, is a perfect size for rebounding. -
Page 5: Safety Instructions
SAFETY INSTRUCTIONS Zupapa® fitness trampolines make home workouts easy. However, the risk of injuries accompanies as with any kind of sports. To enjoy the Zupapa® fitness trampolines, please read, understand, and practice the safety instructions below. • Consult with a physician before beginning any exercise or conditioning Before Using the Trampolines program. - Page 6 • Do not attempt to somersault, or allow it. Landing on the head or neck can cause serious injury, paralysis, or death, even if you land in the middle of the mat. • Avoid bouncing too long. Stop and take a break immediately when you feel tired.
-
Page 7: Parts List
You can refer to the following chart for the part number, diagram, description, and quantity of each size. When you need the replacement(s), get in touch with Zupapa® Customer Happiness Executives, we are ready to make you 100% satisfied. Do not forget to provide the order number, part number, quantity, and pictures or video clips (if applicable) so that you can get what you need as soon as possible. - Page 8 Quantity Quantity (for the model (for the model Part Diagram Description WITH the WITHOUT Number handlebar) the handlebar) Metal Clip M6 x 35 Socket Head Bolt Spanner 4mm Allen Key M6 Safety Nut Handlebar Support Tube M8 x 50 Knob...
- Page 9 Quantity Quantity (for the model (for the model Part Diagram Description WITH the WITHOUT Number handlebar) the handlebar) Plastic Space Quick Release Clip Adjustable Tube Handlebar Clamp Armrest Bungee Rope Protection Circle...
-
Page 10: Placement
PLACEMENT Before assembling, you should find a safe area to place the trampoline. Measure the site to see how much space you have. Keep in mind that you should place the trampoline no less than 45 inches (45", about 1.14 meters) from any structures in all directions. Please also follow the dos and don’ts below. - Page 11 • Check and confirm you have all labeled parts according to the chapter Parts List or the Parts Sketch below. If you need any replacement(s), please feel free to reach out to Zupapa® Customer Happiness Executives with the ORDER NUMBER, PART NUMBER, REQUIRED QUANTITY for each part, and photos (or video clips if applicable).
- Page 12 Step 1 – Frame Assembly WITH There are four steps to assemble the frame base for the model handlebar. (a) Pick up two Base Brackets (#A), put the Bungee Rope Protection Circle (#P) into one of the Base Brackets (#A). (b) Align the holes on the brackets with each other.
- Page 13 As there are NO M6X35 Socket Head Bolts (#E) for the model WITHOUT handlebar, you just need to put all the six Base Brackets (#A) one by one. Step 2 – Trampoline Mat Bungee Cords Assembly There are four steps listed as (a), (b), (c), and (d). (a) Fix one end of the Bungee Cord (#B) into the snap of the Trampoline Mat (#C).
- Page 14 (c) Finish the assembly of one Bungee Cord (#B) after fixing the other end into the snap on the Trampoline Mat (#C). (d) Repeat the steps mentioned above with the other five Bungee Cords (#B). You should always install the next bungee cord in the direction opposite to the previously IMPORTANT IMPORTANT installed one as shown below.
- Page 15 (f) Align the two holes on the Adjustable Tube (#M) and the Armrest (#O) with each other, fix with M6 Safety Nut (#H). Congratulations! You finished the assembly! If you have any further questions, please feel free to email Zupapa® Customer...
-
Page 16: Disassembly
If anything that you feel could cause harm occurs, stop using the trampoline and check all the parts. If you need any replacement(s), please feel free to get in touch with Zupapa® Customer Happiness Executives, we are glad to help out all the time. Please keep in mind: Reuse the... -
Page 17: Limited Warranty
• Damages caused by weather (including but not limited to winds, rains, snow) are excluded from the warranty. You can either contact Zupapa® or the retailer with the inquiry details, order number, and pictures or videos (if applicable) if you need to claim for the warranty. -
Page 18: Appendix
Rebounder A great structure to make home workout easy! Do not hesitate to take a Zupapa® rebounder home as it helps to keep fit and stay in shape. - Page 19 Dome Climber It's the safety, reliability, and versatility that make Zupapa® dome climber stand out from the same category. The heavy-duty construction enables up to 6 kids to play together - they can climb, dangle, or play underneath, making your backyard an exciting playground that will entertain your kids for years.
- Page 20 Hammock Stand Nothing is better than reposing on a Zupapa® hammock set while the gentle breeze and warm sunlight give a pat on your body! You can imagine how delightful it would be to enjoy such a cozy time with the whole family!
Need help?
Do you have a question about the Fitness Trampoline and is the answer not in the manual?
Questions and answers