Advertisement
Quick Links
Advertisement

Related Manuals for Zupapa Small Trampoline


Summary of Contents for Zupapa Small Trampoline
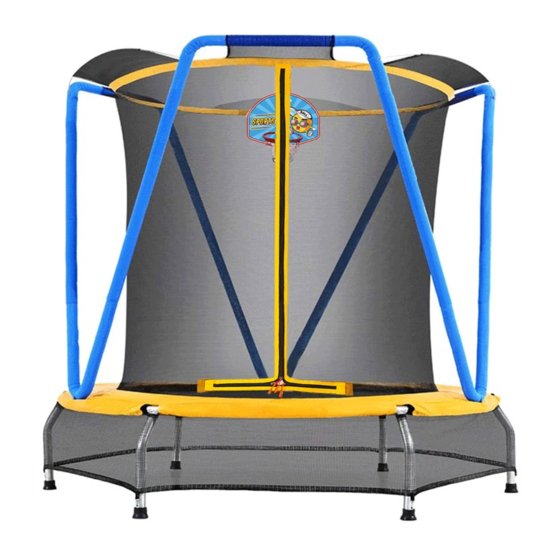
- Page 1 Zupapa Small Trampoline User Manual Read, understand, and follow guidelines in this manual before (dis)assembling, using your trampoline. P L A Y . E N J O Y . B O N D *Not for commercial use *Recommend for children aged 2 to 8...
-
Page 2: Table Of Contents
• If you have any questions, suggestions, and (or) comments, please feel free to contact us at your earliest convenience. Zupapa® Customer Happiness Executives are standing behind to help all the time. We promise you are sure to receive a reply in 12 hours. - Page 3 This user manual applies to Zupapa® small trampolines in 54 inches and 66 inches. Zupapa® reserves the right to change, update any contents included without noticing in advance. For the latest version, please bookmark the online page of all instructions: https://www.zupapa.us/pages/assembly-instructions.
-
Page 4: About Zupapa
PP (polypropylene) in the market, we've upgraded them to PE (polyethylene) which is more durable and stretchable. You can rest assured to take a Zupapa® Small Trampoline home for years of enjoyment. Our Service Standing behind the excellent products is the industrial-leading after-sales service team. -
Page 5: Safety Instructions
SAFETY INSTRUCTIONS Zupapa Small Trampolines make it easy to enjoy bounce at home. However, the risk of injuries accompanies as with any kind of sports. To enjoy the Zupapa® Small Trampolines, whether you are the supervisor or the jumper, you should read, understand, and practice the safety instructions as below. - Page 6 Supervisor’s Role in • Do not allow the player to take alcohol or drugs before using the trampoline. Preventing Accidents • Do not allow the player to jump into/off of the pad. • Do not allow the player to crawl underneath the trampoline. •...
-
Page 7: Parts List
You can refer to the following chart for the part number, diagram, description, and quantity of each size. When you need the replacement(s), get in touch with Zupapa® Customer Happiness Executives (official@zupapa.us), we are ready to make you 100% satisfied. Do not forget to provide... - Page 8 Part Yellow & Blue Yellow & Green Red & Blue Number QTY: 1 QTY: 1 QTY: 1 Frame Pad with Straps Frame Pad with Straps Frame Pad with Straps QTY: 1 QTY: 1 QTY: 1 Net for Frame Tubes Net for Frame Tubes Net for Frame Tubes QTY: 6 QTY: 6...
- Page 9 Part Yellow & Blue Yellow & Green Red & Blue Number QTY: 3 QTY: 3 QTY: 3 U-Pole U-Pole U-Pole QTY: 3 QTY: 3 QTY: 3 Steel Bar Steel Bar Steel Bar QTY: 3 QTY: 3 QTY: 3 Screw Set-1 Screw Set-1 Screw Set-1 QTY: 1...
-
Page 10: Assembly
Parts List. If you need any replacement(s), feel free to reach out to Zupapa® Customer Happiness Executives (official@zupapa.us) with the ORDER NUMBER, PART NUMBER, REQUIRED QUANTITY for each part, and photos or videos (if applicable). 3. Wear gloves and use the Bungee Cord Loading Tool (#12) and the Screw Driver Set (#13) when you assemble the trampoline. The... - Page 11 Assembly Steps Check assembly instructions of the frame, frame pad, trampoline mat, poles, and steel bars from below. There are nine steps in total. STEP 1 – FRAME ASSEMBLY There are some differences in assembling the frame of the 54-inch trampolines and the 66-inch trampolines although the layout looks the same.
- Page 12 STEP 2 - ATTACH THE MAT WITH ENCLOSURE NET TO THE FRAME Please check all the three steps listed as (a), (b), and (c). (a) Please find the three blue rings on the mat. Attach them to the three preformed holes on the frame (see the diagram as shown below) with three Bungee Cords (#6).
- Page 13 1. Please use the Bungee Cord Loading Tool (#12) as it would be difficult to assemble all bungee cords by hand. IMPORTANT 2. Please remember to adjust the position of the bungee balls to make them close to the edge of the mat rather than the frame (see the last picture).
- Page 14 (c) Now let’s move to the installation of the next three bungee cords. Each of them should be in the middle of every two bungee cords that have been installed before. Tip 1. Use the Bungee Cord Loading Tool (#12). Tip 2.
- Page 15 (b) Tie the elastic rope on the pad to the foot of each steel pole. Please do NOT tie the straps because we’ll introduce the details in Step 6. IMPORTANT Hold the steel leg that you’re working on with your thumb and index finger (of one hand) and pull the elastic rope with another hand. √...
- Page 16 IMPORTANT Do not forget to insert each hook of the Net for Frame Tubes (#3) into the preformed hole accordingly. STEP 5 - V-POLE ASSEMBLY There are three steps listed as (a), (b), and (c). (a) Align the hole of the V-pole (#7) with the hole on the frame. (b) Insert the Screw Set-1 (#11) onto the V-pole as shown below.
- Page 17 (c) Finish the assembly of all V-poles as per the steps shown below with the tool Screw Driver Set (#13). STEP 6 - TIE THE STRAPS There are four steps listed as (a), (b), (c), and (d). We’ve also prepared a video tutorial for this step. For a quick approach, please scan the following QR code or visit the page: https://www.youtube.com/watch?v=Xrai_aGmnFo.
- Page 18 (a) Turn the whole trampoline frame upright as shown below. (b) Tie the straps on the pad to the preformed rings on the mat accordingly. (c) Tie the straps on the Net for Frame Tubes (#3) to the frame.
- Page 19 (d) Lay down the trampoline frame and adjust it to a proper shape. STEP 7- VERTICAL POLE ASSEMBLY Install the Vertical Pole (#8) as per the steps shown below. STEP 8 - U-POLE ASSEMBLY Insert the U-Pole (#9) into the shorter mesh sleeve on the top of the enclosure net.
- Page 20 (b) Insert the Steel Bar (#10) into the preformed hole on the U-Pole accordingly. Please be careful and patient in this step, whether when you’re looking for the proper angle or trying the best to insert the Steel Bar (#10). Please feel free to email the Zupapa Customer Happiness Executives (official@zupapa.us) if you have any questions about the assembly.
-
Page 21: Disassembly
MAINTENANCE With proper care and maintenance, the Zupapa® Small Trampolines are capable of providing your family with many years of fun and enjoyment. Always inspect the trampoline and replace any worn, overused, damaged, or missing parts before each use, and be cautious of the following conditions: •... -
Page 22: Limited Warranty
You can either email Zupapa (official@zupapa.us) or the retailer with the inquiry details, order number, and pictures or videos (if applicable) if you need to claim for the warranty. In case of any blocking, we suggest you add Zupapa to your CONTACT LIST in... -
Page 23: Appendix
Twitter: https://twitter.com/zupapa_us Pinterest: https://www.pinterest.com/Zupapa_Official/ Zupapa Product Categories OUTDOOR TRAMPOLINE Not any kid can refuse the bouncing fun! Zupapa® Saffun & Safump outdoor trampolines are the ultimate gift idea for your kids, making the backyard a safe jumping playground for years. - Page 24 REBOUNDER A great structure to make home workout easy! Do not hesitate to take a Zupapa® rebounder home as it helps to keep fit and stay in shape. DOME CLIMBER It's the safety, reliability, and versatility that make Zupapa® dome climber stand out from the same category. The...
- Page 25 Providing enjoyable outdoor toys works great to reduce the time that kids spend on computer games and TV series. Zupapa tree swings are a practical choice. Hang it to a playset or underneath a tree, and add a detachable tent (if required),...
- Page 26 P L A Y . E N J O Y . B O N D...
Need help?
Do you have a question about the Small Trampoline and is the answer not in the manual?
Questions and answers