Table of Contents
Advertisement
Quick Links
Advertisement
Table of Contents

Related Manuals for Zupapa Inflatable SUP


Summary of Contents for Zupapa Inflatable SUP
- Page 1 Zupapa Inflatable SUP User Manual Read, understand, and follow guidelines in this manual before (dis)assembling, using your inflatable SUP. P L A Y . E N J O Y . B O N D *Not for commercial use 2 models: With/Without the kayak seat...
-
Page 2: Table Of Contents
• If you have any questions, suggestions, and (or) comments, please feel free to contact us at your earliest convenience. Zupapa® Customer Happiness Executives are standing behind to help out all the time. We promise you are sure to receive a reply in 12 hours. -
Page 3: About Zupapa
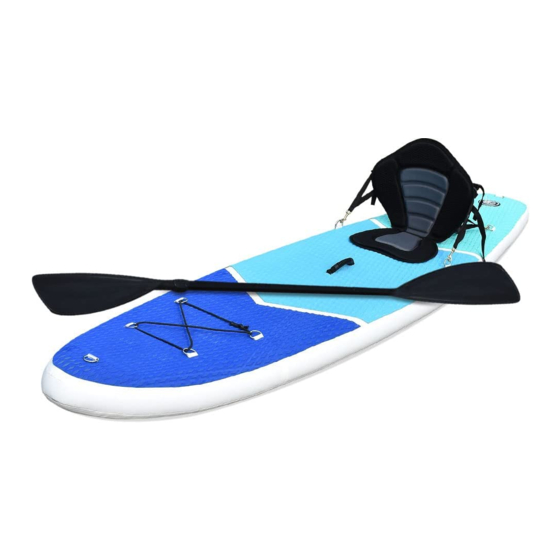
Our Product Want to jump out onto the water for fun in summer? You need a Zupapa® inflatable stand-up paddleboard (SUP). Made of double-layer military-grade materials, the structure is light weight but very sturdy and durable. It can carry up to 350 pounds, you can paddle with your families or your friends ( of course, furry friends included!)! The non-slip paddling top fully covered by EVA is also soft and comfortable, which delivers safer and more enjoyable paddling. -
Page 4: Safety Instructions
SAFETY INSTRUCTIONS As with any kind of sports, the risk of injuries accompanies paddling. To enjoy the Zupapa® inflatable SUPs, please read, under- stand, and practice the safety instructions below. Warning: MINORS MUST BE SUPERVISED AT ALL TIMES! •... - Page 5 • Wear a leash all the time in case of a fall. When Paddling • Wear slip-resistant footwear all the time. • Wear a PFD (Personal Flotation Device) that is Coast Guard Please follow the guidelines when paddling. approved. • Wear a wetsuit or dry suit during cold weather. When Paddling •...
-
Page 6: Parts List
You can refer to the following chart for the diagram, description, and quantity. When you need the replacement(s), get in touch with Zupapa® Customer Happiness Executives, we are ready to make you 100% satisfied. Do not forget to provide the order number, part number, quantity, and pictures (or video clips if applicable) so that you can get what you need as soon as possible. - Page 7 Quantity Quantity Diagram Description (with seat) (without seat) Foot Bar Coil Leash Shoulder Strap Air Pump Hose Air Pump...
- Page 8 Quantity Quantity Diagram Description (with seat) ( without seat) Large Center Fin Small Fin Paddle A Paddle B Paddle Bar A...
- Page 9 Quantity Quantity Diagram Description (with seat) ( without seat) Paddle Bar B Paddle Board Backpack Kayak Seat ZUPAPA...
-
Page 10: Assembly
1. Check and confirm you have all the listed parts according to the chapter Parts List. If you need any replacement(s), feel free to reach out to Zupapa® Customer Happiness Executives with the ORDER NUMBER, PART NUMBER, REQUIRED QUANTITY for each part, and photos (or video clips if applicable) 2. - Page 11 The work is done when you can NOT move the tool. You can also re-confirm it by pouring some soapy water to see if it leaks. IMPORTANT Message Zupapa Customer Happiness Executives if you need more help or have any concerns.
- Page 12 STEP 2 – INFLATE THE PADDLE BOARD Find the tips and the detailed steps to inflate the SUP from here. Tips! 1. You can turn the electric pump into an inflatable SUP pump with the Pump Adapter (in the Tool Kit). 2.
- Page 13 SINGLE ACTION DOUBLE ACTION Now it’s an inflated board! STEP 3 – ASSEMBLE THE ACCESSORIES Find the detailed steps to assemble the shoulder straps, the fins, and the paddle.
- Page 14 Please fix the board at first. Pick out one strap, twist it around the middle (the widest part) of the board, then fasten the buckle. Please repeat with another strap. b. Connect the two assembled straps with the third strap. ZUPAPA...
- Page 15 Assemble the Fins The 3 fins apply to the same assembly steps. Please slide the fin into the slot, then lock and tighten the screw. Assemble the Paddle There are 3 steps to assemble the paddle. We choose the Paddle Bar B for the assembly instruction. You can either use the Paddle Bar B or Paddle B to form a complete paddle.
- Page 16 a. Connect the Paddle Bar A with the Paddle A by pressing down & locking the button on the latter. b. Connect the Paddle Bar B with the Paddle Bar A in the way as shown below. The bracket on the shaft (at the other end of the Paddle Bar A) would make the work easy to be done.
- Page 17 Congratulations! Your Zupapa inflatable SUP without a seat is ready to go! STEP 4 – ASSEMBLE THE KAYAK SEAT Please note that this step ONLY applies to the model with the kayak seat. a. Place the seat on the board.
-
Page 18: Lock The Sup
LOCK THE SUP All Zupapa® inflatable SUPs can be locked. When you have to leave your equipment aside temporarily, please follow the steps below to lock it. Note: We provide a free Paddle Keeper for the model with the seat while you need to find a Paddle... -
Page 19: Disassembly
DISASSEMBLY Please follow the steps below to disassemble Zupapa inflatable SUPs. Please understand Zupapa® will not be liable for any damages due to improper operations. STEP 1 - REMOVE THE FINS Please loosen the screw to remove the fin from the slot. Important: Please make sure that the surrounding is free of debris or sharp objects. - Page 20 c. Extract out the left air with the air pump. Please note that the hose should be connected to the pump where the OUT is on. STEP 4 – DEFLATE THE BOARD To roll up the board, you should make sure the valve is closed at first. Please do the following in order: a.
-
Page 21: Maintenance
Then you can go on with the rolling-up. Please note that you should start from the side with the valve, then wrap up the belt, and finally fasten the buckle. MAINTENANCE Zupapa® inflatable SUPs can provide years of fun and enjoyment with proper maintenance. Please follow the guidelines below for daily care. The Proper Pressure The recommended pressure is from 12-15 PSI. - Page 22 The order number and photos (or video clips if applicable) are required for your warranty applica- IMPORTANT tion. You can either message Zupapa Customer Happiness Executives or the retailer with the inquiry details, order number, and pictures or videos (if applicable) if you need to claim for the warranty.
-
Page 23: Troubleshooting
TROUBLESHOOTING You can refer to this chapter for troubleshooting before contacting Zupapa® Customer Happiness Executives . For the Leaking When you hear some unusual sounds or find any scratches, something may go wrong with the valve or the paddling top. Please take the steps below to troubleshoot. - Page 24 If you don’t find the Adapter when checking parts inside the package, please check the Tool Kit because we’ve packed it in the container with a Wrench Tool and 2 Repair Patches. If you still do not find it, kindly contact Zupapa® Customer Happiness Executives with the order number and details at your earliest convenience, we will send you a new adapter as soon as possible.
-
Page 25: Appendix
If you feel the paddle is not tightly connected, please adjust the black locking pin on the top of the Paddle Bar A. You can also search for the video tutorial--How to adjust the paddle pole of Zupapa inflatable SUP? - Page 26 REBOUNDER A great structure to make home workout easy! Do not hesitate to take a Zupapa® rebounder home as it helps to keep fit and stay in shape. DOME CLIMBER It's the safety, reliability, and versatility that make Zupapa® dome climber stand out from the same category. The...
- Page 27 Providing enjoyable outdoor toys works great to reduce the time that kids spend on computer games and TV series. Zupapa tree swings are a practical choice. Hang it to a playset or underneath a tree, and add a detachable tent (if required),...
- Page 28 P L A Y . E N J O Y . B O N D...
Need help?
Do you have a question about the Inflatable SUP and is the answer not in the manual?
Questions and answers