Advertisement
Quick Links
Advertisement

Subscribe to Our Youtube Channel
Related Manuals for Broyhill A222020602


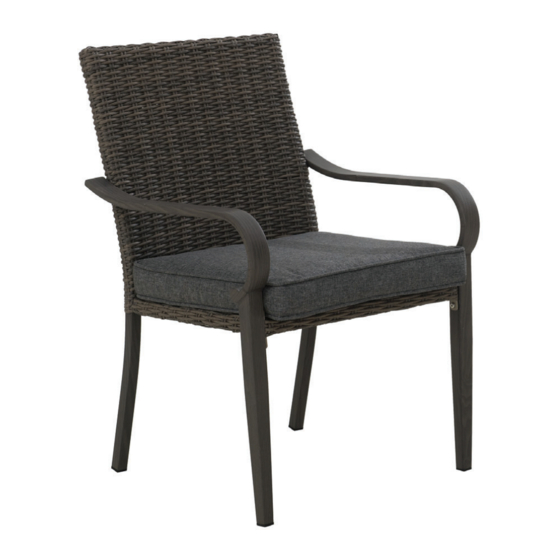
Summary of Contents for Broyhill A222020602
- Page 1 ITEM#: A222020602 SKU#: 810554375 Need h elp? We are here for you! 1(866)578.6569 24/7 · Toll Free...
-
Page 2: What Is Covered
• Please read and understand this entire manual before attempting to assemble or install the product. • Before beginning assembly of product, make sure all parts are present. Compare parts with package contents list and hardware contents list. If any part is missing or damaged, do not attempt to assemble the product. •... - Page 3 3/11...
- Page 4 Label Part Number Description rt Image Label Part Number Description Part Image 4/11...
- Page 5 • Tools needed and not included • Separating parts before starting Provided in hardware pack Provided How many people needed for the installation work 5/11...
- Page 6 Assembled View: Attached Back(A) to Seat(D) with Bolt(H2), Spring Washer(H3) and Flat washer(H4), tighten the Bolt(H2) to 80% depth with Wrench(HW). 6/11...
- Page 7 Assembled View: Attached the Armrest (Left)(B) to Seat(D) with Bolt(H1), Spring Washer(H3) and Flat washer(H4), tighten the Bolt(H1) to 80% depth with Wrench(HW). 7/11...
- Page 8 Assembled View: Attached the Armrest (Left)(B) to Back(A) with Bolt(H1), Spring Washer(H3) and Flat washer(H4), tighten the Bolt(H1) to 80% depth with Wrench(HW). 8/11...
- Page 9 Assembled View: Attached the Armrest (Right)(C) to Seat(D) with Bolt(H1), Spring Washer(H3) and Flat washer(H4), tighten the Bolt(H1) to 80% depth with Wrench(HW). 9/11...
- Page 10 Assembled View: Attached the Armrest (Right)(C) to Back(A) with Bolt(H1), Spring Washer(H3) and Flat washer(H4), tighten all the Bolt to 100% depth with Wrench(HW) at last. 10/11...
- Page 11 Assembled View: Put the Seat Cushion(E) on the Seat(D). 11/11...
Need help?
Do you have a question about the A222020602 and is the answer not in the manual?
Questions and answers