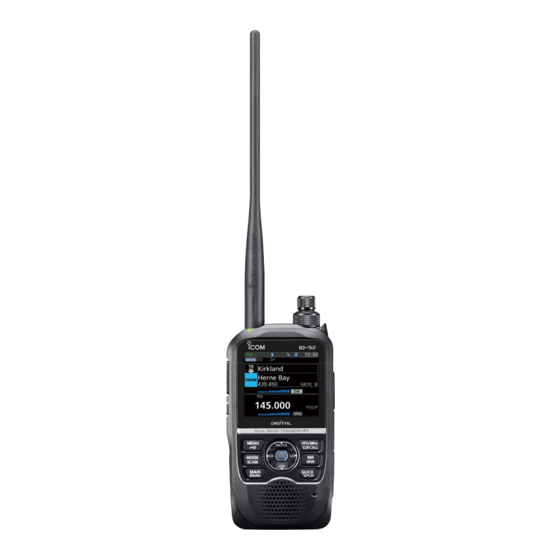
Icom ID-52A Manual
Vhf/uhf
Hide thumbs
Also See for ID-52A:
- Advanced manual (263 pages) ,
- Basic manual (88 pages) ,
- Service manual (83 pages)

Related Manuals for Icom ID-52A


Summary of Contents for Icom ID-52A
- Page 1 基础手册 VHF/UHF 收发信机 ID-52A ID-52E 本设备符合 FCC 规则的第 15 部分。 操作条件 是该设备不会造成有害干扰。 警告:根据 FCC 规则和联邦法律,禁止为了接 收蜂窝无线电话服务信号而修改本设备。...
- Page 2 在使用对讲机之前,请仔细并完整地阅读所有说明。 保存本说明手册— 本说明手册包含 ID-52A/ID-52E 的基本操作说明。 有关高级操作说明, 请参阅高级手册了解详细信息。 可以从以下网站下载高级手册: https://www.icomjapan.com/support/ ■ 特点 z D-STAR 操作:ID-52A/ID-52E 具有 D-STAR 中继器 (DR) 功能。 z 双守功能可以同时接收和记录两种不同的波段或模式。 z 内置 GPS 接收器,用于检查您的当前位置。 z 录音机记录您的 QSO 对话、TX 的语音音频和麦克风语音音频。 z 一个 microSD 卡插槽,可以接受不同的卡来备份设置、各种存储、GPS 航迹等。 z 用于数据传输或电池充电的 USB端口。 z Bluetooth® 功能,可以连接到 Bluetooth® 设备,例如 VS-3。...
- Page 3 住宅安装中的有害干扰提供合理的保护。 本设备会产生、使用和辐射射频能量,如果不按照 说明进行安装和使用,可能会对无线电通信造成有害干扰。 但是,不能保证在特定安装中不 会发生干扰。 如果此设备确实对无线电或电视接收造成有害干扰,这可以通过关闭和打开设 备来确定,鼓励用户尝试通过以下一种或多种措施来消除干扰: • 重新调整或摆放接收天线。 • 增加设备和收发信机之间的距离。 • 将设备连接到与收发信机连接的电路不同的电路插座上。 • 向经销商或有经验的无线电/电视技术人员寻求帮助。 慎重: 未经 Icom Inc. 明确批准而对本设备进行更改或修改,可能会使您根据 FCC 规 定操作本设备的授权无效。 ■ 处理 您的产品、资料或包装上打叉的带轮垃圾桶符号提醒您,在欧盟,所有电气和电子 产品、电池和蓄电池(可充电电池)必须在其废弃时带到指定的收集地点。 工作生 活中,请勿将这些产品作为未分类的城市垃圾处理。 根据您所在地区的法律处理它 们。 ■ 关于CE 和 DOC Icom Inc. 特此声明,产品上带有“CE”符号的 ID-52E 版本符合无线电设备...
- Page 4 ■ 关于 ID-52A/ID-52E 手册 您可以使用以下手册来了解和操作此对讲机。 (截至 2021 年 10 月) 提示:您可以从 Icom 网站下载每个手册和指南: https://www.icomjapan.com/support/ 输入 “ID-52A” 或 “ID-52E” 在网站的搜索框中。 基本手册 (本手册) 基本操作和注意事项的说明。 高级手册(PDF 版) 高级操作说明,如下所示。 • Using a microSD card • Battery operation • FM Radio operation • D-STAR operation •...
- Page 5 ■ 重要说明 D 使用 GPS 接收器时 •GPS 信号不能穿过金属物体。 在车内使用收发器时,您可能收不到 GPS 信号。 我们 建议您在靠近窗户的地方使用它。 • 全球定位系统 (GPS) 由美国国防部建造和运营。 该部门负责系统的准确性和维护。 该部门 的任何更改都可能影响 GPS 系统的准确性和功能。 • GPS 接收器安装在收发器的顶部面板下方。 当 GPS 被激活时,不要用任何会阻挡卫星信号的东西盖住顶部。 GPS接收器 • The GPS receiver may not work if used in the following locations: - Tunnels or high-rise buildings - Underground parking lots - Under a bridge or viaduct...
- Page 6 DV 网关功能 即使您无法访问 D-STAR 中继器,您也可以通过互联网直接发起网关呼叫。 注意: • Windows 或 Android 设备需要公网 IP 进行连接。 • 从 Icom 网站或 Google Play 下载并安装 RS-MS3W 或 RS-MS3A 应用软件。 • 有关详细信息,请参阅可从 Icom 网站下载的“关于 DV 网关功能”。 终端模式 终端模式使您可以使用 USB 电缆经 Windows 或 Android 设备通过 Internet 进行网...
- Page 7 图片分享功能 即使您不使用 RS-MS1A 或 RS-MS1I,您也可以发送保存在 microSD 卡上的图片并查看接 (高级手册) 收到的图片。 L要使用此功能,需要 microSD 卡(用户提供)。 位置自动回复功能 当您接到一个针对您自己的呼号的呼叫,但处于难以操作对讲机的情况下时,此功能会自 (高级手册) 动回复您自己的呼号并传输您的位置数据。 2 您的位置会自动传输。 1 一个针对您自己的 呼号的呼叫。 目的电台 你的电台 (ID-52A/ID-52E) 3 接收后,屏幕显示 您的位置数据。 附近中继 (DV/FM) 搜索功能 您可以使用 DR 功能选择附近的中继器。 该功能可以使 用且仅在您的对讲机中继器列表中的中继器。 (高级手册)
- Page 8 本产品中包含的 AMBE+2™ 语音编码技术受知 R 危险!切勿在未屏蔽的电爆帽附近或爆 识产权保护,包括 Digital Voice Systems, 炸性环境中操作对讲机。 这可能会导致爆 Inc. 的专利权、版权和商业秘密。该语音编码 炸和死亡。 技术仅被授权在本通信设备中使用。 明确禁止该技术的用户试图提取、删除、反编 R 危险! 切勿将 Icom 电池组与非 Icom 对 译、反向工程或反汇编目标代码,或以任何其 讲机或非 Icom 充电器一起使用或充电。 只 他方式将目标代码转换为人类可读的形式。 有 Icom 电池组经过测试和批准可与 Icom 美国专利号 #8,595,002, #8,359,197, #8,315,860, 对讲机一起使用或使用 Icom 充电器充电。...
- Page 9 当心! 收发器符合 IPX7* 防水保护要求。 注意:不要短接电池组的端子。如果端子接 触钥匙等金属物体,可能会发生短路,因此 但是,一旦对讲机跌落,由于可能损坏对 将电池组(或对讲机)装入袋子等时要小 讲机外壳或防水密封,因此无法保证防水 心。携带它们,以免与金属物体发生短路。 保护。 短路不仅会损坏电池组,还会损坏对讲机。 注意:除非柔性天线、电池组和插孔盖牢固 * 仅当安装了 BP-271、BP-272 或 BP-307(选购 地连接到对讲机,并且天线和电池组在连接 件)、柔性天线、[MIC/SP] 盖、[USB/DC IN] 前是干燥的,否则不要操作对讲机。对讲机 盖和 [microSD] 插槽盖时。 内部暴露在灰尘或水中会导致对讲机严重损 坏。接触水后,用淡水彻底清洁电池触点并 完全干燥以去除任何水或盐残留物。 注意:当 BP-273 连接到对讲机时,它满足 IPX4 防溅要求。 连接时,收发器对应 注意:请勿在驾驶车辆时操作对讲机。安全 IPX4。 驾驶需要您全神贯注,否则可能会导致事 故。 即使对讲机电源关闭时,电路中仍会流过微 弱的电流。...
- Page 10 R 危险! 切勿撞击或以其他方式撞击电池 任何其他液体中。请勿充电或使用湿包。如 组。 如果电池组受到严重撞击或跌落,或受 果包装被弄湿,请务必在使用前用干布擦 到重压,请勿使用电池组。 在外壳的外部可 拭。 能看不到电池组损坏。 即使电池表面没有出 现裂纹或任何其他损坏,电池内部的电芯也 注意:如果电池发出异味、发热、变色或变 可能会破裂或着火。 形,请勿使用。如果出现任何这些情况,请 联系您的 Icom 经销商或分销商。 R 危险! 切勿将电池组放在温度高于 60˚C (140˚F) 的地方。 电池单元中的高 注意:请勿在指定温度范围外使用电池组 温积聚,例如可能发生在火或炉子附近、阳 –20˚C ~ +60˚C (–4˚F ~ +140˚F)。使用超出 光加热的车辆内或长时间在阳光直射下,可 此范围的电池组会降低电池组的性能和电池 能会导致电池单元破裂或着火。 过高的温度 寿命。 也可能会降低电池组的性能或缩短电池的寿...
- Page 11 R 警告! 切勿将电池充电或将电池留在电 池充电器中超过指定的充电时间。 如果电 池组未在指定时间内完全充电,请停止充电 并将其从电池充电器中取出。 超过指定的 时间限制继续为电池组充电可能会导致火 灾、过热或电池破裂。 R 警告! 充电时偶尔观察电池组的状况。 如果出现任何异常情况,请停止使用电池 组。 注意:如果充电器潮湿或脏污,请勿将装有 电池组的电台插入充电器。 这可能会腐蚀 电池充电器端子或损坏充电器。 充电器不 防水。 注意:请勿在指定温度范围之外为电池组充 电:0˚C ~ 40˚C (32˚F ~ 104˚F)。 Icom 建议在 25˚C 下为电池组充电 77˚F)。 如果在指定的温度范围外充电,电 池组可能会发热或破裂。 此外,电池性能 或电池寿命可能会降低。 注意:不要使用电池充电器,除非电源插座 很容易够到并且靠近设备。 不使用时将其 从交流电源插座中取出。...
- Page 12 ■ Monitor function......12 ■ Disposal ..........ii ■ About CE and DOC ......ii ■ Setting a squelch level ....12 ■ About the ID-52A/ID-52E manuals ...iii ■ Quick Menu window ..... 13 D Quick Menu window operation ..13 ■ Important Notes......iv D When using the GPS receiver ..iv...
- Page 13 RECORDING A QSO ONTO A D-STAR GUIDE microSD CARD ������������������������������� 25 INTRODUCTION ������������������������������������� 41 ■ About the microSD card ....25 ■ Unique features of D-STAR ..41 ■ Setting the Record operation ..26 ■ What is D-STAR? ......42 ■...
- Page 14 面板说明 ■ 前面板、顶部面板和侧面板 功能界面 (p. 3) 内置麦克风 扬声器 1 PTT SWITCH [PTT] 按住发射,松开接收。 L 仅 ID-52E 短暂按下并松开,然后按住可发送 1750 Hz 的突发音频。 2 SQUELCH KEY [SQL] (p. 12) z 按住的同时,旋转 [DIAL] 以调整静噪级别。 z 按住可暂时打开静噪并监控工作频率。 3 POWER KEY [ ] z 按住 1 秒钟可打开或关闭对讲机。(p. 7) z 当“Screen Capture [PWR] Key”设置为“ON”时,按下以将收发信机显示屏...
- Page 15 按下可打开快捷菜单窗口。 (第 13 页) z 按住 1 秒钟可听到显示的频率和操作模式或呼号。 (第 17 页) 14 MEMORY • SELECT MEMORY WRITE KEY [MR]/[MW] z 按 进入存储模式。 (第 14 页) L 仅美版 ID-52A 在存储模式下,按一次进入天气频道模式。 z 按住 1 秒钟打开 Select Memory Write 窗口。 (第 23 页) z 按住 3 秒可将存储频道内容输入到空白频道。...
- Page 16 面板说明 ■ 功能界面 1 2 6 7 8 10 11 12 14 16 Single band display FM 收音机窗口 双频段显示 (调谐模式) 1 电池图标 显示连接的电池组的当前容量。 (第 6 页) L “ ” 安装了选购的电池盒时会显示。 2 USB 连接指示灯 当通过 USB 电缆连接 USB 设备并且“USB 连接”设置为 “Serialport.” 时显示。 ([MENU] > SET > Function > USB Connect) 3 操作模式图标...
- Page 17 以 5 个级别(SLO/LO1/LO2/MID/无图标)显示发射信号的输出 功率电平。 L 当您选择 HIGH power, 功率图标不显示。 24 MEMORY NAME DISPLAY L 您可以在快捷菜单窗口中更改显示类型。 25 频率读数 显示工作频率。 26 主频段图标 • 当双守功能开启时,表示所选频段(A 或 B)为主频段。 • 当双守功能关闭时,指示所选频段(A 或 B)。 • TM: 在终端模式下显示。 • AP: 在热点模式下显示。 提示:有关终端模式和热点模式,请参见可从 Icom 网站下载的“关于 DV 网关功 能”。...
- Page 18 安装步骤 在开始使用对讲机之前,请按照以下步骤进行初始设置。 安装电池组并为电池充电。 (第 5、6 页) STEP 1 插入 microSD 卡。 (第 7 页) STEP 2 开启对讲机。 (第 7 页) STEP 3 调整音量。 (第 7 页) STEP 4 将您的初始设置保存到 microSD 卡上。 (第 8 页) STEP 5 确认 GPS 信号接收。 (第 10 页) STEP 6 * 在对讲机中输入您的呼号...
- Page 19 安装步骤 ■ 给电池组充电 D 电池组容量 电池组状态 图标 电池容量充足。 电池有点消耗。 电池即将耗尽。 (绿色) 电池几乎完全耗尽。 L 立即为电池组充电。 否则,图标将很 快开始闪烁,将显示“LOW BATTERY”,并 (红) 且对讲机将自动关闭。 显示正确的电池状态 在以下项目中选择附带的电池组。(Default: BP-271/BP-272) ([MENU] > SET > Function > Battery Pack Select) 要在每次安装电池组时显示电池组选择对话框,请将以下项目设置为 “ON.” ([MENU] > SET > Function > Battery Pack Con irmation) 注意: •...
- Page 20 安装步骤 ■ 插入 microSD 卡 有关可用的 microSD 卡,请参见第 25 页。 关闭对讲机。 拉下侧板上的 [microSD] 插槽盖。 将端子朝前,将卡插入插槽,直至其锁定到位并发出“咔嗒”声。 L 取出时,推入 microSD 卡,直到发出“咔嗒”声。 卡已解锁,您可以将其拔出。 注意: • 请勿触摸端子。 • 请勿在访问卡时从收发器中取出卡。 否则,卡数据可能会被损坏或删除。 完全关闭 [microSD] 插槽盖。 注意:请勿强行或反向插入 卡。 它会损坏卡或插槽。 [microSD] 卡槽 microSD 卡 金手指 朝向前方 卡槽盖 ■ 开启对讲机 [VOL] 按住...
- Page 21 安装步骤 ■ 将设置数据保存到 microSD 卡上 您可以将存储频道、菜单屏幕项目设置、中继列表等保存到 microSD 卡上。 将设置保存到卡上使您可以轻松地将电台恢复到以前的设置,即使您执行了全复位。 D 格式化 microSD 卡 重要的! 首次使用 microSD 卡之前,请在对讲机中对其进行格式化。 格式化卡会删除其 所有数据。 在格式化任何使用过的卡之前,请将其数据备份到另一台设备上。 [MENU] > SET > SD Card > Format Turn ON the transceiver. • If a microSD card is inserted, the microSD icon “ ” is displayed. •...
- Page 22 安装步骤 ■ 将设置数据保存到 microSD 卡上 D 保存设置数据 [MENU] > SET > SD Card > Save Setting Push [MENU]. Select “SD Card” in the “SET” menu. Select “Save Setting.” Select “<<New File>>.” • The FILE NAME screen is displayed. L The file name is automatically set in the following format: Setyyyymmdd_xx (yyyy: Year, mm: month, dd: day, xx: serial number).
- Page 23 安装步骤 ■ 确认 GPS 正在接收信号 收发器有一个内置的 GPS 接收器。 您可以查看当前位置,并在 DV 模式下传输 GPS 数据。 有关详细信息,请参阅高级手册。 确认 GPS 接收器正在接收卫星数据。 搜索卫星时 GPS 图标会闪烁。 → → → 找到所需的最少卫星数后,GPS 图标将停止闪烁。 L 接收可能只需要几秒钟,也可能需要几分钟,具体取决于您的操作环境。 如果您在接收时 遇到困难,我们建议您尝试不同的位置。 L 当“GPS 选择”设置为“手动”时,不显示图标。 ([MENU] > GPS > GPS Set > GPS Select) 注意:如果您无法接收...
- Page 24 • 选择频率选择模式。 (第 14 页) • 选择工作频段。 (第 15 页) • 选择操作模式。 (第 15 页) • 设置频率。 (第 16 页) • 设置静噪级别。 (第 12 页) ■ 双守功能 双守功能可同时监控 2 个频率。 ID-52A/ID-52E有2个 独立的接收电路,A波段和B波段。 您可以在每个频 段设置不同的频率或操作模式。 波段 L 可选频率因收发器版本和 A/B 频段而异。 有关详细 信息,请参阅规格。 (第 34 页)...
- Page 25 基本操作 ■ 监听功能 监听功能用于在不改变静噪设置的情况下收听微弱信号。 按住 [SQL] 的同时,您可以听到频率上的微弱信号。 提示:您可以在 MENU 屏幕上设置监听保持功能。 每次 按下 [SQL] 时,收发器都会打开或关闭静噪。 第一段闪烁。 ([MENU] > SET > Function > Monitor) ■ 设置静噪级别 噪声静噪使音频只有在接收到比设置电平更强的信号时才 能听到。 更高的级别会阻止微弱的信号,这使您只能接收 更强的信号。 较低的电平使您能够听到微弱的信号。 L 在本文档中,“噪声静噪”简称为“静噪”。 按住 [SQL] 的同时,旋转 [DIAL] 以选择静噪级别。 自动静噪 L 信息 • Options: “OPEN,” “AUTO” (default), and “LEVEL 1” ~ “LEVEL 9”...
- Page 26 <<GPS Logger Only>> <<FM Radio ON>> <<FM Radio Mode>> <<GPS Logger Only>> For only FM/FM-N. For only DV. For only FM/FM-N/DV. For only A band. For only the ID-52A. D 快捷菜单窗口操作 简化描述——‘选择’操作 在本手册中,用户的“选择”操作被简化,如下所述。 简化说明: Push [QUICK]. D-pad() Select “TS.” [ENT] 动作:...
- Page 27 • Push [MR] to select the Memory mode. • Hold down [CALL] for 1 second to select the Call Channel mode. • For only the ID-52A, push [MR] in the Memory mode to select the Weather Channel mode. 旋转 [DIAL] 选择工作频率或频道。...
- Page 28 基本操作 ■ 选择工作频段 按 [VFO/MHz] 选择 VFO mode. 按 [QUICK]. 选择 “Band Select.” 选择所需的频段。 •设置操作频段,然后返回待机屏幕。 L 可选频段因收发器版本而异。 有关详细信息, 请参阅规格。 (第 34 页) 发送和接收 仅接收 ■ 选择工作模式 可以在五种操作模式中切换, FM, FM-N, AM, AM-N, 和 按 [MODE] 选择操作模式。 L 信息 • 在 FM-N 模式下,TX 调制自动设置为窄(约 ±2.5 kHz)。 •...
- Page 29 基本操作 ■ 设置频率 D 选择调谐步进 当您在 VFO 模式下通过旋转 [DIAL] 选择频率时,它会 以所选的调谐步长变化。 Push [QUICK]. Select “TS.” Select a tuning step. Options (kHz): 6.25 8.33* 10.0 12.5 15.0 20.0 25.0 30.0 50.0 100.0 125.0 200.0 Auto* * For only 108.000 MHz ~ 136.991 MHz •设置调谐步骤,然后返回待机屏幕。...
- Page 30 基本操作 ■ 扫描功能 扫描是一种多功能功能,可以自动搜索信号。 扫描可以 更轻松地定位要联系或收听的电台,或者跳过不需要的频 道或频率。 本节介绍基本扫描操作。 有关详细信息,请参阅高级手 册。 例如: 在 VFO 模式下扫描 Push [VFO/MHz] to enter the VFO mode. Hold down [SCAN] for 1 second. • Opens the Scan Type Select window. Select “ALL.” • The scan starts. Blinks •...
- Page 31 基本操作 ■ 家频道功能 您可以在 VFO 模式、Memory 模式和 DR 屏幕中将常用 频率、Memory 频道或中继器设置为 Home Channel。 当通过旋转 [DIAL] 选择 Home CH 时,会发出哔声。 您 无需查看显示屏即可知道 Home CH 选择。 D 设置家频道 Select the VFO or Memory mode, or the DR screen to set a Home Channel. (p. 14) Select a frequency, Memory channel, or an access repeater to be set as a Home Channel.
- Page 32 基本操作 ■ 传输 D 进行单呼 R 警告! 切勿长时间传输。 在以高功率或中等功率进行长时间传输时,收发器会散发热 量以防止自身过热。 对讲机的内部会变热并可能导致灼伤。 为防止对讲机过热,超时定 时器功能的默认设置为 5 分钟。 当超时定时器功能关闭或设置为很长的时间段并长时间 传输时,请务必小心。 注意:如果对讲机同时使用外部电源充电,则不要在会阻碍散热的情况下操作对讲机。 散热不良可能会导致烧毁、外壳翘曲或损坏对讲机。 注意:不要在没有天线的情况下进行发射。 注意:当对讲机变热时,对讲机的热保护功能会逐渐将输出功率降低到约 2.5 瓦,然后 停止传输。 这样做是为了保护收发器本身,直到它冷却下来。 注意:您只能在业余频段进行发射。 重要提示:发射前,请监控工作频率,确保发射不会对同一频率的其他电台造成干扰。 选择操作模式。 (第 15 页) 旋转 [DIAL] 设置工作频率。 (第 16 页) 按住 [LO] 1 秒钟可选择输出功率。 •选择输出功率窗口随即显示。...
- Page 33 基本操作 D 关于发射功率 • 连接外部 DC 电源线 (13.5 V DC) 或使用 BP-271/ BP-272/BP-307 时:大约 5 W (High)/2.5 W (Mid)/ 1.0 W (Low2)/0.5 W (Low1)/0.1 W (S-Low) • 使用 BP-273 时: 大约 0.1 W (S-Low) (固定) 发射 提示: 使用 BP-273 时,您可以选择“S- 功率...
- Page 34 菜单界面 您可以通过按 [MENU] 打开 MENU 屏幕。 您可以使用 MENU 屏幕设置不经常更改的值或功能设置。 有关 MENU 项目列表,请参 阅附录。 (第 71 页) 有关每个项目的详细信息,请参阅高级手册。 菜单界面 提示:菜单界面以树状结构构建。 您可以转到下一个级别树,或返回 一个级别,具体取决于所选项目。 ■ 选择菜单项 D 菜单界面操作 选择一个项目或选项。 在 MENU 画面和待机 画面之间切换。 返回上一级菜单。 返回上一级菜单。 转到下一级菜单。 返回默认设置。 [ENT] 设置一个选项。 选择一个项目或选项。 简化描述——‘选择’操作 在本手册中,用户的“选择”操作被简化,如下所述。 Simpli ied description: Push [MENU].
- Page 35 菜单界面 D 选择菜单项 例如: 设置“自动关机” 为 “30 分钟.” [MENU] > SET > Time Set > Auto Power OFF Push [MENU]. Select “SET.” Select “Time Set.” Select “Auto Power OFF.” Select “30min.” • Sets the option, then goes back to a tree level. (The TIME SET screen is displayed.) L To exit the MENU screen, push [MENU].
- Page 36 存储操作 ■ 输入存储频道 对讲机共有 1000 个存储信道,可保存常用频率。 在存储模式下,您可以快速选择已保存 的存储。 本章介绍基本频道内容条目。 例如: 输入 146.030 MHz/FM 模式,在01组的频道11中。 Push [VFO/MHz] to enter the VFO mode. Push [MODE] to enter the FM mode. Rotate [DIAL] to set a frequency to 146.030 MHz. Hold down [MW] for 1 second. •...
- Page 37 存储操作 ■ 选择存储频道 在存储模式下,您可以通过旋转 [DIAL] 来选择存储频道。 Push [MR] to enter the Memory mode. L For only the ID-52A, pushing [MR] alternately selects the Memory and Weather Channel modes. Rotate [DIAL]. • Selects a Memory channel. L To select the Memory group, push [QUICK], and then select “Group Select.”...
- Page 38 将 QSO 录制到 microSD 卡上 ■ 关于 microSD 卡 注意:Icom 不提供 microSD 和 microSDHC 卡(用户提供)。 此对讲机可使用最大 2 GB的普通microSD卡,或高达 32 GB 的 microSDHC卡。 Icom 已检查与以下卡的兼容性。 (截至 2021 年 10 月) L The performance of the cards listed to the Brand Type Memory size left is not guaranteed.
- Page 39 将 QSO 录制到 microSD 卡上 ■ 设置记录操作 您可以选择是否仅在 MAIN 频段开始或停止录音。 [MENU] > RECORD > QSO Recorder > Recorder Set > REC Operation Push [MENU]. Select “QSO Recorder” in the “RECORD” menu. Select “Recorder Set.” Select “REC Operation.” Select “A/B Separate” or “A/B Link.” •A/B Separate: 当该功能启动或停止时,录音功能在所选频段(主频段)上分别处于活...
- Page 40 将 QSO 录制到 microSD 卡上 ■ 录制 QSO 音频 注意: • 一旦开始录音,录音功能将持续开启,直到您停止录音,即使您关闭对讲机也是如此。 • FM 收音机音频无法录制。 按 [QUICK]. 选择 “<<REC Start>>.” • “Recording started”显示。 L Information • 录制时显示。 • 暂停录制时显示。 • 录音会一直持续到您停止录音或卡已满为止。 • 如果录音文件达到2GB,电台会自动创建一个新文件并继续录音。 按 [QUICK]. 选择 “<<REC Stop>>.” • “Recording stopped” 显示,并停止录音。 提示:作为默认设置...
- Page 41 将 QSO 录制到 microSD 卡上 ■ 取出 microSD 卡 D 在对讲机关闭时移除 Push in 关闭对讲机。 打开 [microSD] 插槽盖。 推入 microSD 卡,直到发出“咔嗒”声,然后小心地 将其拉出。 L 请勿触摸金手指。 完全关闭 [microSD] 插槽盖。 Slot cover Pull out D 在对讲机打开时移除 [MENU] > SET > SD Card > Unmount Push [MENU].
- Page 42 GPS 操作 注意: 如果无法接收来自 GPS 卫星的信号,内置 GPS 接收器将无法计算其位置。 有关 详细信息,请参阅第 iv 页。 ■ 查看您的位置 您可以查看您当前的位置。 如果您在显示 GPS POSITION 屏幕时发射,屏幕会关闭。 要在传输时查看您当前的位置或来电者的位置,请按 [QUICK],然后选择“GPS Position”。 D 显示位置数据 Confirm the GPS icon is displayed. Push [QUICK]. Select “GPS Position.” • The GPS POSITION screen is displayed. Push D-pad().
- Page 43 GPS 航迹功能使您可以将 GPS 接收器的位置数据作为日志保存到 microSD 卡上。 GPS 记录器保存纬度、经度、海拔、定位状态、路线、速度、日期和时间。 如果您在旅行时使用此 GPS 记录仪,您可以在地图软件上查看您的旅行历史。 关于航迹文件 如果您已将日志文件导入地图软件,则可以在地图软件上显示您的路线。 L 日志文件可能与所使用的地图软件不兼容。 L 有关将日志文件复制到 PC 上的详细信息,请参阅可从 Icom 网站下载的“使用 GPS 记录 器功能”。 注意: • GPS 航迹功能需要 microSD 卡(用户提供)。 详情请参见第 7 页。 • 此功能作为默认设置开启。 因此,当您插入 microSD 卡时,此功能会持续保存来自 GPS 接 收器的位置数据,即使您关闭对讲机,开机后此功能依然开启。...
- Page 44 Bluetooth ® 操作 收发器有一个内置的蓝牙单元。 您可以连接蓝牙耳机或其他蓝牙设备。 当您将蓝牙耳机连 接到收发器时,您可以无线传输和接收它。 有关蓝牙功能或 VS-3 操作的更多详细信息, 请参阅高级手册。 L 蓝牙的通信范围约为 10 米(33 英尺)。 重要提示:蓝牙通信范围可能会有所不同,具体取决于设备运行的环境。 微波炉或无线 局域网可能会造成干扰。 在这种情况下,请停止使用这些设备或增加蓝牙设备与其他设 备之间的空间。 所有蓝牙设备都有一定的使用范围。 如果通信不稳定,请在范围内使用 设备。 ■ 启用 Bluetooth ® 功能 [MENU] > SET > Bluetooth Set > Bluetooth Push [MENU]. Select “Bluetooth Set” in the “SET” menu. Select “Bluetooth.”...
- Page 45 • After connecting to the headset, is displayed in the pairing list. is displayed Device name while connected. Headset icon (“ICOM” indicates the Icom headset.) To exit the MENU screen, push [MENU]. 连接后显示蓝牙 图标 L 连接到蓝牙设备后,蓝牙图标会显示在待机屏幕上。 L 当“AF 输出”设置为“仅耳机”并且蓝牙连接意外断开 时,会显示一个对话框以选择是否从对讲机的扬声器...
- Page 46 Bluetooth ® 操作 ■ 连接到 Bluetooth ® 设备 如果未使用配对的蓝牙设备,您可以断开它。 [MENU] > SET > Bluetooth Set > Pairing/Connect Push [MENU]. Select “Bluetooth Set” in the “SET” menu. Select “Pairing/Connect.” • Paired devices are displayed. is displayed on the device icon, if the device connected.
- Page 47 ±2.5 ppm (–20°C ~ +60°C, –4°F ~ +140°F) • Power supply: 10.0 ~ 16.0 V DC for external DC power 7.4 V DC specified Icom’s battery pack 5.5 V DC specified Icom’s battery case • Current drain (at 7.4 V DC): Transmit (at 5 W) Less than 2.5 A...
- Page 48 规格 D 发射 • Modulation system: FM/FM-N Variable reactance frequency modulation GMSK reactance frequency modulation • Output power (at 7.4 V DC): High: 5.0 W, Mid: 2.5 W, Low2: 1.0 W, Low1: 0.5 W, S-Low: 0.1 W • SAR 10g: 5.49 W/kg •...
- Page 49 L Maximum headsets or data devices are 4 devices each, and the maximum combination is 5 devices in total. Maximum Bluetooth Low Energy devices are 2 devices. • Device Name: ICOM BT(ID-52) (at default) • Passkey: 0000 (four zeros) 熔断器编码说明...
- Page 50 维护 ■ 恢复出厂设置 有时,例如在第一次通电时会显示错误信息。 这可能是由外部静电或其他因素引起的。 如果出现此问题,请执行部分重置或全部重置。 当心! 全部重置会清除所有编程并将所有设置恢复为出厂默认值。 有关详细信息,请参 阅高级手册。 执行全部复位后,您不能使用 DR 功能,因为中继器列表内容也被清除。 D 部分重置 [MENU] > SET > Others > Reset > Partial Reset Push [MENU]. Select “Others” in the “SET” menu. Select “Reset.” Select “Partial Reset.” • The confirmation dialog is displayed. Select “YES.”...
- Page 51 维护 ■ 故障排除 下表旨在帮助您纠正非设备故障的问题。 如果您无法通过使用此图表找到问题的原因或解决问题,请联系离您最近的 Icom 经销商 或服务中心。 L “AM” 表示 PDF 类型的高级手册。 问题 可能的原因 解决方案 参考 p. 6 对讲机无法开机。 电池电量耗尽。 给电池组充电,或更换电 池。 — 电池组(电池盒)连接松 清洁电池端子。 动。 — 电池盒中的电池极性接 检查电池盒中的电池极性。 反。 旋转 [VOL] 调节音量。 p. 7 扬声器没有声音。 音量太低。 p. 12 静噪级别太高。...
- Page 52 维护 ■ 故障排除 L “AM”表示 PDF 类型的高级手册。 问题 可能的原因 解决方案 参考 S-Low, p. 20 提高发射功率。 不能发射 发射功率设置为 Low1, Low2, 或 Mid. PTT 锁定功能已激活。 在 MENU 屏幕上关闭 p. 73 PTT Lock 功能。 p. 73 忙锁定功能被激活。 关闭菜单屏幕上的忙锁定功 能。 p. 19 发射频率超出业余无线电 关闭菜单屏幕上的忙锁定 频段。...
- Page 53 D-STAR 指南 ID-52A/ID-52E...
- Page 54 介绍 ■ D-STAR的独特功能 •通过中继器轻松进行跨频段操作! INTERNET INTERNET 430 MHz 430 MHz 1200 MHz 1200 MHz CQCQ CQCQ CQCQ CQCQ •使用中继器列表或 TX/RX 历史记录轻松输入呼号! •呼号捕获键 [RX>CS] 使呼号捕获变得容易!...
- Page 55 介绍 ■ 什么是 D-STAR? • D-STAR 是由日本业余无线电联盟 (JARL) 开发的数字协议标准。 该系统包括用于数字语 音的 DV 模式和用于数字数据通信的 DD 模式。 • D-STAR 支持 4.8 kbps 的 DV 模式。 您的呼号数据、短消息或 GPS 数据可以与您的语 音信号同时传输。 • D-STAR 支持通过互联网链接的综合中继器系统,使您能够与无论远近的电台建立 QSO。 D-STAR先进的业余无线电技术 DV 模式的带宽仅为 6 kHz,而模拟 FM 模式的带宽为 16 kHz,偏差为 5 kHz。 D- STAR 采用众所周知的...
- Page 56 介绍 IMPORTANT! Before starting D-STAR, the following steps are needed. STEP 1. Enter your call sign (MY) into the transceiver. (p. 45) STEP 2. Register your call sign (MY) to a gateway repeater. (p. 47) STEP 3. Enter your D-STAR equipment into your registration form. (p. 48) ►...
- Page 57 介绍 本地呼叫 Access repeater Area 1 repeater Area 1 网关呼叫 Area 1 Area 2 repeater repeater Area 1 Area 2 单呼 NOTE: • Using the repeater list is required to use the DR function. (p. 66) • Before operating in the Duplex mode, BE SURE to check whether the repeater is busy, or not.
- Page 58 介绍 ■ 在收发器中输入您的呼号 (MY) 要操作 D-STAR,您必须首先将您的呼号输入到我的呼号存储器中。 您最多可以输入 6 个 MY 呼号。 NOTE: • Your MY call sign must match the call sign registered on a gateway repeater. (p. 47) • The MY Call sign in the instructions is ONLY an example that is used in explanations. You MUST enter your own call sign, the one that was assigned to you and is on your license.
- Page 59 介绍 如何输入字符: [DIAL] (Rotate) Selects a character Selects a character Clears Cancels Moves the cursor to the left Moves the cursor to the right [ENT] Selects a Opens the Entry Select window* Sets character • Continuously holding down [CLR] clears characters. •...
- Page 60 介绍 ■ 在网关中继器上注册您的呼号 要通过 Internet 进行网关呼叫,您必须在具有网关的中继器(通常是您附近的中 继器)上注册您的呼号。 About the registration process described: This section describes the call sign registration process at a repeater that is connected to the US Trust server. There are other systems as well, and they have their own registration process.
- Page 61 介绍 Step 3: Register your personal information After your registration is approved, log in your personal account with your registered call sign and password. Click Step 4: Register your D-Star equipment Register your D-STAR equipment information. Ask the gateway repeater administrator for details.
- Page 62 D-STAR 操作 ■ 发起一个单呼 This section describes the simplex operation (through no repeater). NOTE: The frequencies may be different, depending on the transceiver’s version. Check for usable frequencies for your operating area. What is a Simplex Call? A simplex call is a direct call to another station on a single frequency, not using a repeater.
- Page 63 D-STAR 操作 To make a Simplex call in the VFO mode Push [VFO/MHz] to enter the VFO mode. Rotate [DIAL] to set the operating frequency. (p. 16) Push [MODE] to set the operating mode to DV. Hold down [LO] for 1 second to set an output power. (p. 20) Hold down [PTT] to transmit, and speak into the microphone at your normal voice level.
- Page 64 D-STAR 操作 ■ 访问中继器 本节介绍如何检查您是否可以访问您的本地中继器(访问中继器),以及您的信号是否成 功发送到目标中继器。 TIP: If your call sign (MY) has not been set, or your call sign and D-STAR equipment have not been registered at a D-STAR repeater, see pages 45 ~ 48. Step 1: Set “FROM” (Access repeater). Push D-pad() to select “FROM,”...
- Page 65 D-STAR 操作 Step 3: Check whether you can access the repeater. Hold down [PTT] for 1 second to access the repeater. If you get a reply call, or “UR?” is displayed within 3 seconds, your signal reached your access repeater and your call was successfully sent from your destination repeater. TIP: See page 65 for status indications after a reply is received.
- Page 66 D-STAR 操作 ■ 接收 当接收到 DV 呼叫时,主叫方、被叫站和被叫站的接入中继器的呼号都保存在 RX History 中。 最多可保存 50 个通话。 即使关闭对讲机,接收历史也会保留。 本节介绍如何显示 RX History 屏幕以及如何将呼号保存到内存中。 When receiving a call from “JM1ZLK”: The S-meter and the caller’s call sign are displayed. Step 1: Display a received call sign. Hold down [CD] for 1 second.
- Page 67 D-STAR 操作 Step 2: Save the destination call sign into your call sign memory from RX History. Push D-pad() to select the RX HISTORY record with the call sign that you want to save to memory. Push [ENT]. • Displays the RX HISTORY DETAIL screen. Push [QUICK].
- Page 68 D-STAR 操作 ■ 捕捉呼号 接收到信号后,按住呼号捕获键([RX→CS])1秒,即可捕获主叫站的呼号。 释放后, 您可以快速轻松地回复呼叫。 What is the Call Sign Capture key? Holding down the Call Sign Capture key for 1 second sets the last received station’s call sign as a temporary destination, and makes replying quick and easy. Step 1: Set the received call sign to “TO”...
- Page 69 D-STAR 操作 ■ 发起一个本地 CQ 呼叫 当“Local CQ”设置为“TO”(目的地)时,您可以发起 Local CQ。 What is a Local CQ Call? To call a CQ through only your local area (access) repeater. Step 1: Set “FROM” (Access repeater). Push D-pad() to select “FROM,” and then push [ENT]. Select “Repeater List.”...
- Page 70 D-STAR 操作 ■ 发起一个网关 CQ 呼叫 当在“TO”(目的地)中选择了目的地中继器时,您可以进行网关 CQ 呼叫。 What is a Gateway CQ call? • To call a CQ through a repeater connected to the Internet. • You can call a CQ to the areas where you cannot directly access because the communication is routed through the Internet.
- Page 71 D-STAR 操作 ■ 单呼 当在“TO”(目的地)中选择了电台呼号时,您可以呼叫单个电台。 当您通过网关呼叫单个站台时,您的呼叫将自动发送到该站台访问的最后一个中继器。 因此,即使您不知道电台在哪里,也可以使用呼号路由发起呼叫。 Step 1: Set “FROM” (Access repeater). Same as described in page 56. Step 2: Set “TO” (Destination). Push D-pad() to select “TO,” and then push [ENT]. Select “Your Call Sign.” Select your destination station. •...
- Page 72 D-STAR 操作 ■ 关于反射器 D What is a reflector? A reflector is a special server connected to the Internet and running a version of the D-Plus software. If the D-Plus software is installed on your Access repeater, it provides various functions including gateway and reflector linking capabilities (It is known as the D-STAR reflector system).
- Page 73 D-STAR 操作 D 链接到反射器 If your repeater is not currently linked to a reflector, or if you want to change it to another reflector, follow the steps below. Before linking to another reflector, BE SURE to unlink the current reflector. (p. 59) Direct inputting a reflector Example: Directly enter “REF030CL.”...
- Page 74 D-STAR 操作 ■ 关于反射器 D 使用反射器 Push D-pad() to select “TO,” and then push [ENT]. Select “Reflector.” Select “Use Reflector.” • Returns to the DR screen, and “Use Reflector” and “CQCQCQ” are displayed in “TO.” Hold down [PTT] to transmit. •...
- Page 75 D-STAR 操作 D 反射器回音测试 To confirm that your signal is correctly getting into the repeater, you can transmit a short message as a trial. After releasing [PTT], your message will be played back. Push D-pad() to select “TO,” and then push [ENT]. Select “Reflector.”...
- Page 76 D-STAR 操作 ■ “FROM” (Access repeater) setting By rotating [DIAL]: Select a preset repeater by rotating [DIAL] on the DR screen. When you know your access repeater: From the repeater list: When your access repeater is in your transceiver’s repeater list, you can select it by selecting the repeater area and name, if entered, or call sign.
- Page 77 D-STAR 操作 ■ “TO” (Destination) setting TIP: After you receive the individual By rotating [DIAL]: station or repeater’s signal, the call sign Select a repeater or Your Call Sign that is displayed by rotating [DIAL] on the can be captured by holding down the Call Sign Capture key ([RX→CS]), and DR screen.
- Page 78 D-STAR 操作 ■ 未收到回复时 To communicate through the repeater, your signal must access to the repeater. The following chart is designed to help you correct problems which are not equipment malfunctions. “AM” indicates the PDF type Advanced manual. PROBLEM POSSIBLE CAUSE SOLUTION REF.
- Page 79 NOTE: • Before using a microSD card, see page 25 for details of a card. • See “Updating the repeater list” that can be downloaded from the Icom website about how to update the repeater list using a microSD card.
- Page 80 索引 1 MHz tuning ���������������������������������������������� 16 DC IN jack ������������������������������������������������ 2, 6 Default setting��������������������������������������������� 22 A band ���������������������������������������������������������11 DIAL �������������������������������������������������������������� 2 Accessories ���������������������������������������������������ii DOC ���������������������������������������������������������������ii Access Point mode ��������������������������������������� v DR function ������������������������������������������� 14, 43 Access repeater������������������������������������������ 51 DR key ���������������������������������������������������������� 2 AM ��������������������������������������������������������������...
- Page 81 索引 MENU List ��������������������������������������������������������� 71 Save Setting ������������������������������������������������� 9 MENU key ����������������������������������������������� 1 SCAN key ����������������������������������������������������� 1 MENU screen ���������������������������������������� 21 Scan operation ������������������������������������������� 17 Operation ����������������������������������������������� 21 Screen Capture �������������������������������������������� 1 Selecting a item ������������������������������������� 22 SD card microSD card Formatting �����������������������������������������������...
- Page 82 许可 Information on the open source software being used For the purposes of this copyright and license, by this product� “Contributing Authors” is defined as the following set COPYRIGHT NOTICE, DISCLAIMER, and LICENSE: of individuals: If you modify libpng you may insert additional Andreas Dilger notices immediately following this sentence�...
- Page 83 许可 ZLIB DATA COMPRESSION LIBRARY - For 64-bit Irix, deflate.c must be compiled without any zlib 1�2�8 is a general purpose data compression optimization� With - O, one libpng test fails� The test library� All the code is thread safe� The data format works in 32 bit mode (with the -n32 compiler flag).
- Page 84 菜单界面项目 按 [MENU] 时,会显示以下 MENU 项目。 有关每个菜单项的详 细信息,请参阅高级手册。 VOICE SCOPE Record TX Set DV GW Repeat Time <<Terminal Mode>> TX Monitor <<Access Point Mode>> <<Single TX>> PICTURE <<Repeat TX>> RECORD GPS Set QSO Recorder GPS Select <<REC Start>> GPS Option Play Files SBAS Recorder Set...
- Page 85 菜单界面项目 SET > DUP/TONE... SET > DV Set Offset Freq Tone Control Repeater Tone RX Bass TSQL Freq RX Treble Tone Burst RX Bass Boost DTCS Code TX Bass DTCS Polarity TX Treble Digital Code Auto Reply SET > Scan DV Data TX Pause Timer DV Fast Data...
- Page 86 菜单界面项目 SET > Function SET > Display Power Save Backlight Monitor Backlight Timer Dial Speed-UP Brightness Auto Repeater* Dim Screen Remote MIC Key Dim Timer During RX/Standby Brightness (Dim) During TX Background Color Key Lock Contrast PTT Lock Busy LED Busy Lockout RX Call Sign Time-Out Timer...
- Page 87 Headset Function Select Standby Beep Auto Disconnect Sub Band Mute RX Priority Setting (LE Device) SET > Time Set Date/Time Icom Headset GPS Time Correct Data Device Set UTC Offset Serialport Function Auto Power OFF Bluetooth Device Information SET > SD Card Initialize Bluetooth Device SET >...
- Page 88 世界可以如此沟通 A7608D-1EX-1 1-1-32 Kamiminami, Hirano-ku, 日本印刷 Osaka 547-0003, Japan © 2021 Icom Inc. 2021 年 10 月...
Need help?
Do you have a question about the ID-52A and is the answer not in the manual?
Questions and answers