Table of Contents
Advertisement
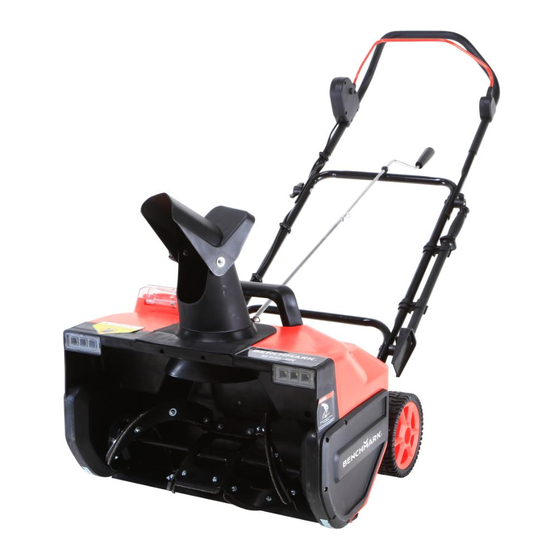
22" CORDLESS SNOW BLOWER
WEAR CSA APPROVED
EYE PROTECTION
READ ALL INSTRUCTIONS BEFORE FIRST USE.
KEEP THIS MANUAL FOR FUTURE REFERENCE.
KEEP AWAY FROM CHILDREN.
Maximum initial battery voltage (measured without a load)
is 60 volts. Normal voltage is 54 volts.
5 Year Limited Warranty on tool
3 Year on battery and charger
WEAR EAR
PROTECTION
WEAR A
FACE MASK
Advertisement
Table of Contents

Related Manuals for Benchmark 5554-514


Summary of Contents for Benchmark 5554-514
- Page 1 22" CORDLESS SNOW BLOWER 5 Year Limited Warranty on tool 3 Year on battery and charger READ ALL INSTRUCTIONS BEFORE FIRST USE. KEEP THIS MANUAL FOR FUTURE REFERENCE. KEEP AWAY FROM CHILDREN. Maximum initial battery voltage (measured without a load) is 60 volts.
-
Page 2: Product Specifications
PRODUCT SPECIFICATIONS 22" CORDLESS SNOW BLOWER Motor Brushless Battery Voltage Max* 60V D.C. Battery Capacity 4.0 Ah Battery Runtime Max Working time up to 30 mins. No-load running time up to 45 mins. Charger Input 100-240V, 50/60Hz Charger Output 63V D.C. 4A Charge Time Max 1 hour No Load Speed... -
Page 3: Table Of Contents
5554-514 22" CORDLESS SNOW BLOWER TABLE OF CONTENTS Product Specifications ................... 1 YF60vRX Hand-held Tool has a 2-Step Battery Latch ........1 Table of Contents ..................2 General Safety Instructions ................3 Battery & Charger Safety Instructions ............4 Information about the battery ................ 6 Information about the charger and the charging process ........ -
Page 4: General Safety Instructions
GENERAL SAFETY INSTRUCTIONS Notice the personal safety alert symbol used in this manual to draw your attention to a WARNING given along with the particular operating instruction. This means that the operation requires special ATTENTION, CAUTION, and AWARENESS. • Keep work area clean and well lit – Cluttered, dark areas invite accidents. •... -
Page 5: Battery & Charger Safety Instructions
5554-514 22" CORDLESS SNOW BLOWER • Moving parts present risks – Keep your face, hair, clothing, hands and feet away from moving parts. All guards and safety attachments must be installed properly before using the unit. Shut off and disconnect the battery before touching any parts other than the handles and switch. - Page 6 • Charge in a well-ventilated area – Do not block the charger vents. Keep them clear to allow for proper ventilation. Do not allow smoking or open flames near a charging battery pack. Vented gases may explode. NOTE: The safe temperature range for the battery is -4 F –...
-
Page 7: Information About The Battery
5554-514 22" CORDLESS SNOW BLOWER • Under abusive conditions, liquid may be ejected from the battery; avoid contact – If contact accidentally occurs, flush with water. If liquid contacts eyes, additionally seek medical help. Liquid ejected from the battery may cause irritation or burns. -
Page 8: Information About The Charger And The Charging Process
7. Do not exhaustively discharge batteries. Exhaustive discharge will damage the battery cells. The most common cause of exhaustive discharge is lengthy storage or non-use of partially discharged batteries. Stop working as soon as the performance of the battery falls noticeably or the electronic protection system triggers. -
Page 9: Protection From Environmental Influences
5554-514 22" CORDLESS SNOW BLOWER 8. Never use or charge batteries if you suspect that it has been more than 12 months since the last time they were charged. There is a high probability that the battery pack has already suffered dangerous damage (exhaustive discharge). -
Page 10: Additional Safety Instructions
ADDITIONAL SAFETY INSTRUCTIONS SAFETY INSTRUCTIONS FOR WALK-BEHIND SNOW BLOWERS • Read the operator’s manual carefully – Learn your snow blower’s applications and limitations as well as the specific potential hazards related to this machine. Do not use this machine for any purpose other than the one for which it was designed. -
Page 11: Clearing A Clogged Discharge Chute
5554-514 22" CORDLESS SNOW BLOWER • Store safely – Store the snow blower indoors in a dry area between uses. Keep in a locked area, where children and unauthorized users cannot gain access. Never store the snow blower with the battery pack installed. It may cause damage and injury. -
Page 12: Safety Symbols
SAFETY SYMBOLS The following table depicts and describes safety symbols that may appear on this product. Read, understand and follow all instructions on the machine before attempting to assemble and operate. SYMBOL DESCRIPTION SYMBOL DESCRIPTION READ THE OPERATOR’S WARNING! Do not expose MANUAL(S) –... -
Page 13: Know Your Cordless Snow Blower
5554-514 22" CORDLESS SNOW BLOWER KNOW YOUR CORDLESS SNOW BLOWER Read the owner’s manual and safety rules carefully before operating your cordless snow blower. Compare the illustration below the actual unit in order to familiarize yourself with the location of the various controls and adjustments. Save this manual for future reference. -
Page 14: Getting Started
GETTING STARTED 1. Remove the snowblower and all other items from the box. 2. Determine the left and right hand side of the snowblower by standing in the normal operating position. 3. Check all items for shipping damage. If damage is found or suspected or if any of the parts are missing, do not assemble. -
Page 15: Discharge Chute Assembly
5554-514 22" CORDLESS SNOW BLOWER 4. Clip the 2 chute clean-out tool clips on the Fig. 4 side of the middle frame, and insert the chute clean-out tool in the clips (Figs. 4-5). Chute Clean-Out Tool Clips Chute Clean-Out Tool Fig. -
Page 16: Chute Crank Assembly
CHUTE CRANK ASSEMBLY 1. Remove the cotter pin from the lower Fig. 10 Cotter Pin chute crank (Fig.10). Lower Chute Crank 2. Install the lower crank rod by inserting it Fig. 11 Align the into the opening at the back of the housing holes with holes aligned (Fig.11). -
Page 17: Charging The Battery Pack
5554-514 22" CORDLESS SNOW BLOWER Fig. 16 7. Align the holes and insert the cotter pin Cotter Pin by hand (Fig.16). NOTE: Before using this machine, make sure that the power source you will use complies with the specifications detailed in this manual. Before inserting the battery to start, verify that the snowblower’s roll shaft and rubber plates are firmly secured... -
Page 18: Starting And Stopping
To obtain the best life from the battery NOTE: 1. Never allow the battery to completely discharge before recharging. The battery pack should be placed on the charger whenever the battery pack is noticeably running down or the tool no longer performs a task as it previously performed. 2. -
Page 19: Moving The Machine & Plowing The Snow
5554-514 22" CORDLESS SNOW BLOWER 2. While depressing the safety switch button, pull the ON/OFF switch bail toward you. Once the machine powers on, release the safety switch button and begin operation (Fig. 21). The machine can only be started by depressing the safety switch button first, followed by squeezing the ON/OFF switch bail;... -
Page 20: Changing Throw Direction And Throw Height
5. Note the wind direction. If possible, move in the same direction as the wind so that the snow is not thrown against the wind (and then back into your face and onto the just cleared path). 6. While moving the snowblower, do not drag the power c able violently or roughly. The s now thrower should move within the range that the cable can reach. -
Page 21: Maintenance And Storage
5554-514 22" CORDLESS SNOW BLOWER Deflector Knob Fig. 24 WARNING: Never direct the snow discharge chute at the operator, at bystanders, at vehicles, or at nearby windows. The discharged snow and foreign objects accidentally picked up by the snowblower can cause serious damage and personal injury. -
Page 22: Lifetime Lubrication (Motor And Paddle)
LIFETIME LUBRICATION (MOTOR AND PADDLE) Lubrication is not necessary and may damage the unit. The snowblower is lubricated for lifetime use at the factory before shipment. GENERAL MAINTENANCE TIPS 1. Do not attempt to repair the machine unless you have the proper tools and instructions for disassembly and repair of the machine. -
Page 23: Replacing The Scraper Bar
5554-514 22" CORDLESS SNOW BLOWER WARNING: Make sure to turn off the switch and disconnect the battery with machine before performing any maintenance task on your snowblower REPLACING THE SCRAPER BAR Fig. 28 1. The scraper bar is located at the base of the snowblower beneath the rotor housing (Fig. -
Page 24: Replacing The Belt And Pulley
REPLACING THE BELT AND PULLEY NOTE: Determine the left and right hand side of the snowblower by standing behind the unit in the normal operating position 1. Remove the screws from the left panel Fig. 31 of the snowblower and remove the left panel (Fig.31). -
Page 25: Automatic Reset
WARRANTY BENCHMARK 22" CORDLESS SNOW BLOWER WARRANTY If this Benchmark tool fails due to a defect in material or workmanship within five years from the date of purchase, return it to any Home Hardware store with the original bill of sale for exchange. This warranty does not include expendable parts including but not limited to blades, brushes, belts, light bulbs and/or batteries. - Page 26 22" CORDLESS SNOW BLOWER 5 Year Limited Warranty on tool 3 Year on battery and charger 5554-514 BENCHMARK TOOLS CANADA Made in China ST. JACOBS, ONTARIO N0B 2N0 © 2021 Home Hardware Stores Limited CUSTOMER SERVICE/TECH SUPPORT 1-833-818-4111 * This Benchmark product carries a five (5) year LIMITED warranty against defects...
Need help?
Do you have a question about the 5554-514 and is the answer not in the manual?
Questions and answers
where do I buy replacement parts for worn rubber plate assembly