Table of Contents
Advertisement
Advertisement
Table of Contents

Related Manuals for Epson EMP-70


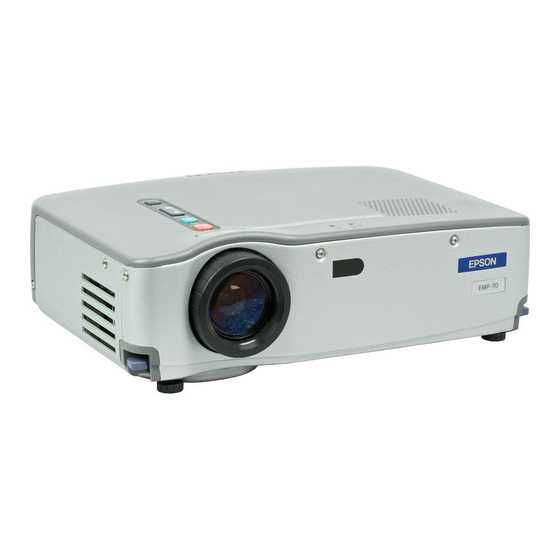
Summary of Contents for Epson EMP-70
-
Page 2: Checking Accessories
Checking Accessories When unpacking the projector and accessories from their box, check that the following items are included. If any items are missing, contact your vendor or an Epson Service Center. • Projector main unit • Lens cover with cord •... -
Page 3: In This Manual
Projecting Images Connecting with different devices and projecting and adjusting images What You Can Do Functions to get the most out of your projector Menu Functions (Remote Control Only) Basic menu functions and settings Troubleshooting Troubleshooting projection failure, bad projection, and other problems... -
Page 4: Table Of Contents
Contents In This Manual ... 1 Contents ... 2 Features... 4 1. Getting Started 1.1 Safety Precautions ... 8 1.2 Component Names and Functions... 12 1.3 Remote Control ... 15 2. Setup 2.1 Special Notes on Setup... 18 2.2 Setup Instructions... 19 2.3 Screen Size and Projection Distance Details ... - Page 5 5.8 Reset All Menu ... 55 6. Troubleshooting 6.1 Possible Failures ... 58 6.2 When Indicators Do Not Help ... 60 7. Maintenance 7.1 Projector Cleaning, Lens Replacement, Air Intake Vent Cleaning... 66 7.2 Lamp Replacement ... 68 8. General Notes 8.1 Optional Parts... 72 8.2 Shipping Instructions ...
-
Page 6: Features
Features Compact and Lightweight The compact, lightweight design of your projector (6.6 liters and roughly 3.1 kilograms (6.83 pounds) ) allows easy carrying. Clear, Sharp Images Though compact, your projector provides clear, sharp presentations even in well-illuminated areas. Global Video Signal Compatibility Your unit projects virtually all of the video signal formats used world-wide, including NTSC, NTSC4.43, PAL, M-PAL, N-PAL, PAL60, and SECAM. - Page 7 E-Zoom Function (Remote control E-Zoom button, see page 40) Enlarges an image (from standard to 4x size vertically and horizontally). Automatic image sizing with Wide/Tele button (see page 41) Allows image enlargement and reduction. Enlargement Reduction...
-
Page 9: Getting Started
Getting Started Safety Precautions ...8 Component Names and Functions ...12 Remote Control ...15... -
Page 10: Safety Precautions
• Do not place heavy objects on the power cord. • Do not bend, twist, or pull the power cord severely. • Do not run the power cord near heating equipment. If the power cord becomes damaged, consult your vendor or an Epson Service Center. - Page 11 The projector cabinet contains lenses, a lamp, and many other glass components. When handling any broken components, use care to avoid injury from fragments, and consult your vendor or an Epson Service Center for repair. Do not place breakable objects, containers of liquid, medicines, or similar items on the unit.
- Page 12 When moving the unit, switch off and unplug the unit and make sure that all cables are disconnected. Fire or electric shock may result. Never remove the lamp immediately after use. After shutting off the projector, allow an hour for complete cooling. Heat may cause burns or injury.
- Page 13 • Environments outside the temperature range for storage (-10°C to 60°C) may cause malfunction and deformation of the cabinet. Take particular care not to leave the projector for extended periods in locations exposed to direct sunlight. • Do not attempt projection with the lens cover in place. Heat may deform the lens cover.
-
Page 14: Component Names And Functions
1.2 Component Names and Functions Projector Unit [Front] Operation Display Indicator Operating Panel Wide/Tele Button Focus Ring Front Foot Remote Control Receiver [Side] [Rear] [Bottom] Front Foot Rear Foot Problem/Alarm Display Indicator Lens Cover Front Foot Speaker Air Exhaust Vent... -
Page 15: Operating Panel
Audio Out Terminal (See page 27) For output of audio signal from projector. Press the right side of the button (Tele) to reduce the image. Press the left side of the button (Wide) to enlarge the image. L/R Audio Terminals... -
Page 16: Remote Control
Battery Cover Indicator Lights during signal output from remote control. Power Button (see page 29, 35) Switches projector power on and off. *Press twice to turn the power off. R/C On Off Button (see pages 29, Switches remote control power on and off. -
Page 17: Remote Control
• The remote control R/C On Off switch must be switched to "On" to use the remote control. • Point the remote control towards the remote control receiver on the projector unit. • Certain screens may shorten the operating distance (approximately 10m (393.70inches) ) of the remote control when the control is pointed towards the screen... - Page 18 Inserting Batteries in the Remote Control This section describes how to insert batteries in your remote control. Remove the battery cover. Slide the catch of the battery cover in the direction shown by the arrow. Caution: Be sure to use fresh batteries of the same type as the old.
-
Page 19: Setup
Setup Special Notes on Setup...18 Setup Instructions...19 Screen Size and Projection Distance Details... 20... -
Page 20: Special Notes On Setup
[View from above or below] Caution: • Do not block the air exhaust vent on the side of the projector or the air intake vents on the right side and rear of the projector. • Do not place the unit in direct contact with air conditioner, heater, or other ventilation currents. -
Page 21: Setup Instructions
2.2 Setup Instructions Your projector allows projection in the following two ways. Set up the projector as your location requires. [Viewing from the front] [Projection on a semi-transparent screen and viewing from the rear]... -
Page 22: Screen Size And Projection Distance Details
2 4 4 x 1 5 2 0 0 1 6 0 *If installing to a wall, leave a space of at least 20 cm between the projector and the wall. Size 300" Size 200" Size 150" Size 120" Size 100"... -
Page 23: Projecting Images
Projecting Images Connecting to a Computer ...22 Connecting to an A/V Device ...25 Providing Sound Through an External Audio Device ...27 Projecting Images...28 Adjusting Images ...32 Ending After the Projection ...35... -
Page 24: Connecting To A Computer
The resolution and frequency of the video signal output by your computer must be compatible with your projector in order to allow projection (some computers allow partial projection, but clear projection cannot be obtained). - Page 25 50/60 HDTV1125I 50/60 NTSC SECAM Frequency used for resized displays (when resizing is on) (dots) EMP-70 EMP-50 1024 x 560 800 x 437 1024 x 640 800 x 500 1024 x 568 800 x 444 1024 x 497 800 x 388...
- Page 26 When connecting to a Macintosh, you may need an optional Mac desktop adapter. Point: • When using the projector, do not bundle power cords and computer cables together. • Some computer models may require a connection adapter during connection. Consult your computer instruction manual or the computer vendor.
-
Page 27: Connecting To An A/V Device
3.2 Connecting to an A/V Device [Inputting a Composite Video Signal] To video terminal (Yellow) To (L) audio terminal (White) To (R) audio terminal (Red) A/V Cable (supplied with projector) [Inputting an S-Video Signal] To S-Video Terminal R-Audio Terminal (Red) - Page 28 To Y terminal (Green) To Pb or Cb terminal (Blue) To Pr or Cr terminal (Red) Component video cable (optional part) A/V cable (supplied with projector) To (L) audio terminal (White) To (R) audio terminal (Red) • If using a D terminal cable DVD player, etc.
-
Page 29: Providing Sound Through An External Audio Device
Audio will no longer be output from the projector speaker. • Though the projector outputs audio for projected video images, in the case of A/V devices, the audio output corresponds to the audio devices connected to the L/R audio terminals. -
Page 30: Projecting Images
Here we begin projecting images from an A/V device. Preparation Warning: • Never look into the lens when the projector is switched on. The intense light can damage your vision. • Use only the power cord supplied. Use of other cables may cause fire or electric shock. - Page 31 Projection When preparations are complete, you are ready for projection. "No-Signal" is displayed. Depending on your settings, there may be no display. (See page 51) The operation display indicator lights green. To use the remote control, turn the remote control R/C On Off switch to "On". Press the Power button to switch power on.
- Page 32 Computer When no S-Video input Press the Source button to select the video source you wish to project. Each time the Source button is pressed, the video source cycles between Computer, S- Video, and Video. If there is no input at the S-Video terminal, the Source button switches the video source S-Video from Computer to Video.
- Page 33 [Settings for notebook and integrated LCD computers (when connected)] When a notebook or integrated LCD computer is connected to the projector, some computers require key commands or settings to change the output destination of a video signal. Press "Fn" and "F0" simultaneously to change the setting.
-
Page 34: Adjusting Images
This section describes how to obtain the best video performance. See "2. Setup" for details on setting-up position and projection size. Adjusting the Image Projection Angle Adjust the projection angle of the projector. Adjust the projector to face the screen as directly as possible. Foot Levers Lower Raise Lift the projector to your desired angle of projection. -
Page 35: Adjusting The Focus
When the foot levers are used to change the projection angle, the keystone correction function can be used to correct trapezoidal distortion upward or downward by roughly 15°. Turn the focus ring on the projector to adjust the focus. Point: •... - Page 36 Adjusting Images (Remote Control Only) [Optimizing Computer Video (Using the Auto button)] This function applies automatically optimized adjustment values to a computer input signal. If the input is a video signal, this function does not operate. Adjusted values set automatically are "Tracking", "Position (vertical and horizontal)", and "Sync".
-
Page 37: Ending After The Projection
Press the Power button. A "Power Off" confirmation message is displayed. Press the Power button again. The projector lamp goes out, the operation display indicator flashes orange, and after cool-down is complete, the indicator switches to steady orange. - Page 38 R/C On Off switch to Off. Support the projector unit with your hands, pull upward on the foot levers with your fingers, and lower the unit slowly.
-
Page 39: What You Can Do
What You Can Do Using the Wireless Mouse ...38 Enlarging an Image ...40 Adjusting Image Size ...41 Adding Image Effects ...42 Freezing and Deleting Images...43 Displaying Help Screens ...44... -
Page 40: Using The Wireless Mouse
4.1 Using the Wireless Mouse The remote control included allows you to control a computer's mouse operations at a separate location. • The Esc button has the same action as a right mouse button, and the Enter button has the same action as a left mouse button. Mouse operation by remote control allows you to make a presentation at 〔... - Page 41 Making a Connection Before making a connection, switch off power to the projector and computer. Caution: • Connecting a non-USB mouse cable with the power on can cause malfunction or failure. • Use only the mouse cable supplied. Any other cable may cause failure.
-
Page 42: Enlarging An Image
4.2 Enlarging an Image The remote control included lets you enlarge portions of an image. Reduction Enlargement Magnification factor is displayed. Press the E-Zoom button on the remote control to enlarge or reduce the display on screen. (The Esc button releases this feature.) Point: 24-step partial enlargement and reduction by factors of 1x-4x is available. -
Page 43: Adjusting Image Size
4.3 Adjusting Image Size The Wide/Tele button on the projector allows you to adjust the size of images. When you press the right side of the button (Tele), images are reduced. When you press the left side of the button (Wide), images are enlarged. -
Page 44: Adding Image Effects
4.4 Adding Image Effects Using the Effect1 and Effect2 buttons, you can add effects to images during presentation (to cancel this function, press the Esc button). For effects settings, see "5.4 Effect Menu" (page 50). Cursor/Stamp This effect displays a cursor on the screen and freezes it at a desired location. Horizontal Bar This effect displays a horizontal line on the screen and allows you to move it up or down by remote control. -
Page 45: Freezing And Deleting Images
4.5 Freezing and Deleting Images Freezing a Moving Image (Remote Control Only) You can freeze a moving image (video or other image). Muting Images and Sound (Remote Control Only) You can temporarily mute images and sound and project a black or blue image. Press the Freeze button on the remote control. -
Page 46: Displaying Help Screens
If you cannot solve your problem using the Help function, consult the "Troubleshooting" section in this manual (see page 57). Use the Select button on the projector to select a topic (on the remote control, use the Enter button). Press the Enter button to enter your selection. -
Page 47: Menu Functions
Menu Functions (Remote Control Only) Learning Basic Operations ...46 Video Menu...47 Audio Menu ...49 Effect Menu...50 Setting Menu ...51 Advanced Menu ...53 About Menu ...54 Reset All Menu ...55... -
Page 48: Learning Basic Operations
5.1 Learning Basic Operations This section presents the basic functions available in menus. For functions in each menu, access the guide available under each menu. [Explanation of symbols] : Push the Enter button to the upper or lower side. : Press the Enter button. [Opening and Closing Menus] Press the Menu button to display the top menu. -
Page 49: Video Menu
5.2 Video Menu Displaying Menus Press the Menu button, use the Enter button to select "Video" from the top menu displayed, and press the Enter button to move to a submenu. Point: • When there is no video signal from a computer or component video device, the "Video"... - Page 50 Menu Brightness Adjusts image brightness. +: Brightens image. - : Darkens image. Contrast Adjusts difference in color brightness/darkness. +: Increases difference in color brightness/ darkness. - : Decreases difference in color brightness/ darkness. Color Adjusts color depth. +: Deepens color. - : Lightens color.
-
Page 51: Audio Menu
Enter button to move to a submenu. Settings Menu Volume Adjusts the volume of sound output from the projector. +: Increases volume. - : Decreases volume. Tone Adjusts the tone of sound output from the projector. -
Page 52: Effect Menu
5.4 Effect Menu Displaying Menus Press the Menu button, use the Enter button to select "Effect" from the top menu displayed, and press the Enter button to move to a submenu. Settings Menu Cursor/Stamp Make detailed settings for the cursor/stamp function assigned to the remote control Effect1 button. -
Page 53: Setting Menu
If the screen is distorted in trapezoidal form, adjust it to normal display. -: Broadens upper screen * • You can also adjust the screen with the Keystone button on the projector. • A keystone correction reduces screen size. • The keystone correction is stored in memory. You will need to readjust the image if the projection angle is changed. - Page 54 Black : A black screen is displayed. Blue Sleep Mode After sleep mode is activated, the projector enters standby mode when no signal is input from an external source for a continuous period of 30 minutes. ON : Sleep Mode active...
-
Page 55: Advanced Menu
This setting is used for projection from the rear of a screen. ON : Inverts a projected image vertically. OFF : Restores original. Ceiling This setting is used for projection with the projector hanging from a ceiling. ON : Inverts a projected image vertically and horizontally. OFF : Restores original. -
Page 56: About Menu
5.7 About Menu Displaying Menus Press the Menu button, use the Enter button to select "About" from the top menu displayed, and press the Enter button to move to a submenu. Setting and Display Information The settings information displayed in the About menu differs as shown below during video projection from a computer/component versus a video device. -
Page 57: Reset All Menu
5.8 Reset All Menu Displaying Menus Press the Menu button, and use the Enter button to select "Reset All" from the top-level menu displayed. Settings Menu Reset All Returns all menu settings to initial settings. (Lamp and language settings excluded) * Note that rear and invert settings will also be cleared by this operation. - Page 58 Initial Settings List Initial settings at product shipment are shown below. Main Menu Title Video (Computer/ Component Video) Video (Video) Audio Effect Setting Advanced Submenu Title Position Tracking Dependent on the connected signal Sync. Brightness Contrast Sharpness Gamma Input Signal Auto Setup Aspect Ratio Position...
-
Page 59: Troubleshooting
Troubleshooting Possible Failures...58 When Indicators Do Not Help...60... -
Page 60: Possible Failures
6.1 Possible Failures If you think your projector may have failed, first check the indicators on the unit. Your projector includes an "operation display indicator" and a "problem/alarm display indicator" which provide information on projector status. Operation Display Indicator Indicator... - Page 61 Stop using the projector, pull the plug from the outlet, and consult your vendor or an Epson Service Center (listed at the end of this manual) for repair. Not a problem, but projection will be interrupted automatically to prevent further temperature rise.
-
Page 62: When Indicators Do Not Help
• Is Sleep Mode on? See page 52 If Sleep Mode is set to on and no video signal is input for 30 minutes, the projector lamp shuts off automatically. • Is video brightness adjusted correctly? See page 48 • Is "A/V Mute" mode active? See page 52 •... - Page 63 See page 18 • Is the lens covered with condensation? If you carry the projector from a cold room into a warm room, the lens may become covered with condensation and the image may be blurred. After a short period, the image should return to normal.
- Page 64 • Is the correct resolution selected? See page 23 Set your computer to provide a signal compatible with the projector. Consult your computer instruction manual with regard to modifying the signal. • Press the Auto button on the remote control.
-
Page 65: There Is No Sound
Image Color is Poor Images Are Dark There is No Sound • Is image brightness adjusted correctly? See page 48 • Are cables connected correctly? See pages 24, 25 • Is contrast* adjusted correctly? See pages 48, 74 • Is color adjusted correctly? See page 53 •... - Page 66 The range of operation is approximately 30° left or right and approximately 15° above or below the remote control sensor on the projector. • Is the remote control too far from the projector? See page 15 The operable distance is approximately 10m (393.70inches).
-
Page 67: Maintenance
Maintenance Projector Cleaning, Lens Replacement, Air Intake Vent Cleaning ...66 Lamp Replacement...68... -
Page 68: Projector Cleaning, Lens Replacement, Air Intake Vent Cleaning
7.1 Projector Cleaning, Lens Replacement, Air Intake Vent Cleaning Clean your projector when it is dirty or image projection is poor. Clean the air intake vent every 100 hours in practice. Warning: • No one but trained service personnel should open the projector cabinet. The projector contains several high voltage components which can cause electric shock. - Page 69 Accumulated dust in the air intake vents degrades ventilation, increases the interior temperature, and can cause malfunction. To prevent debris from entering the air intake vents, always stand the projector upright with the lens upward. Then use a vacuum cleaner or other equipment to suck dust from the vents.
-
Page 70: Lamp Replacement
• Though a replacement message appears at approximately 1,400 hours, individual lamp characteristics or usage conditions may cause failure before 1,400 hours, and we recommend that a replacement lamp be kept on hand. • A replacement lamp can be purchased from your local Epson product vendor. Replacement Point: •... - Page 71 Install the lamp cover. Insert the cover diagonally and press it into the projector until you hear the catches click into place. Check that the catches are securely fastened. Point: After lamp replacement, use the About menu to reset lamp time to its initial value (see page 54).
-
Page 73: General Notes
General Notes Optional Parts...72 Shipping Instructions ...73 Glossary...74 Index...75 Specifications ...77 External Dimensions ...78 International Warranty System ...79... -
Page 74: Optional Parts
Use if the computer cable included is not long enough. (For mini D-sub 15-pin/mini D-sub 15- pin) • Mac Adapter Set (ELPAP01) For use in connecting the projector to a Macintosh computer. • Component Video Cable (ELPKC19: 3.0m) (For Mini D-Sub 15-pin/RCA) •... -
Page 75: Shipping Instructions
Shipping to the Manufacturer for Repair • Use the original shipping box. • If you do not have the original shipping box, protect your projector against transmitted impacts by wrapping it in a shock-absorbing material and placing it in a strong cardboard box. -
Page 76: Glossary
Signals output by a computer are output at a certain predetermined (synchronization) frequency. If the frequency of your projector cannot match that frequency, a clear image cannot be obtained. Matching of signal phases (peak offset) is referred to as synchronization (synch). -
Page 77: Index
8.4 Index A/V Device ....25 A/V Mute ....52 A/V Mute Button ..14, 43 About Menu . - Page 78 Mac Mouse Cable ..39 Macintosh ....39 Menu Button ..14, 46 Mode .
-
Page 79: Specifications
300(W) x 80(H) x 220(D)mm (11.81(W) x 3.15(H) x 8.46(D)inches) (not including protruding parts) Polysilicon TFT <EMP-70> 786,432 (1,024 (Horizontal) x 768 (Vertical) dots) x 3 <EMP-50> 480,000 (800 (Horizontal) x 600 (Vertical) dots) x 3 Manual Electronic 0.8 : 1... -
Page 80: External Dimensions
8.6 External Dimensions The diagram below shows the EMP-70. The EMP-50 has the same external dimensions. 300 (11.81) Units: mm (inch) -
Page 81: International Warranty System
Improper use by the customer, damage due to shipping, or handling not in accordance with this manual c. Service or modification by a third party other than Epson or an Epson- designated service organization d. Problems occurring after the use of accessories or wear parts other than genuine Epson or Epson-quality assured accessories or parts. - Page 82 EUROPE AUSTRIA : EPSON Support Center Austria Tech. Help Desk: 00491805 235470 Web Address: http://www.epson.at BELGIUM : EPSON Support Center BeNeLux Tech. Help Desk: 032 70222082 Web Address: http://www.epson.be BULGARIA : PROSOFT 6. AI Jendov Str. BG-1113 Sofia Tel: 00359.2.730.231 Fax: 00359.2.9711049...
- Page 83 200 Sur y 300 Oeste San Jose, Costa Rica Tel: (50 6) 296-6222 Web Address: http://www.epsoncr.com MEXICO : Epson Mexico, S.A. de C.V. AV. Sonora #150 Mexico, 06100, DF Tel: (52 5) 328-4008 Web Address: http://www.epson.com.mx U. S. A. : Epson America, Inc.
- Page 84 Epson Argentina S.A. Avenida Belgrano 964/970 (1192), Buenos Aires Tel: (54 11) 4346-0300 Web Address: http://www.epson.com.ar BRAZIL : Epson Do Brasil Ltda. Av. Tucunare, 720 Tambore Barueri, Sao Paulo, SP 06460-020 Tel: (55 11) 7295-1757 Web Address: http://www.epson.com.br CHILE : Epson Chile S.A.
-
Page 85: Declaration Of Conformity
ISO/IEC Guide 22 and EN 45014 Manufacturer : SEIKO EPSON CORPORATION Address : 3-5, Owa 3-chome, Suwa-shi, Representative : EPSON EUROPE B. V. Address : Entrada 701, 1096 EJ Declares that the Product Kind of Equipment : LCD Projector Model... - Page 86 Trade Name Type of Product Model Personal Computers : EPSON AMERICA, INC. : MS: 3-13 3840 Kilroy Airport Way Long Beach, CA 90806-2469 Telephone: (562) 290- 5254 : EPSON : LCD Projector : EMP-70/50 / ELP-70/50...
- Page 87 FCC Compliance Statement For United States Users This equipment has been tested and found to comply with the limits for a Class B digital device, pursuant to Part 15 of the FCC Rules. These limits are designed to provide reasonable protection against harmful interference in a residential installation.
Need help?
Do you have a question about the EMP-70 and is the answer not in the manual?
Questions and answers