Table of Contents
Advertisement
Advertisement
Table of Contents

Related Manuals for Peloton PL-01


Summary of Contents for Peloton PL-01
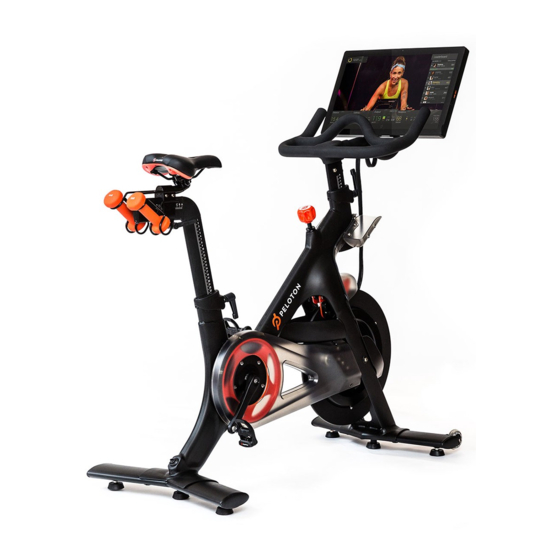
- Page 1 U S E R M A N U A L MODEL: PL-01 SKUs: PL-01 | NEW PL-01-R | REFURBISHED...
-
Page 2: Table Of Contents
TA B L E O F C O N T E N T S WA R N I N G S A N D S A F E T Y I N F O R M AT I O N Connecting To the Internet N O T I C E S Logging In... -
Page 3: Wa R N I N G S A N D S A F E T Y I N F O R M At I O N
Service other than the ensure that users are aware of all warnings and verify that all adjustment handles are fully using the Peloton Bike and remove them procedures described here must be and precautions. tightened. Loose seats or handlebars can immediately after clipping out. -
Page 4: Notic Es
This product is ANT+™ certified and AUS TRALIA determined by turning the equipment off is compatible with ANT+ sensors Peloton Interactive Australia Pty Ltd and on, the user is encouraged to try to that support heart rate monitoring. ACN 644 958 047... -
Page 5: S P E C I F I C At I O N S
S P E C I F I C AT I O N S T O U C H S C R E E N H A N D L E B A R S H A N D L E B A R P O S T S L E E V E R E S I S TA N C E K N O B / E M E R G E N C Y B R A K E H A N D L E B A R H E I G H T L- H A N D L E WAT E R B O T T L E H O L D E R... - Page 6 S P E C I F I C AT I O N S C O N T I N U E D P O W E R I N P U T P O W E R B U T T O N H E A D P H O N E J A C K V O L U M E C O N T R O L S E T H E R N E T P O R T...
-
Page 7: S U P P O R T
B I K E Q U E S T I O N S O R C O N C E R N S Footprint: 4ft x 2ft/120cm x 60cm Peloton’s #1 concern is member satisfaction. If you require assistance Weight: 135lb/61kg... -
Page 8: Location Requirements
S E T T I N G U P Y O U R B I K E L O C AT I O N R E Q U I R E M E N T S M O V I N G T H E B I K E Place the bike on a solid, level and horizontal surface. -
Page 9: Seat Height
S E T T I N G U P Y O U R B I K E C O N T I N U E D C A U T I O N : To prevent injury, always adjust the seat and handlebars to your personal S E AT D E P T H requirements. -
Page 10: Body Position
Turn L-handle counterclockwise to loosen. These adjustments should get you started. If you’re uncomfortable, or want to fine-tune Raise or lower the handlebars your bike’s settings, access Peloton 101 from the menu on your touchscreen or go to Turn L-handle clockwise to tighten. support.onepeloton.com. -
Page 11: Clipping In / Clipping Out
Do not attempt to walk in cycling shoes with cleats. Wear cycling shoes only while using the Peloton Bike and remove them immediately after clipping out. Walking on cleats may cause you to fall or twist your ankle, or otherwise result in serious injury. -
Page 12: Adjusting Resistance
P L U G G I N G I N C A U T I O N : The Peloton Bike has a direct driven flywheel; the pedals will continue to Plug the power supply into the wall. move until the flywheel stops. Reduce speed slowly. To stop the flywheel immediately, Plug the power cord into the power jack at the back of the bike. -
Page 13: Powering On And Off
G E T T I N G S TA R T E D C O N T I N U E D P O W E R I N G O N A N D O F F C O N N E C T I N G T O T H E I N T E R N E T Hold the power button for two seconds to power on the bike. -
Page 14: Logging In
Use the buttons along the bottom of the screen to view a Schedule of upcomingclasses, join Challenges, or view Programs of preselected classes. Check out our introduction to Peloton for more on adjusting your bike to fit your body and Tap More for a Scenic Ride, or to Just Ride without instruction or video. -
Page 15: C L As S Sc Re En
C L A S S S C R E E N T I M E R E M A I N I N G H E A R T R AT E * T I M E L I N E TAP E LE MEN TS TO R E VE AL OR H IDE TH E M L E A D E R B O A R D... -
Page 16: M Ainte Nanc E And C Are
Changes or modifications to this unit not diluted in water. Clean the touchscreen using an electronics wipe. expressly approved by Peloton could void the warranty. Pedals: Tighten any loose pedal with the included 15mm wrench. Pedals should be Always unplug the bike immediately after use and before cleaning or tightened to 26lb-ft/35N•m of torque. - Page 17 If it does not, stop using the bike immediately instructions, see support.onepeloton.com. and contact Peloton Support. Frame: Check the entire frame for signs of wear and damage, and tighten any loose bolts. M AINTE NANC E AND C ARE...
-
Page 18: B I Ke A S Se M B Ly
M8×12 round head screw × 2 WA R N I N G : Perform a complete M8×10 round head screw × 2 visual inspection of the Peloton Bike Flat washer × 4 and test all features and functions M5×15 Phillips head screw prior to use. - Page 19 B I K E A S S E M B LY C O N T I N U E D S P A R E P A R T S Saddle SP-03-1 Small L-handle SP-06/RP-06 Large L-handle SP-07/RP-07 Outer Belt Guard SP-11-12 Belt SP-15 Right Crank Arm SP-11-17 Left Crank Arm SP-11-19...
- Page 20 B I K E A S S E M B LY C O N T I N U E D Fit the handlebar post onto the handlebars. Make sure the letters on the post will be Add an M5×15 Phillips head screw to the hole at the end of the handlebar post. upright when the handlebar is right-side-up.
- Page 21 B I K E A S S E M B LY C O N T I N U E D Rest the bike frame on the weight holders and back foot. Remove the square panel from the back of the touchscreen. Using a Phillips Add the front stabilizer and four M8x20 socket cap screws.
- Page 22 Screw the pedals into the crank arms. The left pedal is reverse-threaded. applies only to non-commercial, in-home, Peloton warrants the frame (excluding any Using a torque wrench and a 15mm crowfoot, tighten each pedal to 26lb-ft/35N•m. Be indoor use of the new or refurbished moving parts attached to the structural careful not to over-tighten the pedals.
-
Page 23: Warrant Y
Products purchased or used Manual, the technical specifications or Peloton warrants the components and all location that is outside of Peloton’s service outside the U.S. or Canada, Products other published guidelines relating to the original parts of the original pedals that area. - Page 24 ◦ no liability for any injury to persons or a description of the nonconformity or Warranty, then without excluding, nent to Peloton or the cost of Peloton property arising from such attempted defect; and restricting or modifying any other rights collecting the relevant part(s) will be at ◦...
- Page 25 Peloton warrants the frame (excluding any that repairs may result in the loss of This limited warranty gives you specific indoor use of the new or refurbished Peloton moving parts attached to the structural that data. legal rights, and you may also have other Bike sold directly by Peloton (“Products”).
- Page 26 Data loss, including any damages or power fluctuation or power failure from part failures. Peloton Bike or Bike+, the owner of the costs related to data recovery, removal, whatever cause, unusual atmospheric original membership attached to that and installation.
- Page 27 AT Member Support to assess the claim. by this Limited Warranty and you submit nent to Peloton or the cost of Peloton YOUR OWN RISK and Peloton will have a claim to Peloton under this Limited...
- Page 28 L I M I T E D H O M E U S E WA R R A N T Y C O N T I N U E D Any disputes between you and Peloton related to this Limited Warranty or the...
- Page 29 0 0 0 0 2 - A © Peloton 2022, Peloton Interactive, Inc. All rights reserved. onepeloton.com...
Need help?
Do you have a question about the PL-01 and is the answer not in the manual?
Questions and answers