Table of Contents
Advertisement
Advertisement
Table of Contents

Subscribe to Our Youtube Channel
Related Manuals for zapco DSP6-SL


Summary of Contents for zapco DSP6-SL
-
Page 2: Table Of Contents
Sonic Purity SymbiLink™ Balanced System Zapco Digital The Zapco Digital Programming Network Addressing Components on the DPN DSP6-SL Zapco Digital – Functions and Control The PC Program The PC Programming Screen The DRC-SL In-Dash Programmer Adjustment Screen Menu Map DRC-SL Quick Menu... -
Page 3: Mission Statement
Another simple fact is that for over 30 years, ZAPCO has been the leader in defining quality standards for the car audio industry. These years of experience have led to a thorough understanding of the challenges that are unique to the world of car audio. -
Page 4: How A Balanced Signal System Works
How a Balanced Signal System Works... -
Page 5: Sonic Purity
Resistors All resistors (other than power resistors) are 1% precision low noise metal film. This is a key reason why ZAPCO products have the industries’ best low noise specifications, and why you won’t see as much fluctuation in our test certificates as you will with other brands. Precision resistors also reduce distortion and improve channel matching. -
Page 6: Symbilink™ Balanced System
By no means is this an ideal situation. Thankfully, ZAPCO has found the solution. SymbiLink™ components convert a standard unbalanced audio... -
Page 7: Zapco Digital
EQ with a multi-order crossover. In addition, all four EQ bands were parametric, so now you could customize the EQ parameters to you car. The result: By the late 80’s even non-Zapco dealers had to have a source of PX’s for all their competition cars. - Page 8 No, Zapco is not the first to put a DSP in a product. What history will remember though, is that Zapco was the first to do it right. Welcome to the World of Zapco Digital In this manual we will take you through the programming and control functions of the DRC6-SL and the on-board DSP in the Reference Digital amps as well networking operations of Zapco’s DPN system.
-
Page 9: The Zapco Digital Programming Network
The Zapco Digital Programming Network All Digital Reference amplifiers, and the ZAPCO DSP6-SL, stand-alone Digital Signal Processor incorporate Zapco’s exclusive Digital Programming Network™ (DPN). This network allows the user to program all amp functions using a DRC-SL or a PC. The amps DSP can then be programmed to control Gain, Volume, Crossover, Q-Bass, Equalization, and even Time Delay. -
Page 10: Addressing Components On The Dpn
Addressing Components on the DPN The Digital Programming Network consists of 16 amplifier/DSP nodes numbered 0 through 15. An extra node (number 16) can be occupied by the in-dash controller (DRC-SL). NOTE: Turn all amps off before setting address switches The binary numbering scheme is shown below with the DIP switch. -
Page 11: Dsp6-Sl
DSP6-SL Six Channel Digital Signal Processor Specifications Analog < 0.0015 Digital < 0.0008 S/N Ratio Analog > 99dB Digital > 100dB Sensitivity 0.25V to 10V Control Input Mini USB Dimensions 8.5”L x 7.4”W x 2.35”H... - Page 12 3) DIP Switch- Six position DIP switch is used to address the unit and assign a node on the Zapco Digital Programming Network. 4) USB Port- Like all Zapco DC products, the DSP6-SL has a USB port to interface with a PC for all DSP programming functions.
-
Page 13: Zapco Digital - Functions And Control
Processor. It has all the DSP functions of the Reference Digital amps, but, as a stand-alone piece, it brings the world of Zapco Digital to all amplifiers. The RCA inputs allow you to use the DSP6-SL with any head unit and the SymbiLink™ outputs can be connected to any SymbiLink™ amp directly, or, you can use SymbiLink™... -
Page 14: The Pc Program
DRIVER). 4) Install all drivers. Usually, you will need to install the drivers twice. 5) Run shortcut “ZAPCO DPN” from the start menu or from the desktop. Details for Windows 98: After installing the program, plug the mini-USB cable between the PC and one of the network devices. - Page 15 USB cable, go to Control Panel and open “Install New Hardware”. Your computer will search for new hardware and offer Screen C. Check “Yes, the device is on the list” and Highlight Zapco Network Amplifier. Click Next to go to Screen D.
- Page 16 At screen D, click Next to go to Screen A, and proceed as above.
- Page 17 Details for Windows 2000, XP, XP Pro: After installing the program, plug the mini-USB cable between the PC and one of the network devices. After a few moments the “Found New Hardware” screen will show. Caution: The default choice is “Install the software automatically.” Do not use this option! (A-1) Mark “Install from a specific location”...
- Page 18 At screen B, check “Include this location in the search” and browse to (C:\FTDI USB DRIVER 2). If it is not already in then use the drop down box. Then click Next to install the drivers. When the drivers start to install you will see screen C.
- Page 19 “Zapco DPN” to begin programming your Zapco Digital equipment. Program Upgrades The Zapco Digital Programming Network is an evolving entity. As it evolves we will issue program updates. As noted earlier in the section on “Addressing” your components their is an upgrade mode for each device.
- Page 20 2) Connect the PC to the network with the mini USB cable. 3) Power up the system. 4) Open the Zapco DPN program. The system will come up in Upgrade Mode as in screen 1 above. 5) Click “Start Upgrade.
-
Page 21: The Pc Programming Screen
The PC Programming Screen The PC programming screen has 5 sections. They are (top to bottom) Channel Select, Function/Graph, Equalizer, Crossover, and Input/Delay. We will consider these sections individually and we think you will find the controls very user friendly. There are numerous drop-down menus at the arrow points in the DSP screen. - Page 22 The top section of the PC screen allows you to determine which available channels you will be programming. The number of options will be determined by the Zapco Digital item you are programming. The Zapco Digital Control will identify which unit you are programming and how many channels are available.
- Page 23 • The bottom row of the EQ screen sets the center frequencies. The EQ section is a true parametric EQ. We have set factory defaults at about ½ octave intervals. However you can alter the center frequencies to fit the requirements of your car. There are numerous drop-down menus at the arrow points in the DSP screen.
- Page 24 The example below has five speakers. The chart shows how to use the delay to correct your position. With the Zapco Digital system, you need only measure the distances and enter them. The program will do all the time formulas automatically.
- Page 25 Distances: Longest Distance Delay Length 30” 75” - 30” = 45” delay 70” 75” - 70” = 5” delay 75” 75” No delay needed 60” 75” - 60” = 15” delay 20” 75” – 20” = 55” delay Adjust the delay of each speaker’s output channel to match the delay in inches (in.).
-
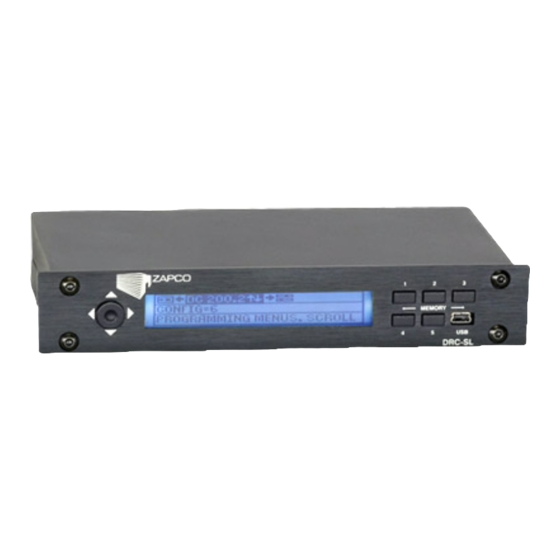
Page 26: The Drc-Sl In-Dash Programmer
The DRC-SL In-Dash Programmer Yes, this is the age of the computer and Zapco has developed a superb programming system for your PC or laptop, which we have just covered. However, while the computer program is perhaps the easiest method of controlling you Zapco Digital system, it does have a couple of major disadvantages. - Page 27 The DRC-SL All of the DSP functions of the Reference Digital series amplifiers or the Zapco DSP6-SL processor can be controlled right from your front seat, with the DRC-SL in-dash controller. A few up/down clicks of the joystick control will take you to any function and no more than four right/left clicks will take you to any adjustment.
-
Page 28: Adjustment Screen
Networking – USB Port - 4 Yes, the DRC-SL is a Zapco Digital Programming Network piece. Your DRC-SL is addressed in the network and you can control all digital functions of up to 16 amplifiers. -
Page 29: Menu Map
Adjustment Channel: Toggling the control up or down chooses the channel (or channel Pair) you will be making adjustments to. You will find you can adjust channels in pairs or individually. The choices available in this area will vary with the number of channels in the amplifier. Band: This is a sub-menu available only in the EQ Function and picks which EQ band will be adjusted within channel selection. - Page 30 Q-Bass: Adjustment channel (Channel or channel pair choices determined by amplifier). Action Screen: Freq - Allows you to choose which bass frequency will be boosted by toggling value up or down. Q - Allows you to set the slope of the bass boost by toggling the value up or down.
-
Page 31: Drc-Sl Quick Menu
Mode: Adjustment channel (Channel or channel pair choices determined by amplifier). Action Screen: Turn On - Toggle value up or down to turn functions on or off. DRC-SL Quick Menu There are three quick menu functions in the DRC-SL. These are accessed by pushing in on the joystick to the left from the Home Screen. -
Page 32: Technical Assistance
Once we issue you an RMA, please write it in a highly visible area on the package. ZAPCO will not accept any packages that do not have a valid RMA number clearly marked on the outside of the package.
Need help?
Do you have a question about the DSP6-SL and is the answer not in the manual?
Questions and answers