
Subscribe to Our Youtube Channel
Summary of Contents for Wine Enthusiast 261 02 58 03
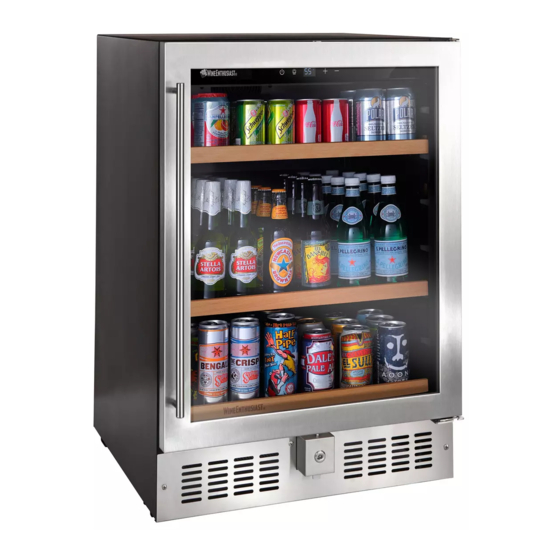
- Page 1 Vinotheque Beverage Cooler User Manual (Features and Size May Vary) Models: 261 02 58 0Y Y= 3 (Right Hinge) or 4 (Left Hinge) PLEASE READ THIS MANUAL CAREFULLY BEFORE INSTALLING AND OPERATING...
-
Page 2: Important Safeguards
IMPORTANT SAFEGUARDS When using this appliance, always exercise basic safety precautions, including the following: 1. Read all of the instructions before using this appliance. 2. This appliance is not intended for use by persons (including children) with reduced physical, sensory, or mental capabilities, or lack of experience and knowledge, unless they have been given supervision or instruction concerning use of the appliance by a person responsible for their safety. - Page 3 Risk of child entrapment. Before you throw away your old appliance, take off the door. Leave the shelves in place so that children may not easily climb inside. Thank you for using our Wine Enthusiast product. This easy-to-use manual Model number will guide you in getting the best use of your appliance.
-
Page 4: Table Of Contents
Table of Contents IMPORTANT SAFEGUARDS ..................2 Appliance Features and Use .................. 5 Initial Setup ...................... 5 Temperature Adjustment ..................6 Shelving ......................6 Replacement of Charcoal Filter ................7 Parts and Features....................7 Installation as a Built-In Cellar ................8 Reversing the Door Swing ................... -
Page 5: Appliance Features And Use
Electrical Requirement • Make sure there is a suitable power Outlet (115 volts, 15 amps outlet) with proper grounding to power the appliance. • Avoid the use of three plug adapters or cutting off the third grounding in order to accommodate a two-plug outlet. -
Page 6: Temperature Adjustment
• Once you have plugged the unit into an electrical outlet, let the unit run for at least 30 minutes to acclimate before making any adjustments. Temperature Adjustment • When the appliance is plugged in for the first time, the LED display will show the factory preset temperature. -
Page 7: Replacement Of Charcoal Filter
Replacement of Charcoal Filter Your cooler comes with a charcoal filter that helps to eliminate orders. It should be replaced every 6 to 12 months for optimal protection. To replace the filter: 1. Find the location of the charcoal filter on the back wall (air-duct plate). 2. -
Page 8: Installation As A Built-In Cellar
Installation as a Built-In These cut out dimensions show the minimum space required for your appliance to perform as designed. Reversing the Door Swing Before you begin: Tape down shelves to avoid movement during the process. The door of this appliance can be hung to open on the left or right side. To reverse the door swing of your cooler and open from the opposite side, please follow the instructions and diagram below. - Page 9 6. Rotate the door 180 degrees, then Install the door on the right side of the cabinet. (Drawing 5) 7. Finally, install the decorative covers and door support at the opposite side. (Drawing 6) 1. Decorative cover 2. Knife 3. Door Support 4.
-
Page 10: Installing The Handle
Installing the Handle 1. Pull back the door seal behind handle location. 2. Insert screws into pre-drilled screw holes. 3. Attach handle and tighten screws. 4. Press door seal back into place. Operating Your Appliance Each appliance includes an operating panel on the front of the unit. This operating panel includes several features to operate and control the temperature. -
Page 11: Before You Start
1. Press and hold for 3 seconds to unlock the display. 2. Press and hold for 1 second to turn the Power ON or 3 seconds for OFF. 3. Function button: Activates the temperature set function. 4. Light button; Turns the interior lights ON and OFF. Press and hold for 3 seconds to toggle the display between Fahrenheit and Celsius. -
Page 12: Setting The Temperature Control
Setting the Temperature Control 1. Make sure power cord is connected to a properly grounded outlet. 2. Press and hold the POWER button for 1 second to turn the power ON. 3. Press and hold the LOCK button for 3 seconds to unlock the display. 4. -
Page 13: Temperature Alarm
• Boiling water, gurgling sounds or slight vibrations that are the result of the refrigerant circulating through the cooling coils. • The thermostat control will click when it cycles on and off. Technical Data Model 261 02 58 03/04 Total Volume 5.15 Cu. Ft. Installation Free-Standing or Built-In... -
Page 14: Proper Appliance Care And Cleaning
Proper Appliance Care and Cleaning Cleaning and Maintenance Warning: To avoid electric shock always unplug your appliance before cleaning. Ignoring this warning may result in death or injury. Caution: Before using cleaning products, always read and follow manufacturer’s instructions and warnings to avoid personal injury or product damage. General: •... -
Page 15: Troubleshooting
Power Interruptions • Occasionally there may be power interruptions due to thunderstorms or other causes. Remove the power cord from AC outlet when a power outage occurs. When power has been restored, wait 3 to 5 minutes then re-plug the power cord to AC outlet. - Page 16 Beverage temperature is too cold: • If temperature control setting is too cold, adjust to a warmer setting. Appliance runs too frequently: • This may be normal to maintain constant temperature during high • temperature and humid days. • Doors may have been opened frequently or for an extended period of time. •...
-
Page 17: Limited Warranty
What We Will Do: During the Limited Warranty Period, Wine Enthusiast and/or the manufacturer will, at its sole discretion, repair or replace any appliance not operating within the manufacturer’s specifications. - Page 18 Limited Warranty. Exclusion of Certain Damages: Wine Enthusiast’s liability is limited to replacement or repair of the defective appliance. Wine Enthusiast shall not be liable for any damages, whether incidental, consequential or otherwise, because of any defective appliance.
Need help?
Do you have a question about the 261 02 58 03 and is the answer not in the manual?
Questions and answers