Table of Contents

Related Manuals for Ninglu SR362


Summary of Contents for Ninglu SR362
- Page 1 NINGLU SR362 Steering Repeater Operating & Installation Manual NINGLU TECHNOLOGY CO., LTD. 105-2 Da Ming Road Nanjing City, China NLT-SR362-SSEN Doc No.: Phone: 86-25-52614640 ext. 8820 V140301 Version: URL: http://www.sounder.com.cn...
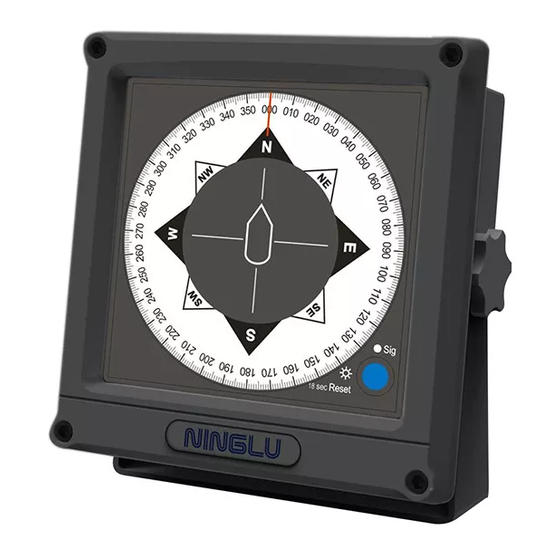
- Page 2 INSTRUCTION Steering repeater SR362 ensures a clear indication of the heading information by using a 360°compass card. Brightness is adjusted on the front panel, via NMEA or from the optional remote controller, DIM930. Multiple installation methods facilitate observation in different positions.
- Page 3 SPECIFICATIONS Dimension: 218 (L) × 202(W) × 64(H) mm 170×170mm (6.693×6.693 inch) Flush mounting window size: Weight: about 2Kg Supply voltage: DC18~36V reverse-polarity and over-current protection Power consumption: ≤ 8.4W(DC 24V) Indication range: 0 ~ 359° Reading accuracy: ±1° Data format: NMEA0183 sentence $--HDT,x.x,T*hh<CR><LF>...
- Page 4 OPERATION Panel introduction ②Indicating arrow ①Backlight ③Signal light ④Reset key 6-level adjustable LED backlight ①Backlight: Indicating arrow Indication of the heading ② ③Signal light: Indication of working status 1. Normal mode: Signal monitor Signal correct: green (continuous) Signal incorrect: red (flash) 2.
- Page 5 OPERATION 1. Boot-strap (self-calibration) Connected with MEA0183 gyro signal and power supply, SR362 will auto start self-calibration to 0° while signal light is red (continuous). ATTENTION! Please avoid direct sunshine during self-calibration! Otherwise it may cause calibration failure. 2. Common mode When self-calibration, unit auto identify the NMEA0183 signal and turn into common mode.
- Page 6 After calibrating to 0°, stop all operation, then the signal light will flash quicker and quicker until be green (continuous) which means common mode. REMOTE DIMMER (optional) DIM930 can is used for remote control of the SR362 backlight. WIRING Supply voltage: DC24 (DC18V~DC36V)
- Page 7 INSTALLATION The unit can be mounted in panel, table, wall or ceiling. Table/Wall/Ceiling Screws Mounting Bracket Front Frame Panel Panel (Flush) 1. For tabletop mounting, wall or ceiling mounting use the supplied bracket. 2. For panel (flush) mounting, take off the bracket and take off the front frame.
Need help?
Do you have a question about the SR362 and is the answer not in the manual?
Questions and answers