Table of Contents
Advertisement
Advertisement
Table of Contents

Related Manuals for DXG DXG-328


Summary of Contents for DXG DXG-328
- Page 1 DXG-328 User’s Manual Version 2.0 07/01/04...
-
Page 2: Table Of Contents
Chapter 1 Attention 1-1 Safety Precautions………...…...…..…...2 1-2 Before Using Your Camera……...……...2 1-3 Operating Precautions.…...……...2 1-4 Package Contents………...………..…...3 Chapter 2 Getting to Know Your Camera 2-1 Features Overview……...…………...…...4 2-2 Specifications...………...…...6 2-3 System Requirements……………………………………………6 Chapter 3 Controls, Operation, and Display 3-1 LED Indicators………...…...………...8 3-2 LCD Monitor Display………...…...8 3-3 Power Supply.…………………………………..…………...9 3-4 Shutter Button………...………...9... -
Page 3: Chapter 1 Attention
●Copyright information Unless agreed to by the rightful owner, pictures taken with this digital camera cannot be used in violation of copyright law. Moreover, when "No Photography" restrictions are in place, you may not record performances, improvisations or exhibits, even for personal purpose. -
Page 4: Package Contents
4. Locations full of smoke, oil fumes or steam. 5. Locations subject to strong magnetic fields. 6. Rainy or snowy environments. Camera Do’s and Don’ts: ● Do not open the battery cover when the power is ● If water gets into the camera, turn the power OFF and remove the batteries immediately. -
Page 5: Chapter 2 Getting To Know Your Camera
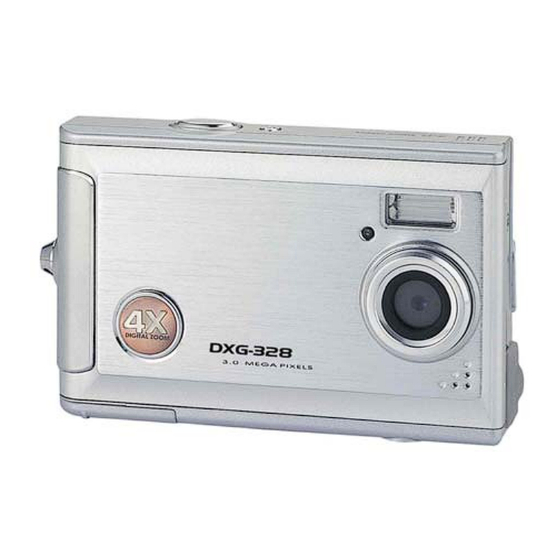
2. Getting to Know Your Camera 2-1 Features Overview Front View (1) Shutter (2) Flash (3) Lens (4) Power Switch (5) Strap Holder (6) Battery Cover (7) Memory Card Slot (8) Tripod Socket... -
Page 6: Rear View
Rear View (1) Macro LED (2) Status LED (3) Mode Display Button (4) Mode Button (5) Set Button (6) Function Key (7) Macro Lens Switch (8) USB Port Cover (9) USB Port (10) LCD Monitor... -
Page 7: Specifications
2-3 System Requirements When operating the digital camera, we strongly recommend you use a better computer system for optimal performance; however, the minimal system requirement for digital camera use is as follows: System Requirements Microsoft Windows 98SE/Me/2000/XP Intel Pentium 166MHz or higher... - Page 8 System requirement (Macintosh Computer) Mac OS 8.6~9.2, Mac OS X 10.1 or above PowerPC 601 processor or higher Memory 64 MB memory or above Minimum 10MB free disk space on the hard drive Others One standard USB 1.1 or USB 2.0 port and CD-ROM...
-
Page 9: Chapter 3 Controls, Operation, And Display
3. Controls, Operation, and Display 3-1 LED Indicators The meanings of the LED indicators located on the top of the LCD monitor are: Macro LED Standby/Busy (Green LED) (Red LED) Macro (Left The green LED turns on when Green LED) the Macro key on the left hand side of the camera is switched to Macro mode. -
Page 10: Power Supply
3-3 Power Supply ● Depress the power button until a long beep sounds. Power is on. ● Depress the power button sound until a long beep sounds. Power is off. ● Depress the power button to turn on the camera. After the camera is on, the red LED will blink, and then the last image recorded will appear on the LCD monitor. -
Page 11: Mode Button
3-5 Mode Selection ●Please press and hold the ” seconds to enter mode selection menu including “Play Mode” “Setup Mode” “Record Mode" and "Function Selection” 3-6 Function Keys ● Use the Function Keys to navigate the display in its various modes (rotate icons, change selections). 3-7 ”SET”... -
Page 12: Chapter 4 Navigating Modes And Menus
4-1 Record Mode ↑ For more information, please refer to section 3-2, "LCD Monitor Display," page 8. Index for Quick Menu: Press MODE to enter Press Mode again to Exit... -
Page 13: Playback Mode
DPOF (Digital Print Order Format) allows for tagging of images on memory cards for printing. DPOF allows digital camera users to define what images are to be printed on compatible print devices. Basically, it is a set of text files in a special directory in the digital camera’s storage files. -
Page 14: Movie Mode
DPOF Tip: ※ The DPOF function is only enabled when a memory card is inserted. 4-3 Movie Mode (1) Movie Mode (2) Recorded Movie Time (seconds) (3) Recording (4) Remaining Battery Power (5) Time/Date... -
Page 15: Setup Mode
4-4 Setup Mode 1. Image Resolution 2976x2232 1280x960 2. Image Quality (Fine Quality) 3. White Balance 2048x1536 1600x1200 4. EV Compensation (Basic Quality) (Auto) (Sun) (Fluorescent) (Bulb) - Page 16 5. OSD Language 6. Date/Time 7. Light Frequency Select the correct frequency type (50Hz or 60Hz) according to your region. 8. Format Media ※ If a memory card has been inserted, only the memory card is formatted, and not the internal memory.
-
Page 17: Pc Mode
4-5 PC Mode... -
Page 18: Chapter 5 Preparing Your Camera
5. Preparing Your Camera 5-1 Attaching the Strap ●Insert the thin end of the strap into the strap holder. ●Pass the other end of the strap through the loop. ●Pull the strap tight. 5-2 Loading Batteries ● Turn the camera off. ●... -
Page 19: Loading And Removing The Memory Card
● Close and lock the battery cover. NOTE: Open the cover gently to avoid damaging the battery compartment cover. Battery Tips: ※ If the battery power indicator shows only one black block, the flash light is disabled. ※ When the battery indicator turns red, you can no longer record still pictures and movies. -
Page 20: Setting Up The Osd Language
● The memory card should pop up automatically. Remove the memory card in direction indicated by the arrow (see illustration). Attention: Before using the camera, please remember to insert the memory card into the slot. If the memory card is full or contains unwanted images/files, you can press the Mode Button to the Setup Mode... -
Page 21: Chapter 6 Getting Started
6-1 Setup Mode In Setup Mode, you can adjust settings, including Image Size, Image Quality, White balance, and EV Compensation; format and factory default setting. Setup language, date/time, and light frequency as follows: 1. Turn the camera on. 2. Press Mode Button for two seconds and use the Function keys to move to... -
Page 22: Play Mode
hand side of the camera is toggled to Macro Mode. ※ If the battery icon indicates low power, change the batteries immediately to maintain normal operation. ※ The countdown for the Self-timer is 10 seconds. ※ There are 4 basic resolutions offered by the camera: 2048x1536, 1600x1200, 1280x960, and 800x600, from highest to lowest. -
Page 23: Pc Mode
8. You can now use the removable disk feature (SD device). ● PC Camera To use the digital camera either as a PC camera or a Web Cam: 1. Install the camera driver (see Chapter 7, “Driver Installation”) on your PC if you have not already done 2. - Page 24 disk” and press Function key storage. 6. Connect the USB cable to the camera and the PC when the USB Connection icon appears. 7. You can operate the PC camera with the software that comes with the companion CD, or webcam software.
-
Page 25: Chapter 7 Driver Installation
7. Driver Installation 7-1 Installing the Camera Driver for PC The camera’s Mass Storage and PC Camera functions are used in conjunction with a personal computer. To install the camera driver: 1. Insert the software CD-ROM supplied by the package into the CD-ROM drive. -
Page 26: Installing The Pc Applications
7-2 Installing the PC Applications Arcsoft application installation (Example given: Photo Impression) 1. Insert the software CD-ROM supplied by the package into the CD-ROM drive. 2. The software installation menu screen appears: (If the screen above does not appear, it may be because your CD-ROM drive doesn't support auto-run, in which case please double click on the "My Computer"... - Page 27 7. Follow the installation wizard instructions to select 8. Select the folder where you want to install the the folder location and application components. program.
- Page 28 9. After installation the following window will appear. Press Finish to complete the application installation.
-
Page 29: Chapter 8 File Transfers
Double click on the My Computer icon. Eject any CDs in the CD-ROM drive. Find an icon representing the digital camera. Double click on the icon. Double click on file folder, labeled DCIM. Double click on file folder, labeled 100COACH. - Page 30 The information in this document is believed to be reliable,but no responsibility is assumed for inaccuracies. DXG Technology reserves the right to make changes to the items described herein to improve reliability, function or design. Neither DXG nor any of its...
Need help?
Do you have a question about the DXG-328 and is the answer not in the manual?
Questions and answers