Table of Contents
Advertisement
Advertisement
Table of Contents

Related Manuals for DXG DXG 552


Summary of Contents for DXG DXG 552
- Page 1 User’s Manual Model 552...
-
Page 2: Table Of Contents
Content Chapter 1 Attention 1-1 Safety Precautions………..……………………..………...…...……3 1-2 Before Using Your Camera……...……………………………...3 1-3 Operation Warnings……...…..…...4 1-4 Package Contents………...…...………...5 Chapter 2 Getting to Know Your Camera 2-1 Names of Parts………...……...…...…...…...6 2-2 Attaching the Strap ...……...…...…...…...8 2-3 Loading the Batteries...….9 2-4 Loading & Removing the Memory Card ..…..………………………10 2-5 Setting Up the On Screen Language..…………………….…………..11 2-6 Setting Up the Date/Time ..………………………..……….……………..11 Chapter 3 Controls, Operation, and Display... - Page 3 Chapter 5 Driver Installation 5-1 Installing the Camera Driver ……………………….………...………..26 Chapter 6 Software Application 6-1 NewSoft Application Installation…... ……...27 Appendix A: PictBridge Errors Appendix B: Specifications Appendix C: System Requirements Installation...
-
Page 4: Chapter 1 Attention
DXG and no compensation will be provided for it. ●Copyright information Any pictures taken with this digital camera must be in accordance with copyright law. When "No Photography" signs are posted, it is illegal to record even for personal purpose. Any transfer of memory card data must also be conducted under the provisions of copyright law. -
Page 5: Operation Warnings
1-3 Operation Warnings This product consists of intricate electrical parts. To ensure optimal performance, do not drop or hit the camera. ●Avoid using or placing the camera in the following locations: 1. Damp and dusty places. 2. Sealed vehicles, direct sunlight exposure areas, or places with extreme high temperatures or heat. -
Page 6: Package Contents
1-4 Package Contents Please check if the following items are in the package when purchasing this product. Please call DXG technical support immediately if something is missing. 1. CD-ROM (incl. Camera Driver) 4.USB CABLE ●CD-ROM (incl. Camera Driver) ●Pouch ●Wrist Strap ●2 x AAA Alkaline Batteries ●USB Cable ●User's Manual... -
Page 7: Chapter 2 Getting To Know Your Camera
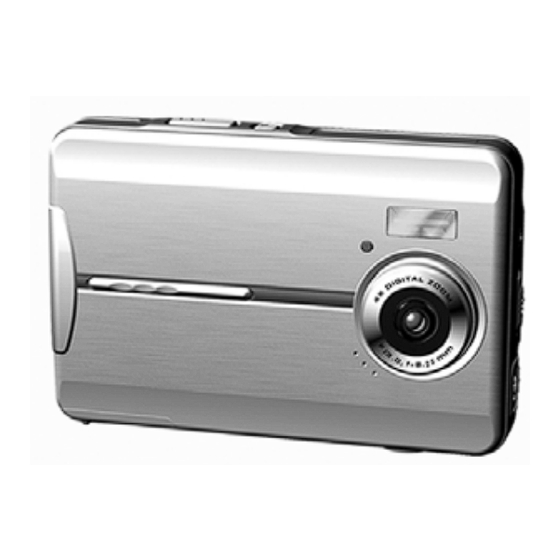
2. Getting to Know Your Camera 2-1 Names of Parts Front View (1) Shutter Button (2) Power Button (3) Self-timer LED (4) Flash (Strobe) (5) Lens (6) Wrist Strap Holder (7) Battery Cover (8) SD Memory Card Slot (9) Tripod Socket (10) Microphone... -
Page 8: Rear View
Rear View (1) Macro LED (2) Status (Busy) LED (3) Playback Button (4) Mode Button (5) Flash/Set Button (6) “Previous” and “Next” Keys (7) Macro Switch (8) USB Cover (9) USB Port (10) LCD screen... -
Page 9: Attaching The Strap
Attaching the Strap ●Insert the thin end of the strap into the strap holder. ●Pass the other end of the strap through the loop. ●Pull the strap tightly. -
Page 10: Loading The Batteries
2-3 Loading the Batteries ●First, turn the camera off. ●Insert 2 x AAA alkaline or Ni-MH rechargeable batteries. Make sure the batteries are fully charged. If the batteries are low on power, change the batteries as soon as possible to maintain optimal operation. ※... -
Page 11: Loading & Removing The Memory Card
If you are using an optional SD memory card, remember to insert the memory card first before turning on the camera. ● There is 32MBs of internal memory built into this digital camera for Image Storage. If a memory card is inserted, images will be saved to the card, not the internal memory. -
Page 12: Setting Up The On Screen Language
●To avoid damage to the SD card or camera, do not remove the SD card while recording or playing back images. ● If the memory card is inserted the wrong way, it will not fit. Do not force the card or you could cause damage to the card of camera. ●... -
Page 13: Chapter 3 Controls, Operation, And Display
3. Controls, Operation, and Display 3-1 LED Indicators The LEDs located on the top of the LCD screen indicate: Macro LED (Green LED) (Red LED) Macro (Left Green LED) Busy (Right Red LED) 3-2 LCD Screen Standby/Busy The green LED will be on when the Macro switch on the left hand side of the camera is switched to Macro mode. -
Page 14: Power Supply
3-3 Power Supply To turn on the camera, press down the power button. ● To turn off the camera, press the power button again. ● When the camera is turned on, the red indicator will briefly illuminate ● and the LCD screen will come on. This camera is equipped with power saving software. -
Page 15: Shutter Button
3-4 Shutter Button This camera is designed for a 2-step shutter function. A "[ ]" mark will ● appear in the center of the LCD screen when the Shutter button is pressed and held half way down. Press and then release the Shutter button to take a picture;... -
Page 16: Image/Movie Playback Button
3-8 Image/Movie Playback Button 1. Press the Playback view). Capture Mode → Playback Mode → Capture Mode Movie Mode → Playback Mode → Movie Mode Press the Shutter button to play the video and press it again to pause the video. Press either of the “Previous” or “Next” keys to stop the video. -
Page 17: Chapter 4 Taking Pictures And Playback
4. Taking Pictures and Playback Mode Selection Menu This mode is the entry of other modes. Under any situation, once the MODE button is pressed and held, the camera will enter to this mode. Press the “Prev” or “Next” button to select one of other modes. Press the Flash/Set Button, to enter the selected mode. -
Page 18: Taking A Picture (Picture Mode)
4-2 Picture Mode The Picture mode is the mode the camera is in when powered on. It is for taking digital still pictures. Taking a picture: (1) Press and hold the Shutter button halfway down; a yellow “[ ]" will appear in the center of the LCD screen. -
Page 19: Recording A Movie (Movie Mode)
(6) The green LED will be on when the Macro key on the left hand side of the camera is toggled to the Macro Mode. (7) Press the button to enter to playback mode. (8) Once connected to TV, the LCD power will shut off automatically, and the images will then be displayed on TV screen. -
Page 20: Reviewing Your Pictures (Playback Mode)
Under the situation, the user can complete four types of settings which include AWB setting, resolution setting, image quality setting and EV setting. (5) Press and hold the MODE button for one second to enter to mode selection menu. (6) Press the button to enter to playback mode. - Page 21 displayed. You can press the “Prev” and “Next” buttons to choose a specific image or movie. Press the Flash/Set Button to view in full screen. When reviewing movie, you can press the Shutter button to start or pause the movie and the “Prev” and “Next” buttons to stop playing the movie.
- Page 22 picture on it will be displayed on TV screen. (11) If you entered the playback mode by pressing the capture mode or movie mode, you will return the previous mode when you press the (12) If you press the MODE button quickly, the camera system will exit the menu page and return to the picture being played back.
-
Page 23: Setup Mode
Press the “Prev” button to enter to the PICTBRIDGE menu page. Then press the Flash/Set Button to enter the sub menu. ※ When you enter the PICTBRIDGE menu page, the camera will flash an icon of a cable which indicates you must insert a USB/AV cable that is connected to a printer. - Page 24 Menu items: Copy to Card This allows you to copy files stored in the internal memory to the SD card. Make sure you have inserted an SD card with available memory. Click OK. The camera will copy the files within a DCIM directory in the 100FSCAM file. If there is an existing photo file with the same name it will create another, in a numeric sequence (i.e.
-
Page 25: Transferring Pictures To Your Computer (Pc Mode)
Both modes will ask for a USB cable to be connected. ● Mass Storage This digital camera has the ability to function like a card reader or removable hard drive. Mass Storage allows you to “see” your files on your camera. - Page 26 ● PC Cam This digital camera can be used as a PC camera (webcam). 1. If you are running an operating system OTHER than Windows XP or 2000, please follow the steps of “Driver Installation” to complete the installation of the camera driver.
-
Page 27: Driver Installation
5. Driver Installation 5-1 Installing the Camera Driver on a PC If you are using Windows XP or 2000, you should not install this driver. If you have installed This driver allows users of older operating systems like Windows 98SE use the "Mass Storage"... - Page 28 6. Software Application Installation 6-1 NewSoft Application Installation (In case of MP38) This is for installation of the NewSoft Application Software. If you have other video editing or photo viewing software you would like to use, this step is optional. 1.
- Page 29 Appendix A: PictBridge Errors Type Value Description Paper related error (default) Paper is empty Load Error – paper not loaded correctly Eject Error – paper not ejected correctly Paper Media Error – paper not detected, paper skewed, roll paper cannot cut or turn off Paper jam Paper nearly empty Paper type / paper size combination not supported or paper...
- Page 30 Appendix B: Specifications ● Lens: ME shutter + Iris. f=8.25mm ● Image Sensor: 5.13 Mega pixels CMOS sensor ● TFT LCD: 2” ● Focus: Fno: 3.0/8.0 ● Sensitivity: ISO 100 ● White Balance: Auto, Sunny, Tungsten, Fluorescent. ● Shutter Speed: 1/4 sec. ~ 1/2000 sec. ●...
- Page 31 Appendix C: System Requirements The minimal PC system requirements for using this digital camera are as follows: (For Macintosh computers, only removable disk is applicable). Memory CD-ROM Others Macintosh Computer Requirement Mac OS 8.6~9.2, Mac OS X 10.1 or above...
Need help?
Do you have a question about the DXG 552 and is the answer not in the manual?
Questions and answers