Table of Contents
Advertisement
Advertisement
Table of Contents

Related Manuals for DXG DXG DXG-308


Summary of Contents for DXG DXG DXG-308
- Page 1 DXG-308 User’s Manual...
-
Page 2: Table Of Contents
Table of Contents Chapter 1 Attention 1-1 Safety Precautions ...….…...2 1-2 Before Using Your Camera ...……..…...2 1-3 Operating Precautions...…...………..3 1-4 Package Contents ...…………...3 Chapter 2. Getting to Know Your Camera 2-1 Features Overview…..………...……...4 2-2 Specifications...….…..…..……...6 2-3 System Requirements……………………………………..…6 Chapter 3. Controls, Operation, and Display 3-1 LED Indicators………...…...…….….…...7 3-2 LCD Monitor Display………...…..…...7 3-3 Power Supply.…………………………………………..……...8... -
Page 3: Chapter 1 Attention
Always take test shots before formal recording. ● Always observe intellectual property rights Pictures taken with this digital camera may not be used in violation of copyright laws. Moreover, when "No Photography" restrictions are in place, do not record any live performance, improvisation or exhibit, even for personal and non-commercial purposes. -
Page 4: Operating Precautions
1-3 Operating Precautions This product consists of intricate electrical parts. To ensure normal photography, do not drop, strike or hit the camera. ● Avoid using or placing the camera in the following locations: Damp and dusty places. Sealed vehicles or places exposed to direct sunlight or places subject to extremely high temperatures or heat. -
Page 5: Chapter 2 Getting To Know Your Camera
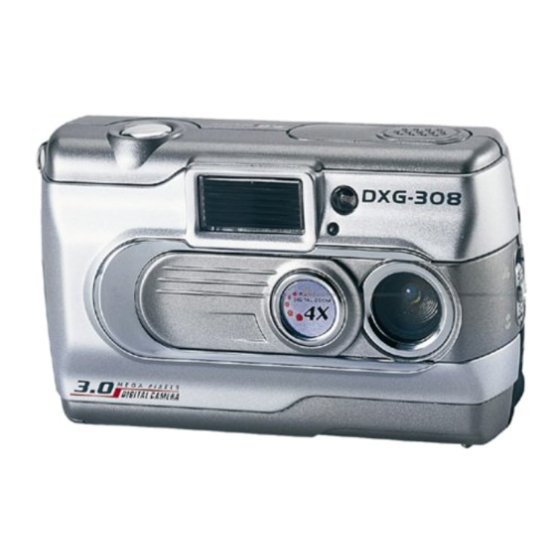
Chapter 2 Getting to Know Your Camera 2-1 Features Overview Front View (1) Flash (2) Lens Cover/Power Switch (3) Lens (4) Shutter Button (5) Self-Timer LED (6) Red-Eye Reduction LED (7) Macro Switch (8) Terminator Cover (9) TV-OUT Port (10) USB Port (1) Flash (2) Lens Cover/Power Switch (3) Lens... -
Page 6: Rear View
Rear View (1) LCD Monitor (2) Mode Display Button (3) Mode Dial (4) Status LED (5) Macro Mode LED (6) ENTER Button (7) Multi-Select Button (8) Strap Holder (9) Flash Button (10) Battery Cover (11) Memory Card Slot (1) LCD Monitor (2) Mode Display Button (3) Mode Dial (4) Status LED... -
Page 7: Specifications
● Weight: About 120g (batteries excluded) 2-3 System Requirements The following are minimum system requirements for the digital camera. We recommend that you use a computer system that exceeds the minimum requirements in order to utilize the camera at its optimum efficiency. The minimum... -
Page 8: Chapter 3 Controls, Operation, And Display
Chapter 3 Controls, Operation, and Display 3-1 LED Indicators The meanings of the LED indicators located above the LCD monitor are: Standby/Busy Macro Mode (Red LED) (Green LED) LED Status The red LED turns on when the camera is recording or when the batteries are charging the flash. -
Page 9: Power Supply
3-3 Power Supply ● Slide the lens cover to the left to turn on the camera. ● Slide the lens cover towards the right to turn off the camera. ● Use the lens cover to turn the camera on and off. After turning on the camera, the red busy LED blinks, then the last recorded image appears on the LCD monitor. -
Page 10: Mode Dial
3-5 Mode Dial ● Select a working mode by using the Mode Dial: 1. PC Mode Record Mode Play Mode Movie Mode Setup Mode 3-6 Multi-Select Button You can perform various operations in different modes by using the Multi-Select button, for example, select, confirm, go forward and go back. -
Page 11: Macro Switch
3-9 Macro Switch ● Use the Macro switch on left side of the camera to select either Basic (normal lens) or Macro (close-up) mode. When you select Macro, the green macro LED turns on. Basic Macro ※ In Macro Mode the flash is disabled automatically to avoid overexposure. -
Page 12: Chapter 4 Navigating Modes And Menus
Chapter 4 Navigating Modes and Menus 4-1 Record Mode Quick Index of Menus (for Reference): For more information, please refer to section 3-2 “LCD Monitor Display,” page 7. -
Page 13: Play Mode
3. DPOF (Digital Print Order Format) Settings. DPOF (Digital Print Order Format) allows for tagging of images on memory cards for printing. DPOF allows digital camera users to define what images are to be printed on compatible print devices. Basically, it is a set of text files in a special directory in the digital camera’s storage files. -
Page 14: Movie Mode
Page Up Page Down 4-3 Movie Mode 4-4 Setup Mode 1. Image Resolution 2976x2232 1280x960 (1) Movie Mode (2) Movie Length (3) Record Indicator (4) Battery Power Level (5) Time/Date 2048x1536 1600x1200... - Page 15 2. Image Quality: (Fine Quality) 3. White Balance: (Auto) (Fluorescent) 4. EV (Exposure Value) Compensation (Basic Quality) (Sun) 5. OSD Language (Tungsten)
-
Page 16: Mode Selection
6. Date / Time 7. TV-Out Operation 8. Light Frequency Select the correct frequency (50Hz or 60Hz) for your region. (USA=60Hz) 9. Format Media ※ If a memory card has been inserted, only the memory card is formatted, and not the internal memory. 10. -
Page 17: Chapter 5 Preparing Your Camera
Chapter 5 Preparing Your Camera 5-1 Attaching the Strap ● Insert the thin end of strap into the strap holder. ● Pass the other end of strap through the loop. ● Stretch the strap tightly. 5-2 Loading Batteries ● Turn the camera off. ●... -
Page 18: Loading And Removing The Memory Card
● Insert batteries as indicated on the inside cover. ● Close and lock the battery cover. NOTE: Open the cover gently to avoid damaging the battery compartment cover. Battery Tips: ※ If the battery power indicator shows only one black block, the flash is disabled. - Page 19 2. To remove the memory card ● Press the memory card down gently. ● The memory card will bounce upward. ● Pull the memory card out with your fingers as shown. NOTE: Before using the camera, please remember to insert the memory card into the slot.
-
Page 20: Setting Up The Osd Language
● LCD monitor will display card is present. ● LCD monitor will display card is loaded and working properly. In case the LCD monitor still displays with the card inserted, consider the following possible cause and solutions: -Image format can’t be recognized by camera: Save image data to PC for backup, then format the memory card. -
Page 21: Chapter 6. Getting Started
Chapter 6: Getting Started 6-1 Setup Mode In Setup Mode, you can adjust the camera’s basic functions, including Image Size, Image Quality, Self-timer, White Balance, EV Compensation, OSD Language, Date/Time, Preset Settings, Format Media, and TV-Out. To set these options: 1. -
Page 22: Play Mode
※If the "Memory is not enough!" warning message appears on the LCD Monitor, the memory card is full. 6-3 Play Mode In Play Mode, users can review recorded stills and movies. To review: 1. Turn the Mode Dial to Play Mode 2. -
Page 23: Tv-Out Operation
PC Camera and Mass Storage options will appear on the LCD Monitor. 2. Press the arrow buttons Button Button to move and select the desired option. Press the save the settings. 3. The message will pop up on the LCD Monitor. Connect the USB cable to the camera and PC to complete the configuration. -
Page 24: Chapter 7 Driver Installation
Chapter 7 Driver Installation 7-1 Installing the Camera Driver for PC You can use the PC Camera and Mass Storage functions of the camera via PC. To install the driver: 1. Insert the companion CD-ROM supplied with the camera into the CD-ROM drive. 2. -
Page 25: Installing The Applications For Pc
7-2 Installing Applications for PC Install the Arcsoft Software (example given: Photo Impression). 1. Insert the companion CD-ROM supplied with the camera into the CD-ROM drive. 2. The Auto-run program execute and a welcome screen appears: (Note: If your CD-ROM drive does not automatically run the CD install program, double click the "My Computer"... - Page 26 7. Follow the installation Wizard to select a destination 8. Select the program folder you want to install folder and components. 9. When the installation is complete, the window below will appear. Click Finish to end the installation.
-
Page 28: Chapter 8 File Transfers
Double click on the My Computer icon. Eject any CDs in the CD-ROM drive. Find an icon representing the digital camera. Double click on the icon. Double click on file folder, labeled DCIM. - Page 29 Press the Enter Button on the Multi-Select Button to select PC Camera; a flashing USB cable icon appears on the display. 5. Connect the USB cable between the camera and the computer. 6. Open your web chat software. Click on the appropriate icon or menu selection to start the camera and use the web chat software to broadcast images via the Internet.
Need help?
Do you have a question about the DXG DXG-308 and is the answer not in the manual?
Questions and answers