
Subscribe to Our Youtube Channel
Related Manuals for Dual XPE1700


Summary of Contents for Dual XPE1700
- Page 1 XPE1700 XPE2700 XPE4700 XPE SERIES INSTALLATION/OWNER’S MANUAL Mobile Power Amplifiers...
- Page 2 XPE SERIES INSTALLATION Preparation Please read entire manual before installation. Due to the technical nature of amplifiers, it is highly recommended that your DUAL amplifier is installed by a professional installer or an authorized dealer. Before You Start • Disconnect negative battery terminal. (consult a qualified technician for instructions) •...
-
Page 3: Connection Descriptions
NOTE Be sure to follow specific instructions included with your amplifier installation kit (not included with this amplifier). The information below should be used a general guideline only. Power Wire (+12V) • Disconnect negative battery terminal before proceeding. Consult a qualified technician for instructions if you are unsure. • Plan wire routing before cutting any wires to length. Begin by routing the power +12V wire from the battery to the amplifier location. Use a grommet when running wires through the firewall or metal openings. - Page 4 GAIN FREQUENCY SPEAKER X-OVER INPUTS GAIN FREQUENCY 50Hz INPUT MODE GAIN X-OVER 4CH 2CH SPEAKER INPUTS PHASE XPE1700 BASS BOOST 0FF 6dB 12dB 500Hz XPE2700 FREQUENCY BASS BOOST FRONT 0FF 6dB 12dB 50Hz 500Hz REAR 0FF 6dB 12dB 50Hz 500Hz...
-
Page 5: Power And Speaker Connections
Power and Speaker Connections POWER BAT + POWER BAT + XPE2700 POWER BAT + Ground Connection Remote Connection +12VDC Battery Connection XPE SERIES INSTALLATION SPEAKER FUSES SPEAKERS FUSE LEFT SPEAKERS BRIDGE FUSES LEFT Fuse(s) Speaker Connection(s) XPE1700 BRIDGE RIGHT RIGHT FRONT REAR XPE4700... -
Page 6: Typical Wire Routing
When replacing fuses, make sure new fuse is the correct type and amperage. Using an incorrect fuse could damage the amplifier. XPE1700 30 amp ATO x 2 XPE2700 30 amp ATO x 1 XPE4700 25 amp ATO x 2 (TURN-ON LEAD) Power/Ground Wire Size... -
Page 7: Input Signal Connections
Speaker Connections Connect speaker wires observing polarity. The minimum impedance load for the XPE2700 and XPE4700 is 2 ohms stereo and 4 ohms bridged. Use of loads lower than these is not recommended and may cause amplifier damage. The XPE2700 and XPE4700 can be wired for stereo, bridged or stereo/bridged simultaneous operation. -
Page 8: Configuration/Setup
XPE SERIES OPERATION Configuration/Setup Input level Control Input Mode Switch (XPE4700) Crossover Mode Crossover Frequency Control Bass Boost LED Indicator The input level control (gain) is used to obtain the best possible match between the head unit audio output and the amplifier input. Begin by turning the input level control fully counterclockwise. -
Page 9: Limited One-Year Warranty
Dual Electronics Corp. agrees, at our option, during the warranty period, to repair any defect in material or workmanship or to furnish an equal... -
Page 10: Specifications
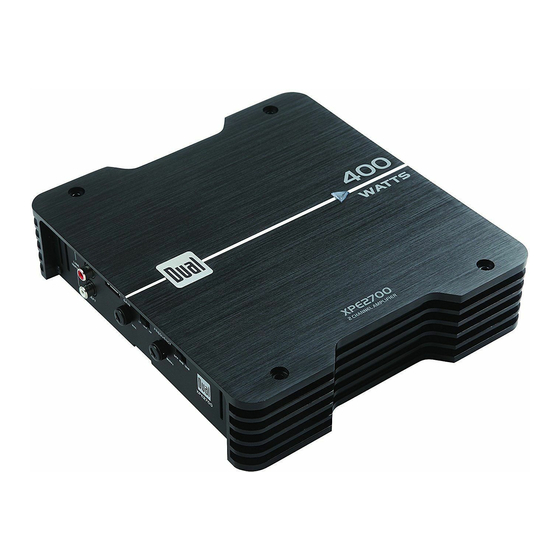
XPE SERIES OPERATION Specifications Power XPE1700 240 Watts RMS x 1 channel @ 4 ohms and ≤ 1% THD+N 400 Watts RMS x 1 channel @ 2 ohms and ≤ 1% THD+N Total dynamic power: 1000 Watts Signal to noise ratio: 75dBA (reference: 1 watt into 4 ohms) Frequency response: 20Hz ~ 20kHz (-3dB) Amplifier dimensions: 8.95”(L) x 13.3”(W) x 2.06”(D) Typical installation dimensions: 11”(L) x 15”(W) x 3.25”(D) Power 50 Watts RMS x 2 channels @ 4 ohms and ≤ 1% THD+N XPE2700 75 Watts RMS x 2 channels @ 2 ohms and ≤ 1% THD+N 150 Watts RMS x 1 channel @ 4 ohms (bridged) and ≤ 1% THD+N Total dynamic power: 400 Watts @ 4 ohms Signal to noise ratio: 75dBA (reference: 1 watt into 4 ohms) Frequency response: 20Hz ~ 20kHz (-3dB) Amplifier dimensions: 8.95”(L) x 8.82”(W) x 2.06”(D) Typical installation dimensions: 11”(L) x 11”(W) x 3.25”(D) Power XPE4700 50 Watts RMS x 4 channels @ 4 ohms and ≤ 1% THD+N 75 Watts RMS x 4 channels @ 2 ohms and ≤ 1% THD+N 150 Watts RMS x 2 channel @ 4 ohms (bridged) and ≤ 1% THD+N Total dynamic power: 800 Watts @ 4 ohms Signal to noise ratio: 75dBA (reference: 1 watt into 4 ohms) Frequency response: 20Hz ~ 20kHz (-3dB) Amplifier dimensions: 8.95”(L) x 14.1”(W) x 2.06”(D) Typical installation dimensions: 11”(L) x 16”(W) x 3.25”(D) CEA-2006 Power Standard Specifications (reference: 14.4VDC, 20Hz~20kHz) Output (14.4VDC, 20Hz ~ 20kHz): CEA-2006 Power Standard Specifications (reference: 14.4VDC, 20Hz~20kHz) - Page 11 XPE SERIES OPERATION Notes...
-
Page 12: Troubleshooting
4 ohms when bridged Check connections and reduce/adjust input level Check connections and increase/adjust input level Check (+) and (-) speaker connections (Observe correct polarity) Dual Electronics Corp. Toll Free: 1-866-382-5476 www.dualav.com ©2010 Dual Electronics Corp. NSA0610-V01 Action...
Need help?
Do you have a question about the XPE1700 and is the answer not in the manual?
Questions and answers