Denon DRA-395 Operating Instructions Manual
Denon am-fm stereo receiver operating instructions dra-395
Hide thumbs
Also See for DRA-395:
- Service manual (125 pages) ,
- Operating instructions manual (30 pages) ,
- Specifications (2 pages)
Table of Contents
Advertisement
Available languages
Available languages
AM-FM STEREO RECEIVER
DRA - 395
OPERATING INSTRUCTIONS
MODE D'EMPLOI
B
CDR / TAPE
ON / STANDBY
FOR ENGLISH READERS
We greatly appreciate your purchase of this unit.
2
To be sure you take maximum advantage of all the
2
features this unit has to offer, read these instructions
carefully and use the set properly. Be sure to keep this
manual for future reference should any questions or
problems arise.
"SERIAL NO.
PLEASE RECORD UNIT SERIAL NUMBER ATTACHED TO
THE REAR OF THE CABINET FOR FUTURE REFERENCE"
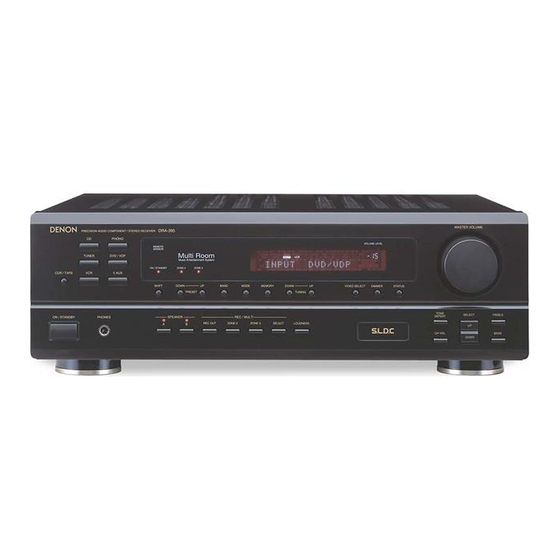
DRA-395
PRECISION AUDIO COMPONENT / STEREO RECEIVER
CD
PHONO
REMOTE
SENSOR
Multi Room
TUNER
DVD / VDP
Music Entertainment System
ON / STANDBY
ZONE 2
ZONE 3
VCR
V.AUX
SHIFT
DOWN
UP
BAND
MODE
MEMORY
PRESET
PHONES
SPEAKER
REC / MULTI
A
B
REC OUT
ZONE 2
ZONE 3
SELECT
PAGE 02 ~ PAGE 26
MASTER VOLUME
VOLUME LEVEL
DOWN
UP
VIDEO SELECT
DIMMER
STATUS
TUNING
TONE
SELECT
DEFEAT
LOUDNESS
UP
DOWN
CH VOL
POUR LES LECTEURS FRANCAIS
Nous vous remercions pour l'achat de cet appareil.
2
Pour être sûr de profiter au maximum de toutes les
2
caractéristiques qu'offre cet appareil, lire avec soin ces
instructions et bien utiliser l'appareil. Toujours
conserver ce mode d'emploi pour s'y référer
ultérieurement en cas de question ou de problème.
"NO. DE SERIE
PRIERE DE NOTER LE NUMERO DE SERIE DE L'APPAREIL
INSCRIT A L'ARRIERE DU COFFRET DE FAÇON A POUVOIR LE
CONSULTER EN CAS DE PROBLEME."
OFF
POWER
ON
RANDOM
6
7
8
9
DISC SKIP +
CD
REPEAT
3
2
1
A / B
4
REC
3
2
ON
MAIN
TAPE
6
7
0
1
OFF
ZONE 2
ZONE 3
MULTI ROOM
•
•
ON
ON
VOLUME
VOLUME
OFF
ª
OFF
ª
TUNER
PHONO
V. AUX
VCR
DVD / VDP
CD
PHONO
DVD / VDP
•
PRESET
CDR / TAPE
CD
VCR
ª
A
SPEAKER
B
TUNER
CDR / TAPE
V. AUX
DIMMER
CH VOL
SHIFT
•
•
STATUS
•
PRESET
MASTER VOL
VIDEO SELECT
MUTING
ª
ª
ª
TREBLE
B
REMOTE CONTROL UNIT RC-894
BASS
PAGE 2, 27 ~ PAGE 49
Advertisement
Chapters
Table of Contents

Related Manuals for Denon DRA-395


Summary of Contents for Denon DRA-395
- Page 1 Be sure to keep this manual for future reference should any questions or problems arise. “SERIAL NO. PLEASE RECORD UNIT SERIAL NUMBER ATTACHED TO THE REAR OF THE CABINET FOR FUTURE REFERENCE” DRA-395 VOLUME LEVEL Multi Room Music Entertainment System ZONE 2 ZONE 3...
-
Page 2: Safety Precautions
ENGLISH FRANCAIS SAFETY PRECAUTIONS CAUTION RISK OF ELECTRIC SHOCK DO NOT OPEN CAUTION: REDUCE THE RISK OF ELECTRIC SHOCK, DO NOT REMOVE COVER (OR BACK). NO USER-SERVICEABLE PARTS INSIDE. REFER QUALIFIED SERVICE PERSONNEL. The lightning flash with arrowhead symbol, within an equilateral triangle, is intended to alert the user to the presence of uninsulated “dangerous voltage”... -
Page 3: Safety Instructions
SAFETY INSTRUCTIONS Read Instructions – All the safety and operating instructions should be read before the appliance is operated. Retain Instructions – The safety and operating instructions should be retained for future reference. Heed Warnings – All warnings on the appliance and in the operating instructions should be adhered to. -
Page 4: Table Of Contents
ENGLISH INTRODUCTION Thank you for choosing the DENON AM-FM Stereo receiver. This remarkable component has been engineered to provide outstanding high fidelity reproduction of your favorite music sources. As this product is provided with an immense array of features, we recommend that before you begin hookup and operation that you review the contents of this manual before proceeding. -
Page 5: Cautions On Installation
4. Remote Control Functions The Remote Control (RC-894) commands not only the receiver but can also operate the main functions of a DENON CD player and a cassette deck. External remote control equipment, such as DENON's RC-616 and RC-617, can be connected to this unit. By connecting such... -
Page 6: Connections
ENGLISH 5 CONNECTIONS • Do not plug in the power cord until all connections have been completed. • Be sure to connect the left and right channels properly (left with left, right with right). • Insert the plugs securely. Incomplete connections will result in the generation of noise. - Page 7 Connecting the video equipments • To connect the video signal, connect using a 75 /ohms video signal cable cord. Using an improper cable can result in a drop in sound quality. • When making connections, also refer to the operating instructions of the other components. TV or DBS tuner AUDIO VIDEO...
-
Page 8: Connecting The Antenna Terminals
ENGLISH Connecting the antenna terminals DIRECTION OF FM ANTENNA BROADCASTING STATION 75 /ohms COAXIAL CABLE FM INDOOR ANTENNA (An Accessory) FM ANTENNA ADAPTER (An Accessory) AM loop antenna assembly Remove the vinyl tie and take out the connection line. a. With the antenna on top any stable surface Mount... -
Page 9: Speaker System Connections
Speaker system connections • Connect the speaker terminals with the speakers making sure that like polarities are matched ( < with < , > with > ). Mismatching of polarities will result in weak central sound, unclear orientation of the various instruments, and the sense of direction of the stereo being impaired. -
Page 10: Part Names And Functions
If the protection circuit is activated again even though there are no problems with the wiring or the ventilation around the unit, switch off the power and contact a DENON service center. • The protector circuit may be activated if the set is played for long periods of time at high volumes when speakers with an impedance lower than the specified impedance (for example speakers with an impedance of lower than 4 are connected. -
Page 11: Remote Control Unit
7 REMOTE CONTROL UNIT Following the procedure outlined below, insert the batteries before using the remote control unit. Range of operation of the remote control unit 30° Approx. 7 m/23 feet Inserting the batteries For remote control unit (RC-894) q Press as shown by the arrow and slide off. -
Page 12: Remote Control Unit (Rc-894)
ENGLISH Remote control unit (RC-894) • For details on the functions of these parts, refer to the pages given in parentheses ( ). 8, 9 : Auto search (reverse and forward) 6, 7 : Manual search (reverse and forward) : Play : Stop : Pause RANDOM : RANDOM... -
Page 13: Operations
8 OPERATIONS Before operating POWER RANDOM DISC SKIP + REPEAT A / B MAIN TAPE ZONE 2 ZONE 3 MULTI ROOM • • VOLUME VOLUME ª ª TUNER PHONO V. AUX DVD / VDP PHONO DVD / VDP • PRESET CDR / TAPE ª... - Page 14 ENGLISH Playing the program source MAIN ZONE 2 ZONE 3 • • VOLUME VOLUME ª ª TUNER PHONO V. AUX PHONO • PRESET CDR / TAPE ª SPEAKER TUNER CDR / TAPE DIMMER CH VOL SHIFT • STATUS • PRESET VIDEO SELECT MUTING ª...
- Page 15 Adjusting the CHANNEL LEVEL, TONE, and LOUDNESS control MAIN TAPE ZONE 2 ZONE 3 MULTI ROOM • • VOLUME VOLUME ª ª TUNER PHONO V. AUX DVD / VDP PHONO DVD / VDP • PRESET CDR / TAPE ª SPEAKER TUNER CDR / TAPE V.
- Page 16 The ZONE 2/3 mode cannot be selected from the remote control unit when the main unit is set to the REC OUT mode. With ZONE 2/3 ROOM playback, the this unit and DENON CD players or tape decks etc, can be controlled using the included remote control unit.
- Page 17 Multi-Source recording/playback The Multi-Source function allows you to record a source other than the source currently playing or to output its signal to the MULTI ZONE output terminal. [1] Playing one source while recording another (REC OUT mode) 1, 4 DISPLAY Press the REC OUT button.
- Page 18 ENGLISH [2] Playing a source other than the one currently playing in a different room (MULTI mode) 1, 4 RANDOM REPEAT DISC SKIP + A / B MAIN ZONE 2 ZONE 3 • • VOLUME VOLUME ª ª TUNER PHONO V.
- Page 19 Simulcast playback Use this switch to monitor a video source other than the audio source. PHONO DVD / VDP • PRESET CDR / TAPE ª SPEAKER TUNER CDR / TAPE V. AUX DIMMER CH VOL SHIFT • • STATUS • PRESET MASTER VOL VIDEO SELECT...
- Page 20 ENGLISH Checking the currently playing program source, etc. When an operation is performed on the remote control unit, that operation appears on the display, making it possible to check the operation visually. The set’s operating status can also be checked on the display using the procedure described below. TUNER PHONO V.
-
Page 21: Listening To The Radio
LISTENING TO THE RADIO Auto preset memory This unit is equipped with a function for automatically searching for FM broadcast stations and storing them in the preset memory. DEFAULT VALUE AUTO TUNER PRESETS A1 ~ A8 87.5/89.1/98.1/107.9/90.1/90.1/90.1/90.1 MHz B1 ~ B8 520/600/1000/1400/1500/1710 kHz/90.1/90.1 MHz C1 ~ C8 90.1 MHz... - Page 22 ENGLISH Auto tuning Manual tuning Set the input function to “TUNER”. Watching the display, press the BAND button to select the desired band (AM or FM). NOTE: • When the manual tuning mode is set, FM stereo broadcasts are received in monaural and the “STEREO” indicator turns off. Set the input function to “TUNER”.
-
Page 23: Preset Memory
Preset memory 1, 4 ª SPEAKER TUNER CDR / TAPE V. AUX DIMMER CH VOL SHIFT • • STATUS • PRESET MASTER VOL VIDEO SELECT MUTING ª ª ª REMOTE CONTROL UNIT RC-894 Recalling preset stations ª SPEAKER TUNER CDR / TAPE V. -
Page 24: Initialization Of The Microprocessor
ENGLISH 10 INITIALIZATION OF THE MICROPROCESSOR When the indication of the display is not normal or when the operation of the unit does not shows the reasonable result, the initialization of the microprocessor is required by the following procedure. 11 LAST FUNCTION MEMORY •... -
Page 25: Troubleshooting
12 TROUBLESHOOTING If a problem should arise,first check the following. 1. Are all connections correct ? 2. Have you operated the receiver according to the Operating Instructions ? 3. Are the speakers, turntable other components operating property ? If this unit is not operating properly, check the items listed in the table below. Should the problem persist, there may be a malfunction. Disconnect the power immediately and contact your store of purchase. -
Page 26: Specifications
ENGLISH 13 SPECIFICATIONS • Audio section (Power amplifier) Rated output: Output terminals: (Analog) LINE input — PRE OUT Input sensitivity/input impedance: Frequency response: S/N ratio: Total harmonic distortion: Rated output: PHONO input — REC OUT Input sensitivity/input impedance: RIAA deviation: S/N ratio: Total harmonic distortion: Rated output/Maximum output:... - Page 27 INTRODUCTION Nous vous remercions d’avoir choisi le récepteur radio FM - AM stéréo DENON. Ce remarquable composant a été fabriqué pour assurer une reproduction haute fidélité remarquable de vos sources musicales favorites. Ce produit étant équipé d’une immense foule de caractéristiques, nous vous recommandons avant de commencer l’installation et l’utilisation de l’appareil de bien lire le contenu de ce manuel avant de procéder.
-
Page 28: Précautions D'installation
DENON. Les télécommandes de l’équipement externe, RC-616 et RC-617 DENON, peuvent être connectées à cet appareil. La connexion ce dispositif et l’utilisation de la télécommande RC-894 dans une autre pièce (ZONE 2 ou 3) permettent d’activer et de désactiver la sortie de la pièce secondaire, la sélection de la source de la... -
Page 29: Connexions
5 CONNEXIONS • Ne pas brancher le cordon d’alimentation avant d’avoir terminé toutes les connexions. • Toujours connecter correctement les canaux de gauche et de droite (gauche avec la gauche et droite avec la droite). • Insérer fermement les fiches. Des connexions incomplètes peuvent générer des parasites. - Page 30 FRANCAIS Connexion des composants vidéo • Pour connecter le signal vidéo, connecter en utilisant un câble de signal vidéo de 75 une baisse de la qualité du son. • Lors des connexions, se reporter également aux instructions d’utilisation des autres composants. Téléviseur ou tuner AUDIO VIDEO...
-
Page 31: Fm Antenna Adapter
Connexion des bornes d’antennes DIRECTION DE ANTENNE FM STATION DE RADIODIFFUSION CABLE COAXIAL DE 75 /ohms 300 /ohms Antenne intérieure FM (Fourni) BORNES ADAPTATEUR D'ANTENNE FM 300 /ohms (Fourni) Ensemble d’antenne-cadre AM Connecter aux bornes d’antenne AM. Défaire le noeud en Plier dans la vinyle et sortir la direction inverse. - Page 32 FRANCAIS Connexions du système d’enceintes • Connecter les bornes d’enceinte aux enceintes en respectant les polarités ( < au < , > au > ). Si les polarités ne sont pas respectées, un son central faible est entendu, l’orientation des divers instruments n’est pas correcte et le sens de la direction du son stéréo est détérioré.
-
Page 33: Nomenclature Et Fonctions
Si le circuit de protection est à nouveau activé bien qu’il n’y ait pas de problème de câblage ou de ventilation autour de l’appareil, couper l’alimentation, et contacter un centre d’entretien DENON. Remarque sur l’impédance des enceintes •... -
Page 34: Unité De Télécommande
FRANCAIS 7 UNITE DE TELECOMMANDE En suivant la procédure expliquée ci-dessous, insérer les piles avant d’utiliser la télécommande. Plage d’utilisation de la télécommande 30° Approx. 7 m/23 pieds Insertion des piles Pour télécommande (RC-894) q Appuyer de la manière indiquée par la flèche, et retirer en glissant. - Page 35 Unité de télécommande (RC-894) • Pour les détails sur les fonctions de ces pièces, se reporter aux pages données entre parenthèses ( ). 8, 9 : Recherche automatique (en arrière et en avant) 6, 7 : Recherche manuelle (en arrière et en avant) : Lecture : Arrêt : Pause...
-
Page 36: Opérations
FRANCAIS 8 OPERATIONS Avant l’utilisation POWER RANDOM DISC SKIP + REPEAT A / B MAIN TAPE ZONE 2 ZONE 3 MULTI ROOM • • VOLUME VOLUME ª ª TUNER PHONO V. AUX DVD / VDP PHONO DVD / VDP • PRESET CDR / TAPE ª... - Page 37 Lecture de la source de programme MAIN TAPE ZONE 2 ZONE 3 MULTI ROOM • • VOLUME VOLUME ª ª TUNER PHONO V. AUX DVD / VDP PHONO DVD / VDP • PRESET CDR / TAPE ª SPEAKER TUNER CDR / TAPE V.
- Page 38 FRANCAIS Réglage de la commande CHANNEL LEVEL (niveau du canal) et LOUDNESS (compensation physiologique) MAIN TAPE ZONE 2 ZONE 3 MULTI ROOM • • VOLUME VOLUME ª ª TUNER PHONO V. AUX PHONO • PRESET CDR / TAPE ª SPEAKER TUNER CDR / TAPE DIMMER...
- Page 39 La mode de ZONE 2/3 ne peut pas être sélectiommé à partir de la télécommande lorsque l'unité est réglée en mode REC OUT. Lors de l’utilisation de la lecture ZONE 2/3 ROOM, cet appareil et les lecteurs de CD et platines cassettes DENON peuvent être commandés à...
- Page 40 FRANCAIS Enregistrement/lecture de source multiple La fonction de source multiple vous permet d’enregistrer une source autre que la source actuellement reproduite ou de sortir son signal vers la borne de sortie de source multiple. [1] Lire une source tout en enregistrant une autre (mode REC OUT (sortie d’enregistrement)) 1, 4 Affichage Appuyer sur la touche REC OUT.
- Page 41 [2] Lecture d’une source autre que celle en cours de lecture dans une autre pièce (MULTI) mode 1, 4 RANDOM DISC SKIP + REPEAT A / B MAIN TAPE ZONE 2 ZONE 3 MULTI ROOM • • VOLUME VOLUME ª ª...
- Page 42 FRANCAIS Lecture simultanée Utiliser cette touche pour contrôler une source vidéo autre que la source audio. PHONO • PRESET CDR / TAPE ª SPEAKER TUNER CDR / TAPE DIMMER CH VOL SHIFT • STATUS • PRESET VIDEO SELECT MUTING ª ª...
- Page 43 Vérification de la source programme actuellement en cours de reproduction, etc. Lorsqu’une commande est éxecutée à partir de la télécommande, cette commande apparaît sur l’affichage, ce qui rend sa vérification possible visuellement. L’état de service de l’appareil peut également être vérifié sur l’affichage en utilisant la procédure décrite ci-dessous. TUNER PHONO V.
-
Page 44: Ecouter De Là Radio
FRANCAIS ECOUTER DE LA RADIO Mémoire préréglée automatique Cet appareil est équipé d’une fonction de recherche automatique d’émissions de radiodiffusion en FM et de leur stockage dans la mémoire préréglée. VALEUR PAR DEFAUT AUTO TUNER PRESETS A1 ~ A8 87,5/89,1/98,1/107,9/90,1/90,1/90,1/90,1 MHz B1 ~ B8 520/600/1000/1400/1500/1710 kHz/90,1/90,1 MHz C1 ~ C8... - Page 45 Syntonisation automatique Syntonisation manuelle Régler la fonction d’entrée à “TUNER”. En regardant l’affichage, appuyer sur la touche BAND (bande) pour sélectionner la bande désirée (AM ou FM). REMARQUE: • Lorsque le mode de syntonisation manuelle est réglé, les émissions en stéréo FM sont reçues en mode monaural et le témoin “STEREO” s’éteint.
- Page 46 FRANCAIS Mémoire préréglée 1, 4 ª SPEAKER TUNER CDR / TAPE V. AUX DIMMER CH VOL SHIFT • • STATUS • PRESET MASTER VOL VIDEO SELECT MUTING ª ª ª REMOTE CONTROL UNIT RC-894 Rappel de stations préréglées ª SPEAKER TUNER CDR / TAPE V.
-
Page 47: Initialisation Du Microprocesseur
10 INITIALISATION DU MICROPROCESSEUR Lorsque l’indication de l’affichage est anormale ou quand l’utilisation de l’appareil ne donne pas les résultats escomptés, le microprocesseur doit être initialisé en suivant la procédure suivante. 11 MEMOIRE DE DERNIERE FONCTION • Cet appareil est équipé d’une mémoire de dernière fonction qui stocke les conditions des réglages d’entrée et de sortie telles qu’elles étaient immédiatement après la mise hors tension. -
Page 48: Depistage Des Pannes
FRANCAIS 12 DEPISTAGE DES PANNES Si un problème se produit, vérifier d’abord les points suivants: 1. Les connexions sont-elles correctes ? 2. L’ampli-tuner a-t-il été utilisé conformément au mode d’emploi ? 3. Les enceintes, la platine tourne-disque et les autres appareils fonctionnent-ils correctement ? Si cet appareil ne fonctionne pas correctement, vérifier les points énumérés dans le tableau ci-dessous. -
Page 49: Spécifications
SPECIFICATIONS • Section audio (Amplificateur de puissance) Puissance de sortie nominale: Bornes de sortie: Analogique (Analog) Entrée LINE — PRE-OUT Sensibilité d’entrée/Impédance d’entrée: Réponse en fréquence: Rapport signal/bruit: Distorsion harmonique totale: Niveau de sortie nominal: Entrée PHONO — REC OUT Sensibilité... - Page 50 14-14, AKASAKA 4-CHOME, MINATO-KU, TOKYO 107-8011, JAPAN Telephone: (03) 3584-8111 Printed in China 511 3791 007...
Need help?
Do you have a question about the DRA-395 and is the answer not in the manual?
Questions and answers