Table of Contents
Advertisement
Quick Links
Advertisement
Table of Contents

Related Manuals for Feasa Low Light LED Analyser


Summary of Contents for Feasa Low Light LED Analyser
- Page 1 FEASA LED ANALYSER LOW LIGHT FUNCTIONAL VERSION User Manual for Low Light LED Analyser Feasa Enterprises Ltd, Holland Road, National Technology Park, Castletroy, Limerick, Ireland. www.feasa.ie Email: sales@feasa.ie Rev. 3.0 Date: October 2021...
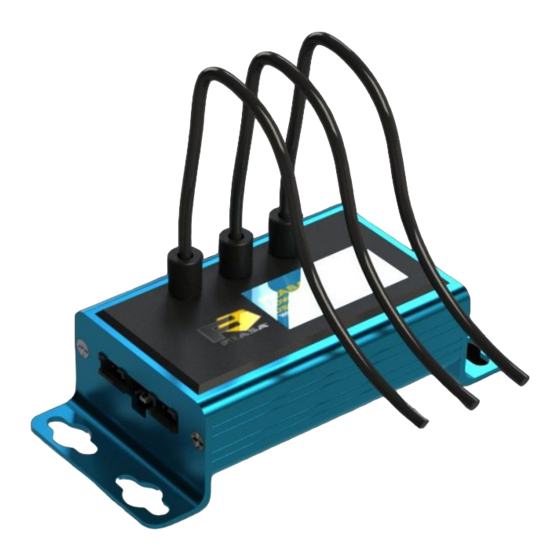
- Page 2 This manual is written for models Feasa Low Light Led Analysers. The model numbers are Feasa 3-A, 5-A, 6-A and 10-A. The Feasa 10-A model is a 10 channel unit which will test up to 10 LEDs while the Feasa 3-A is a 3 channel unit testing up to 3 LEDs.
-
Page 3: Table Of Contents
FEASA LED ANALYSER LOW LIGHT FUNCTIONAL VERSION Table of Contents Introduction............................5 IMPORTANT INFORMATION for Programmers................6 Colour and Saturation...........................7 Intensity..............................9 White LED's............................10 Setting Tolerance Limits for Color and Intensity................11 Physical Layout..........................12 USB Port Control..........................12 Serial Port Control..........................13 Capture Commands........................15 AUTO CAPTURE - Store LED Data ..................16... - Page 4 FEASA LED ANALYSER LOW LIGHT FUNCTIONAL VERSION set/putXOFFSET##0.xxx - Set the x Chromaticity Offset............45 set/putYOFFSET##0.xxx - Set the x Chromaticity Offset............46 getXOFFSET## - Return the x Chromaticity offset..............47 getYOFFSET## - Return the y Chromaticity offset..............48 set/putWAVELENGTHOFFSET@@±## - Set the wavelength Offset........49...
-
Page 5: Introduction
FUNCTIONAL VERSION Introduction The Feasa Low Light Analyser is an instrument that tests the Color and Intensity of Light Emitting Diodes (LEDs) in a Test Process. It has been specifically designed to test Leds in low light situations such as backlit Switches and Panels. -
Page 6: Important Information For Programmers
FEASA LED ANALYSER LOW LIGHT FUNCTIONAL VERSION IMPORTANT INFORMATION for Programmers set / put Commands The Set / Put commands are used to adjust various settings in the LED Analyser such as Intensity, Exposure and offsets. The Set commands are written to the on-board Flash. -
Page 7: Colour And Saturation
– the greater the amount of white the closer it will be to the center. The Feasa Led Analyser output of Saturation is NOT part of the International System of Units. and is not an absolute or traceable unit of colour measurement. It is part of the Hue Saturation and Relative intensity (HSI) system of describing colour. - Page 8 FEASA LED ANALYSER LOW LIGHT FUNCTIONAL VERSION The RGB and Hue values in Figure 2 show how different Colour LEDs can be identified. SATURATION 100% Green Blue Yellow Orange White See Page 10 Figure 2. The RGB or Hue values are used to identify different Colour LEDs.
-
Page 9: Intensity
FEASA LED ANALYSER LOW LIGHT FUNCTIONAL VERSION Intensity Intensity is a measure of the amount of light being emitted by the LED. The Analyser tests the Intensity of each LED and outputs this value to the Test System. The value is output as a number in the range 0-99,999. -
Page 10: White Led's
FEASA LED ANALYSER LOW LIGHT FUNCTIONAL VERSION White LED's White LED's must be treated differently to coloured LED's when being tested. White is not a colour – it is a mix of all other colours. The three Primary colours Red, Green and Blue will be mixed in approximately equal proportions to display a White colour. - Page 11 64000 56000 Bright LED Figure 5b. Note:- the Relative Intensity Value will depend on the Range selected. Note:- Feasa recommends selecting a Capture Range to achieve Relative Intensity Reading of 55K to 85K for the best results. Back to Index...
-
Page 12: Physical Layout
This shows the layout of the Connectors viewed from the edge of the board. Figure 6a shows the physical layout of the Feasa Low Light Analyser Front Panels. Figure 6b shows the physical layout of the Feasa Low Light Analyser Rear Panels. - Page 13 FEASA LED ANALYSER LOW LIGHT FUNCTIONAL VERSION Serial Port Control For serial communications the LED Analyser must be connected from the 3-pin Serial Connector to the PC or Controller using the supplied serial cable. 5V DC @ 200mA must be supplied to the 2-pin Power Connector using the Power Cable provided.
-
Page 14: Capture Commands
Analyser. This program is also available as a drop down function of the USER and Test Software programs. The Feasa LED Analyser User Program is a graphical tool that can be used to send commands and receive results from the Analyser. -
Page 15: Auto Capture - Store Led Data
FEASA LED ANALYSER LOW LIGHT FUNCTIONAL VERSION Capture Mode AUTO CAPTURE - Store LED Data Transmit Receive Capture Description This Auto Range Capture instructs the LED Analyser to capture and store the data of all the LED's positioned under the fibers. The Analyser automatically determines the correct settings to capture the LED data based on the Intensity. -
Page 16: Manual Capture - Store Led Data For A Specific Range
Capture2 There are 5 manual capture ranges each with an intensity output range of 0 to 99,999. Feasa recommends that the UUT readings should be in the 55K to 85K range for the best stability. Back to Index... -
Page 17: Get Data Commands
FEASA LED ANALYSER LOW LIGHT FUNCTIONAL VERSION Capture Mode Get Data Commands The get data commands are used to read out the Color, Saturation and Intensity data stored by the capture commands. The data from the last capture command remains in memory until a new capture command is issued or the power is removed from the Analyser. -
Page 18: Getrgbi## - Get Rgb And Intensity For A Led
FEASA LED ANALYSER LOW LIGHT FUNCTIONAL VERSION Get Data Mode getRGBI## - Get RGB and Intensity for a LED Transmit Receive getrgbi## iiiii getrbgiall Where: ## represents the Fiber Number and is a number in the range 01 – 10. -
Page 19: Gethsi## - Get Hue, Saturation And Intensity
## represents the Fiber Number and is a number in the range 01 – 10. represents the 10 Fibers in a Feasa 10A, or 3 Fibers in a 3A. hhh.hh represents the Hue (color) and is a number in the range 0.00 – 360.00. -
Page 20: Getxy## - Return The Xy Chromaticity Values
Where: represents the Fiber Number and is a number in the range 01 – 10. represents the 10 Fibers in a Feasa 10A, or 3 Fibers in a 3A. 0.xxxx represents the x Chromaticity value 0.yyyy represents the y Chromaticity value... -
Page 21: Getuv## - Return The U'v' Chromaticity Values
0.uuuu 0.vvvv getuvall Where: represents the Fiber Number and is a number in the range 01 – 10. represents the 10 Fibers in a Feasa 10A, or 3 Fibers in a 3A. 0.uuuu represents the u Chromaticity value 0.vvvv represents the v Chromaticity value... -
Page 22: Getwavelength## - Get The Dominant Wavelength
Where: represents the Fiber Number and is a number in the range 1 – 10. represents the 10 Fibers in a Feasa 10A, or 3 Fibers in a 3A. represents the dominant wavelength of the LED in nanometers. Description This command is used to get the value of the Dominant Wavelength for the LED under the Fiber number ##. -
Page 23: Getwi## - Get The Dominant Wavelength & Intensity
Where: represents the Fiber Number and is a number in the range 1 – 10. represents the 10 Fibers in a Feasa 10A, or 3 Fibers in a 3A. represents the dominant wavelength of the LED in nanometers. YYYYY represents the intensity of the LED. -
Page 24: Getcct## - Get The Correlated Colour Temperature
Where: represents the Fiber Number and is a number in the range 1 – 10. represents the 10 Fibers in a Feasa 10A, or 3 Fibers in a 3A. ccccc represents the Correlated Colour Temperature of the LED. d.dddd represents the perpendictular distance the LED is from the Plankian locus (Delta E). -
Page 25: Getintensity## - Get The Intensity
Where: represents the Fiber Number and is a number in the range 01 – 10. represents the 10 Fibers in a Feasa 10A, or 3 Fibers in a 3A. IIIII represents the Intensity value. Description This command is used to get the Intensity value for the LED under the Fiber number ##. -
Page 26: Getabsint@@ Get The Absolute Intensity Value Of The Led Under Test
#.####e±## Where: represents the Fiber Number and is a number in the range 01 – 10. represents the 10 Fibers in a Feasa 10A, or 3 Fibers in a 3A. #.####e±## represents the Intensity reading Description: This command will allow the user to interrogate the Led Analyser to return the absolute Intensity Value for the Led under test at Fiber@@. -
Page 27: Getfactor - Get The Exposure Factor
FEASA LED ANALYSER LOW LIGHT FUNCTIONAL VERSION Get Data Mode getfactor - Get the exposure Factor Transmit Receive getfactor Where: represents the exposure factor value 01 to 15. The default value is 01. Description This command is used to get the exposure factor value for all Fibers. -
Page 28: Getabsint@@ Get The Absolute Intensity Value Of The Led Under Test
#.####e±## getabsintall Where: represents the Fiber Number and is a number in the range 01 – 10. represents the 10 Fibers in a Feasa 10A, or 3 Fibers in a 3A. #.####e±## represents the Intensity reading Description: This command will allow the user to interrogate the Led Analyser to return the absolute Intensity Value for the Led under test at Fiber@@. -
Page 29: Getaverage - Get The Number Of Captures To Average
FEASA LED ANALYSER LOW LIGHT FUNCTIONAL VERSION Get Data Mode getaverage - Get the number of Captures to Average Transmit Receive getaverage Where: represents the number of Captures that are averaged and is a number in the range 01 – 15. -
Page 30: Getbaud- Get The Baud Rate
The default Port settings of the Analyser are 57,600, 8 Data bits, 1 Stop bit and No Parity. It can also be seen on the comment section of the Feasa terminal window. Example: To get the baud rate of the Analyser transmit the command getbaud to the Analyser. -
Page 31: Gethw - Get The Hardware Version
Where: XX-YY is an alphanumeric value. Description This command will return the hardware version the Analyser. Example: The PC transmits gethw to the LED Analyser an it will return Feasa XX-YY to the PC. gethw Feasa 10-A Back to Index... -
Page 32: Getstatus - Get A Summary Of The Led Analyser Details
FEASA LED ANALYSER LOW LIGHT FUNCTIONAL VERSION General Commands getSTATUS - Get a summary of the Led Analyser details Transmit Receive getstatus See details below Information Received back from the Analyser: Hardware: Feasa xx-y Serial number : Xyyy Firmware Version : Iyyy... -
Page 33: Getserial Get The Serial Number Of The Analyser
FEASA LED ANALYSER LOW LIGHT FUNCTIONAL VERSION General Commands getSERIAL Get the Serial Number of the Analyser Transmit Receive getSerial xxxx Where: xxxx is an alphanumeric value. (Always 4 characters) Description This command will return the Serial Number of the Analyser. -
Page 34: Getversion - Get The Firmware Version
FEASA LED ANALYSER LOW LIGHT FUNCTIONAL VERSION General Commands getVERSION - Get the Firmware Version Transmit Receive getVersion xxxx Where: xxxx is an alphanumeric value. (Always 4 characters) Description This command will return the Version Number of the firmware in the Analyser. -
Page 35: Eot - End Of Transmission Character
The EOT command is ENABLED by default. To disable EOT simply send the command disableeot using Feasa Terminal software. The Analyser will maintain the EOT state even when powered off. To enable the state just send the command enableeot. -
Page 36: Set Data Mode
FEASA LED ANALYSER LOW LIGHT FUNCTIONAL VERSION Set Data Mode General Set Commands IMPORTANT INFORMATION for Programmers set / put Commands The Set / Put commands are used to adjust various settings in the LED Analyser such as Intensity, Exposure and offsets. -
Page 37: Set/Putfactor## - Set The Exposure Factor
FEASA LED ANALYSER LOW LIGHT FUNCTIONAL VERSION Set Data Mode set/putFACTOR## - Set the Exposure Factor Transmit Receive setfactor## putfactor## Where: represents the Factor Number and is in the range 01 – 15 (default 01). Description This command allows the user to adjust the Exposure Factor for all Fibers. -
Page 38: Setaverage - Set The Number Of Captures To Average
FEASA LED ANALYSER LOW LIGHT FUNCTIONAL VERSION Set Data Mode setaverage - Set the number of Captures to Average Transmit Receive setaverage## Where: represents the number of Captures to average and is a number in the range 01 – 15. -
Page 39: Setbaud - Change The Baud Rate
The command getbaud will return the set baud rate. It can also be seen on the comment section of the Feasa terminal window. Test times are improved by increasing the baudrate from the default to higher values and this can be further enhanced by decreasing the latency (windows default 16) to latency of 1. -
Page 40: User Calibration Mode
Ensure the signal level is > 30 % in order to maximize the repeatability. When this data is accumulated then proceed with the calibration. Feasa provide a program called UserCal on the CD to accomplish this process. However should you wish to undertake the process manually please refer to the procedure below. -
Page 41: Usercal Manual Procedure
User Calibration Mode This is a manual procedure to calibrate the Led Analyser. However we recommend to use the Feasa UserCal program provided on the CD. Each command is detailed in the section below. UserCal Manual Procedure: Select Calibration set... -
Page 42: Set/Putintgain - Set The Intensity Gainfactor
FEASA LED ANALYSER LOW LIGHT FUNCTIONAL VERSION Set Data Mode set/putINTGAIN - Set the Intensity GainFactor Transmit Receive Setintgain##xxx putintgain##xxx Where: represents the Fiber Number and is a number in the range 01 – 10. represents a 3 digit gain factor, default 100. -
Page 43: Getintgain## - Get The Intensity Gain Factor
FEASA LED ANALYSER LOW LIGHT FUNCTIONAL VERSION User Calibration Mode getINTGAIN## - Get the Intensity Gain Factor Transmit Receive getIntGain## Where: represents the Fiber Number and is a number in the range 01 – 10. represents the Intensity gain value. -
Page 44: Offset
FEASA LED ANALYSER LOW LIGHT FUNCTIONAL VERSION User Calibration Mode set/putXOFFSET##0.xxx - Set the x Chromaticity Offset Transmit Receive setxoffset##±0.xxx putxoffset##±0.xxx Where: represents the Fiber Number and is a number in the range 01 – 10. 0.xxx represents the x Chromaticity offset value (±0.000 – 0.300). -
Page 45: Set/Putyoffset##0.Xxx - Set The X Chromaticity Offset
FEASA LED ANALYSER LOW LIGHT FUNCTIONAL VERSION User Calibration Mode set/putYOFFSET##0.xxx - Set the x Chromaticity Offset Transmit Receive setyoffset##±0.xxx putyoffset##±0.xxx Where: represents the Fiber Number and is a number in the range 01 – 10. 0.xxx represents the x Chromaticity offset value (±0.000 – 0.300). -
Page 46: Getxoffset## - Return The X Chromaticity
FEASA LED ANALYSER LOW LIGHT FUNCTIONAL VERSION User Calibration Mode getXOFFSET## - Return the x Chromaticity offset Transmit Receive getxoffset## ±0.xxx Where: represents the Fiber Number and is a number in the range 01 – 10. ±0.xxx represents the x Chromaticity offset... -
Page 47: Getyoffset## - Return The Y Chromaticity
FEASA LED ANALYSER LOW LIGHT FUNCTIONAL VERSION User Calibration Mode getYOFFSET## - Return the y Chromaticity offset Transmit Receive getyoffset## ±0.yyy Where: represents the Fiber Number and is a number in the range 01 – 10. ±0.yyy represents the y Chromaticity offset... -
Page 48: Offset
FEASA LED ANALYSER LOW LIGHT FUNCTIONAL VERSION User Calibration Mode set/putWAVELENGTHOFFSET@@±## - Set the wavelength Offset Transmit Receive setwavelengthoffset##±xx putwavelengthoffset##±xx Where: represents the Fiber Number and is a number in the range 01 – 10. represents the wavelength offset value (±99). -
Page 49: Offset
FEASA LED ANALYSER LOW LIGHT FUNCTIONAL VERSION User Calibration Mode getWAVELENGTHOFFSET@@ - Get the Dominant Wavelength Offset Transmit Receive getwavelengthoffset@@ +/-XX Where: represents the Fiber Number and is a number in the range 1 – 10. +/- xx represents the wavelength offset set of the LED in nanometers. -
Page 50: Set/Putabsintmult@@ - Set The X Chromaticity Offset
FEASA LED ANALYSER LOW LIGHT FUNCTIONAL VERSION User Calibration Mode set/putABSINTMULT@@ - Set the x Chromaticity Offset Transmit Receive setabsintmult@@ m.mmmmme+mm putabsintmult@@ m.mmmmme+mm Where: represents the Fiber Number and is a number in the range 01 – 10. m.mmmmme+mm represents the Absolute Intensity Multiplier Factor Description This set command is used to set an offset to the displayed y Chromaticity value. -
Page 51: Getabsintmult@@ Get The Absolute Intensity Correction Factor Of The Led Under Test
FEASA LED ANALYSER LOW LIGHT FUNCTIONAL VERSION User Calibration Mode getABSINTMULT@@ Get the Absolute Intensity Correction Factor of the Led under test. Transmit Receive getabsintmult@@ #.####e±## Where: represents the Fiber Number and is a number in the range 01 – 10. -
Page 52: Setcalibration## - Select The Calibration Set To Use
FEASA LED ANALYSER LOW LIGHT FUNCTIONAL VERSION User Calibration Mode setCALIBRATION## - Select the Calibration Set to use Transmit Receive setcalibration# putcalibration# Where: represents the set value (# can be 0 to 9). Description This command will select which calibration set you are accessing. The Led analyser is capable of storing fifty one (51) separate user Calibration sets on the board. -
Page 53: Setcalibrationdateddmmyyyy - Set The User Cal Date
FEASA LED ANALYSER LOW LIGHT FUNCTIONAL VERSION User Calibration Mode SetCalibrationDateddmmyyyy - Set the user Cal Date Transmit Receive Setcalibrationdateddmmyyyy Where: represents the 2 digit Day (01, 02..21, 30) represents the 2 digit Month (01, 02...12) yyyy represents a 4 digit Year. (2019) Description This command allows the user to input the Calibration Date for the Led Analyser. -
Page 54: Getcalibrationdate Get The Calibration Date Set By The User
FEASA LED ANALYSER LOW LIGHT FUNCTIONAL VERSION User Calibration Mode getcalibrationdate Get the Calibration Date set by the user. Description: This command will allow the user to interrogate the Led Analyser to return the actual USER Calibration Date in the format dd/mm/yyyy. This is the date set by the user for a specific cal version. -
Page 55: Help - Command Summary Listing
FEASA LED ANALYSER LOW LIGHT FUNCTIONAL VERSION General Commands HELP - Command Summary Listing Transmit Receive help Command listing Description This command will generate a summary listing of all the LED Analyser commands. This is useful when using a terminal program such as HyperTerminal. -
Page 56: Daisy Chain Mode
FEASA LED ANALYSER LOW LIGHT FUNCTIONAL VERSION Daisy Chain Mode There are two options when connecting the Daisy Chain Function USB and Serial RS232 : Daisy Chain USB Wiring Method: The Daisy chain is a method used to communicate with multiple Led Analyser units to save connections and simplify the wiring. -
Page 57: Method
FEASA LED ANALYSER LOW LIGHT FUNCTIONAL VERSION Daisy Chain Mode Daisy Chain Serial Method: The Daisy chain is a method used to communicate with multiple Led Analyser units to save connections and simplify the wiring. The 1 Led analyser in the chain is connected to the computer using the Serial cable supplied. -
Page 58: Daisy Chain Communication
Analyser or can be read out using the getSerial command. Feasa provides a Terminal Program on the CD for the customers use. When you connect your 1 analyser the terminal program will detect which port you are connected to. At this time you have the option of connecting to the Standalone option or the Daisy Chain option from the drop down box. -
Page 59: Busfree - Deactivate Any Active Analysers
FEASA LED ANALYSER LOW LIGHT FUNCTIONAL VERSION Daisy Chain Mode BusFree - Deactivate any active Analysers Transmit Receive busfree Description This command is used to deactivate any active Analysers on the Daisy Chain Bus. This will free the Bus to allow an Analyser to be made active. -
Page 60: Busget#### - Activate A Led Analyser
FEASA LED ANALYSER LOW LIGHT FUNCTIONAL VERSION Daisy Chain Mode BusGet#### - Activate a LED Analyser Transmit Receive busget#### Where: #### represents the Serial Number of the Analyser. Description This command will activate the LED Analyser with the specified Serial Number. -
Page 61: Analyser's
FEASA LED ANALYSER LOW LIGHT FUNCTIONAL VERSION Daisy Chain Mode BusC - Initiate Capture for all LED Analyser's Transmit Receive busc Description This command will cause all LED Analysers in the Daisy Chain to initiate a capture sequence using the Automatic Range Mode. -
Page 62: Busc# - Initiate Capture For All Led Analyser's
FEASA LED ANALYSER LOW LIGHT FUNCTIONAL VERSION Daisy Chain Mode BusC# - Initiate Capture for all LED Analyser's Transmit Receive busc# Where: # represents the ranges 1, 2, 3, 4, 5. The LED brightness level for each range is as follows:-... -
Page 63: Busce#### - Poll Each Led Analyser To Verify A Capture Is Complete
FEASA LED ANALYSER LOW LIGHT FUNCTIONAL VERSION Daisy Chain Mode BusCE#### - Poll each LED Analyser to verify a capture is complete Transmit Receive busce#### 0 or 1 Where: #### represents the Serial Number of the Led Analyser. If reply is 1... -
Page 64: Ports Description And Wiring
FEASA LED ANALYSER LOW LIGHT FUNCTIONAL VERSION Daisy Chain Mode Ports Description and Wiring. D_OUT Power Serial D_IN Figure 10 The Daisy Chain Connectors are shown on the right-hand side of figure 10. The D_OUT connector is connected to the D_IN connector of the next Analyser in the chain. -
Page 65: Daisy Chain Pinout
FEASA LED ANALYSER LOW LIGHT FUNCTIONAL VERSION Daisy Chain Mode Daisy Chain Pinout D_IN D_OUT POWER SUPPLY D_IN D_OUT RX_in RX_out TX_out TX_in Figure 11 Figure 11 shows the layout of the Connectors viewed from the edge of the board. -
Page 66: Step-By-Step Method For Daisy Chaining
FEASA LED ANALYSER LOW LIGHT FUNCTIONAL VERSION Daisy Chain Mode Step-by-Step method for Daisy Chaining To sucessfully implement Daisychaining the following steps are recommended:- Decide how many Analysers are to be daisychained. Make a list of the Serial Numbers of the Analysers and note the order in which they will be interconnected. - Page 67 FEASA LED ANALYSER LOW LIGHT FUNCTIONAL VERSION Daisy Chain Mode To connect to Analyser 2 (s/n F461) send:- busfree Response from the Analyser busgetF461 Response from the Analyser The host computer is now connected to Analyser 2 (s/n F461). This can be verified by requesting the Serial Number:-...
-
Page 68: Example
FEASA LED ANALYSER LOW LIGHT FUNCTIONAL VERSION Daisy Chain Mode Example Busfree 'free the bus busc3 'All Analysers capture using range 3 High busceF304 'poll the analyser F304 busgetF304 'Connect to the Analyser F304 getserial 'Confirm s/n of the Analyser... - Page 69 FEASA LED ANALYSER LOW LIGHT FUNCTIONAL VERSION Begin BUSFREE BUSC Serial Number = First Serial BUSCE#### Answer? “1” Serial Number = Next serial End Serial?
-
Page 70: Step-By-Step Approach To Testing A Led
FEASA LED ANALYSER LOW LIGHT FUNCTIONAL VERSION Step-by-Step approach to Testing a LED Standard Capture Mode To Test the Color and Intensity of up to 10 LEDs simultaneously carry out the following: 1. Ensure that the LEDs to be Tested are turned on and that the fibers are centered over the LEDs. -
Page 71: Command Summary
FEASA LED ANALYSER LOW LIGHT FUNCTIONAL VERSION Command Summary COMMAND DESCRIPTION Busfree Free the Daisy Chain Bus of the active Analyser Busget#### Make Analyser #### active on the Daisy Chain Bus BusC All Analysers on the Daisy Chain to Auto Capture... -
Page 72: Back To Index
FEASA LED ANALYSER FUNCTIONAL VERSION Command Summary COMMAND DESCRIPTION getcct## Get Correlated Color Temperature for LED getcctall Get Correlated Color Temperature for all LEDs getVersion Get the Firmware Revision of the Analyser getHW Get the Hardware Version of the Analyser... -
Page 73: Specifications
LED Analyser with 3 Fibers Physical Dimensions: 145mm x 55mm x 50mm (L x W x H) - Feasa 10A Dimensions: 105mm x 55mm x 50mm (L x W x H) - Feasa 6A, 5A, 3A Fiber Length 0.6m Fiber Diameter 2.2mm incl. cladding Minimium Bend Radius: 15mm Fiber Core Diameter 1.0mm... -
Page 74: Warranty
Feasa does not warrant that the operation of Feasa products will be uninterrupted or error free. If Feasa is unable, within a reasonable time, to repair or replace any product to a condition as warranted, customer will be entitled to a refund of the purchase price upon prompt return of the product to Feasa.
Need help?
Do you have a question about the Low Light LED Analyser and is the answer not in the manual?
Questions and answers