
Related Manuals for Appostar RTP-3280


Summary of Contents for Appostar RTP-3280
- Page 1 Receipt Thermal Printer RTP-3280 User’s Manual Edition: NOV 2012 Version: 1.01...
- Page 2 For more information about where to send your waste equipment for recycling, please contact your local city office, your household waste disposal service or where you purchased the product. RTP-3280 Thermal Receipt Printer...
- Page 3 The material in this document is for information purpose and is subject to change without prior notice. APPOSTAR has made every effort to ensure that this user’s manual is accurate and complete. However, no liability is assumed for any errors and omissions that may have occurred.
- Page 4 PREFACE Impor rtant S Safety I Instruc ctions Failure to o observe these safe ety instruc ctions ma y cause b body injury y, or dama age to the produ uct. Read these inst tructions c carefully a and keep t this user m manual in accessibl...
-
Page 5: Table Of Contents
Replacing the Paper Roll ................12 Adjusting the Paper Sensor ................13 Paper Jam Elimination ................. 14 Paper Jam Considerations ................15 3.5 Advanced Settings ................... 15 Adjusting the Settings ................. 15 RTP-3280 Thermal Receipt Printer... - Page 6 Description: ......................57 Installation ......................57 Hardware ....................57 Software ....................57 Configure RTP-3280 ..................58 Printing via TCP/IP ..................58 Use Standard TCP/IP Port ................58 Use Virtual-COM Tool .................. 60 ...
-
Page 7: Chapter 1 Product Overview
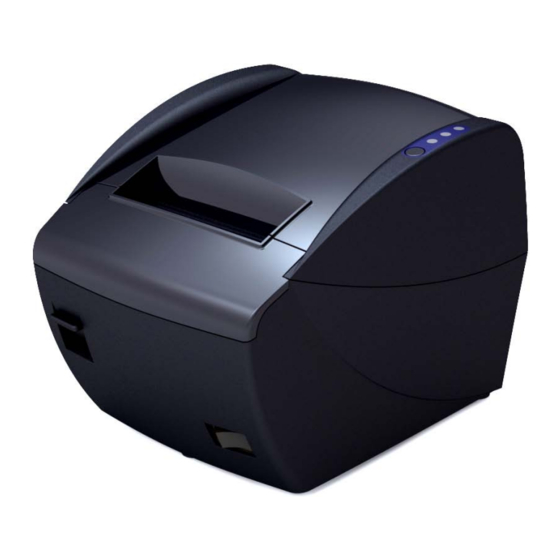
1.1 Introduction Thank you for choosing Appostar RTP-3280 Thermal Receipt Printer, a high quality and high speed printer ideal for use with Electronic Cash Registers (ECR), Point-of- Sale (POS) terminals, banking equipments and other demanding applications. -
Page 8: Package Contents
PRODUCT OVERVIEW 1.3 Pa ackage Content Standar rd Packag The follow wing items s come wit th your pa ckage. If a any item is s missing o or damage contact t he dealer f from whom m you pur rchased the e product. -
Page 9: Printer Parts
Status indicators See “Status Indicators” on page 4. Feed button Press to feed paper. Use to cut the paper manually. Note: Cutter Auto-cutter blade is located below this cutter. Power button Turns the printer on or off. RTP-3280 Thermal Receipt Printer... -
Page 10: Status Indicators
Paper roll is near its end /No paper Solid Compartment cover open / No paper Error occurred: Compartment cover open while Error LED Flashing printing Printer head temperature too high Paper jam Sshooting” on page for more information. RTP-3280 Thermal Receipt Printer... -
Page 11: Rear View
3 versions which interface board is detachable as Other interface version shown in the table . The interface board is separately available. NOTE: Please refer to RTP-3280 User’s Manual CH. 2 Getting Started for the complete instructions. RTP-3280 Thermal Receipt Printer... -
Page 12: Chapter 2: Getting Started
1. Drill the wall to make three holes at Ф 6.5mm distance and depth over 35mm. Insert the three anchors inside the each hole. 2. Attach the mounting bracket to the wall surface using the three screws. 3. Align the mounting screws to the designated hook holes of the printer. RTP-3280 Thermal Receipt Printer... -
Page 13: Location Considerations
By Serial Interface Connection 1. Plug the male end to the serial port of the computer. 2. Plug the female end of the serial cable into the serial connector of your printer. RTP-3280 Thermal Receipt Printer... -
Page 14: By Usb Interface Connection
1. Plug the single end of the Y-cable to the drawer kick-out connector of your printer. 2. Plug the other ends to the connectors of the cash drawers. WARNING: DO NOT connect a telephone line to your printer . This may damage the printer or the telephone. RTP-3280 Thermal Receipt Printer... -
Page 15: Connecting The Power Supply
2.5 Turning the Printer On Press the Power button to turn the printer on/off. O Off ─ WARNING: DO NOT turn off the power while printing data. This may cause data loss or damage the printer . RTP-3280 Thermal Receipt Printer... -
Page 16: Loading The Paper Roll
1. Press the Open button to open the compartment cover. 2. Place the paper roll into the compartment. Take note of the correct paper direction. 3. Pull out a small portion of the paper then push down the compartment cover to close it. RTP-3280 Thermal Receipt Printer... -
Page 17: Printing A Test Label
After which, the printer pauses and the Paper LED flashes. 2. Press the Feed button to continue printing the test label. The printer prints out the built-in character set. 3. After printing, the printer automatically cuts the paper . Pull out the paper. RTP-3280 Thermal Receipt Printer... -
Page 18: Chapter 3: Using The Printer
3. Place the new paper roll into the compartment. Take note of the correct paper direction. 4. Pull out a small portion of the paper then close the compartment cover. 5. Press the Feed button to restart printing. RTP-3280 Thermal Receipt Printer... -
Page 19: Adjusting The Paper Sensor
To adjust the paper sensor, do the following: 1. Loosen the adjustment screw using a coin or screw driver. 2. Move the knob to adjust the sensor. 3. Secure the adjustment screw to fix the sensor. RTP-3280 Thermal Receipt Printer... -
Page 20: Paper Jam Elimination
If the compartment cover does not open after pressing the Open bar , the cutter blade is not in its normal position. Roll the gear wheel forwards or backwards to position the cutter blade back. DO NOT forcibly open the compartment cover . RTP-3280 Thermal Receipt Printer... -
Page 21: Paper Jam Considerations
Changes made with the power on have no effect until the printer is restarted. 1. Lay the printer upside down on a flat even surface. 2. Unscrew the DIP switch cover. 3. Adjust the DIP switches according your preference. Refer to the table below for DIP switch configurations. RTP-3280 Thermal Receipt Printer... -
Page 22: Dip Switch Tables
TABLE 2 : DIP Switch Set 2 Switch Function Kitchen bell Enable Disable With cash drawer Kitchen bell Enable Disable with cutter Band Mode Drive Normal Reserved Print Density See Table 2-1: Print Density Chinese font Disable Enable Reserved RTP-3280 Thermal Receipt Printer... -
Page 23: Printer Status Report
Before printing the status report, make sure that the printer is turned off and the cover is closed. To print the status report, press and hold the FEED button and turn on the printer. The printer prints the current status. After printing, the printer goes to standby mode. RTP-3280 Thermal Receipt Printer... -
Page 24: Chapter 4 Epson Esc/Pos Commands
Turn upside-down printing mode on/off FS ! n 1C 21 n Set print mode(s) for Kanji characters FS & 1C 26 Select Kanji character mode FS S n1 n2 1C 53 n1 n2 Set Kanji character spacing RTP-3280 Thermal Receipt Printer... - Page 25 1D 6B m n … Transmit status <GS> r n 1D 72 n <GS> v 0 m … 1D 76 30 m… Print raster bit image Set bar code width <GS> w n 1D 77 n RTP-3280 Thermal Receipt Printer...
-
Page 26: Chapter 5 Code Page
Multilingual Latin I + Euro PC864 Arabic PC857 Turkish PC737 Greek PC855 Cyrillic PC861 Icelandic PC862 Hebrew PC869 Greek WPC1250 Central Europe WPC1251 Cyrillic (Slavic) WPC1253 Greek PC851 Greek PC928 Greek PC3843 Polish PC3844 PC3845 Hungarian PC3846 Turkish WPC1257 Lithuanian RTP-3280 Thermal Receipt Printer... - Page 27 ¼ ╝ ╠ ▄ ∞ ⁿ C 1100 ì ¥ ¡ ╜ ═ ▌ Ø ² D 1101 Ä « ╛ ╬ ▐ ε ■ E 1110 Å ƒ » ┐ ╧ ▀ ∩ F 1111 RTP-3280 Thermal Receipt Printer...
- Page 28 ャ シ フ ワ 村 C 1100 ○ ▉ ╮ ュ ス ヘ ン 人 D 1101 ▒ █ ╰ ョ セ ホ ゛ ∕ E 1110 ┼ ╯ ツ ソ マ ゜ ﹨ F 1111 RTP-3280 Thermal Receipt Printer...
- Page 29 ╝ ╠ ▄ ý ³ C 1100 ì Ø ¡ ¢ ═ ¦ Ý ² D 1101 Ä × « ¥ ╬ Ì ¯ ■ E 1110 Å ƒ » ┐ ¤ ▀ ´ F 1111 RTP-3280 Thermal Receipt Printer...
- Page 30 ¼ ╝ ╠ ▄ ∞ ⁿ C 1100 ì Ù ¡ ╜ ═ ▌ Ø ² D 1101 Ã « ╛ ╬ ▐ ε ■ E 1110 Â Ó » ┐ ╧ ▀ ∩ F 1111 RTP-3280 Thermal Receipt Printer...
- Page 31 ╝ ╠ ▄ ∞ ⁿ C 1100 ‗ Ù ¾ ╜ ═ ▌ Ø ² D 1101 À Û « ╛ ╬ ▐ ε ■ E 1110 § ƒ » ┐ ╧ ▀ ∩ F 1111 RTP-3280 Thermal Receipt Printer...
- Page 32 ¼ ╝ ╠ ▄ ∞ ⁿ C 1100 ì Ø ¡ ╜ ═ ▌ Ø ² D 1101 Ä « ╛ ╬ ▐ ε ■ E 1110 Å ƒ ¤ ┐ ╧ ▀ ∩ F 1111 RTP-3280 Thermal Receipt Printer...
- Page 33 Œ œ ¬ ¼ Ì Ü ì ü C 1100 ½ Í Ý í ý D 1101 Ž ž ® ¾ Î Þ î þ E 1110 Ÿ ¯ ¿ Ï ß ï ÿ F 1111 RTP-3280 Thermal Receipt Printer...
- Page 34 ╝ ╠ ▄ ь № C 1100 Н Э н ╜ ═ ▌ э ¤ D 1101 О Ю о ╛ ╬ ▐ ю ■ E 1110 П Я п ┐ ╧ ▀ я F 1111 RTP-3280 Thermal Receipt Printer...
- Page 35 Ř C 1100 Ź Ł ş Ż ═ Ţ Ý ř D 1101 Ä × « ż ╬ Ů ţ ■ E 1110 Ć č » ┐ ¤ ▀ ´ F 1111 143 159 239 255 RTP-3280 Thermal Receipt Printer...
- Page 36 ╝ ╠ ▄ ý ³ C 1100 ì Ø ¡ ¢ ═ ¦ Ý ² D 1101 Ä × « ¥ ╬ Ì ¯ ■ E 1110 Å ƒ » ┐ ¤ ▀ ´ F 1111 RTP-3280 Thermal Receipt Printer...
- Page 37 ، ¬ س ﺟ ﻌ ك C 1100 ┌ ÷ ﻻ ج ش ﺣ ﻎ ي D 1101 └ × ■ ﻼ ح ص ﺧ غ E 1110 ┘ خ ؟ د ع م F 1111 RTP-3280 Thermal Receipt Printer...
- Page 38 ╝ ╠ ▄ ì ³ C 1100 ı Ø ¡ ¢ ═ ¦ ÿ ² D 1101 Ä Ş « ¥ ╬ Ì ¯ ■ E 1110 Å ş » ┐ ¤ ▀ ´ F 1111 RTP-3280 Thermal Receipt Printer...
- Page 39 ╝ ╠ ▄ Ή ⁿ C 1100 Ξ ζ φ ╜ ═ ▌ Ί ² D 1101 Ο η χ ╛ ╬ ▐ Ό ■ E 1110 Π θ ψ ┐ ╧ ▀ Ύ F 1111 RTP-3280 Thermal Receipt Printer...
- Page 40 ╝ ╠ ▄ В Ч C 1100 Ї Ю Г й ═ П ь § D 1101 ј ъ « Й ╬ я Ь ■ E 1110 Ј Ъ » ┐ ¤ ▀ № F 1111 RTP-3280 Thermal Receipt Printer...
- Page 41 ¼ ╝ ╠ ▄ ∞ ⁿ C 1100 Þ Ø ¡ ╜ ═ ▌ Ø ² D 1101 Ä « ╛ ╬ ▐ ε ■ E 1110 Å ƒ » ┐ ╧ ▀ ∩ F 1111 RTP-3280 Thermal Receipt Printer...
- Page 42 ¼ ╝ ╠ ▄ ∞ ⁿ ל C 1100 ¥ ¡ ╜ ═ ▌ Ø ² ם D 1101 « ╛ ╬ ▐ ε ■ מ E 1110 ƒ » ┐ ╧ ▀ ∩ F 1111 RTP-3280 Thermal Receipt Printer...
- Page 43 ╝ ╠ ▄ σ ΰ C 1100 Έ έ Ι Ξ ═ δ ς ώ D 1101 ― ή « Ο ╬ ε τ ■ E 1110 Ή ί » ┐ Σ ▀ ΄ F 1111 RTP-3280 Thermal Receipt Printer...
- Page 44 Ľ Ě Ü ě ü C 1100 Ť ť ˝ Í Ý í ý D 1101 Ž ž ® ľ Î Ţ î ţ E 1110 Ź ź Ż ż Ď ß ď ˙ F 1111 RTP-3280 Thermal Receipt Printer...
- Page 45 ј М Ь м ь C 1100 Ќ ќ Ѕ Н Э н э D 1101 Ћ ћ ® ѕ О Ю о ю E 1110 Џ џ Ї ї П Я п я F 1111 RTP-3280 Thermal Receipt Printer...
- Page 46 Λ Ϋ λ ϋ B 1011 ¬ Ό Μ ά μ ό C 1100 ½ Ν έ ν ύ D 1101 ® Ύ Ξ ή ξ ώ E 1110 ― Ώ Ο ί ο F 1111 RTP-3280 Thermal Receipt Printer...
- Page 47 ╝ ╠ ▄ σ ΰ C 1100 É έ Ι Ξ ═ δ ς ώ D 1101 Ä Ή « Ο ╬ ε τ ■ E 1110 Ή ί » ┐ Σ ▀ ΄ F 1111 RTP-3280 Thermal Receipt Printer...
- Page 48 A 1010 « » Λ Ϋ λ ϋ B 1011 ¬ Ό ά μ ό C 1100 ½ έ ν ύ D 1101 Ύ Ξ ή ξ ώ E 1110 ¯ Ώ ί ο F 1111 RTP-3280 Thermal Receipt Printer...
- Page 49 ╝ ╠ ▄ ∞ ⁿ C 1100 Ć ¥ ¡ ╜ ═ ▌ Ø ² D 1101 Ä ś « ╛ ╬ ▐ ε ■ E 1110 Ą ƒ » ┐ ╧ ▀ ∩ F 1111 RTP-3280 Thermal Receipt Printer...
- Page 50 ╝ ╠ ▄ ∞ ⁿ C 1100 í Ý § ╜ ═ ▌ Ø ² D 1101 Ä Ř « ╛ ╬ ▐ ε ■ E 1110 Á ť » ┐ ╧ ▀ ∩ F 1111 RTP-3280 Thermal Receipt Printer...
- Page 51 ¼ ╝ ╠ ▄ ∞ ⁿ C 1100 Í ¥ ¡ ╜ ═ ▌ Ø ² D 1101 Ä « ╛ ╬ ▐ ε ■ E 1110 Ą ƒ » ┐ ╧ ▀ ∩ F 1111 RTP-3280 Thermal Receipt Printer...
- Page 52 ¼ ╝ ╠ ▄ ∞ ⁿ C 1100 ¥ ¡ ╜ ═ ▌ Ø ² D 1101 Ä Ş « ╛ ╬ ▐ ε ■ E 1110 Ą ş » ┐ ╧ ▀ ∩ F 1111 RTP-3280 Thermal Receipt Printer...
- Page 53 ¬ ¼ Ģ Ü ģ ü C 1100 ¨ ¯ ½ Ķ Ż ķ ż D 1101 ˇ ˛ ® ¾ Ī Ž ī ž E 1110 ¸ Æ æ Ļ ß ļ ˙ F 1111 RTP-3280 Thermal Receipt Printer...
-
Page 54: Chapter 6: Cleaning The Printer
To clean the print head, do the following: 1. Turn off the printer. 2. Press the Open button to open the compartment cover. 3. Clean the print head with a cotton swab moistened with alcohol. RTP-3280 Thermal Receipt Printer... -
Page 55: Cleaning The Manual Cutter
Platen roller To clean the compartment and other components, brush the interior compartment to remove bits of paper. Or use a cotton swab moistened with water to remove sticky paper or dust. RTP-3280 Thermal Receipt Printer... -
Page 56: Cleaning The Housing
6.4 Cleaning the Housing NOTE: You need a damped cloth with water. WARNING: DO NOT apply alcohol solvent or strong cleaning liquid on the printer housing. To clean the printer housing, use a damped cloth with water. RTP-3280 Thermal Receipt Printer... -
Page 57: Chapter 7: Troubleshooting
When the print head cools down, the printer will recover automatically and resume printing. Paper is jammed. Remove the jammed paper. LED is See “3.4 Paper Jam Elimination” flashing on page 14. RTP-3280 Thermal Receipt Printer... -
Page 58: Printer Operation
Printer is printing The paper roll is not Check if the paper roll is approved but nothing appears thermal type. by the manufacturer. If not, on the paper. replace the paper roll. RTP-3280 Thermal Receipt Printer... - Page 59 The cutter blade is Move the cutter blade back to its Compartment cover not positioned normal position. does not open after correctly. See “3.4 Paper jam Elimination” the Open button is on page 14. pressed. RTP-3280 Thermal Receipt Printer...
-
Page 60: Chapter 8: Specifications
Bar code CODE128, and ITF Paper end, Paper near end, Cover, Print head overheat, and Detectors Cutter jam Head 100 km Reliability Cutter 1,500,000 times Flash 2 MB Memory Flash 8 MB Power supply 24V DC/2.5A RTP-3280 Thermal Receipt Printer... - Page 61 Yellow, Pink, Light blue, Silver black, and Golden chocolate Housing Body Cool white, Dark gray Dimensions 155 x 190 x 140 mm (W x D x H) Net Weight 1.3 kg NOTE: Product specification is subject to change without prior notice. RTP-3280 Thermal Receipt Printer...
-
Page 62: Paper Specifications
8.2 Paper Specifications To ensure printing quality, use only approved paper rolls with the following specifications: Paper Roll Specification Paper Single-ply thermal paper roll Roll Size 80+0/-1mm (W) x 83 mm (Diameter) Thickness 0.05 ~ 0.06 mm RTP-3280 Thermal Receipt Printer... -
Page 63: Appendix I. : User Guide For Ethernet Interface
IE from Microsoft, chrome from Google , Firefox and so forth. Installation Before the RTP-3280 is able to work with network interface, both the hardware and software are needed to be set up properly. The section details the installation on both hardware and software. -
Page 64: Configure Rtp-3280
IE or othe er internet t browser y you are fa miliar with Type the IP addres s of your R RTP-3280 in the URL L field. If yo ou did not t ever chan nge the IP addres ss, it shou... - Page 65 5.After displaying the information of the newly added port, click “Finish” to end the procedure. 6.In the option “Ports” of RTP-3280’s properties sheets, a newly added TCP/IP port can be found. Select the new port and then click “Apply” to make it effect.
-
Page 66: Use Virtual-Com Tool
2.Click “COM Mapping” to switch to COM Mapping mode 3.Click ”Add” to enter virtual COM setting screen. Select RTP-3280 in the device list and most fields are filled with proper values automatically. You can select a different COM only when this COM is not occupied. - Page 67 4.After the virtual COM has been created, you can see the mapping on the list. Your PC now has a new COM port virtually. You can check the device manager for the new COM port. 5.Install the printer driver with port created above. RTP-3280 Thermal Receipt Printer...
-
Page 68: Appendix Ii : Rs232C Connector Pin Assignment
PC/HOST set ready signal Power ground Output PC/Host Printer Printer set ready signal Input PC/Host Printer PC/Host ACK to RTS signal Output Printer PC/Host Printer request send signal 2. Series Cable Connection for Printer PC/HOST PRINTER RTP-3280 Thermal Receipt Printer...
Need help?
Do you have a question about the RTP-3280 and is the answer not in the manual?
Questions and answers