Table of Contents
Advertisement
Quick Links
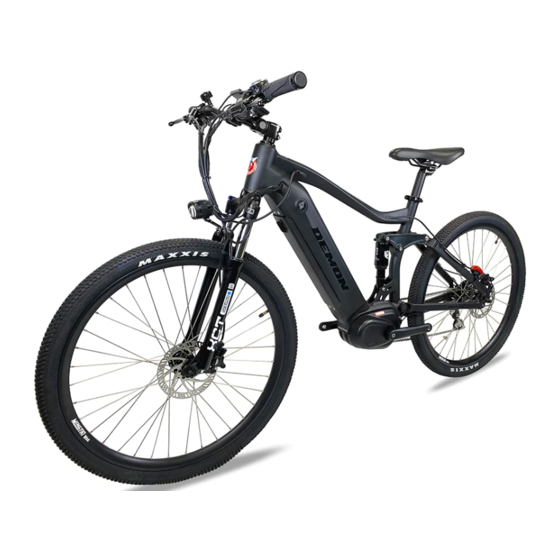
First of all, we would like to thank you for
choosing the OUTLAW electric bike.
We warmly welcome you to our Demon
Powersports family. We wish you enjoy the
numerous kilometers and happy moments with
your new bike.
After the initial shipment we have made many
improvements and modifications for the
OUTLAW
including:
*Suspended seat post - Takes the shock out of the big
bumps, without the cost or complexity of suspension.
*Adjustable handlebar stem- Provides up to 1 1/2" of
rise and reach adjustment, for fully customizable riding
position.
*Upgraded Shimano derailleur- Rigid cast aluminum
construction gives smoother, more precise shifting.
*New gearing, with taller top gear for relaxed touring,
plus a lower low gear for tight, technical riding.
1
Advertisement
Table of Contents

Summary of Contents for Demon Powersport OUTLAW
-
Page 1: Welcome
*Suspended seat post - Takes the shock out of the big First of all, we would like to thank you for bumps, without the cost or complexity of suspension. choosing the OUTLAW electric bike. *Adjustable handlebar stem- Provides up to 1 1/2” of We warmly welcome you to our Demon rise and reach adjustment, for fully customizable riding Powersports family. -
Page 2: Table Of Contents
Welcome Important Contact Us Assembly Instructions Parts Kickstand Handle bar Pedal Wheel Battery Charging Tips Operation Display Button Definition Meter Programming and Use Error Code Definition Warning and Safety... -
Page 3: Important
IMPORTANT PLEASE NOTE: THIS MANUAL IS NOT INTENDED Electric Bikes can be dangerous to use. The user or AS A DETAILED USER, SERVICE, REPAIR OR consumer assumes all risk of personal injuries, damage, MAINTENANCE MANUAL. PLEASE SEEK or failure of the bicycle or system and all other losses or ASSISTANCE FROM A QUALIFIED TECHNICIAN damages to themselves and others and to any property FOR SERVICE, REPAIRS OR MAINTENANCE. -
Page 4: Assembly Instructions
ASSEMBLY INSTRUCTIONS Your bike has been pre-assembled and requires only a few simple steps to get it ready for you to 4) Align the stem with the front wheel and tighten the ride: top stem bolt with 5mm Allen key enough to hold 1) Remove the outside carton after cutting the nylon the stem in place. -
Page 5: Pedal
After tightening the 2 side bolts, firmly tighten the top bolt. After all 3 bolts have been securely fastened, make sure there is no play in the headset by tighten the 4 pinch screws with 4mm Allen key. Loctite is recommend on the screw Align the brake controls so they are facing slightly downward. - Page 6 7) Using the 15mm wrench provided in the toolkit, 8) Make sure the seat is tight enough so that you cannot twist it out of alignment. Pull the seat clamp attach, and tighten the pedals. PLEASE NOTE – The handle away from the seat post and slide the seat up pedals are marked “L”...
-
Page 7: Battery Charging Tips
Do not charge the battery with any other chargers first use. The OUTLAW battery may be charged while on the then what was originally supplied with your bike or removed and charged at a location away from the OUTLAW OUTLAW. -
Page 8: Display
DISPLAY... -
Page 9: Button Definition
Button definition Normal operation... - Page 10 Switch between Distance Mode and Speed Mode Headlight / Display Backlight Switch Briefly press (0.5s) to switch the display between the Press and hold (>2S) to turn on the display backlight as distance and speed, cycle show signal-trip distance (TRIP) → well as headlight.
-
Page 11: Meter Programming And Use
Walk assistance mode METER PROGRAMMING AND USE Press and hold (>2S) to enter walk assistance mode, the symbol is displayed, when release key , will exit the walk assistance the mode. - Page 12 Enter “SETTING” interface. After turning on the display, briefly press (<0.5S) for two times to enter the “SETTING” interface. The interface includes the three options as “Display setting”, “Information” and “EXIT”. Briefly press (<0.5S) switch the options and then briefly press (<0.5S) confirm and enter the option.
- Page 13 to exit back to the main interface or select “BACK” → ⑶ “Auto Off”- set automatic Off time “EXIT” to exit back the main interface. Briefly press (<0.5S) to select “Auto Off”, and then briefly press (<0.5S) . This moment, briefly press (<0.5S) to switch automatic Off time as “OFF”/“9”/“8”/“7”/“6”/“5”/ “4”/“3”/“2”/“1”.
- Page 14 (<0.5S) to save the set value and exit back to “Speed Limit”. Briefly press for two times (interval time is less ⑺ “TRIP Reset” - set reset function for single-trip distance than 0.5S) to exit back to main interface or select “BACK” →...
- Page 15 ⑿ “Password”- boot password setting Briefly press (<0.5S) to select “Password” and then briefly press (<0.5S) . This moment, briefly press (<0.5S) to select “Start Password” and then briefly press Change password: (<0.5S) again. Briefly press (<0.5S) or to switch between “OFF”...
- Page 16 ⒀ “Set Clock”- time setting Briefly press (<0.5S) to select “Set Clock” and then briefly press (<0.5S) . The time is represented in the 24- hour system. Cursor stays at the first digit of the clock. Briefly press to select “0-2” and then briefly press (<0.5S) to confirm the selection.
-
Page 17: Error Code Definition
Error code definition... -
Page 18: Warning And Safety
WARNINGS AND SAFETY Local laws may prohibit the use of high-speed electric bicycles on bike paths or trails. Be sure you are familiar with the laws in your area. Even if legal, it is usually not safe to You should check the operation of your brake inhibitor ride at high speed on paths or trails around other users.


Need help?
Do you have a question about the OUTLAW and is the answer not in the manual?
Questions and answers