
Related Manuals for Cressi-sub MC9


Summary of Contents for Cressi-sub MC9
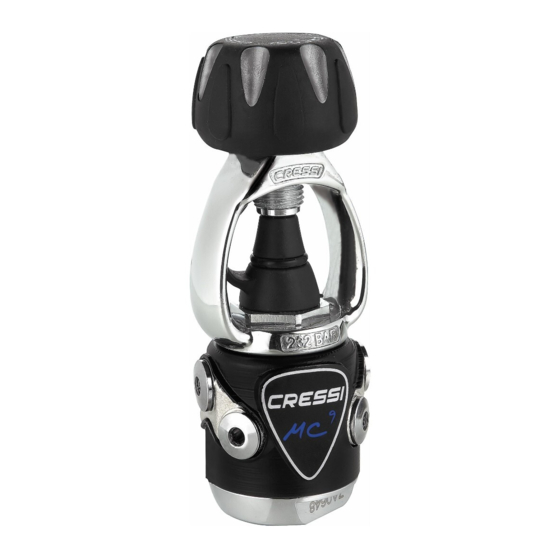
- Page 1 MC9 1 stage Regulators repair and maintenance MC9 INT HZ 820097 MC9 DIN 300 bar HZ 820098 January 2009 Rev. MC9/B Ed.C/13...
- Page 2 EXCLUSIVELY by an authorized Cressi-Sub center. If the information provided in this document is unclear or not fully intelligible, • please contact Cressi-sub before proceeding with any disassembly or maintenance procedures. Before proceeding, Cressi-sub recommends that you read the following document •...
- Page 3 • To prevent any assembly errors when performing maintenance and/or repairs, we recommend using all the replacement parts provided by Cressi-Sub in every operation. • Pay special attention to the recommendations provided in the margin of the figures that show the various sequences of equipment maintenance and/or repair in order to avoid any problems that could result in an accident.
-
Page 4: Spare Parts
MC9 1 stage : spare parts Regulators repair and maintenance MC9-MC9 S.C.-MC5 1 STAGES (HZ800047) ANNUAL REPLACEMENT KIT CHART (Real Size) January 2009 Rev. MC9/B Ed.C/13... - Page 5 MC9 DIN 1 stage Regulators repair and maintenance • Kit MC9-MC9 S.C.-MC5 Annual replacement kit • Cod. N° HZ 800047 (Real Size) Go back to •Use only Cressi-sub spare parts •Note: it is recommended to carry out a complete servicing of the regulator yearly or more frequently in case of intensive use.
- Page 6 Regulators repair and maintenance • Annual replacement • Cressi-Sub recommends complete regulator maintenance at least once a year, or more frequently in the case of particularly intense use. • Maintenance must include replacement of all components provided in the annual equipment maintenance kit.
- Page 7 Users must never perform maintenance themselves; all maintenance must be performed EXCLUSIVELY by an authorized Cressi-Sub center. • You can find your authorized Cressi-Sub center by asking your dealer, or Cressi Sub S.p.A. itself by sending an e-mail to: info@cressi-sub.it •Use only original Cressi-sub replacement parts January 2009 Rev.
- Page 8 1°stage MC9 Special tools Regulators repair and maintenance January 2009 Rev. MC9/B Ed.C/13...
- Page 9 O-ring seat; • To replace the O-ring correctly, press its sides to create a bulge inside which to insert the round pointed tool, as shown in the pictures; • Attention: USE ONLY ORIGINAL CRESSI-SUB SPARE PARTS January 2009 Rev. MC9/B Ed.C/13...
- Page 10 MC9 1 stage: disassembling phases Regulators repair and maintenance • In case the regulator has been used under water for a long time and shows oxidation traces, it may be useful to tap gently with a plastic hammer all along the perimeter of the area to be removed.
- Page 11 MC9 1 stage: INT disassembling phases Regulators repair and maintenance January 2009 Rev. MC9/B Ed.C/13...
- Page 12 MC9 1 stage: INT disassembling phases Regulators repair and maintenance • Remove the bracket nut using the special spanner, as shown in the picture. • After inserting the threaded tool in one of the first stage ports, tighten the regulator in a vice.
- Page 13 MC9 1 stage: INT disassembling phases Riparazione e Manutenzione Erogatori • In case the special spanner is not available, the bracket nut can be removed using a large adjustable spanner as shown in the HZ 709018 picture. January 2009 Rev. MC9/B...
- Page 14 MC9 1 stage: INT disassembling phases Regulators repair and maintenance 2 = HZ 770080 4 = HZ 800054 • Remove the 1 stage bracket nut and bracket. Continues on page 20 January 2009 Rev. MC9/B Ed.C/13...
- Page 15 MC9 1 stage: DIN disassembling phases Regulators repair and maintenance 25 K (Kit OR DIN) HZ 800066 January 2009 Rev. MC9/B Ed.C/13...
- Page 16 MC9 1 stage: DIN disassembling phases Regulators repair and maintenance • Using the threaded bar, tighten the 1 stage in a vice. • Unscrew the DIN connector from the relating thread on the DIN filter, using a 6 mm. allen wrench.
- Page 17 MC9 1 stage: DIN disassembling phases Regulators repair and maintenance • Warning: in case the disassembling operations are difficult, do not carry out them with any wrench extensions, since this might damage details of the equipment! • In such case please...
- Page 18 MC9 1 stage: DIN disassembling phases Regulators repair and maintenance • Remove the DIN connector ring from the DIN filter body. 31 = HZ 800046 January 2009 Rev. MC9/B Ed.C/13...
- Page 19 MC9 1 stage: DIN disassembling phases Regulators repair and maintenance • Unscrew the DIN filter body using a 24 mm. hexagonal spanner, as shown in the picture. • Pay particular attention: unscrewing the thread causes the inner valve spring to lessen its...
- Page 20 MC9 1 stage: disassembling phases Regulators repair and maintenance 6 = HZ 800056 10K = HZ 800058 • Remove the sintered filter and take out the first stage valve completely. January 2009 Rev. MC9/B Ed.C/13...
- Page 21 MC9 1 stage: disassembling phases Regulators repair and maintenance 5 = OR HZ 800055 4 = HZ 800054 11 = HZ 800059 • Remove the bracket nut O-Ring (same as the DIN filter one) and take the HP jacket-piston bush completely out of its seat.
- Page 22 MC9 1 stage: disassembling phases Regulators repair and maintenance • Remove the push pin 17 = HZ 800041 January 2009 Rev. MC9/B Ed.C/13...
- Page 23 MC9 1 stage: disassembling phases Regulators repair and maintenance • Take out the interchangeable nozzle, inserting the special tool curved end very carefully under its edge, so that you can use it to contrast the O-ring frictional resistance. January 2009 Rev.
- Page 24 MC9 1 stage: disassembling phases Regulators repair and maintenance • The especially shaped tool combined with the sturdiness of the stainless steel nozzle allows to take it out safely without any risk of damage. 28 = HZ 800042 29 = HZ 800043...
- Page 25 MC9 1 stage: disassembling phases Regulators repair and maintenance • In case the regulator has been used under water for a long time and shows oxidation traces, it may be useful to tap gently with a plastic hammer all along the perimeter of the first stage closing disk.
- Page 26 MC9 1 stage: disassembling phases Regulators repair and maintenance • Keeping the first stage tightened in the vice through the threaded bar, remove the closing 22 = HZ 800063 disk using a 30 mm. hexagonal spanner. • Then remove the 1 stage setting spring and guide plate.
- Page 27 MC9 1 stage: disassembling phases Regulators repair and maintenance • Introduce low pressure air through a 3/8“ LP port to remove the diaphragm from its seat. January 2009 Rev. MC9/B Ed.C/13...
- Page 28 MC9 INT 1 stage Regulators repair and maintenance HP piston jacket Filter Setting screw Spring guide plate HZ 800065 HZ 800059 HZ 800056 HZ 800062 Setting spring stage body HZ 800080 16K = HZ 800040 Nozzle 28= HZ 800042 Nozzle O-Ring...
- Page 29 MC9 DIN 1 stage Regulators repair and maintenance Pin pusher + pin Filter Setting screw Setting screw HZ 800062 / HZ 800061 HZ 800056 HP piston jacket HZ 800065 Setting spring stage body HZ 800059 HZ 800080 DIN 300 connector...
- Page 30 MC9 1 stage: assembling phases Regulators repair and maintenance 29 = OR HZ 800043 28 = HZ 800042 • After lubricating it carefully, insert the O-Ring into the interchangeable nozzle seat. Insert the nozzle into its seat inside the first stage body, as shown in the picture.
- Page 31 MC9 1 stage: INT-DIN assembling phases Regulators repair and maintenance • Insert the backup ring into the HP housing, being careful not to scratch its internal sealing surface. 7K = HZ 800057 January 2009 Rev. MC9/B Ed.C/13...
- Page 32 MC9 1 stage: INT-DIN assembling phases Regulators repair and maintenance • After lubricating it carefully, 7K = HZ 800057 insert the O-Ring into the balancing chamber. • Note: a rich and thorough lubrication is unavoidable to make the HP valve work perfectly.
- Page 33 MC9 1 stage: INT-DIN assembling phases Regulators repair and maintenance • Place the piston spring on the balancing chamber and the HP piston inside it, as shown in the picture. • Note: Make sure the hole through the HP piston stem is...
- Page 34 MC9 1 stage: INT-DIN assembling phases Regulators repair and maintenance • Insert the new HP piston jacket bush into the first stage body as shown in the picture. 11 = HZ 800059 January 2009 Rev. MC9/B Ed.C/13...
- Page 35 MC9 1 stage: INT-DIN assembling phases Regulators repair and maintenance • Insert the assembled HP valve into the first stage body as shown in the picture. 10K = HZ 800058 January 2009 Rev. MC9/B Ed.C/13...
- Page 36 MC9 1 stage: INT-DIN assembling phases Regulators repair and maintenance Place the sintered filter on the valve as shown in the 6 = HZ 800056 picture. January 2009 Rev. MC9/B Ed.C/13...
- Page 37 MC9 1 stage: INT-DIN assembling phases Regulators repair and maintenance Click 1 for INT assembling procedure Click 2 for DIN assembling procedure January 2009 Rev. MC9/B Ed.C/13...
- Page 38 MC9 1 stage: INT assembling phases Riparazione e Manutenzione Erogatori January 2009 Rev. MC9/B Ed.C/13...
- Page 39 MC9 1 stage: INT assembling phases Regulators repair and maintenance • After replacing the bracket nut O-Ring, place the INT bracket between the nut and the first stage body. Press the nut onto the filter and overcome the spring resistance down to the thread inside the first stage body.
- Page 40 MC9 1 stage: INT assembling phases Regulators repair and maintenance Bracket nut blocking with dynamometric wrench: 30 N x m Continues on page 48 January 2009 Rev. MC9/B Ed.C/13...
- Page 41 MC9 1 stage: DIN assembling phases Regulators repair and maintenance 25 K (DIN O-Rings kit) HZ 800066 January 2009 Rev. MC9/B Ed.C/13...
- Page 42 MC9 1 stage: DIN assembling phases Regulators repair and maintenance • After lubricating it, insert the DIN 5 (OR) = HZ 800055 filter body O- Ring into its seat. 26K = HZ 800067 January 2009 Rev. MC9/B Ed.C/13...
- Page 43 MC9 1 stage: DIN assembling phases Regulators repair and maintenance • Press the DIN filter body onto the filter and overcome the spring resistance down to the inner thread of the first stage body. Screw the filter body completely, keeping the first stage firmly on the work top, so that the O-ring will be placed correctly into its seat.
- Page 44 MC9 1 stage: DIN assembling phases Regulators repair and maintenance • Tighten the first stage body in a vice through the threaded bar. Tighten the DIN filter body with a 24 mm. hexagonal dynamometric wrench, applying 30 N x m.
- Page 45 MC9 1 stage: DIN assembling phases Regulators repair and maintenance • Insert the DIN 26K = HZ 800067 connector ring onto the DIN filter body. January 2009 Rev. MC9/B Ed.C/13...
- Page 46 MC9 1 stage: DIN assembling phases Regulators repair and maintenance • After lubricating them carefully, insert the DIN connector O-Rings into their seats. January 2009 Rev. MC9/B Ed.C/13...
- Page 47 MC9 1 stage: DIN assembling phases Regulators repair and maintenance • Screw the DIN connector onto the relating thread of the DIN filter body, using a 6 mm. Allen wrench. • Tighten it using a 6 mm. hexagonal dynamometric wrench, applying 10 31 = HZ 800046 N x m.
- Page 48 MC9 1 stage: assembling phases Regulators repair and maintenance • After connecting the HP valve including the filter through either the bracket nut (for INT model) or the DIN filter body (for DIN model), turn the body and insert the push pin into its seat.
- Page 49 MC9 1 stage: assembling phases Regulators repair and maintenance 18 = HZ 800062 • Insert the pin pusher and push softly, to make sure the device works correctly. January 2009 Rev. MC9/B Ed.C/13...
- Page 50 MC9 1 stage: assembling phases Regulators repair and maintenance • Insert the diaphragm in the housing inside the body, making sure it that it is seated correctly in its operating position. • Then, pressing lightly on the diaphragm, check that the mechanism...
- Page 51 MC9 1 stage: assembling phases Regulators repair and maintenance 22 = HZ 800063 • Screw the diaphragm closing disk completely, using a 30 mm. dynamometric wrench, applying 30 N x m. January 2009 Rev. MC9/B Ed.C/13...
- Page 52 MC9 1 stage: assembling phases Regulators repair and maintenance • Insert the spring washer into the first stage setting screw. 23 = HZ 800064 January 2009 Rev. MC9/B Ed.C/13...
- Page 53 MC9 1 stage: assembling phases Regulators repair and maintenance • Insert the spring guide plate onto the spring itself and connect the whole with the first stage as shown in the picture. • Screw without over 20 = HZ 800081...
- Page 54 MC9 1 stage: assembling phases Regulators repair and maintenance • Screw the setting screw onto the threaded seat of the diaphragm closing disk, using a 6 mm. Allen wrench, before carrying out the correct setting of the first stage. January 2009 Rev.
- Page 55 MC9 1 stage setting Riparazione e Manutenzione Erogatori • MC9 S.C. 1 stage setting procedures, referring to the picture on page 57: • Connect the setting pressure gauge with one of the first stage LP ports • Connect the whole regulator (including both 1st and 2nd stages) with a 200 bars pressurized tank, or with an equally pressurized workbench.
- Page 56 Regulators repair and maintenance • Check the pressure on the gauge. MC9 first stage is correctly set at an intermediate pressure of 10 bars. If it is different, close the air valve and discharge the regulator. Use a 6 mm. Allen wrench to turn clockwise (+) the setting screw, in order to increase the first stage intermediate pressure.
- Page 57 MC9 1 stage setting Regulators repair and maintenance D < 1 bar January 2009 Rev. MC9/B Ed.C/13...
- Page 58 MC9 1 stage: Service records Regulators repair and maintenance Download January 2009 Rev. MC9/B Ed.C/13...
-
Page 59: Service Records
MC9 1 stage: Service records Regulators repair and maintenance Download Tab Maintenance / Service Record January 2009 Rev. MC9/B Ed.C/13...
Need help?
Do you have a question about the MC9 and is the answer not in the manual?
Questions and answers