Table of Contents
Advertisement
Available languages
Available languages
Quick Links
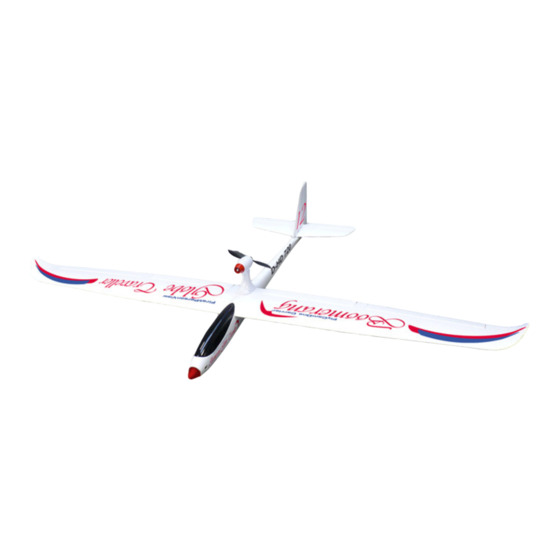
Boomerang GT
Content ARF
- Fuselage with 2 Servos
and ESC
- Foam noose
- Main wings L+R with 2
Servos each
- Elevator unit
- Rudder
- Carbon Shaft
- wooden plate
- Motor with arm
- Propeller
- 4 Screws for the wing
(35x30mm)
- 4 Washer screws for
wooden plate(8x2mm)
- 4 Screws for the motor
unit (10x3mm)
- 2 Washer screws for the
linkage of the tail
unit(50x2mm)
- 2 Screws for the rudder
unit (20x2mm)
Boomerang
FlyCamOne Carrier
FlyCamOne Carrier
FlyCamOne Carrier
FlyCamOne Carrier
Manual
www.Air-Ace.net
Contenu du kit
ARF
- Fuselage avec 2 Servo et
ESC
- Nez en mousse
- Deux ailes D+G avec 2
servo par ailes
- Profondeur
- Dérive
- Mât carbone
- Renfort en bois
- Moteur avec support
- Hélice
- 4 Vis pour les ailes
(35x30mm)
- 4 Vis à rondelle pour le
renfort en bois
(8mmx2mm)
- 4 Vis pour le moteur
(10x3mm)
- 2 Vis à pour la profondeur
(50x2mm)
- 2 Vis pour la dérive
(20x2mm)
Incluido en el kit
ARF
- Fuselaje con 2 Servos y
ESC
- Dos alas D+I con 2 servo
en cada
- Profundidad
- Timón
- Junco carbón
- Chapa de madera
- Motor con soporte
- Hélice
- 4 Tornillos para las alas
(35x30mm)
- 4 Tornillos para la chapa
de madera (8x2mm)
- 4 Tornillos para el motor
(10x3mm)
- 2 Tornillos para la
profundidad (50x2mm)
- 2 Tornillos para el timón
(20x2mm)
Advertisement
Table of Contents

Related Manuals for Boomerang FlyCamOne Carrier


Summary of Contents for Boomerang FlyCamOne Carrier
- Page 1 Boomerang Boomerang GT FlyCamOne Carrier FlyCamOne Carrier FlyCamOne Carrier FlyCamOne Carrier Manual www.Air-Ace.net Content ARF Contenu du kit Incluido en el kit - Fuselage with 2 Servos - Fuselage avec 2 Servo et - Fuselaje con 2 Servos y and ESC...
-
Page 2: Security Advices
SECURITY ADVICES The Boomerang GT is not suitable for children under the age of 14 years. For under age use, parent’s supervision is -absolutely needed. • The operation with this Boomerang GT requires a middle level of technical knowledge as well as care and awareness in safety and •... - Page 3 3) Install the rudder unit into the connector above the elevator unit and fix it with the screws. 4) Connect the rudder plastic linkage of the rudder and elevator. Then insert carbon pipe to one side of the main wing. 5) Insert the carbon pipe to the other side of the main wing and put them together as shown.
- Page 4 7) Take the extension line for ESC and the power line and put it into hole of the main wing as shown. 8) Put the base of the motor pedestal to the main wing and fix it with the screws. 9) Use the screws 350mmx30mm to fix main wings to the fuselage.
- Page 5 10) Connect the extension and power line to the ESC. 11) Install the motor pedestal on its base and fix it with the screws. 12) Install the propeller to the axe of the motor and keep in my mind that plane must push when flying (do not fix it reverse sided!) 13) Before your first fly, you must adjust the center of gravity (CG) of the plane with the battery inside.
- Page 6 Repairs The Boomerang GT is made of EPO, a material that absorbs mechanical shocks by its flexibility. Nevertheless it can be damaged due to hard touch downs. Use „Blue Glue“to stick crannies, breakings or cracked parts. You will get spare parts at your retailer or at www.air-ace.net.
-
Page 7: Assemblage Du Modèle
CONSEILS DE SECUTITE Le Boomerang GT n’est pas conseillé pour les enfants de moins de 14 ans. Pour les enfants de moins de 14 ans, l’encadrement par un • adulte est indispensable. L’utilisation de ce modèle requiert des connaissances technologiques, de la prudence ainsi qu’une appréhension des risques liés à... - Page 8 2) Positionner la dérive de profondeur sur la partie arrière du fuselage comme illustré et fixer avec les vis prévues à cet effet. (50mmx2mm) 3) Positionner à présent la dérive sur les connecteurs prévus à cet effet sur la partie arrière du fuselage et fixer à l’aide des vis fournies.
- Page 9 6) Renforcer la rigidité des deux ailes principales à l’aide du renfort en bois fourni. Fixer à l’aide des vis prévues à cet effet. Une fois cette opération réalisée, connecter les servo internes présents sur l’aile avec les gouvernes correspondantes et faites de même avec les servo externes. Enfin, connecter les servo au récepteur en veillant à...
- Page 10 10) Connecter la rallonge servo et l’alimentation à l’ESC. 11) Installer le support moteur sur sa base et fixer à l’aide des vis prévues à cet effet. 12) Enfin, installer l’hélice sur son axe en vous assurant que celle-ci est correctement positionnée. (Ne pas monter à...
-
Page 11: Premier Vol
Entretien Le Boomerang GT est construit en EPO (Polypropylène expansé), matériau connu pour sa capacité à absorber les chocs. Néanmoins, certain crashs peuvent endommager la structure. Il est recommandé d’utiliser de la colle « BlueGlue » pour réparer les pièces cassées. Votre revendeur possède également toutes les pièces détachées nécessaires. - Page 12 ACONSEJOS DE SEGURIDAD El Boomerang GT no es un producto aconsejados a niños de menos de 14 años de edad. Es necesario vigilar a los niños que tienen • menos de esta edad. La utilización de este modelo necesita conocimientos técnicos en los productos de modelismo y en el vuelo de un avión de cuatros •...
- Page 13 3) Ahora, posicionar el timón sobre los conectadores laterales y atornillar el todo con los siguientes tornillos. (20mmx2mm) 4) Conectar las abrazaderas plásticas blancas de la profundidad y del timón. Pues inserir el junco carbón en una de las dos alas. 5) Pues inserir el junco carbón en la otra ala afín de reunirlas como ilustrado aquí...
- Page 14 7) Tomar el hilo de su ESC y el de la alimentación eléctrica y inserirlos en la ala principal como ilustrado aquí. 8) Posicionar la base del soporte motor sobre la ala principal y fijarla utilizando los tornillos adecuados. 9) Utilizar los tornillos 350mmx30mm para fijar las alas al fuselaje principal.
- Page 15 10) Conectar el alargador servo y la alimentación con su ESC. 11) Instalar el motor sobre su base y fijarlo con los tornillos adecuados. 12) Por fin, instalar la hélice sobre su eje asegurándolo que está bien posicionada. ¡Verificar la dirección de la rotación!) Antes de volar, tiene que verificar el centro de gravedad de su modelo.
-
Page 16: Mantenimiento
Mantenimiento El Boomerang GT ha sido construido con EPO (Polipropileno expensado). Esté material es conocido por su capacidad a absorber los choques. En el caso de que una parte se rota, puede utilizar nuestra colla « BlueGlue ». Su revendedor también propone las piezas de recambio originales. - Page 17 CE - Declaration Important Battery Information / Informations importantes sur les piles de l’émetteur Herewith we declare that this item is in accordance Transmitter Battery Care with the essential requirements and other relevant regulations of the directive 1999/5/EC. A copy of Utilisez toujours des piles AA.
Need help?
Do you have a question about the FlyCamOne Carrier and is the answer not in the manual?
Questions and answers