ActronAir Classic 2 Series Installation And Commissioning Manual
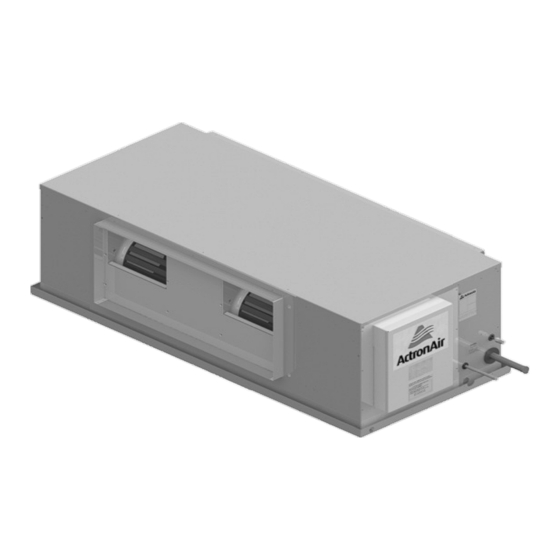
Split ducted unit
Hide thumbs
Also See for Classic 2 Series:
- Installation and commissioning manual (36 pages) ,
- Installation and commissioning manual (37 pages)
Table of Contents
Advertisement
Classic Series 2
Split Ducted Unit
Installation and Commissioning Guide - Outdoor
Model Numbers
Classic Condenser Add On Cooling Only
CRA100S
CCA130S
CRA130S
CCA150S
CRA130T
CCA170S
CRA150S
CCA170T
CRA150T
CCA200T
CRA170S
CCA230T
CRA170T
CRA200T
CRA230T
IMPORTANT NOTE:
Please read this manual carefully before installing or operating your air conditioning unit.
Advertisement
Table of Contents

Related Manuals for ActronAir Classic 2 Series


Summary of Contents for ActronAir Classic 2 Series
- Page 1 Classic Series 2 Split Ducted Unit Installation and Commissioning Guide - Outdoor Model Numbers Classic Condenser Add On Cooling Only CRA100S CCA130S CRA130S CCA150S CRA130T CCA170S CRA150S CCA170T CRA150T CCA200T CRA170S CCA230T CRA170T CRA200T CRA230T IMPORTANT NOTE: Please read this manual carefully before installing or operating your air conditioning unit.
-
Page 2: Table Of Contents
Classic 2 Outdoor Units Installation and Commissioning Guide Table of Contents 01. Inspection ..........................4 01.01. Product Inspections 01.02. Codes, Regulations and Standards 02. General Information ........................4 03. Safety Instructions ........................5 04. Installation Information ......................6 05. Operation Manual Access ......................7 06. - Page 3 Classic 2 Outdoor Units Installation and Commissioning Guide 18. Indoor Fan Commissioning via Third Party Control ..............37 18.01. EVA100S / EFA100S 18.02. EVA130S / EFA130S 18.03. EVA150S / EFA150S 18.04. EVA170S / EFA170S 18.05. EVA200S / EFA200S 18.06. EVA230S / EFA230S 19.
-
Page 4: Inspection
Check your air conditioning unit and all items against the invoice upon receiving your shipment. Inspect the unit, components and accessories for any sign of damage. If there is any damage to the unit, contact ActronAir Customer Care Department immediately on: 1300 522 722 to obtain a Goods Return Number. -
Page 5: Safety Instructions
Blue Epoxy Coat Coil Protection heat exchangers ensures an enhanced heat transfer with increased performance efficiency. System Flexibility The ActronAir air conditioning units are the first choice for residential, office, schools and other air conditioning facilities applications, both for new construction or retrofitting projects. Refrigerant Handling and Accountability ActronAir strongly urges that all service technicians make every effort to eliminate and/or vigorously reduce the emission of refrigerants to the atmosphere. -
Page 6: Installation Information
Classic 2 Outdoor Units Installation and Commissioning Guide DANGER Hazardous Voltage - Risk of Electrocution. Turn Off the power from main isolator before proceeding with any service work of the unit. Observe proper LOCK-OUT/TAG- OUT (LOTO) procedures for electrical appliances in order to prevent accidental switching-on of the power supply. Extreme care and caution must be observed should there be a need to work on live circuit. -
Page 7: Operation Manual Access
• Secure the power cords and control cables that goes in/out the unit. Use the cable ties provided in the control box. NOTES This outdoor unit is designed to match only with ActronAir Classic Series indoor unit as specified in the Technical Selection Catalogue. -
Page 8: Components Overview
Classic 2 Outdoor Units Installation and Commissioning Guide 06. Components Overview FANS CONTROL PANEL COIL ASSEMBLY LP CONTROL HP CONTROL REVERSING VALVE COMPRESSOR ACCUMULATOR DISCHARGE MUFFLER Installation and Commissioning Guide - Classic 2 Split Ducted Outdoor Unit Doc. No.0525-073 Ver. 8 210414... -
Page 9: Control Panel
Classic 2 Outdoor Units Installation and Commissioning Guide 07. Control Panel 07.01. Single Phase (10-17kW) 24VAC RELAY (Add On Cooling CONTROL BOARD CONTROL for CCA models only) CIRCUIT BREAKER MAIN TERMINAL BLOCK COMPRESSOR TERMINAL BLOCKS SINGLE PHASE SOFT STARTER FAN SPEED CAPACITORS FAN RUNNING CAPACITORS... -
Page 10: Three Phase - Soft Starter Option (13-23 Kw)
Classic 2 Outdoor Units Installation and Commissioning Guide 07.03. Three Phase - Soft Starter Option (13-23 kW) 24VAC RELAY (Add On Cooling for CCA models only) CONTROL BOARD 3 PHASE SOFT STARTER FAN SPEED CAPACITORS SUB-MAINS TERMINAL BLOCKS FAN RUNNING CAPACITORS CONTROL CIRCUIT BREAKER... -
Page 11: Unit Dimensions And Clearances
(COMPRESSOR CLEARANCE 3. Minimum service access areas and spaces for airflow clearances are responsibilities of the installer, ActronAir will not be held liable for any ELECTRICALS OUTDOOR COIL extra charges incurred due to lack of access and space for airflow. -
Page 12: Cra130S / Cra130T / Cca130S
(COMPRESSOR CLEARANCE 3. Minimum service access areas and spaces for airflow clearances are responsibilities of the installer, ActronAir will not be held liable for any ELECTRICALS OUTDOOR COIL extra charges incurred due to lack of access and space for airflow. -
Page 13: Cra150S / Cra150T / Cca150S
(COMPRESSOR CLEARANCE 3. Minimum service access areas and spaces for airflow clearances are responsibilities of the installer, ActronAir will not be held liable for any ELECTRICALS OUTDOOR COIL extra charges incurred due to lack of access and space for airflow. -
Page 14: Cra170S / Cra170T / Cca170S / Cca170T
CLEARANCE COMP 3. Minimum service access areas and spaces for airflow clearances are responsibilities of the installer, ActronAir will not be held liable for any ELECTRICALS OUTDOOR COIL extra charges incurred due to lack of access and space for airflow. -
Page 15: Cra200T / Cca200T
CLEARANCE (COMPRESSOR 3. Minimum service access areas and spaces for airflow clearances are responsibilities of the installer, ActronAir will not be held liable for any ELECTRICALS extra charges incurred due to lack of access and space for airflow. 4. Under all circumstances, condenser air must not recirculate back onto condenser coil. -
Page 16: Cra230T / Cca230T
CLEARANCE (COMPRESSOR 3. Minimum service access areas and spaces for airflow clearances are responsibilities of the installer, ActronAir will not be held liable for any ELECTRICALS extra charges incurred due to lack of access and space for airflow. 4. Under all circumstances, condenser air must not recirculate back onto condenser coil. -
Page 17: Unit Lifting Procedure
Classic 2 Outdoor Units Installation and Commissioning Guide 09. Unit Lifting Procedure WARNING WH&S regulations must be observed and will take precedence during lifting process. Crane Lifting Method Crane lifting method is recommended for high rise lifting. Connect the loop ends Provide rubber of slings into shackle pads between the... - Page 18 Classic 2 Outdoor Units Installation and Commissioning Guide Fork Lift Method DANGER Make sure rigging equipment, accessories and plant are sufficiently and safely capable to lift the unit in order to prevent potential damage to property, severe personal injury or death. Please check unit weight and weight distribution points as shown in the unit drawing dimensions section.
-
Page 19: Outdoor Unit Preparation
Classic 2 Outdoor Units Installation and Commissioning Guide 10. Outdoor Unit Preparation 1. Remove mounting screws, as shown below: OUTDOOR UNIT ACCESS PANEL MOUNTING SCREWS 2. Remove Access Panel. • Remove Access Panel-Electrical as illustrated below: Removal Order: Pull-Out 20mm Pull-Down to remove Access Panel-Electrical REMOVE... -
Page 20: Field Pipe Connection
Selected field pipe sizes must match the recommended sizes in table above. If the installation requires different field pipe diameter due to different application condition other than recommended, contact ActronAir for advice. Most of unit pipe connections are factory swaged to easily fit to the recommended field pipe diameter. - Page 21 Classic 2 Outdoor Units Installation and Commissioning Guide Both pipes are required to be insulated. INDOOR UNIT OUTDOOR UNIT FIELD PIPE (Installer to Supply) A = EQUIVALENT PIPE LENGTH, 60 meters (max) B = VERTICAL HEIGHT, 20 meters (max) Example of Total Equivalent Field Pipe Length Calculations INDOOR UNIT OUTDOOR...
- Page 22 Classic 2 Outdoor Units Installation and Commissioning Guide TABLE 2: REFRIGERATION PIPING - SINGLE PHASE CRA100S / CRA130S / CRA150S / CRA170S / Reverse Cycle (Outdoor / Indoor) EVA100S EVA130S EVA150S EVA170S CCA130S / CCA150S / CCA170S / Add On Cooling (Outdoor / Indoor) EAA130S EAA150S EAA170S...
- Page 23 Classic 2 Outdoor Units Installation and Commissioning Guide CAUTION Brazed joints should only be made while purging Nitrogen through the system. Failure to do so will cause carbon deposit to be left on the internal pipe surface, that in turn can cause system failure and void warranty.
-
Page 24: Pressure Testing
Classic 2 Outdoor Units Installation and Commissioning Guide 11.02. Pressure Testing Pressurize the system to 2500kPa in stages. A recommended pressure test is to be performed for no less than 1 hour at 2500kPa. IMPORTANT Importance of Evacuation: • Any non-condensable product left in the system can cause the pressure in the high side of the system to increase and in turn, the compression temperature to rise. -
Page 25: Electrical Installation
Classic 2 Outdoor Units Installation and Commissioning Guide 12. Electrical Installation All electrical work must be carried out by a qualified technician. Make sure all wiring is in accordance with local wiring rules. Wiring connections should be made in accordance with the wiring diagram provided. DANGER Live Electrical Supply ! During installation of your air conditioning unit, it may be necessary to work in close proximity to live electricity. -
Page 26: Split Unit Electrical Connection
Classic 2 Outdoor Units Installation and Commissioning Guide 13. Split Unit Electrical Connection NOTE To minimise noise interference, Data and Power cable clearance should be maintained as much as possible. DETAILED WIRING DIAGRAM IS PROVIDED WITH THE UNIT. Outdoor Unit: Located at the back of electrical/compressor access panel. Indoor Unit: Located at the back of electrical box cover. - Page 27 Classic 2 Outdoor Units Installation and Commissioning Guide 2 Core Twisted Data Cable Shielding Instructions (ActronAir Part Number: AEDC2) NOTES • Maintain the twist of the core wires up to the Green Terminal Plug. • Maximum strip length of outer insulation to the Green Terminal Plug is 50mm.
-
Page 28: Maximum Cable Lengths
Classic 2 Outdoor Units Installation and Commissioning Guide Circuit Breaker Size and Cable Size Requirement Circuit Breaker Size Cable Size (mm2) Model Amps MAIN O.D. to I.D. CRA100S / EVA100S 25.0 CRA130S / EVA130S / EFA130S 32.0 CCA130S / EVA130S / EFA130S CRA150S / EVA150S / EFA150S 32.0 CCA150S / EVA150S / EFA150S... -
Page 29: Wiring Configuration : Recommended
Classic 2 Outdoor Units Installation and Commissioning Guide 14.02. Wiring Configuration : Recommended LR7-1 INDOOR UNIT WALL CONTROLLER WALL CONTROLLER WALL CONTROLLER (OPTIONAL) (OPTIONAL) (OPTIONAL) LM-RS-2 OUTDOOR UNIT (OPTIONAL) DATA CONTROL AERSS CABLE (OPTIONAL) MEPS MODEL C ERT I FI ED R-410A LIVE ELECTRICAL WITHIN ENCLOSURE ISOLATE ELECTRICAL SUPPLY BEFORE REMOVING PANELS... -
Page 30: Wiring Configuration : Alternate
Classic 2 Outdoor Units Installation and Commissioning Guide 14.03. Wiring Configuration : Alternate LR7-1 LR7-1 LR7-1 INDOOR UNIT WALL CONTROLLER WALL CONTROLLER WALL CONTROLLER (OPTIONAL) (OPTIONAL) (OPTIONAL) OUTDOOR UNIT LM-RS-2 (OPTIONAL) DATA CONTROL CABLE AERSS (OPTIONAL) MEPS C ERT I FI ED MODEL R-410A LIVE ELECTRICAL WITHIN ENCLOSURE... -
Page 31: Wiring Connections
Classic 2 Outdoor Units Installation and Commissioning Guide 15. Wiring Connections 15.01. LR7-1 and LC7-2 Wall Control Wiring Connections WALL CONTROL WIRING INDOOR POWER: - BROWN / ORANGE CONTROL BOARD 485 A: - BLUE 485 B: - BLUE-WHITE WALL CONTROLLER +12V A GND: - BROWN-WHITE / ORANGE-WHITE... -
Page 32: Lm-Rs-2 Optional Sensor Wiring Connections
Classic 2 Outdoor Units Installation and Commissioning Guide 15.03. LM-RS-2 Optional Sensor Wiring Connections REMOTE SENSOR WIRING INDOOR REMOTE SENSOR WIRING PAIR 1 (BLUE / BLUE-WHITE) CONTROL PAIR 2 (ORANGE / ORANGE-WHITE) PAIR 3 (GREEN / GREEN-WHITE) PAIR 1: - BLUE / BLUE-WHITE BOARD PAIR 4 (BROWN / BROWN-WHITE) PAIR 2: - ORANGE / ORANGE-WHITE... -
Page 33: Demand Response Management
Classic 2 Outdoor Units Installation and Commissioning Guide 15.05. Demand Response Management These products are compliant to AS/NZS 4755.3.1 ODU CPU BOARD +12V/COM DRM 3/COMP DRM 2/FAN DRM 1/HEAT 1. Route DRM input cables into the Unit (as per previous wiring installation procedure) 2. -
Page 34: Control Source Configuration (Ctrs)
Configurable settings are as follows: Third Party Control The unit can be controlled by non-ActronAir wall controller. To do this, CtrS on the Outdoor Board must be set to 0. For connection details, see the wiring diagram supplied with the outdoor unit. -
Page 35: Third Party Control Input (Indoor And/Or Outdoor Board)
Classic 2 Outdoor Units Installation and Commissioning Guide 17. Third Party Control Input (Indoor and/or Outdoor Board) This option allows Fan, Compressor and Reversing Valve to be controlled by a Third Party Controller. There are two ways on how the Indoor Fan may be controlled, using 0-10V Analogue Input (InZone) or Fixed Indoor Fan Speed (UNOJR). NOTES •... -
Page 36: Run And Fault Indication Output (Outdoor Board)
Classic 2 Outdoor Units Installation and Commissioning Guide 3. Use the MENU Button to navigate to 0 to select third Party Control as the control source. Press the ENTER Button to save the setting. NOTES • 0-10V Fan Operation will operate between LOW, PWM and HIGH PWM. •... -
Page 37: Indoor Fan Commissioning Via Third Party Control
Classic 2 Outdoor Units Installation and Commissioning Guide 18. Indoor Fan Commissioning via Third Party Control 18.01. EVA100S / EFA100S EXTERNAL STATIC PRESSURE (Pa) AIRFLOW (l/s) % PWM % PWM % PWM % PWM % PWM % PWM % PWM MOTOR / BLOWER LIMIT MOTOR / BLOWER LIMIT NOTES:... -
Page 38: Eva130S / Efa130S
Classic 2 Outdoor Units Installation and Commissioning Guide 18.02. EVA130S / EFA130S EXTERNAL STATIC PRESSURE (Pa) AIRFLOW (l/s) % PWM % PWM % PWM % PWM % PWM % PWM % PWM MOTOR / BLOWER LIMIT MOTOR / BLOWER LIMIT NOTES: W = Indoor Fan Power, Watts PWM = Pulse Width Modulation Setting, % PWM... -
Page 39: Eva150S / Efa150S
Classic 2 Outdoor Units Installation and Commissioning Guide 18.03. EVA150S / EFA150S EXTERNAL STATIC PRESSURE (Pa) AIRFLOW (l/s) % PWM % PWM % PWM % PWM % PWM % PWM % PWM MOTOR / BLOWER LIMIT NOTES: W = Indoor Fan Power, Watts PWM = Pulse Width Modulation Setting, % PWM Default PWM Setting = 75% PWM (Medium Speed) MOTOR / BLOWER LIMIT... -
Page 40: Eva170S / Efa170S
Classic 2 Outdoor Units Installation and Commissioning Guide 18.04. EVA170S / EFA170S EXTERNAL STATIC PRESSURE (Pa) AIRFLOW (l/s) % PWM % PWM % PWM % PWM % PWM % PWM % PWM % PWM MOTOR / BLOWER LIMIT NOTES: W = Indoor Fan Power, Watts PWM = Pulse Width Modulation Setting, % PWM Default PWM Setting = 90% PWM (Medium Speed) MOTOR / BLOWER LIMIT... -
Page 41: Eva200S / Efa200S
Classic 2 Outdoor Units Installation and Commissioning Guide 18.05. EVA200S / EFA200S EXTERNAL STATIC PRESSURE (Pa) AIRFLOW (l/s) % PWM % PWM % PWM % PWM % PWM % PWM % PWM 1000 1025 1050 1075 1100 MOTOR / BLOWER LIMIT 1125 1150 NOTES:... -
Page 42: Eva230S / Efa230S
Classic 2 Outdoor Units Installation and Commissioning Guide 18.06. EVA230S / EFA230S EXTERNAL STATIC PRESSURE (Pa) AIRFLOW (l/s) 1020 1050 1075 1100 1125 1150 1175 1200 1225 1250 1275 1300 1012 MOTOR / BLOWER LIMIT 1325 1350 1039 1375 1025 1380 1035 NOTES:... -
Page 43: Refrigerant Charging
Classic 2 Outdoor Units Installation and Commissioning Guide 19. Refrigerant Charging • The units detailed on this guide are pre-charged with R-410A refrigerant. Should there be a need to add or remove some refrigerant, it is recommended to follow the charging method explained below. •... - Page 44 Classic 2 Outdoor Units Installation and Commissioning Guide 3. Start the unit in cool mode ensuring that the compressor is in operation before taking service gauges reading. Allow the system to stabilise for next 15 - 30 minutes before recording. 4.
- Page 45 Classic 2 Outdoor Units Installation and Commissioning Guide Checking for Superheat: Maintaining the correct superheat is important for ensuring the evaporator is achieving maximum capacity and avoiding excessive liquid refrigerant returning to the compressor. 1. From the R-410A Pressure/Temperature Chart record the corresponding Saturated Suction Temperature (SST) at the given suction pressure.
- Page 46 Classic 2 Outdoor Units Installation and Commissioning Guide CHARGING TABLE Temp Pressure Temp Pressure Temp Pressure Temp Pressure - 60 - 34.4 - 28 194.9 805.9 2090.7 - 59 - 30.7 - 27 206.9 834.1 2145.5 - 58 - 26.8 - 26 219.2 862.9...
-
Page 47: Maintenance
Classic 2 Outdoor Units Installation and Commissioning Guide 20. Maintenance Maintenance Procedures This section describes the procedures that must be performed as a part of normal maintenance program. Regular servicing of equipment by licensed technician is highly recommended. Regular servicing of your unit helps in maintaining its optimum performance and reliability. - Page 48 Classic 2 Outdoor Units Installation and Commissioning Guide Cleaning the Condenser Coils Clean the coils at least once a year or more frequently if unit is located in a dusty and dirty environment, in order to maintain your system’s proper operating performance. High discharge pressures are good indication that the coils need cleaning.
-
Page 49: Maintenance Frequency Checklist
Classic 2 Outdoor Units Installation and Commissioning Guide 21. Maintenance Frequency Checklist Regular servicing of equipment by a qualified technician is recommended every 12 months for residential applications and every quarter for commercial applications. Regular servicing of your unit helps in maintaining its optimum performance and reliability. - Page 50 Classic 2 Outdoor Units Installation and Commissioning Guide OUTDOOR UNIT Service Period Parts Detail of Service Check Service Methods For highly corrosive environment, wash panels Casing / Panels Visual check for damage, rust quarterly with water and neutral and Frames and dust accumulation.
-
Page 51: Start Up And Commissioning Report
Classic 2 Outdoor Units Installation and Commissioning Guide 22. Start Up and Commissioning Report INSTALLATION INFORMATION Name: Tel. Number: CUSTOMER Address: Name: Tel. Number: INSTALLER Address: Site Address: Date Installed: Model: Serial Number: CIRCUIT TEMPERATURE SETTINGS Supply Air Temperature Return Air Temperature Suction Temperature Discharge Temperature Condenser Coil Temperature... - Page 52 ©Copyright 2019 Actron Engineering Pty Limited ABN 34 002767240. ®Registered Trade Marks of Actron Engineering Pty Limited. ActronAir is constantly seeking ways to improve the design of its products, therefore specifications are subject to change without notice. Document: 0525-073 Ver. 8 Issue Date: 04/2021...
Need help?
Do you have a question about the Classic 2 Series and is the answer not in the manual?
Questions and answers