Advertisement
Quick Links
Hiermit erklärt die Ergolutions GmbH, dass die gedruckte Konformitätserklärung dem Produkt beiliegt. Sollte die
Konformitätserklärung fehlen, kann diese postalisch unter der unten genannten Herstelleradresse angefordert
werden.
Hereby Ergolutions GmbH declares that the Declaration of Conformity is part of the shipping content. If the
declaration is missing, you can request it by post under the below mentioned manufacturer adress.
www.ergolutions.de
Ergolutions GmbH
Kalver Str. 20
58515 Lüdenscheid
Ver.1.0.
Artikelnummer / Item number
10150
10151
10152
Bedienungsanleitung / Manual
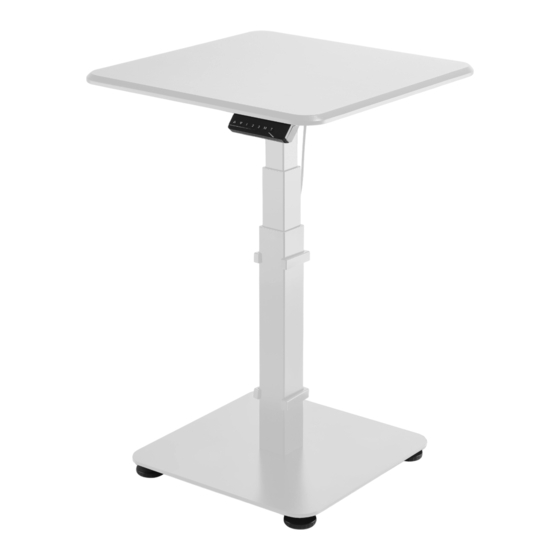
Elektronischer Steh - Sitz Arbeitsplatz
Electric Stand - Sit Workdesk
Advertisement

Related Manuals for ergolutions 10150


Summary of Contents for ergolutions 10150
- Page 1 Konformitätserklärung fehlen, kann diese postalisch unter der unten genannten Herstelleradresse angefordert werden. 10152 Hereby Ergolutions GmbH declares that the Declaration of Conformity is part of the shipping content. If the declaration is missing, you can request it by post under the below mentioned manufacturer adress. Bedienungsanleitung / Manual www.ergolutions.de...
- Page 2 Vielen Dank, dass Sie sich für Ihren ergonomischen und aufgeräumten Arbeitsplatz für Produkte der Firma Ergolutions Thank you very much for choosing a product from Ergolutions to equip your ergonomic and tidy workspace. This electric heigh adjustable standing desk lets you work in a either standing or sitting position and supports you to entschieden haben.
- Page 3 Zusätzliche Sicherheitsanweisungen: Elektrische Sicherheitsanweisungen: Additional safety instructions: Electric safety instructions: Dieses Produkt wird durch Elektrizität betrieben. Um Verbrennungen, Feuer und Elektrische Schläge zu vermeiden lesen Sie bitte die vollständige Anleitung. The product is powered by electricity. In order to avoid burns, fire and electric shock, please read the instructions carefully. Nicht mit Wasser reinigen, wenn der Stecker eingesteckt ist.
- Page 4 VORBEREITUNG / PREPARATION KOMPONENTEN LISTE / COMPONENT LIST Wichtige Spezifikationen Important specifications Eingangsspannung Arbeitstemperatur Maximale Belastung Power input Working temperature Maximum capacity 5 kg (100~240V) °C 40°C Rahmen / Frame Tischbein / Table leg Basisplatte / Base Benötigte Werkzeuge Tools needed Wasserwage Imbusschlüssel (inkl.) Bohrer...
- Page 5 Tischbein montieren / Mounting the lifting column Jetzt kann die Montage beginnen Decke Now let`s start the installation Blanket...
- Page 6 Die Rahmenbreite einstellen / Adjusting the frame width Imbusschlüssel Allen Wrench 35(max) 0(min) 35(max) When adjusting the frame position, please make sure it doesn't exceed the range of silk screen printing on the inner crossbar. Lösen Sie die Madenschrauben welche die beiden Hälften des Leiterrahmens zusammenhalten, aber entfernen Sie die Schrauben nicht komplett.
- Page 7 Füße Montieren / Assembling the feet Tischplatte Montieren / Assembling the table top Setzen Sie die Unterkonstruktion auf Ihre Schrauben Sie die Füße bis zum Ende ein. Sie können die Füße später wieder etwas Tischplatte auf und positionieren Sie wie gewün- herausschrauben um Bodenunebenheiten scht.
- Page 8 Display Montieren / Assembling the columns Motorkabel anschließen / Connect the engine cable Verbinden Sie das rechte Kabel des Displays mit dem Motorkabel. Connect the right cable of the control panel to the motor cord. Das Display kann an beiden Seiten montiert werden.
- Page 9 Netzteil Montieren / Installing the AC Adaptor Stromkabel anschließen / Connecting the power cable Verbinden Sie das linke Kabel des Displays mit dem Netzteil. Connect the left cord of the control panel with the AC adaptor. Fädeln Sie das Stromkabel durch das Loch in der Basis Platte.
- Page 10 Kabelclips anbringen / Attaching the cable clips Drehen Sie den Tisch am besten mit zwei Personen um Verletzungen zu vermeiden. If only one person turns over the table serious injuries might occur. Entfernen Sie den Klebefilm und positionieren den Kabel Halter an der gewünschten Stelle der Tischplatte.
- Page 11 Feinjustage / Fine adjustment Stecken Sie das Stromkabel ein. Jetzt können Sie Ihren neuen Steh-Sitz Arbeitsplatz nutzen. Unter der Bodenplatte sind 4 justierbare Pads. Wenn der Fußboden leichte Unebenheiten hat, kann man mit diesen den Tisch optimal austarieren. Am besten nutzen Sie hierzu eine Wasser- Connect the desk to power.
Need help?
Do you have a question about the 10150 and is the answer not in the manual?
Questions and answers