Table of Contents
Advertisement
Quick Links
Advertisement
Table of Contents

Subscribe to Our Youtube Channel
Related Manuals for Allen + Roth A102006002


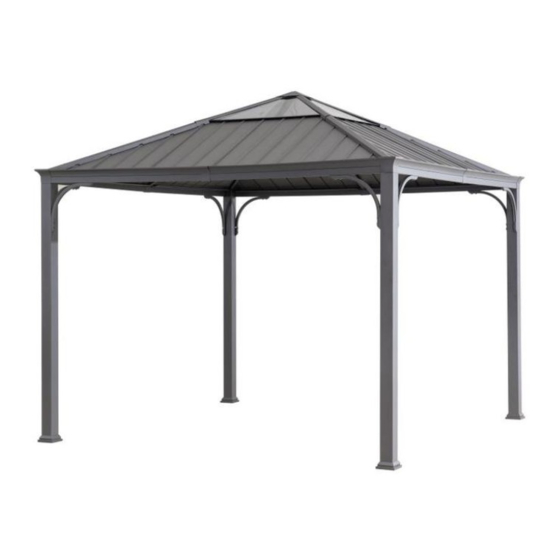
Summary of Contents for Allen + Roth A102006002
- Page 1 ITEM #xxxxxx GAZEBO MODEL # A102006002 Français p. 20 ATTACH YOUR RECEIPT HERE Purchase Date Serial Number Questions, problems, missing parts? Before returning to your retailer, call our customer service department at 1-866-439-9800, 8 a.m. - 8 p.m., EST, Monday - Friday.
-
Page 2: Package Contents
PACKAGE CONTENTS PART DESCRIPTION QUANTITY PART DESCRIPTION QUANTITY Post Small Roof Connector Base cover Top Cover Base Hook Small Roof Sloping Beam Cover Plate Beam 1 Small Roof Panel Beam 2 Roof Panel 1 Beam Connector Inner Cover Plate Roof Panel 2 Roof Panel 3 Arc Support Bar Netting pipe... -
Page 3: Hardware Contents
HARDWARE CONTENTS M6 X 15 mm Bolt M6 X 45 mm Bolt M6 X 40 mm Bolt Qty. 1 + 1 spare Qty. 176 + 9 spare Qty. 32 + 2 spare Φ8X180 mm Stake M6 Flat washer M6 X 55 mm Bolt Qty.8 Qty. -
Page 4: Safety Information
SAFETY INFORMATION Please read and understand this entire manual before attempting to assemble or install the product. WARNING • Keep all children and pets away from assembly area. Children and pets should be supervised while gazebo is being assembled. • The assembled gazebo should be located at least 6 feet from any obstruction such as fence, garage, house, overhanging branches, laundry lines or electrical wires. - Page 5 CAUTION • If the gazebo will not be used for a long period of time (e.g. during winter time), disassemble and store it in a clean, dry environment. • This product is for domestic, outdoor use (i.e. decorative and sunshade purposes only).
- Page 6 ASSEMBLY INSTRUCTIONS 1. Insert the Base Cover (B) to the Post (A), Then attach Base (C) to the Post (A) with Bolts (AA) and Flat Washer (EE). Tighten with Allen Key (Z1). Hardware Used M6 x 15 mm Bolt M6 Flat washer M6 Wrench...
- Page 7 ASSEMBLY INSTRUCTIONS 2. Insert Beam Connector (E) to the Beam 2 with Bolts (AA) and Flat Washer (EE). Then insert Beam 1 (D1) to the Beam Connector (E) with Bolts (AA) and Flat Washer (EE).Tighten with Allen Key (Z1). Hardware Used x 16 M6 x 15 mm Bolt x 16...
- Page 8 ASSEMBLY INSTRUCTIONS 5. Attach the Netting Pipe (H) to the Beam 2 (D2) and Beam 1 (D1) with Bolts (AA), Flat Washer (EE) and Plastic Cap (FF). Tighten with Allen Key (Z1). Hardware Used M6 x 15 mm Bolt x 16 x 16 M6 Flat washer M6 Wrench...
- Page 9 ASSEMBLY INSTRUCTIONS 7. Attach the assembled big roof frame (I) to the Big Roof Sloping Beam (J) with Bolts (AA) and Flat Washer .Tighten with Allen Key (Z1). Hardware Used M6 x 15 mm Bolt M6 Flat washer M6 Wrench 8.
- Page 10 ASSEMBLY INSTRUCTIONS 10. Attach Big Roof Middle Beam (K) to the Big Roof Frame (I) with Bolts (AA) and Flat Washer (EE). Tighten with Allen Key (Z1). Hardware Used M6 x 15 mm Bolt M6 Flat washer M6 Wrench 11. Attach Big Roof Middle Beam (K) to the assembled Beam (D1/D2) with Bolts (AA) and Flat Washer (EE).
- Page 11 ASSEMBLY INSTRUCTIONS 13. Connect Small Roof Sloping Beam (M) to the Big Roof Frame (I) with Bolts (AA) and Flat Washer (EE). Tighten with Allen Key (Z1). Hardware Used M6 x 15 mm Bolt M6 Flat washer M6 Wrench 14. Attach Hook (Q) to the Small Roof Connector (O).
- Page 12 ASSEMBLY INSTRUCTIONS 15. Tear off the membrane on the Small Roof Panel (S), then put the Small Roof Panel (S) to the Small Roof Sloping Beam (M) with Bolts (AA) and Flat Washer(EE). Tighten with Allen Key (Z1). Hardware Used M6 x 15 mm Bolt M6 Flat washer M6 Wrench...
- Page 13 ASSEMBLY INSTRUCTIONS Connect the Big Roof Small Beam (L) to the Big Roof Sloping Beam (J) with Bolts (AA) and Flat Washer (EE). Tighten with Allen Key (Z1). Hardware Used M6 x 15 mm Bolt M6 Flat washer M6 Wrench 19.
- Page 14 ASSEMBLY INSTRUCTIONS 20. Place the Roof Panel 3 (T3) on the big roof and then insert it into the groove of the Big Roof Frame (I). 21. Overlap the edge of the Roof Panel 6 (T6) on the edge of the Roof Panel 3 (T3) as shown in Figure 21.
- Page 15 ASSEMBLY INSTRUCTIONS 23. Overlap the edge of the Roof Panel 1 (T1) on another edge of the Roof Panel 2 (T2) as shown in Figure 23. Repeat the same step to the Roof Panel 4 (T4) and the Roof Panel 5 (T5). 24.
- Page 16 ASSEMBLY INSTRUCTIONS 26. Insert the Big Roof Sloping Beam Cover Plate (U) to the bottom of Small Roof Panel (R). 27. Connect the Big Roof Sloping Beam Cover Plate (U) to the Big Roof Sloping Beam with Bolts (DD) and Flat Washer (EE).
-
Page 17: Care And Maintenance
CARE AND MAINTENANCE • Steel components for this gazebo are treated with rust inhibiting paint that protects it from rusting. However, due to the nature of steel, surface oxidation (rusting) will occur if these protective coatings are scratched. This is not a defect and thus not covered by the warranty. - Page 18 ONE-YEAR LIMITED WARRANTY Finishes. Paint finishes are warranted against peeling, cracking and blistering for one year from purchase date provided the item has not been scratched or abraded. Chips and scratches or fading resulting from normal wear and tear and exposure to the elements are not covered. Fabrics.
-
Page 19: Replacement Parts List
REPLACEMENT PARTS LIST For replacement parts, call our customer service department at 1-866-439-9800, 8 a.m. - 8 p.m., EST, Monday - Friday. - Page 20 REPLACEMENT PARTS LIST For replacement parts, call our customer service department at 1-866-439-9800, 8 a.m. - 8 p.m., EST, Monday - Friday. PART DESCRIPTION PART# PART DESCRIPTION PART# P000200244 Post P000700273 Roof Panel 1 P000700274 P006100095 Roof Panel 2 Base cover P000100155 P000700275 Base...
Need help?
Do you have a question about the A102006002 and is the answer not in the manual?
Questions and answers