Advertisement
Available languages
Available languages
Quick Links
Advertisement

Related Manuals for INTERSPORT CR5.1


Summary of Contents for INTERSPORT CR5.1
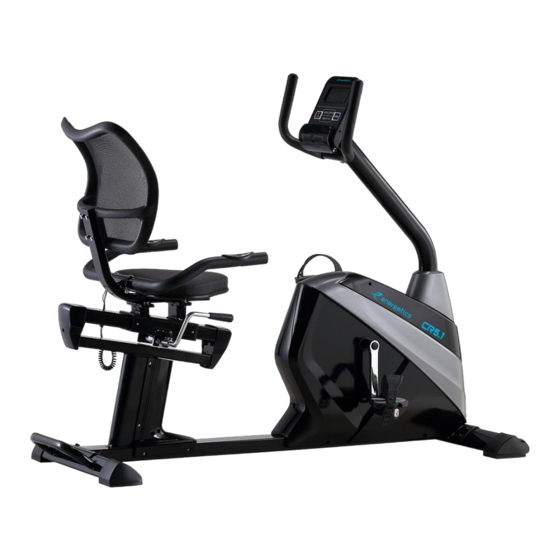
- Page 1 CR5.1 PROGRAMMABLE MAGNETIC RECUMBENT BIKE ENGLISH MANUAL...
- Page 2 Important Safety Information Please keep this manual in a safe place for reference. 1. It is important to read this entire manual before assembling and using the equipment. Safe and efficient use can only be achieved if the equipment is assembled, maintained and used properly. It is your responsibility to ensure that all users of the equipment are informed of all warnings and precautions.
- Page 3 EXPLODED-VIEW ASSEMBLY DRAWING...
- Page 5 PART LIST DESCRIPTION DESCRIPTION 001 Computer 030 Slideway 002 Bolt M5*10*Φ8 031 Crash pad Φ22*Φ18*16*Φ4 032 Washer d4*Φ9*1 003 Handle pulse wire 2 033 Bolt ST4.2*19*θ8 004 Trunk wire 1 005 Handlebar post join 034 Rectangular bush J50*100*60 006 Handlebar 035 Supporting shoe for seat 007 Arc washer d8*Ф20*2*R30 036 Bolt ST3*6*Φ5.6...
- Page 6 PART LIST DESCRIPTION DESCRIPTION 059 Round end cap Φ25*16 089 Bolt M6*16*S10 Tension spring 060 Assembly of Saddle Frame Φ2*Φ12*54*N15 061 Square end cap J50*25*14 091 Nylon Nut 062 Seat 092 Idler connecting rod 063 Bolt M6*40 093 Wave washer 064 Back cushion 094 Bearing 2 065 Wrench S13-14-15...
- Page 7 HARDWARE PACKING LIST...
- Page 8 ASSEMBLY INSTRUCTIONS A. Before assembling make sure that you will have enough space around the item. B. It is strongly recommended this machine to be assembled by two or more people to avoid possible injury. STEP 1 Take out the bottom of the packaging tube (68), bolt (16) and washers (17) from main frame (13) by wrench (65),...
- Page 9 #8 d8 8PCS #65 S13-14-15 1PC STEP 2 Take out the bolts (16), spring washers (8) and washers (17) by wrench (65), then attach front bottom tube (15) and rear bottom tube (26) on the main frame (13) with wrench (65),bolts (16), spring washers (8) and washers (17).
- Page 10 STEP 3 1. Take out bolt (9), spring washers (8) and arc washers (7) from main frame (13) by wrench (66). 2. Put cover of handlebar post join (10) into handlebar post join (5), connect trunk wire 1 (4) and trunk wire 2 (12) well;...
- Page 11 STEP 4 1. Attach pedal (14L/R) to main frame (13) by wrench (65). 2. Take out bolt (43),spring washers (41) and arc washers (46) from adjusted handlebar (47) by wrench (67), then attach adjusted handlebar (47) to adjusted shaft (44) with bolt (43) ,spring washers (41) and arc washers (46) .
- Page 12 STEP 5 1. Take out bolt (69),spring washers (8) and washer (17) from supporting shoe for seat (35) by wrench (66), then attach assembly of Saddle Frame (60) to supporting shoe for seat (35) with bolt (69), spring washers (8) and washer (17) by wrench (66).
- Page 13 #51 M8*H16*S13 2PCS #55 M8*47*20*H5 2PCS #17 d8*§ ¶ 2 0*2 2PCS #40 d6*§ ¶ 1 2*1.2 4PCS #63 M6*45*20 4PCS STEP 6 #41 d6 4PCS #8 d8 2PCS a) Take out bolt (63), spring washers (41) and washer (40) from back cushion (64) by wrench (65);...
- Page 14 STEP 7 1. Connect wire of computer (1a) and trunk wire 1 (4) well, connect wire of computer(1b) and trunk wire2 (3) well. 2. Take out bolt (2) from computer (1) first and attach computer (1) to handlebar post join (5) with bolt (2) by wrench (65).
- Page 15 ADJUST THE SEAT Adjust the seat to a suitable The seat could be moved in the location, pull up adjusted horizontal direction when under handlebar (47) to horizontal draught adjusted handlebar (47). position, then lock...
- Page 16 EXERCISE INSTRUCTIONS 1.The Warm Up Phase This stage helps get the blood flowing around the body and the muscles working properly. It will also reduce the risk of cramp and muscle injury. It is advisable to do a few stretching exercises as shown below. Each stretch should be held for approximately 30 seconds, do not force or jerk your muscles into a stretch - if it hurts, STOP.
- Page 17 HEART RATE MAXIMUM TARGET ZONE This stage should last for a minimum of 12 minutes though most people start at about 15-20 minutes COOL DOWN 50 55 65 70 75 3. The Cool Down Phase This stage is to let your Cardio-vascular System and muscles wind down. This is a repeat of the warm up exercise e.g.
- Page 18 EXERCISE COMPUTER FUNCTIONS Program: 21 programs as following B: 10 Preset Program Profile(PROGRAM:P1-P10) A: 1 Manual Program P1: ROLLING P2:VALLEY P3: FATBURN P4:RAMP P5:MOUNTAIN P6: INTERVAL P7:CARDIO P8:ENDURANCE P9:SLOPE P10:RALLY...
- Page 19 C: 1 Watt Control Program (WATT PRO:P16) D: 4 Heart Rate Control Program: (PULSE PRO:P17-P20) 55%H.R, 75%H.R, 95%H.R and TARGET H.R...
- Page 20 E: 5 User Setting Programs: CUSTOM1 to CUSTOM5 (P11 ~ P15) 1. Record the user's data of 5 User Setting Programs. 2. Display Speed (RPM), TIME and WATT., CAL and DIST, at the same time. 3. The computer will turn off automatically if there is no operation, speed signal and pulse signal over 4 minutes. Meanwhile, it will store your current exercise data and urn the loading resistance to the minimum.
- Page 21 BUTTONS 1. ENTER: • In "stop" mode, press ENTER button to enter into program selection and setting value which flash in related window. A: When you choose the program, press Enter to confirm the one you like. B: When in setting, press ENTER to confirm the value that you would like to preset. •...
- Page 22 OPERATION 1.Turn on the computer Plug in one end of the adaptor to the AC electrical source and connect the other end to the computer. The computer will beep and enter into initial mode. 2.Program select and value setting • Manual Program and Preset Program P1~P10 A.
- Page 23 • HEART RATE CONTROL PROGRAM: 55%H.R, 75% H.R and 95% H.R(PULSE PRO: P17-P19) The maximum heart rate depends on different age and this program will ensure you do the healthy exercise within maximum heart rate. A.Press UP, DOWN button to choose the heart rate control program. B.Press ENTER to confirm the heart rate control program, and enter into AGE setting window.
- Page 24 • HEART RATE CONTROL PROGRAM: TARGET HEART RATE(PULSE PRO: P20) The user can set any target heart rate to do the exercise. A. Press UP, DOWN button to select TARGET HEART RATE program. B. Press ENTER to confirm your choice and enter time setting window. C.
- Page 25 The pulse recovery test is to compare your heart rate before and after exercise. It is target to determine your heart strength via the measuring. Please do the test as below: A. Both your hands hold the pulse sensor or via wireless transmitter belt to test the pulse (if applicable), the computer will display your current pulse value.
- Page 26 SPECIFICATIONS Speed KM/H(M/H): showing your current speed. Range: 0.0~99.9 KM/H(M/H). RPM: showing the current rotate per minute. Range : 0~999. TIME: the accumulative exercise time, range : 0:00~99M59S. the preset time range is 5:00~99M00S. The computer will start to count down from preset time to 0:00 with average time for each resistance level.
- Page 27 【5】Tap the matching devices like 'Fs-XXXX' (X means random digit) to pair; 【6】Find related videos to start your favorite running mode. Supported versions for KINOMAP: -For Android devices: 5.0 or later. -Requires iOS 9.0 or later. Compatible with iPhone, iPad, and iPod touch. INTERSPORT ATHLETICS SA 18-20 SOROU 15125 MAROUSI GREECE...
- Page 28 CR5.1 ΗΛΕΚΣΡΟΜΑΓΝΗΣΙΚΟ ΚΑΘΙΣΟ ΠΟΔΗΛΑΣΟ GREEK MANUAL...
- Page 29 ΗΜΑΝΣΙΚΔ ΟΓΗΓΙΔ ΑΦΑΛΔΙΑ Παξαθαινύκε θπιάμηε απηό ην εγρεηξίδην ζε αζθαιέο κέξνο γηα λα κπνξείηε λα αλαηξέμεηε εύθνια ζε απηό. 1. Δίλαη ζεκαληηθό λα δηαβάζεηε νιόθιεξν ην εγρεηξίδην πξηλ ζπλαξκνινγήζεηε θαη ρξεζηκνπνηήζεηε ην κεράλεκα. Αζθαιήο θαη απνηειεζκαηηθή ρξήζε κπνξεί λα επηηεπρζεί κόλν αλ ην κεράλεκα ζπλαξκνινγεζεί, ζπληεξείηαη θαη ρξεζηκνπνηείηαη ζσζηά. Δίλαη...
- Page 30 ΑΝΑΛΤΣΙΚΟ ΓΙΑΓΡΑΜΜΑ ΤΝΑΡΜΟΛΟΓΗΗ...
- Page 32 ΛΙΣΑ ΔΞΑΡΣΗΜΑΣΩΝ ΠΔΡΙΓΡΑΦΗ ΠΟΟΣΗΣΑ ΠΔΡΙΓΡΑΦΗ ΠΟΟΣΗΣΑ Computer 030 Slideway Crash pad Bolt M5*10*Φ8 Φ22*Φ18*16*Φ4 032 Washer d4*Φ9*1 Handle pulse wire 2 033 Bolt ST4.2*19*θ8 Trunk wire 1 Rectangular bush Handlebar post join J50*100*60 035 Supporting shoe for seat Handlebar Arc washer d8*Ф20*2*R30 036 Bolt ST3*6*Φ5.6 Spring washer d8 037 Stator...
- Page 33 ΛΙΣΑ ΔΞΑΡΣΗΜΑΣΩΝ ΠΔΡΙΓΡΑΦΗ ΠΟΟΣΗΣΑ ΠΔΡΙΓΡΑΦΗ ΠΟΟΣΗΣ Α 059 Round end cap Φ25*16 089 Bolt M6*16*S10 Tension spring 060 Assembly of Saddle Frame Φ2*Φ12*54*N15 061 Square end cap J50*25*14 091 Nylon Nut 062 Seat 092 Idler connecting rod 063 Bolt M6*40 093 Wave washer 064 Back cushion 094 Bearing 2...
- Page 34 ΔΣ ΤΝΑΡΜΟΛΟΓΗΗ...
- Page 35 ΟΓΗΓΙΔ ΤΝΑΡΜΟΛΟΓΗΗ A. Πξηλ από ηελ ζπλαξκνιόγεζε βεβαησζείηε όηη ππάξρεη αξθεηόο ρώξνο πεξηκεηξηθά ηνπ αληηθεηκέλνπ . B. πληζηάηαη αλεπηθύιαθηα απηό ην κεράλεκα λα ζπλαξκνινγείηαη από δύν ή πεξηζζόηεξα άηνκα γηα λα απνθεπρζεί πηζαλόο ηξαπκαηηζκόο. ΒΗΜΑ 1 Αθαηξέζηε ην θάησ κέξνο ηνπ ζσιήλα...
- Page 36 #8 d8 8PCS #65 S13-14-15 1PC ΒΗΜΑ 2 Αθαηξέζηε ηηο βίδεο (16) ηηο ξνδέιεο ηύπνπ grover (8) θαη ηηο ξνδέιεο(17) κε ην θιεηδί (65) θαη ζηε ζπλέρεηα βηδώζηε ηνλ εκπξόζζην ζηαζεξνπνηεηή (15) θαη ηνλ νπίζζην ζηαζεξνπνηεηή κε ηελ ιαβή κεηαθνξάο (26) ζην θύξην...
- Page 37 ΒΗΜΑ 3 1. Αθαηξέζηε ηηο βίδεο (9) , ηηο ξνδέιεο ηύπνπ grover (8) θαη ηηο θακππισηέο ξνδέιεο (7) από ην θύξην πιαίζην (13) κε ην θιεηδί (66) 2. Πεξάζηε ην θάιπκκα (10) κέζα από ηνλ άμνλα ζηήξημεο (5) θαη ζπλδέζηε ην...
- Page 38 ΒΗΜΑ 4 1. Βηδώζηε ηα πεηάιηα (14L/R) ζηνπο αληίζηνηρνπο βξαρίνλεο από ην θύξην πιαίζην (13) ρξεζηκνπνηώληαο ην θιεηδί (65). 2. Αθαηξέζηε ηηο βίδεο (43) ηηο ξνδέιεο ηύπνπ grover(41) θαη ηηο θακππισηέο ξνδέιεο (46) από ηελ ιαβή ξύζκηζεο ηνπ θαζίζκαηνο (47) κε ην θιεηδί (67). ηε...
- Page 39 BHMA 5 1. Αθαηξέζηε ηηο βίδεο (69) ηηο ξνδέιεο ηύπνπ grover (8) θαη ηηο θακππισηέο ξνδέιεο (17) από ηηο δύν βάζεηο ζηήξημεο ηνπ άμνλα (35) κε ην θιεηδί (66). Έπεηηα πξνζαξκόζηε ην κεηαιιηθό πιαίζην ζηήξημεο ηεο ζέιαο (60) ζηηο βάζεηο ηνπ άμνλα (35) ρξεζηκνπνηώληαο...
- Page 40 #51 M8*H16*S13 2PCS #55 M8*47*20*H5 2PCS #17 d8*§ ¶ 2 0*2 2PCS #40 d6*§ ¶ 1 2*1.2 4PCS ΒΗΜΑ 6 #63 M6*45*20 4PCS 1. Αθαηξέζηε ηηο βίδεο (63) ηηο ξνδέιεο ηύπνπ #41 d6 4PCS grover (41) θαη ηηο ξνδέιεο (40) από ην #8 d8 2PCS καμηιάξη...
- Page 41 ΒΗΜΑ 7 1. πλδέζηε ην θαιώδην ηεο θνλζόιαο(1a) κε ην θαιώδην πνπ βγαίλεη από ηνλ άμνλα ζηήξημεο 1 (4). ηελ ζπλέρεηα ζπλδέζηε ην θαιώδην ηεο θνλζόιαο (1b) κε ην θαιώδην πνπ βγαίλεη από ηνλ άμνλα ζηήξημεο 2 (3). 2. Αθαηξέζηε ηηο βίδεο (2) από ηελ θνλζόια (1) θαη...
- Page 42 ΡΤΘΜΙΗ ΣΟΤ ΚΑΘΙΜΑΣΟ Ρπζκίζηε ην θάζηζκα ζηελ Σν θάζηζκα κπνξεί λα κεηαθηλεζεί θαηάιιειε ζέζε, ηξαβώληαο ηελ ζε νξηδόληηα ζέζε από ηνλ κνριό ιαβή ξύζκηζεο (47)πξνο ηα πνπ βξίζθεηαη θάησ από ηελ ιαβή επάλσ ζε νξηδόληηα ζέζε θαη ξύζκηζεο (47) . έπεηηα...
- Page 43 ΥΔΙΡΙΜΟ ΚΟΜΠΙΟΤΣΔΡ ΛΔΙΣΟΤΡΓΙΔ Πξνγξάκκαηα: 21 B: 10 Πξνεπηιεγκέλα πξνγξάκκαηα ( ΠΡΟΓΡΑΜΜΑ:P1-P10) A: 1 Υεηξνθίλεην πξόγξακκα: P1: ROLLING P2:VALLEY P3: FATBURN P4:RAMP P5:MOUNTAIN P6: INTERVAL P7:CARDIO P8:ENDURANCE P9:SLOPE P10:RALLY...
- Page 44 Γ: 1 Watt Control Program (WATT PRO:P16) Γ: 4 Πξνγξάκκαηα ειέγρνπ ηνπ θαξδηαθνύ παικνύ:(PULSE PRO:P17-P20) 55%H.R, 75%H.R, 95%H.R and TARGET H.R...
- Page 45 E: 5 πξνγξάκκαηα ξύζκηζεο ηνπ ρξήζηε: CUSTOM1 to CUSTOM5 (P11 ~ P15) 1. Καηέγξαςε ηα δεδνκέλα ηνπ ρξήζηε από 5 δηαθνξεηηθά πξνγξάκκαηα ξύζκηζεο. 2. ηελ νζόλε εκθαλίδεηαη ε ηαρύηεηα (RPM), ν ρξόλνο θαη WATT, ζεξκίδεο θαη απόζηαζε ηελ ίδηα ζηηγκή. 3.
- Page 46 ΚΟΤΜΠΙΑ 1.ENTER: •ε ιεηηνπξγία"stop", παηήζηε ην θνπκπί ENTER γηα λα επηιέμεηε έλα πξόγξακκα θαη λα νξίζηε ηελ ηηκή πνπ αλαβνζβήλεη ζην ζρεηηθό παξάζπξν. A: Όηαλ επηιέμεηο ην πξόγξακκα πνπ επηζπκείο πάηα Enter γηα λα ην επηβεβαηώζεηο. B: Καηά ηε ξύζκηζε, παηήζηε ην πιήθηξν ENTER γηα λα επηβεβαηώζεηε ηελ ηηκή πνπ ζέιεηε λα πξνθαζνξίζεηε. •Καηά...
- Page 47 ΛΔΙΣΟΤΡΓΙΔ 1. Δλεξγνπνηήζηε ηνλ ππνινγηζηή πλδέζηε ην έλα άθξν ηνπ αληάπηνξα ζηελ ειεθηξηθή πεγή AC θαη ζπλδέζηε ην άιιν άθξν ζηνλ ππνινγηζηή. Ο ππνινγηζηήο ζα ερήζεη θαη ζα κπεη ζηελ αξρηθή ιεηηνπξγία. 2. Δπηινγή πξνγξάκκαηνο θαη ξύζκηζε ηηκήο •Υεηξνθίλεην πξόγξακκα θαη πξνθαζνξηζκέλν πξόγξακκα P1~P10 •Παηήζηε...
- Page 48 •Πξόγξακκα ειέγρνπ Watt (WATT PRO:P16) Α. Πηέζηε UP, DOWN γηα λα επηιέμεηε ην πξόγξακκα ειέγρνπ Watt Β. Πηέζηε ENTER γηα επηβεβαίσζε ηνπ επηιεγκέλνπ πξνγξάκκαηνο ειέγρνπ watt θαη είζνδνο ζην παξάζπξν ξύζκηζεο ώξαο. Γ. Ζ ώξα ζα αλαβνζβήλεη θαη, ζηε ζπλέρεηα, παηήζηε ην θνπκπί UP, DOWN γηα λα ξπζκίζεηε ηελ ώξα...
- Page 49 ΠΡΟΓΡΑΜΜΑ ΔΛΔΓΥΟΤ ΣΩΝ ΚΑΡΓΙΑΚΩΝ ΠΑΛΜΩΝ: 55%H.R, 75% H.R θαη 95% H.R(PULSE PRO: P17-P19) Ο κέγηζηνο θαξδηαθόο παικόο εμαξηάηαη από ηελ ειηθία θαη απηό ην πξόγξακκα ζα δηαζθαιίζεη όηη ζα θάλεηε ηελ πγηή άζθεζε εληόο ηνπ κέγηζηνπ θαξδηαθνύ παικνύ. Α. Πηέζηε UP, DOWN γηα λα επηιέμεηε ην πξόγξακκα ειέγρνπ ησλ θαξδηαθώλ παικώλ. Β.
- Page 50 •ΠΡΟΓΡΑΜΜΑ ΣΟΥΟΤ ΣΗ ΚΑΡΓΙΑΚΗ ΤΥΝΟΣΗΣΑ: TARGET HEART RATE (PULSE PRO: P20) Ο ρξήζηεο κπνξεί λα νξίζεη νπνηνδήπνηε ζηόρν ηεο θαξδηαθήο ζπρλόηεηαο γηα λα θάλεη ηελ άζθεζε. Α. Πηέζηε UP, DOWN γηα λα επηιιέμεηε ην πξόγξακκα ζηόρνπ ησλ θαξδηαθώλ παικώλ. Β. Πηέζηε ENTER γηα επηβεβαίσζε ηνπ πξνγξάκκαηνο ζηόρνπ θαξδηαθνύ παικνύ θαη είζνδνο ζην παξάζπξν...
- Page 51 ΠΡΟΓΡΑΜΜΑ ΥΡΗΣΗ: CUSTOM1~CUSTOM5(P11-P15) Α. Πηέζηε UP, DOWN γηα λα επηιιέμεηε ην πξόγξακκα ρξήζηε. Β. Πηέζηε ENTER γηα επηβεβαίσζε ηεο επηινγήο ζαο θαη είζνδνο ζην παξάζπξν ξύζκηζεο ηεο ώξαο. Γ. Ζ ώξα ζα αλαβνζβήλεη θαη, ζηε ζπλέρεηα, παηήζηε ην θνπκπί UP, DOWN γηα λα ξπζκίζεηε ηελ ώξα...
- Page 52 Γ. πλερίζηε ηελ αλίρλεπζε παικώλ. Γ. Ο ρξόλνο ζα κεηξήζεη από 60 δεπηεξόιεπηα ζε 0 δεπηεξόιεπην. Δ. Όηαλ ν ρξόλνο θηάζεη ζην 0, ην απνηέιεζκα ηεο δνθηκήο (F1-F6) εκθαλίδεηαη ζηελ νζόλε. F1=Excellent F2=Good F3=Fair F4=below average F5= No Good F6= Poor Σ.
- Page 53 ΠΡΟΓΙΑΓΡΑΦΔ Speed Σαρύηεηα: KM/H(M/H): Γείρλεη ηελ ηξέρνπζα ηαρύηεηα ζαο. Δύξνο: 0.0~99.9 KM/H(M/H). RPM: Γείρλεη ηελ ηξέρνπζα πεξηζηξνθή αλά ιεπηό. Δύξνο : 0~999. Time Υξόλνο: ν ζπλνιηθόο ρξόλνο άζθεζεο, εύξνο: 0: 00 ~ 99M59S. ην πξνθαζνξηζκέλν ρξνληθό εύξνο είλαη 5: 00 ~ 99M00S. Ο ππνινγηζηήο ζα αξρίζεη λα κεηξάεη αληίζηξνθα από...
- Page 54 ΤΝΓΔΗ ΜΔ (SMART)ΔΞΤΠΝΗ ΤΚΔΤΗ Δίλαη ζπκβαηό κε ηελ εθαξκνγή Kinomap (απαηηείηαη ζπλδξνκή). Καηέβαζε ζην smart phone ή ζην tablet ηελ εθαξκνγή Kinomap ( Google Play γηα Android & APP Store γηα IOS). Πξνπνλήζνπ ζε όιν ηνλ θόζκν κε δηαδξαζηηθά βίληεν θαη δηαδξνκέο θαη ν δηάδξνκνο ζα πξνζαξκόζεη απηόκαηα ηελ θιίζε αλάινγα...
- Page 55 ε όιεο ηηο παξαπάλσ πεξηπηώζεηο ν ρξήζηεο επηβαξύλεηαη κε ην θόζηνο επίζθεςεο θαη αληαιιαθηηθώλ. •Ζ εηαηξεία θαη ν εηζαγσγέαο δελ επζύλνληαη γηα ηπρόλ ηππνγξαθηθά ιάζε. •Σν πξντόλ έρεη έγθξηζε θπθινθνξίαο ζηελ Δπξσπατθή Κνηλόηεηα, CE INTERSPORT ATHLETICS SA 18-20 SOROU 15125...
Need help?
Do you have a question about the CR5.1 and is the answer not in the manual?
Questions and answers