Table of Contents
Advertisement
Quick Links
Advertisement
Table of Contents

Related Manuals for Snell PYXIS


Summary of Contents for Snell PYXIS
- Page 1 PYXIS System User Guide User Guide Issue: 2.3 www.snellgroup.com...
-
Page 2: Table Of Contents
PYXIS System User Guide Contents Introduction Pyxis Boards Frame/Chassis Parts Rear Panels MODULES Installation 3U Frame 3.1.1 Specification 3.1.2 Ventilation 3.1.3 Before Switch-On. - Page 3 PYXIS System User Guide 5.1.7 Video Reference (REF1, REF2, REF3) 5.1.8 Ethernet (CON1 & CON2) 5.1.9 Expansion (EXP_IN, EXP_OUT) 1U Frame Control Connections 5.2.1 Interconnections and Safety 5.2.2 Pin-Outs ...
- Page 4 Figure 19: 2449 Controller: Diagnostic LEDs ..................27 Figure 20: 2450 Controller: Diagnostic LEDs ..................29 Figure 21: Pyxis Control Interface - System Connection Example ............30 Figure 22: Pyxis Control Rear Panel Connectors ................. 31 ...
- Page 5 Figure 44: RS422/Timecode Modules: LEDs and Switches ..............70 Figure 45: A Typical Rear Panel Combination ..................72 Figure 46: Pyxis 9100 72 x 72 SDI Rear Panel ..................72 Figure 47: Pyxis 9101 34 x 34 SDI Rear Panel ..................73 ...
- Page 6 PYXIS System User Guide LIST OF TABLES Table 1: Frame/Chassis Part Numbers ....................8 Table 2: Rear Panels ..........................8 Table 3: Signal Modules .......................... 9 Table 4: Front Door LEDs (3U) ......................13 Table 5: Front Door LEDs (1U) ......................18 ...
-
Page 7: Introduction
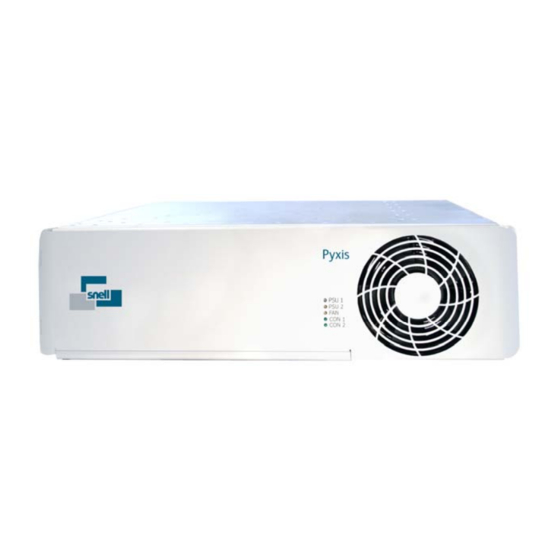
Pyxis features a wide range of signal cards in a choice of 1U or 3U frames. All cards are removable from the front allowing ease of maintenance and negating the need for the router to be disconnected should servicing be required. -
Page 8: Pyxis Boards
PYXIS System User Guide Pyxis Boards Frame/Chassis Parts Number Description 9000 3U frame 9001 1U frame Nebula Based Controller 2449 (includes Ethernet connection) Nebula Based Controller 2448 (No Ethernet connection) 2450 Nucleus Based Controller 2451 Slave Frame Controller 9006 3U door... -
Page 9: Modules
PYXIS System User Guide MODULES Number Description Digital Video Routing 9200 72 x 72 2HD reclocking router module 9201 34 x 34 2HD reclocking router module 9202 17 x 17 2HD reclocking router module 9203 72 x 72 HD non-reclocking router module... -
Page 10: Installation
System User Guide Installation The Pyxis range of routers is supplied in 1U and 3U frames. The 3U has an integral power supply whilst the 1U has an external power supply. All cards and modules are accessible from the front once the door has been opened or removed. All signal and control cables are connected to the rear panels. -
Page 11: Before Switch-On
3.1.4 3U Frame Layout Figure 3: 3U Frame - Layout The 3U Pyxis frame has four horizontal slots for signal modules. It also has two slots for power supplies, the frame can run from one but the second provides redundancy in case of power supply failure. -
Page 12: Inserting And Removing Modules
Screws Figure 5: Card Retainer (3U) The Pyxis 3U frame is shipped with a card retaining bracket and card retaining strip fitted. These hold the modules, PSUs and Controllers firmly in place during transit. The card retaining bracket and card retaining strip must be removed before power is connected to the router. -
Page 13: Figure 6: Removing Modules
3U Fan Module (1945) Figure 7: 3U Fan Module The 1945 3U Fan Module and 119mm fan are mounted in the door of the Pyxis frame. The Fan Module controls and monitors the fan in addition to driving the door status LEDs. -
Page 14: Figure 8: Replacing A Fan Module
PYXIS System User Guide A fault signal is available from the fan module relay that can be used within the system as an alarm. Accessed using the AES/LTC 9-way on the rear panel. See Section 5.1.5 for pin-out details. Details of setting up the relay are in section 3.1.7.2... -
Page 15: Power Supply Modules
Figure 9: Power Supply (3U) The power supply slots are on the right hand side of the frame. The Pyxis frame can run from a single supply but fitting a second provides full redundancy. Each power supply has a 240Watt rating. If both supplies are fitted they are always live and are electrically arranged to share the load. -
Page 16: Figure 10: Alarm Relay Trigger Enable
PYXIS System User Guide 3.1.7.2 Alarm Relay Trigger Enable Figure 10: Alarm Relay Trigger Enable Alarm Relay Trigger, accessible via the AES/LTC & RELAY connector on the rear panel can be set for PSU1, PSU2, and the Fan; they are individually enabled by setting Switches of SW1 on the 1945 Fan Module (fitted to the 3U Frame door) to the ‘ON’... -
Page 17: Ventilation
Figure 11: 1U Air Flow The 1U Pyxis frame ventilation system uses three small fans mounted in the front door. The fans draw air in from the front circulate it throughout the router, finally passing out through the side vents. -
Page 18: Power Supply
PYXIS System User Guide 3.2.2.1 The 1U Fan Module (1946) The 1946 1U Fan Module mounts on the door of the 1U frame. The Fan Module provides monitoring of the fans fitted on the door, and also carries the status LEDs that show through the door. -
Page 19: Control Options
System User Guide Control Options A Pyxis router supports a variety of Snell control systems; Nebula, Aurora and Workbench. Nebula and Aurora combine to make up the legacy control system and Workbench the next generation with enhanced features and user front end. The control system defines which control card must be used within the Pyxis frame. -
Page 20: 2449: Nebula Controller
2449: Nebula Controller The Pyxis router is supplied with a basic database and default settings for all control ports. This means external controllers, control panels and Under Monitor Displays can be directly connected to the frame if required. The database contains system configuration details such as the number of logical/control levels within the system, signal types and control panel functions. -
Page 21: The System Database
Only version 3 (or higher) software will function with Pyxis. The simplest way of checking the version installed on a PC is to run the editor and click on the Snell icon or select 'ABOUT' under the configuration dropdown, it should show Nebula Editor Version 3.2.0.88 or newer. -
Page 22: Control Protocol Options
It uses numbers in the range 0 to 1023 to set, acknowledge and poll crosspoints via a single router control module. Pyxis ports must be configured for this protocol if the router is to be controlled by an Aurora control system Although labeled ‘RS485’, this port is actually software configured to be point to point, as with RS422,... -
Page 23: 2449 Configuration (Switches & Headers)
Two banks of 4 DIP switches labeled CONFIG SWITCHES do configure the controller and its basic operation. Table 6 and the following text describe the function of each switch and highlight the default settings the 2449/2445 is supplied with when in a Pyxis frame. Issue 2.3... -
Page 24: Table 6: 2445 Nebula Control Card: Config. Switch Functionality
SW2 P clock select is used to select between 10 MHz and 20MHz µP clock frequency and should be left set to 10MHz. SW3 System Run Mode determines which mode of operation the Pyxis powers up in (i.e. NORMAL or TEST). NORMAL is the standard mode of operation. TEST selects a special test mode where various features of the Nebula Controller hardware can be tested by Snell. -
Page 25: Figure 16: 2449 Base Card - Switch Locations
PYXIS System User Guide SW8 Control mode selects which protocol the serial control ports will use. ‘GENERAL’ configures both RS485 ports to support General Switcher protocol. ‘PANELS’ configures both RS485 Remote ports to support Multi-drop Comms protocol. See the next section for a description of these protocols. -
Page 26: Figure 17: 2449 Controller: Master/Slave Settings
MANUAL, avoiding over-writing the configuration should any modules be removed or added temporarily. 4.2.5.4 Rotary Hex Switches The bank of 8 Rotary Hex switches on the front of the 2449 controller is not used on in the Pyxis system and should all be set to 0. 4.2.5.5 DIP Switches The bank of three four-way DIP switches on the front of the 2449 is not used in the Pyxis system and should all be set to off. -
Page 27: Figure 18: 2449 Controller: Ethernet Port Configuration
Software is also required to enable Ethernet Control, detailed in section 5.2.3 A standard CAT5 patch cord may be used to connect the Pyxis active Ethernet port to a 10 Base-T hub or switch. By default, the SC13 chip is configured for DHCP, meaning that a DHCP Server must be present on the same network segment in order for an IP address to be assigned. -
Page 28: Table 8: 2449 Controller: Led Functionality
PYXIS System User Guide There are eight status LEDs on the 2449, they have the following functions: Name Color Function Normal Status +3V3 Green Power OK Green Green Power OK Green CTRL ACT Green Crosspoint command Occasional flash Green if present... -
Page 29: Nucleus Control System
The 2450 Nucleus controller has no headers or switches to set; all configuration is controlled via the software. There are 12 LED’s and a reset switch accessible to the user via the Pyxis frame front door. Figure 20: 2450 Controller: Diagnostic LEDs... -
Page 30: Control Interface
Figure 21: Pyxis Control Interface - System Connection Example The Pyxis frames and controllers are designed to offer a high degree of flexibility in their use. At its simplest, a single frame with one signal type can be controlled by a single XY or BPX panel. -
Page 31: Frame Control Connections
5.1.2 Port 1 RS422 or EXP_IN If the Pyxis is a Master Frame (using 2449 or 2450 Controllers) Port1 should be configured as RS422 and the required protocol selected in the Nebula database (refer to section 4.2 for details of... -
Page 32: Figure 23: Configuration Of Port 1 To Rs422 With 2449 Controller
Workbench database. 5.1.2.2 PORT 1 CONNECTION OPTIONS An RJ45 Connector is not standard for RS422 communications, if a 9 Way interface is required Snell provide an adapter (Part Number HW-RJ45D9SA) which converts the RJ45 socket to a 9Way D- Type socket. -
Page 33: Figure 24: Port 1 Wiring Rj45 Cable To 9 Way D-Type
5.1.2.3 SETTING PORT 1 as EXP_IN When configuring a Pyxis slave frame the 2451 Expansion Controller must be used. When the 2451 is configured correctly (detailed in section 5.1.9.1) Port 1 will be configured as EXP_IN and operate with a straight through Network cable. -
Page 34: Port 2 Config (Database Upload Configuration Mode)
For the port to function as CONFIG it needs to be basic RS232 wiring only. Pins 2, 3 & 5 Connected only. The Pyxis will not function with a standard serial cable or a 9 way ribbon cable connection to your... -
Page 35: Table 12: Rs232 Port Pin Out And Cable Requirements
PYXIS System User Guide Rear Panel PC Serial Name CABLE Name Function Port Port 2 Carrier Detect Connect Receive Data Connect Transmit Data Data Terminal Ready Connect Data Set Ready Ready To Send Clear To Send Ring Indicator Table 12: RS232 Port Pin Out and Cable Requirements It is also possible to configure Port 2 as an RS422 port (making Port 3 unusable) –... -
Page 36: Port 3 Rs422
NOTE: For Port 3 to operate as an RS422 port the following application “Reroute 2 port / SDC Na-00743 SW-P-02 over IP” must be loaded onto the Beck Chip (SC12/SC13), this is done by default when the Pyxis is shipped from Snell. -
Page 37: Aes/Ltc & Relay
PYXIS System User Guide 5.1.4.3 PIN OUT RS422 Port 3 General Multi-Drop Switcher Table 13: Port 3 Pin Out 5.1.5 AES/LTC & RELAY The third 9 Way on the rear panel is a mix of inputs to and outputs from the panel. -
Page 38: Audio Reference (Unbalanced Aes, Balanced Aes)
5.1.7 Video Reference (REF1, REF2, REF3) The 3U Pyxis provides connections for three loop-through video reference inputs. The Pyxis uses the reference (when allocated correctly to a source) to switch between sources in accordance with SMPTE RP168. If no references are present the Pyxis will ‘crash’ switch sources. -
Page 39: Ethernet (Con1 & Con2)
PYXIS System User Guide 5.1.8 Ethernet (CON1 & CON2) Figure 27: Rear Panel Ethernet Ports CON1 & CON2 allow 10/100 Ethernet connection and TCP/IP communication with the controllers. Connection is only required if using the TCP/IP interface, but they connect directly to the controller slots, if a configuration uses two controllers and TCP/IP comms it requires both Ethernet connections. -
Page 40: Expansion (Exp_In, Exp_Out)
System User Guide 5.1.9 Expansion (EXP_IN, EXP_OUT) Pyxis 3U frames can be expanded up to eight frames. A single Master Router, using Nebula or Nucleus controller(s) and up to seven slave routers using 2451 Slave controller(s). Physical connection is between the EXP_OUT of the Master Router into the EXP_IN of a Slave Router (as illustrated in the diagram below). -
Page 41: Frame Control Connections
Figure 30: Pyxis 1U Frame Rear Panel This section discusses the rear connectors and ports on a 1U Pyxis frame. Most port settings and configurations are common with the 3U panel (refer to Section 5.1 for detail). This section will concentrate on the differences between the two frames. -
Page 42: Port 3 Serial Comms/Aes
PYXIS System User Guide 5.2.4 Port 3 Serial Comms/AES Port 3 can be RS422 or RS232 comms with the Balanced AES reference input on two unused pins. As a result a standard serial cable should not be used on Port 3. -
Page 43: Signal Modules
Digital Video 6.1.1 Digital Video Routing Modules 9200 Range The Pyxis Digital Video Routing Modules are available in a variety of configurations. The modules will support all normal SDI formats up to and including 3Gb/s. They all feature auto-equalization, and are available in Reclocking and Non-reclocking versions. -
Page 44: User Interface
PYXIS System User Guide 6.1.2 User Interface Each digital video routing module has the same user interface (accessible via the front door). In the left hand corner are 3 RGB LED’s, 2 Hex Switches and 3 Banks of DIP Switches. -
Page 45: Table 19: 9200 Range Modules: Control Level Settings
PYXIS System User Guide LEVEL HEX Switch HEX Switch Logical Level Logical Level Position Position Table 19: 9200 Range Modules: Control level Settings DIP SWITCHES The state of the switches is only relevant when the switch labelled ENABLE is ON. When off the output slew rate is either set by the reclockers (if available) or via the controller. -
Page 46: Specifications
PYXIS System User Guide 6.1.3 Specifications 6.1.3.1 3G/HD/SD Reclocking Modules Video Inputs SMPTE 424M & 425M-AB (2.97 & 2.976Gb/s) 1080p50/59.94/60 SMPTE 292M (1.485 & 1.435Gb/s) 1080i 60/59.94/50 1080p/psf 30/29.97/25/24/23.98 720p 60/59.94/50/30/29.97/25/24/23.98 SMPTE 259M-C (270Mb/s) 625i 50 525i 59.94 Number 72 / 34 / 17 Connector 75Ω... -
Page 47: Table 22: 3G/Hd/Sd Non-Reclocking Modules Specification
PYXIS System User Guide 6.1.3.2 3G/HD/SD Non-Reclocking Modules Video Inputs SMPTE 424M & 425M-AB (2.97 & 2.976Gb/s) 1080p50/59.94/60 SMPTE 292M (1.485 & 1.435Gb/s) 1080i 60/59.94/50 1080p/psf 30/29.97/25/24/23.98 720p 60/59.94/50/30/29.97/25/24/23.98 SMPTE 259M-C (270Mb/s) 625i 50 525i 59.94 Number 72 / 34 / 17 Connector 75Ω... -
Page 48: Table 23: Sd Non-Reclocking Modules Specification
PYXIS System User Guide 6.1.3.3 SD Non-Reclocking Modules Video Inputs SMPTE 259M-C (270Mb/s) 625i 50 525i 59.94 Number 72 / 34 / 17 Connector 75Ω BNC Return Loss >15dB to 270M Cable SD to 200m Belden 1694A Equalisation Video Outputs... -
Page 49: Audio
System User Guide Audio Pyxis has been designed to seamlessly handle, Analogue, AES, and MADI audio signals. A comprehensive range of modules and rear panels are available to support most applications. Each module has a ‘level’ set and a ‘Dest Offset’ switch; these allow modules to be configured as individual Levels or as part of one larger Level. -
Page 50: Madi
MADI is currently documented in AES10-2003. The MADI standard includes a bit-level description and has features in common with the two-channel format of AES3. Pyxis supports either 56 channels (28 stereo pairs) or 64 channels (32 stereo pairs) but not both simultaneously, with sampling rates of up to 48 kHz and resolution of up to 24 bits per channel. - Page 51 PYXIS System User Guide = Router mode, ON = Transcoder mode (up) (down) Router Mode allows the user to route any input (MADI, AES or Analogue) to any output (MADI, AES or Analogue). When multiple cards within a single frame are set to the same level they are treated as a single larger router (refer to section 6.2.4 for details of internal expansion)
-
Page 52: Internal Expansion
PYXIS System User Guide AES or AES or Analogue Equivalent Analogue Equivalent Channel Channel Channel Channel Stereo Mono Source Stereo Mono Source MADI MADI MADI MADI Pair Pair Left Left Right Right Left Left Right Right Left Left Right Right... -
Page 53: External Expansion
MADI routing system translating AES or Analogue into MADI or MADI to AES or Analogue. Figure 33 illustrates a MADI router using 3 Pyxis frames to translate MADI to and from AES or Analogue Audio. -
Page 54: Audio Port Numbering
6.2.6 Audio Port Numbering Pyxis Audio modules support Analogue Audio, AES, and MADI formats. The ‘D’ type sockets on the rear panel (refer to section 7.2 for details) support the first 36 channels; Analogue or AES depending on the audio module. -
Page 55: Table 27: Audio Modules: Port Numbering With Nebula Controller
PYXIS System User Guide NEBULA CONTROL ROUTE NUMBERING ROUTE NUMBERING 56-CHANNEL MADI MODE 64 CHANNEL MADI MODE STEREO STEREO DEST DEST MODULE PAIR AUDIO MODULE PAIR AUDIO OFFSET OFFSET NUMBER FORMAT NUMBER FORMAT Analogue Analogue or AES or AES MADI... -
Page 56: Audio Modification
MADI Table 28: Audio Modules: Port Numbering with Nucleus Controller 6.2.7 Audio Modification The Pyxis Audio modules, Analogue & AES, support audio modification allowing manipulation of the audio streams when routed through the crosspoint. The modification features are: Left to both / Right to both ... -
Page 57: Audio Specifications
PYXIS System User Guide Normal A source or destination is one that requires no manipulation whilst being routed, i.e. no changing of channels These features are configured within the Nebula or Nucleus database and stored on a source and destination basis. -
Page 58: Table 30: Audio Modules: Digital Input To Analogue Output Specification
PYXIS System User Guide Bit depth 24 bits Line-Up Level Resolution 0.025 to 0.25dB (range 15-24dBU) Table 30: Audio Modules: Digital Input to Analogue Output Specification Mixed AES & Analogue Systems Analogue Input→ Digital Output Analogue Inputs Between +15 and +24dBU line-up level... -
Page 59: Aes
System User Guide The Pyxis 9305 is an AES router module. A single card capacity is 36 x 36 AES + up to 32 x 32 on MADI; using multiple modules can expand that capacity. Any extra modules can be a mix of Analogue or AES. -
Page 60: Table 32: Aes Module: Status Led Functionality
PYXIS System User Guide LEDs Name Function PWR_OK Green = all power rails ok Flashes green at about 2Hz when commands are received from controller TAKE Lights green for about 1 second when the controller sets a route on this card... -
Page 61: Table 35: Aes Module: Menu Modes
PYXIS System User Guide * MENU MODES Status LEDs Mode Description Individual LEDs indicate state of input port Normal (see table below) As in Normal Mode except… Input Single Port, Amber LED indicates channel monitored at headphones. Monitor Solid indicates channel Sample Rate Converters in Auto †... -
Page 62: Figure 36: Aes Module: Menu Flow Diagram
PYXIS System User Guide CHANGING MENU MODES Figure 36: AES Module: Menu Flow Diagram EXAMPLES Figure 37: AES Module: Input Monitoring Input Status LED 13 Solid Amber indicates the 9305 module is in Input Monitor Mode and Input Port 13 is in auto mode and monitored on headphone socket. -
Page 63: Figure 38: Aes Module: Normal Mode Example
PYXIS System User Guide Figure 38: AES Module: Normal Mode Example Colored LEDs (not Amber) indicate the 9305 module is in Normal Mode. Ports 1, 2, 3, 18, 19, 20, 33, 34, 35, 36: Solid Green LEDs indicate input data is present, carries pcm data and is near rate to reference Ports 6 &... -
Page 64: Aes Module With Non-Audio Signals
Dolby E Routing To route Dolby E through an AES module the system should be set up as illustrated in Figure 40. The Pyxis frame requires an AES reference and a video black and burst reference to set the switching point. The two references should be locked together. -
Page 65: Analogue Audio
PYXIS System User Guide Analogue Audio 6.4.1 User Interface The Analogue Audio module user interface, switches and LEDs allow the user to perform the following functions Configure the module (Reset, Mode, Dest Offset, Level) Monitor Input Port Status ... -
Page 66: Table 37: Analogue Audio Module: Configuration Switch Functionality
PYXIS System User Guide SWITCHES Name Type Function RESET Manual Reset of Module Push Button OFF = 56 channel MADI, ON = 64 channel MADI 4 Way DIP OFF = Router mode, ON = Transcoder mode MODE Piano Key OFF = lock to reference, ON = lock to MADI OFF = Fs is not 44.1kHz, ON = Fs = 44.1kHz. -
Page 67: Table 39: Analogue Module: Menu Modes
PYXIS System User Guide * MENU MODES MODE Normal Mode Input Setup & Monitor MENU LEDs AMBER (I/PL of I/P OFF indicates Mono Channel) STATUS LEDs Indicate state of input port Single Amber LED indicates channel (see table below) monitored at headphones. -
Page 68: Figure 43: Analogue Module: Menu Flow Diagram
PYXIS System User Guide CHANGING MENU MODES Figure 43: Analogue Module: Menu Flow Diagram HU-PYXIS... -
Page 69: Rs422/Timecode
PYXIS System User Guide RS422/Timecode The RS422/Timecode is a dual-purpose board depending on the switch settings. The RS422/Timecode routing range consists of three modules MODULES 9600: 128 Port (RS422) / 128x128 (Timecode) 9601: 64 Port (RS422) / 64x64 (Timecode) 9602: 32 Port (RS422) / 32x32 (Timecode) The 128, 64 and 32 modules take up 1, 2 and 4 rear panel positions respectively. -
Page 70: User Interface
PYXIS System User Guide 6.5.2.1 Timecode Routing Modules Inputs/Outputs Output Amplitude 1-2V pk-pk into a 1 kΩ load Output Impedance 50 Ω nominal Input Impedance > 5 kΩ Data Rate 50 Hz - 5 MHz Table 41: Timecode Routing Modules: I/O Specification 6.5.3... -
Page 71: Table 43: Rs422/Timecode Modules: Switch Functionality
PYXIS System User Guide 6.5.3.2 Switch Description Label Type Functionality Sets modules ‘logical level’ adjusting LEVEL Rotary Hex Switch port offset (numbering) TEST Rotary Hex Switch Not Used Not Used MODE DIP Switch Table 43: RS422/Timecode Modules: Switch Functionality Issue 2.3... -
Page 72: Rear Panels
System User Guide Rear Panels Pyxis digital video rear panels are available in one, two, and four slot high varieties. The one slot panels may also be used in the 1U Pyxis frame. Specific rear panels have been designed to support Audio, Video, and Control modules in various sizes. -
Page 73: Rear Panel Port Mapping For Digital Video
7.1.2 Rear Panel Port Mapping for Digital Video Pyxis is designed to be versatile allowing different module combinations to exist in the same 3U frame. In normal practice rear panels are matched with their corresponding modules e.g. a 9100 (72x72 SDI Rear Panel) connected to a 9203 (72 x 72 Non-Reclocking Digital Video Module). -
Page 74: Figure 49: Digital Video Rear Panel: Module & Rear Panel Combinations: 9100 Port Mapping
PYXIS System User Guide It is possible to fit other combinations of rear panel and modules, and these will work perfectly well, but the mapping will be different. If a larger capacity rear panel is used with a smaller capacity module then there is no longer a one to one mapping and route numbers will no longer match the BNC connector numbers on the rear panel. -
Page 75: Figure 50: Digital Vid2Eo Rear Panel: Module & Rear Panel Combinations: 9101 Port Mapping
PYXIS System User Guide Figure 50: Digital Vid2eo Rear Panel: Module & Rear Panel Combinations: 9101 Port Mapping Figure 51: Digital Video Rear Panel: Module & Rear Panel Combinations: 9102 Port Mapping Issue 2.3... -
Page 76: Audio Rear Panels
Figure 54: 9108 7.2.1 9105: Balanced Audio Rear Panel Figure 55: 9105 36 x 36 (72 Mono) High Density Balanced Audio Rear Panel The Pyxis 9105 Rear Panel may be used for analogue or AES audio signals, each panel is one HU-PYXIS... -
Page 77: Figure 56: 56 Channel Madi - Port Numbering
Figure 56: 56 Channel MADI - Port Numbering Figure 57: 64 Channel MADI - Port Numbering Due to the very high density of these connectors, and the difficulty wiring them, Snell have designed a breakout system which takes multiple 62-way D-Types and converts them to standard screw fix connectors to ease wiring. -
Page 78: Figure 59: 62 Way D-Type - Audio Pair Layout
1790 – with crimp connectors 1791 – with solder buckets To order a connector kit, including shell, mating connector and pins, please contact Snell or your local dealer. Note: Suitable crimp tool (not supplied), Multicomp 1564260 or SPC Technology CTT8424-01 7.2.1.1... -
Page 79: Table 45: 64 Way D-Type Analogue Audio Pin Out
PYXIS System User Guide BALANCED ANALOGUE AUDIO Pair Function Pair Function 10L+ 10R+ 10L- 10R- 11L+ 11R+ 11L- 11R- 12L+ 12R+ 12L- 12R- Table 45: 62 Way D-Type Analogue Audio Pin Out Issue 2.3... -
Page 80: 9107 9108: Unbalanced Audio Rear Panels
MADI interface is provided by four SMB connectors, two input and two output. A single panel has an 18 x 18 capacity and can be used in a 1U Pyxis frame but only utilizes half the capacity of the AES module (9305). If a larger capacity router is required the 9107 2 slot rear panel should be used in preference to multiple 9108 rear panels. -
Page 81: Rs422 Rear Panels
PYXIS System User Guide RS422 Rear Panels Pyxis RS422 rear panels are available in one, two, and four slot high varieties. The one slot panel may also be used in the 1U Pyxis frame. REAR PANELS 9121: 128 port RS422 Rear Panel... -
Page 82: Connector Layout
PYXIS System User Guide 7.3.1 Connector Layout The layout of the ‘D’ type socket (viewed from the rear of the router) is shown below; Figure 62: 50 Way D-Type Pin Numbering Pin Outs are identical on all connectors. The diagram and tables below detail the location of the... -
Page 83: Timecode Rear Panels
PYXIS System User Guide Timecode Rear Panels The Timecode rear panels are fitted with: 50 way ‘D’ type fixed plug for Inputs 50 way ‘D’ type fixed socket for Outputs Figure 64: 32x32 Timecode rear panel 7.4.1... -
Page 84: Figure 66: 50 Way D-Type Signal Layout
PYXIS System User Guide Figure 66: 50 Way D-Type Signal Layout Inputs/ Outputs 1‐16 Inputs/ Outputs 17‐32 Pin Function Pin Function Pin Function Pin Function 1 Chassis 50 Chassis 1 Chassis 50 Chassis 34 1 Gnd ... - Page 85 PYXIS System User Guide 1U Rear Panels The 1U frame can take any of the signal modules however the format restricts the rear panels that can be fitted. All rear panels are listed in section 7. 1U rear panels are:- ...
-
Page 86: Figure 67: 9124: Rs422 Breakout System Diagram
The transition board connects directly onto the 50 Way sockets of the rear panel, the Breakout Panel is a 2U high module mounted in the 19” rack to the rear of the Pyxis frame and the Ribbon Cable connects the two boards quickly and cleanly. -
Page 87: Figure 68: 9124 Breakout Panel - Idc Connector Labelling
PYXIS System User Guide PART Qty for 32 Qty for 64 Qty for 128 port panel port panel port panel (9123) (9122) (9121) Number of 9124 Assemblies Required: 912426 50-Way to Cable Converter 912825 Twisted Pair Ribbon Cable 912427 64 9-way D-Type Board Table 47: 9124 Part Quantities 8.1.1... -
Page 88: Figure 70: Port Numbering For Breakout Of 9121 Rear Panel
PYXIS System User Guide To breakout a 9121 (128 port panel) two 9124 boards are required. Port connection and mapping are detailed in the tables and illustration below. 9121 Port Numbering Break Out Panel Numbering Ports 1-8 Panel 1 Ports 1-8... -
Page 89: Figure 71: 9128: Audio Breakout System Diagram
Analogue or AES data via screw fix headers. The 9128 Audio breakout assembly converts the 64 way connectors on the rear of the Pyxis to 10 way screw fix headers for ease of wiring. Each 9128 assembly breaks out up to 72 stereo analogue audio inputs and outputs or up to 144 balanced AES inputs and outputs. -
Page 90: Table 49: 9128: Analogue Audio Breakout - Part Quantities
PYXIS System User Guide simple tool is included (and mounted on the Breakout Panel) to make it easier. The 9128 break out panel is designed to break out two 9105 panels worth of Analogue Audio (72 Channels – Left & Right) or four 9105 panels worth of AES (144 Channels). -
Page 91: Figure 72: 9128 Analogue Audio Breakout Wiring And Port Numbering
PYXIS System User Guide Figure 72: 9128 Analogue Audio Breakout Wiring and Port Numbering 8.2.2 Connecting AES A single breakout panel gives you access to 144 AES Channels. Connections and port mapping are detailed below. PART 9105 Audio Rear Panel... -
Page 92: Figure 73: 9128 Aes Breakout Wiring And Port Numbering
PYXIS System User Guide Since MADI not on Board Port Numbering based on AES only System (no MADI) Figure 73: 9128 AES Breakout Wiring and Port Numbering HU-PYXIS... -
Page 93: Figure 74: 9128 Breakout Panel Silkscreen Labelling
PYXIS System User Guide 8.2.3 Connector Pin Out The breakout panel silkscreen shows port numbering and connector pin out (where possible). The example below is a close up of the right hand side of the Panel. Figure 74: 9128 Breakout Panel Silkscreen Labelling The rear panel labeling also follows the Transcoder mode port numbering, the diagram below illustrates the 9128 break out board viewed from the IDC header side. -
Page 94: Figure 76: Analogue Example Table
PYXIS System User Guide Appendices Audio Break Out Port Mapping The audio break out board does not include MADI signals so port numbering does not match routing port numbers. This appendix includes tables to establish the physical port connection, the logical routing number and the break out panel numbering. -
Page 95: Figure 77: Aes Example Table
Figure 77: AES Example Table 9.1.1 ANALOGUE BREAKOUT: Port Mapping If two Analogue Pyxis Modules (9400) are connected to the break out panel as illustrated in Figure 78 the port numbering is detailed in Table 51. Figure 78: Analogue Audio Breakout Connection... - Page 96 PYXIS System User Guide PHYSICAL REAR PANEL SYSTEM ROUTING NUMBERING BREAKOUT BOARD CONNECTION SILKSCREEN LABELLING Module 56 CHANNEL MADI 64 CHANNEL MADI Source / Dest Destination Analogue Offset Router Transcoder Router Transcoder CH10 Left Left Left Left Left CH82 Right...
-
Page 97: Table 51: Audio Breakout Port Mapping: Analogue Audio
PYXIS System User Guide PHYSICAL REAR PANEL SYSTEM ROUTING NUMBERING BREAKOUT BOARD CONNECTION SILKSCREEN LABELLING Module 56 CHANNEL MADI 64 CHANNEL MADI Source / Dest Destination Analogue Offset Router Transcoder Router Transcoder CH42 Left Left Left Left Left CH114 Right... -
Page 98: Figure 79: Aes Breakout Connection
PYXIS System User Guide 9.1.2 AES BREAKOUT: Port Mapping If four AES Modules (9305) are connected to the break out panel as illustrated in Figure 79 the port numbering is detailed in Table 52. Figure 79: AES Breakout Connection PHYSICAL REAR PANEL... - Page 99 PYXIS System User Guide PHYSICAL REAR PANEL SYSTEM ROUTING NUMBERING CONNECTION BREAKOUT BOARD SILKSCREEN LABELLING 56 CHANNEL MADI 64 CHANNEL MADI Module Source / Dest Offset Destination Analogue ROUTER TRANSCODER ROUTER TRANSCODER CH22 CH23 CH24 CH25 CH26 CH27 CH28 Port Not Available...
- Page 100 PYXIS System User Guide PHYSICAL REAR PANEL SYSTEM ROUTING NUMBERING CONNECTION BREAKOUT BOARD SILKSCREEN LABELLING 56 CHANNEL MADI 64 CHANNEL MADI Module Source / Dest Offset Destination Analogue ROUTER TRANSCODER ROUTER TRANSCODER Port Not Available CH67 In Transcoder Mode Port Not Available...
-
Page 101: Table 52: Audio Breakout Port Mapping: Aes
PYXIS System User Guide PHYSICAL REAR PANEL SYSTEM ROUTING NUMBERING CONNECTION BREAKOUT BOARD SILKSCREEN LABELLING 56 CHANNEL MADI 64 CHANNEL MADI Module Source / Dest Offset Destination Analogue ROUTER TRANSCODER ROUTER TRANSCODER CH109 CH110 CH111 CH112 CH113 CH114 CH115 CH116...
Need help?
Do you have a question about the PYXIS and is the answer not in the manual?
Questions and answers