Table of Contents
Advertisement
Quick Links
Advertisement
Table of Contents

Related Manuals for ParTech 228531


Summary of Contents for ParTech 228531
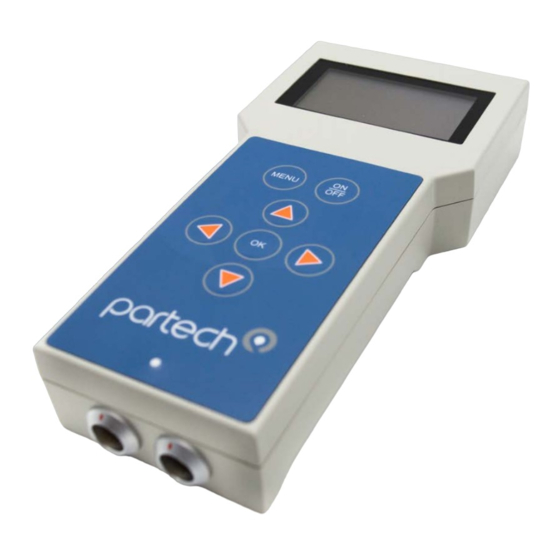
- Page 1 750w² Monitor Instruction Manual...
-
Page 2: Table Of Contents
Contents Sensor Calibration ..........................5 Set Zero Calibration (Suspended Solids) ...................5 Set Cal (Suspended Solids Sensors) ...................5 Take Sample (Turbidity/Suspended Solids Sensors) ..............6 Sample Result (Turbidity/Suspended Solids Sensors)..............6 100% Saturation Calibration (RDO Sensors) ................7 Introduction to the 750w² Monitor ....................8 General ............................8 Display ............................8 Keypad ............................8... - Page 3 Other Configuration Options.........................17 Enable Service Mode ........................17 Menu Option ..........................17 Set Date and Time Menu ......................17 . B attery.Charging ..........................18 Battery ............................18 Charger ............................18 . F irmware.Updates..........................19 Introduction ..........................19 Updating.Firmware ........................19 Technical Support ..........................20 Returning.Equipment.for.Repair ....................20 . T echnical.Specification ........................22 Spare Parts ...........................22 .
- Page 4 750w² Monitor Quickstart Guide Connect the sensor. Measure Press the On/Off button if the monitor isn’t Plug.the.sensor.into.the.port.on.the.right-hand. side of the 750w² Monitor. already.displaying.a.reading. Use the menu. Charge as needed. Press the Menu button and use the arrow keys Connect.a.charging.cable.to.the.left.port. to access menu options. when necessary.
-
Page 5: Sensor Calibration
Sensor Calibration Suspended Solids Sensor - Zero Calibration Use the Set Zero function to store a zero value. Start by immersing the sensor in a container of clean water. Use a dark container to prevent interference from ambient light. Press Menu on the Choose Set Zero and Select Measurement Select Suspended... -
Page 6: Take Sample (Turbidity/Suspended Solids Sensors)
The Set Cal screen Use the arrow keys to The monitor displays a “Calibration Success” displays sensor info. adjust the value to the reading. Press OK. appears at the bottom Press OK. maximum expected of the screen. concentration. Press OK to continue. -
Page 7: 100% Saturation Calibration (Rdo Sensors)
Press OK. the last sample. Press Press OK. Dissolved Oxygen Sensor - 100% Open Air Calibration Calibrate.the.RDO.sensor.using.the.0%.saturation.method.described.below..See.the. manual for the Partech 750w2.Monitor.to.get.more.information.about.calibration.. Select Measurement Choose DO Highlight.Calibrate The monitor displays Config and press the Saturation and press and press OK. -
Page 8: Introduction To The 750W² Monitor
The manual has been written on the basis that the user has a basic knowledge of instrumentation and an understanding of the type of measurement being made. Training in the use of the 750w² monitor can be provided by Partech, please contact Partech for further information. 228538IM-Iss12... - Page 9 USB Charger and Data Transfer Socket 228538IM-Iss12...
-
Page 10: Basic Operation
Basic Operation Power On/Off Press the On/Off button to turn With no sensor connected, the on the monitor. The monitor status bar displays ‘NO SENSOR’ . automatically enters measure mode. Measure Mode The.normal.operating.mode.for.the. Pressing.the.OK.key.in.measure. 750w2 Monitor is measure mode. mode saves the current sensor In this mode the measured value reading,.time.and.date.stamp..The. -
Page 11: Configuration Structure
Configuration Structure Menu Mode To access the main Pressing.the.Menu key Use.the.arrow.keys.to. Press the OK button to menu, press the Menu when the main menu select an option from activated the selected key when the monitor is displayed returns the menu. option. -
Page 12: Monitor Configuration
Monitor Configuration This.section.explains.the.options.available.under.the.Monitor.Configuration.menu.. Press the OK.key.to.select.a.highlighted.menu.option. Bleeper Menu Option Highlight.On or Off to activate Highlight.Bleeper in the menu and press the OK button. or deactivate the bleeper. Backlight Menu Option Highlight.Always On or On Use.the.arrow.keys.to.change. after keypress to enable the the.backlight.brightness..Then. -
Page 13: Site Management
In order to support the ‘Site’ option, both monitor and sensor require the necessary firmware versions. Please contact Partech for further information. Each site stores its own calibration values, so changing the site will change the calibration settings. - Page 14 Edit a Site Name Edit a Site Name Edit the site name with Select Edit Site Select Sites on the main the arrow keys. Press Name. Press the menu. Press the OK key. OK when complete. OK key. Sensors with more than one active site If a sensor with multiple sites is attached to the device when powered on, the device with display a 'Loading Sites' screen until the site list is displayed.
-
Page 15: Measurement Configuration
Measurement Configuration Measurement.Config.provides.access.to.sensor.calibration.and.other.measurement- related.settings. These.settings.reside.on.the.sensors..Thus,.you.can.swap. sensors.without.reconfiguring.them.. Press OK to select within this menu. Title Menu Options From.the.Main.Menu,.navigate.to. Select one of the standard ti- Measurement Config to see the tles, or choose User Defined to Title option. create your own. Maximum title length.is.20.characters. -
Page 16: Recorded Data
Recorded Data The.recorded.data.function.displays.saved.snapshot.readings.from.sensors..Get.to.it. by.pressing.the.OK key in Measure Mode. Each individual record consists of: • Date / time • Measurement title • Value / units The.records.appear.with.the.newest.first.(at. the.bottom.of.the.display)..Using.the. keys.scrolls.through.the.records. Data Via USB When.plugged.into.a.PC,.the.750w2.monitor.appears.as.a.USB.memory.drive.named.750w . It contains a folder named DataRecordings. Inside.this.folder.is.a.CSV.file.named.DataRecordings..This.file.combines.all.the.recorded.data. and.is.used.to.display.data.on.the.monitor..Do.not.edit.this.file..Doing.so.may.corrupt.your.data. The.folder.also.contains.files.that.are.specific.to.each.sensor...You.should.copy.this.file.to.your. -
Page 17: Other Configuration Options
Auto shutdown deactivates You.can.change.the.date.and the monitor if 60 seconds pass time with the monitor’s arrow without a key press. keys. Enable Service Mode Menu Option The Enable Service Mode option provides.diagnostic.information.. This menu is intended for use by Partech.engineers. 228538IM-Iss12... -
Page 18: Battery Charging
Battery Charging Battery The monitor contains a Nickel Metal Hydride (NiMH) battery pack that supplies the power for operation..This.type.of.battery.does.not.have.to.be.fully.discharged.prior.to.charging,.although. this.is.a.preferred.option..It’s.therefore.possible.to.“top.up”.the.battery.charge.as.required..This. is.particularly.useful.prior.to.using.the.instrument.for.a.long.period. Battery.life.is.sufficient.for.1.week.of.normal.use.between.charges: •.When.normal.use.is.defined.as.30.measurements.per.day •.Under.normal.operating.conditions.(normal.contrast.and.brightness.settings,.auto-shutdown. enabled,.meaning.the.750w is on for only one minute at a time). Charger The 750w .Monitor.comes.with.a.USB.power.adapter.and.cable..These.plug.into.the.socket. on.the.bottom.left.of.the.monitor..This.device.is.specifically.designed.to.provide.the.optimum. conditions for the 750w .battery..However,.a.variety.of.USB.charge.sources.can.be.used.as.long. -
Page 19: Firmware Updates
Firmware Updates Introduction The.firmware.on.the.750w Monitor is easy to update. Follow the steps below to put the.latest.firmware.on.your.750w . Please contact customer service with any questions. Updating Firmware Click OK on the Make sure the monitor Plug.the.USB.cable. Ensure there is only is.fully.charged.. into the PC. -
Page 20: Technical Support
• Sensor Type, and Serial Number • Application details • Description of fault Returning Equipment for Repair Outside the United States Send.equipment.to.the.following.address.for.repairs.or.service: Service Department Partech Instruments Rockhill.Business.Park,.Higher.Bugle St Austell, Cornwall, Pl26 8Ra United.Kingdom Please.include.the.following.information.with.the.returned.equipment..Also.ensure.that. products.are.adequately.protected.for.transportation..Ask.our.service.department.if.you.need. packing.advice. • Contact name and phone number •... - Page 21 Inside the United States Send.equipment.to.the.following.address.for.repairs.or.service: ChemScan 2325 Parklawn Drive Suite I Waukesha,.Wisconsin,.USA.53186 Please.include.the.following.information.with.the.returned.equipment..Also.ensure.that. products.are.adequately.protected.for.transportation..Ask.our.service.department.if.you.need. packing.advice. • Contact name and phone number • Return.address.for.equipment • Description.of.fault.or.service.required • Any special safety precautions because of nature of application 228538IM-Iss12...
-
Page 22: Technical Specification
Technical Specification Power Supply Internal.Rechargeable.Battery.Pack.NiMH Charge.Input 5 VDC (min 500mA) USB.Power.Adaptor,.100.to.240VAC.Input,.5VDC.2.1A.Output,.10. Partech.Charger Watt Battery.Life Sufficient.for.1.week.normal.use.(30.measurements.per.day) EMC Conformity EN 61326:2013, IEC 61010-1:2017 Adjustment via Membrane Keypad Operating.Temperature 0 to +60° C Display 4...Digit,.Graphical.LCD Interface to PC USB.cable.for.data.download Minimum 500 points per sensor, actual capacity will depend on... -
Page 23: Sensor Specifications
Sensor Specifications IR Sensor - Physical Specifications Weight. 0.7kg.inc.5m.of.cable Protection Class IP68 Enclosure Material Black Acetal Co-Polymer Cable Connection 4.Way.Lemo.Circular.Plug Cable Type 4 core. 2 twisted pair 5mm O/D Polyurethane Cable.Length 5 and 10 meters available as standard Optical Path Height (mm) Width (mm) Depth (mm) -
Page 24: Declaration Of Conformity
We,.Partech.Instruments,.Rockhill.Business.Park,.Higher.Bugle,.St..Austell,.Cornwall,.United. Kingdom,.declare.under.our.sole.responsibility.that.the.product.to.which.this.declaration. relates: Product Name: 750w2.Monitor.c/w.Carrying.Bar.and.USB.Cable Model Number(s): 228531, 229340, 229341, 229342, 229343, 229385 Is in conformity with the standards noted below: EN 61326:2013.—.Electrical.equipment.for.measurement,.control.and. laboratory.use.—.EMC.requirements IES 61010-1:2017.—.Safety.Requirements.for.electrical.equipment,. control and laboratory use EN 50581:2012 — Assessment of electrical and electronic products with respect.to.the.restriction.of.hazardous.substances...
Need help?
Do you have a question about the 228531 and is the answer not in the manual?
Questions and answers