Safety 1st onBoard 35 Manual
Hide thumbs Also See for onBoard 35:

Advertisement

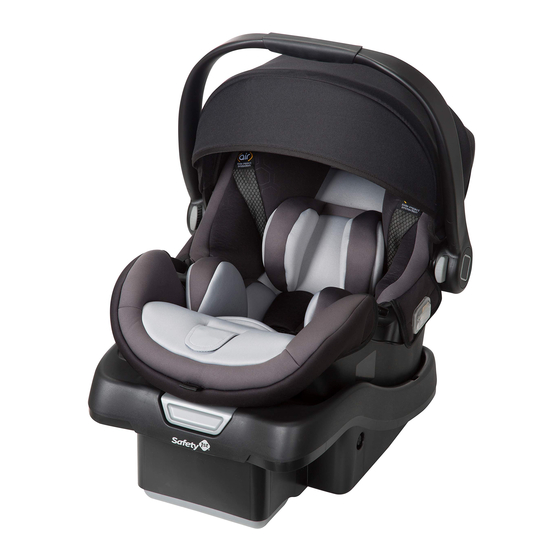
onBoard 35, onBoard 35 Air
onBoard 35 Air +
onBoard Air 360
Infant Car Seat
www.safety1st.com
Model shown may be different than
model purchased.
KEEP INSTRUCTIONS FOR FUTURE USE
Read all instructions before
using this car seat.
WARNING
Failure to follow the
warnings on the labels and in the
instruction manual can result in
serious injury or death
to your child.
4358-8078
8.26.20

Advertisement

Table of Contents
loading

Summary of Contents for Safety 1st onBoard 35

  • Page 1 35, onBoard 35 Air onBoard 35 Air + onBoard Air 360 Infant Car Seat www.safety1st.com Model shown may be different than model purchased. KEEP INSTRUCTIONS FOR FUTURE USE Read all instructions before using this car seat. WARNING Failure to follow the...
  • Page 2 Overview Quick Navigation Welcome to the Safety 1st family and thank you for choosing REAR-FACING this car seat, also known as a child restraint! To help you get started using your child’s new car seat, 4-35 lb (1.8-15.9 kg) and here are the 4 main tasks you’ll need to complete:...
  • Page 3: Table Of Contents

    Contents Getting Started Wash & Care of Car Seat Parts Parts of Car Seat ..............Removing Harness System ........... Accessory Use ..............Removing Seat Pad Set for Cleaning ........Rear-Facing Use Requirements ......... Cleaning Parts of Car Seat and Installing Seat Pad Set ..
  • Page 4: Parts Of Car Seat

    Parts of Car Seat Base Release Carry Shoulder Handle Handle Harness Slots Canopy Head Pillow* Harness (On Select Strap Models) Base Vehicle Belt Attachment Path Guide Body Pillow* Splitter Hooks (when used (On Select Plate without the Models) Harness base) Harness Instruction Ajustment...
  • Page 5: Accessory Use

    Accessory Use Harness Covers (On Select Models) Infant Insert (On Select Models) The infant insert must not cover your Harness covers help provide comfort to child’s face in any way. the neck. Remove the infant insert when your child’s If harness covers will not allow proper head has reached the top inside part of the positioning of the chest clip or interfere insert.
  • Page 6: Rear-Facing Use Requirements

    Rear-Facing Use Requirements Infant Insert (On Select Models) Measure your child’s weight and height (do not guess) before choosing the car seat’s mode. The infant insert must not cover your child’s face in any way. Your child’s height, weight, and age determine how the car seat should be placed in the vehicle.
  • Page 7: Preparing Car Seat For Child Fit

    Preparing Car Seat for Child Fit Rear-Facing Child Fit Remove Carrier from Base Head Position From the back of the carrier, pull The top of your child’s head must be the base release handle out and at least 1 in. (2.5 cm) below the top lift the carrier out of the base.
  • Page 8: Changing Harness Strap Position

    Changing Harness Strap Position Rethread Harness Straps into Fully Loosen Harness Straps Correct Shoulder Harness Slots Push down on the harness release for Your Child lever (through the opening in the Rear-Facing Child Fit, see page 8. pad) while pulling out on the harness straps as shown.
  • Page 9: Changing Buckle Position

    Changing Buckle Position Insert Buckle’s Metal Retainer Unbuckle Harness into Buckle Slot Closest to Press in on the red button and pull Child out buckle tongues. Buckle The buckle must face out. Tongue From Bottom of Car Seat, Pull Turn Car Seat Over Metal Retainer Completely Through Pad and Shell Locate the buckle’s metal retainer...
  • Page 10: Harness System Adjustments For Smaller Infants

    Harness System Adjustments for Smaller Infants From Top of Car Seat, If you cannot achieve a snug harness fi t for your child, Lay Metal Retainer Flat you may need to adjust the buckle strap length Against Shell As Shown as shown in this section.
  • Page 11: Removing And Installing Car Seat To Base

    Removing and Installing Base Use Car Seat to Base On select models, this base has multiple positions. To Remove Car Seat from Base Use any of these to help you get the correct right recline for your child. From the back of the car seat, slide the base release handle up and lift the car To Lower Base Foot seat out of the base.
  • Page 12: Carrier Use

    Carrier Use To Adjust Carry Handle Squeeze both adjustment buttons on each side of the carry handle. To Remove Canopy Rotate up or down to desired location. Release buttons. With a flathead screw driver, press on the canopy tab locks on the Make sure both carry handle adjuster buttons are in the locked position.
  • Page 13: Securing Child In Car Seat

    Securing Child in Car Seat Check Harness Tightness Place Child in Car Seat Try to pinch the harness strap at the Your child’s bottom and back should shoulder vertically between your index be fl at against the car seat. fi nger and thumb as shown. Position the harness straps over your If your fi...
  • Page 14: Latch: Lower Anchor Use

    LATCH: Lower Anchor Use Adjuster Lower Anchor Hooks Lower Anchor Belt Lower Anchor LATCH: Lower Anchor Bars Storage Attachments Belt Parts Vehicle To Remove Lower Anchor Belt from Storage Seat Bight Attachment on Base Squeeze the spring lever on the hooks and remove the hooks from the storage attachments.
  • Page 15: Vehicle Belts

    Vehicle Belts You Must Review Your Vehicle Owner’s Manual Your vehicle owner’s manual will let you know which vehicle belts and seating positions car seats can be installed in. Lap/Shoulder Belts Check How This Car Seat Will Be Locked Into Place Your vehicle’s features may be considerably different than those pictured here.
  • Page 16 Types of Retractors Check Latch Plates Latch plates are the part of Switchable Retractor the seat belt that goes into the buckle. (most vehicles have this type) To see if the latch plate locks: This retractor can be switched to a locking mode. 1.
  • Page 17: Rear-Facing Use With Base

    Rear-Facing Use with Base Vehicle Belt Install 4-35 lb (1.8-15.9 kg) and 32 in. (81.3 cm) Before you begin installing the car seat or less in height into your vehicle, did you check: Your child’s weight and height? See page 6. Your child’s fi...
  • Page 18 Check if Your Vehicle Belts Will Check Belt Tightness Work With This Car Seat Hold the base at the Rear-Facing Belt Path with your weaker hand. This is very important because not Push and pull the base from side to all vehicle belts will work with car side.
  • Page 19: Latch: Lower Anchor Belt Install

    LATCH: Lower Anchor Belt Install Check Angle Indicator Before you begin installing the car seat With your vehicle parked on level into your vehicle, did you check: ground, check the angle indicator. The ball must be in the zone that matches your child’s weight.
  • Page 20 LATCH: Lower Anchor Install Attach Lower Anchor Route Lower Anchor Belt Hooks to Vehicle’s Lower Through Base Belt Path Anchors in Seat Bight The adjuster can be on either side of Review your vehicle owner’s manual the car seat. for LATCH: lower anchor locations Do not twist belt.
  • Page 21 Check Belt Tightness Check Angle Indicator Hold the base at the Rear-Facing With your vehicle parked on level Belt Path with your weaker hand. ground, check the angle indicator. Push and pull the base from side to The ball must be in the zone that side.
  • Page 22: Rear-Facing Use Without Base

    Vehicle Belt Install Rear-Facing Use without Base Before you begin installing the car seat 4-35 lb (1.8-15.9 kg) and 32 in. (81.3 cm) into your vehicle, did you check: or less in height Your child’s weight and height? See page 6. Your child’s fi...
  • Page 23 Check Belt Tightness Check if Your Vehicle Belts Will Hold the car seat at the belt path with Work With This Car Seat your weaker hand. This is very important because not Push and pull from side to side. all vehicle belts will work with car It should not move more than seats.
  • Page 24: Removing Harness System

    Removing Harness System Unthread Chest Clip Only remove the harness system to clean the seat pad. To remove accessories, see pages 3-5. Fully Loosen Harness Straps Unthread Buckle Do not unbuckle. From Back of Car Seat, Remove Harness Strap Pull Harness Strap Out Loops From Splitter Plate of Seat Turn Car Seat Over...
  • Page 25: Removing Seat Pad Set For Cleaning

    Removing Seat Pad Set for Cleaning Rotate Metal Retainer and Push It Up Through Shell and You must remove the harness system and Pad As Shown the accessories in order to remove the seat pad for cleaning. To remove accessories, see pages 3-5. To remove the harness system, see pages 41-43.
  • Page 26: Cleaning Parts Of Car Seat And Installing Seat Pad Set

    Cleaning Parts of Car Seat and Installing Seat Pad Set Remove Pad from Top Cleaning Pad and Accessories and Bottom of Car Seat Machine wash separately with cold water on a gentle cycle. Do not use bleach. Tumble dry separately for 10-12 minutes on low heat. Remove immediately.
  • Page 27: Installing Harness System

    Installing Harness System Insert Buckle’s Metal Weave Harness Strap In and Retainer into Buckle Out of Shell As Shown Slot Closest to Child The buckle must face out. From Bottom of Car Seat, Pull Metal Retainer Completely Through Pad and Shell Check Buckle Pull up on the buckle to make sure it is secured.
  • Page 28: Aircraft Information

    Aircraft Information This restraint is certified for aircraft use. Thread Harness Straps into Correct Shoulder Harness Slots for Your Child Install the car seat in a window seat to avoid blocking the aisle. If the Rear-Facing Child Fit, see page aircraft lap belt is too short, ask the flight attendant for a belt extender.
  • Page 29: Replacement And Expiration Of Car Seat

    Replacement and Expiration of Car Seat Do not risk your child’s safety. Child Restraint Use To keep your child as safe as possible, Dorel Juvenile Group strongly Never take your child out of the child restraint while the vehicle recommends replacing the car seat even after a minor crash; is moving.
  • Page 30: Vehicle Seating Position

    Registration and Safety Notices Vehicle Seating Position Please complete the postage-paid registration card that came with your child restraint, and send it to us. Child restraints could be recalled Never place a child rear-facing in a seating for safety reasons. You must register this restraint to be reached in a position with an active frontal air bag.
  • Page 31: Warranty

    Warranty Troubleshooting 1. If the car seat’s buckle or harness release lever sticks or you Dorel Juvenile Group, Inc. (DJG) warrants this product to the original cannot get the straps tight enough around your child: retail purchaser as follows: This product is warranted against defective materials or workmanship for one year from the date of Do not lubricate.
  • Page 32: Replacement Parts List

    Replacement Parts List Dorel Juvenile Group Information Thank you for choosing this car seat, also known as a child restraint. The DJG family is committed to creating car seats Chest Clip Lower Anchor Belt with the most comfort and convenience available today. Buckle Assembly Harness Straps Remember, parents are a child’s first teachers and...

This manual is also suitable for:

Onboard 35 airOnboard air 360

Table of Contents