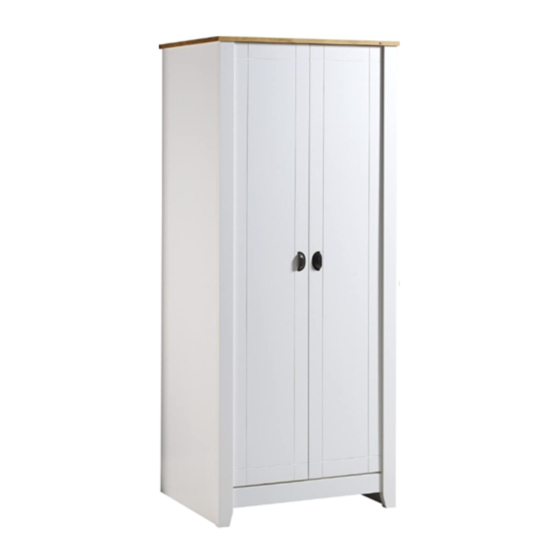
Summary of Contents for Seconique Ludlow 51119
- Page 1 SEC/WG/02/17/DC1 51119 LUDLOW 2 DOOR WARDROBE ASSEMBLY INSTRUCTIONS IMPORTANT FOR DOMESTIC USE ONLY PLEASE READ BEFORE YOU CONTINUE FURTHER CARE AND MAINTENANCE PAGE 1...
- Page 2 SEC/WG/02/17/DC1 Please Note: The below highlighted parts have been stamped with the part number to help identify them during assembly. part name of quantity number part Left Side Panel Shelf Right Side Panel Top Panel Front Left Uprght Crossbeam Front Right Upright Back Panel Back Panel Strip - Lower Door...
- Page 3 SEC/WG/02/17/DC1 8x30mm Ø 3,0 x 10 18x18 Black Ø Ø 4,0 x 40 3,5 x 14 SAFETY KIT PAGE 3...
- Page 4 SEC/WG/02/17/DC1 PRE-ASSEMBLY 05 07 Glue must be added to the dowel holes on part 01, 02, 03, 05, 06, 07,11 Please refer to page 3 on how to use cams correctly. Ø 3,5 x 14 PAGE 4...
- Page 5 SEC/WG/02/17/DC1 Please refer to page 3 on how to use cams correctly. Glue must be added to the dowel holes on part 01, 03 Ø 4,0 x 40 Glue must be added to the dowel holes on part PAGE 5...
- Page 6 SEC/WG/02/17/DC1 Ø 3,5 x 14 Glue must be added to the dowel holes on part 01, 03 xx xx xx xx REFERENCE PAGE 6...
- Page 7 SEC/WG/02/17/DC1 Ø 3,5 x 14 Ø 3,5 x 14 PAGE 7...
- Page 8 SEC/WG/02/17/DC1 Ø 3,0 x 10 Black WARNING Serious or fatal injuries can occur from furniture tipping over. To prevent the furniture from tipping over we recommend that it is permanently fixed to the wall. Wall fixings are not supplied with this product as different wall materials require different types of fixing devices.
- Page 9 SEC/SH/11/19/DC2...
- Page 10 SEC/SH/11/19/DC2...
- Page 11 SEC/SH/11/19/DC2 BLACK 4,918 mm...
- Page 12 SEC/SH/11/19/DC2...
- Page 13 SEC/SH/11/19/DC2...
- Page 14 SEC/SH/11/19/DC2 BLACK...
- Page 15 SEC/SH/11/19/DC2...
- Page 16 SEC/SH/11/19/DC2...
- Page 17 SEC/SH/11/19/DC2...
- Page 18 SEC/WG/02/17/DC1 51119 LUDLOW BEDSIDE ASSEMBLY INSTRUCTIONS IMPORTANT FOR DOMESTIC USE ONLY PLEASE READ BEFORE YOU CONTINUE FURTHER CARE AND MAINTENANCE PAGE 1...
- Page 19 SEC/WG/02/17/DC1 Please Note: The below highlighted parts have been stamped with the part number to help identify them during assembly. part name of part name of quantity quantity number part number part Left Side panel Back Base Panel Door Right Side Panel Left Drawer Side Top Panel Drawer Back...
- Page 20 SEC/WG/02/17/DC1 8x30mm 4,0 x 40 Ø Ø Ø 3,5 x 12 3,0 x 10 Black Ø 4,0 x 16 PAGE 3...
- Page 21 SEC/WG/02/17/DC1 PRE-ASSEMBLY Please Note: Depending on which side you would like the door to open from, please attach the hinge brackets (O) to either ‘Part 05’ or ‘Part 07’. Glue must be added to the Ø Ø 4,0 x 16 3,5 x 12 dowel holes on part 01, 02, 03, 05, 06, 07, 10,11,12...
- Page 22 SEC/WG/02/17/DC1 Please refer to page 3 on how to use cams correctly. Glue must be added to the dowel holes on part 01, 03 Please refer to page 3 on how to use cams Glue must be added to the correctly.
- Page 23 SEC/WG/02/17/DC1 Ø 3,5 x 12 Glue must be added to the dowel holes on part 05, 07 Please refer to page 3 on how to use cams correctly. PAGE 6...
- Page 24 SEC/WG/02/17/DC1 Ø 3,0 x 10 Black Ø 3,5 x 12 x x x x x x x x REFERENCE PAGE 7...
- Page 25 SEC/WG/02/17/DC1 Please refer to Ø 4,0 x 40 Ø page 3 on how 3,5 x 12 to use cams correctly. Ø 3,0 x 10 Black PAGE 8...


Need help?
Do you have a question about the Ludlow 51119 and is the answer not in the manual?
Questions and answers