Table of Contents
Advertisement
Quick Links
Rev. 1.0, 12-11-2012
Fancy Foam Models, LLC
7635 Laramie Cir., Maize, Ks. 67101
www.fancyfoam.com
Micro Assembly Instructions.
These instructions apply to the following models:
Mini EPP MX2
Mini EPP Fenix V2
Recommended Electronics and motors:
These models were designed to make use of the power
and electronics from the popular UMX Beast and Sbach.
We also carry a full set of electronics for these models.
Disclaimer: Fancy Foam Models has done everything
we can to caution and inform the end user regarding
the use of Lithium polymer battery technology. We
are in no way responsible for any damage that may
be caused by these batteries. Please read,
understand and follow all instructions for the
charger and batteries. Failure to use this battery
technology properly can result in the risk of fire. If
you are not comfortable with this technology, return
the batteries packs and kit to us for a refund. By
building the kit and using the batteries, you accept
full responsibility for the safety of these batteries.
Recommended building methods and glues:
Much of the construction of this model is done by laying
the parts on a flat table. It is strongly recommended that
you put wax paper down on the surface first so any excess
glue doesn't soak through the foam and glue the parts to
the table. For all assembly, use Welders contact adhesive.
It is easiest to paint or apply graphics to the body before
it is assembled. Remember that you want to keep the
graphics as light as possible.
Wing spar:
With the wing upside down, find the spar slot. Bend the
wing a little to open the slot and blow out the loose foam.
Apply glue to the slot and squeeze the foam together so
both sides of the slot are covered. Cut the piece of carbon
flat to length and place it in the slot. Allow the glue to
fully cure before proceeding.
Control surface hinging:
Hinge the control surfaces by applying a light bead of
Welders glue near the hinge line on the non beveled side
of the foam. Smear this into the foam and allow to dry
about 2 min. The glue allows the hinge tape to stick to the
foam. Apply a strip of hinge tape to the control surface
and then position and stick the control surface in place.
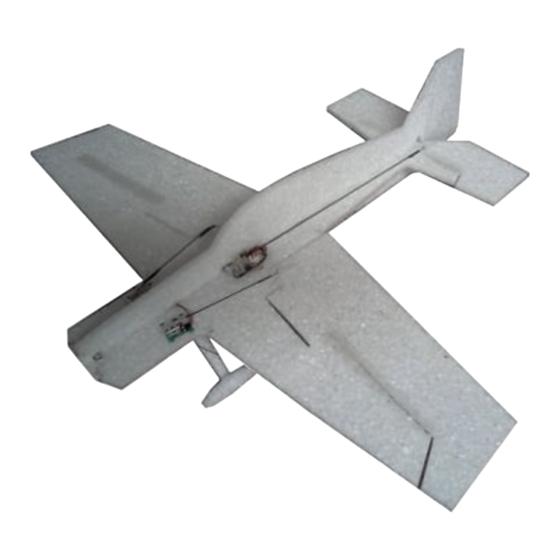
Main Assembly:
Glue the nose to the front of the wing, the wing to the
horizontal fuselage and it to the horizontal tail. All the
bevels should be on the same side.
Advertisement
Table of Contents

Related Manuals for Fancy Foam Models 3dEPP001


Summary of Contents for Fancy Foam Models 3dEPP001
- Page 1 UMX Beast and Sbach. We also carry a full set of electronics for these models. Disclaimer: Fancy Foam Models has done everything we can to caution and inform the end user regarding the use of Lithium polymer battery technology. We are in no way responsible for any damage that may be caused by these batteries.
- Page 2 Glue the lower vertical fuselage in place with the hinge bevels facing up and the hinge tape on the bottom. Check that the lower vertical piece is square to the horizontal structure. Landing gear: Cut 2 pieces of the 1.5mm carbon, 6” long and two pieces 3/4”...
- Page 3 Start with +/- 1” deflection on all surfaces. You can increase this as you get used to flying it. These will roll very fast so use expo and ease into using high rates. Thank You, Mike and Niki Bailey Fancy Foam Models...
Need help?
Do you have a question about the 3dEPP001 and is the answer not in the manual?
Questions and answers