Table of Contents
Advertisement
Quick Links
Advertisement
Table of Contents

Related Manuals for Gram BULL


Summary of Contents for Gram BULL
- Page 1 Weighing system BULL USER'S MANUAL...
-
Page 3: Table Of Contents
INDEX GENERAL DESCRIPTION ................4 UNPACKING ....................5 INSTALLATION ................... 6 CHARGING THE BATTERIES ............... 8 TURN ON ....................10 TURN OFF ....................12 LCD KEYBOARD AND DISPLAY ..............13 FUNCTIONING ..................16 8.1. TARE .................... 16 8.2. MEMORY TARE RECORDING ............16 8.3. -
Page 4: General Description
1. GENERAL DESCRIPTION BULL is a weighing system for forklift trucks that integrates three independent equipments connected to each other through a wireless network: Indicator: When an object is lifted with the forks, the indicator shows the weight. At rest, it indicates the battery level of the forks. It allows to operate the weighing functions of the scale with a simple 11 mechanical keys interface. -
Page 5: Unpacking
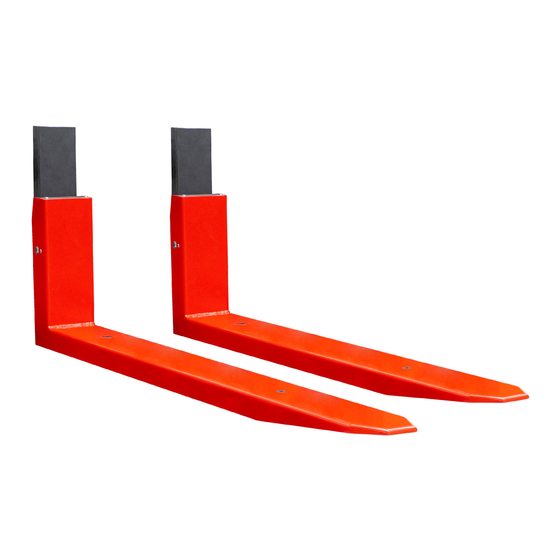
2. UNPACKING BULL indicator and documentation SIndicator support Fork 1 Fork 2 Battery chargers for forks... -
Page 6: Installation
3. INSTALLATION Place the indicator holder in the intended housing at the rear of the unit: Slide the bracket between the two guides on the indicator box and push until the safety stop engages. Screw the indicator holder firmly onto one of the bars in the forklift cabin in the position you feel is most convenient. - Page 7 Mount both forks on the fork lift truck holder by sliding them to the desired distance from the fork lift truck. Once positioned, secure the fork with the safety lock to prevent accidental movement.
-
Page 8: Charging The Batteries
4. CHARGING THE BATTERIES Weight indicator: The support battery inside the scale is not removable. To charge the battery, connect the supplied 12Vdc AC/DC adapter to the scale and plug the adapter into a 220V / 50Hz outlet. When the power is on, the indicator shows the battery charge level on the LCD display by means of a pictogram: Battery operation. - Page 9 Charging the battery of the forks: Open the battery compartment cover by loosening the two fastening screws. Remove the rechargeable battery from each fork and connect it to either of the two chargers provided. Plug the charger into a 220V/50Hz outlet. It is convenient to recharge both batteries at the same time: The system will automatically switch off when the battery with the lowest charge is exhausted.
-
Page 10: Turn On
5. TURN ON Press and hold the button / light on the side of each fork until it lights up: Turn on the weight indicator installed in the truck cabin by pressing the indicator on/off button:... - Page 11 When you press the power key, the display lights up and goes through the following sequence 1. On the LCD display all the segments and symbols light up for one second to check that they are working correctly. 2. Then the version code of the equipment firmware is shown for one second.
-
Page 12: Turn Off
6. TURN OFF Press and hold the indicator on/off button for more than two seconds. The indicator display will show “OFF” and then both the indicator and the two forks will turn off. The system will automatically turn off in any of the following circumstances: •... -
Page 13: Lcd Keyboard And Display
7. LCD KEYBOARD AND DISPLAY Turn on/off the equipment. When pressed, it turns on the indicator. When the indicator is on, pressing and holding it for two seconds turns it off. Escape. In menu mode, you have the function of menu exit and return to normal mode. - Page 14 Tare When pressed, subtracts the weight of any container or box on the platform until the weight is removed from the platform and this key is pressed again. M+ and right arrow. Selects the next stored tare. In menu mode, it displays the next option.
- Page 15 It shows the weight that the forks are lifting. Stable weight indication: There is a weight on the scale and it does not change. Flashing or off to indicate that there is movement on the scale. Negative sign. The indication may be negative if a tare is activated or a problem has occurred with the acquisition of zero.
-
Page 16: Functioning
8. FUNCTIONING 8.1. TARE Press the tare key: The scale stores the weight currently lifted by the trolley, and subtracts it from the total weight until the tare function is deactivated or cancelled. The weight display shows >T< The tare remains after unloading the forks. When the scale is unloaded, the display shows the tare value with a negative sign. -
Page 17: Resetting
Once you have selected the tare memory you wish to use, press the ¿ , key, the display will show the associated tare value. Press the ¿ key again to apply the tare and the display returns to weight display mode. To change the value associated with a tare value, follow the procedure below: 1. -
Page 18: Lcd Display Test
8.4. LCD DISPLAY TEST When this key is held down for more than one second, it shows the LCD display test (all segments and pictograms lit), the version code of the instrument firmware, and finally the maximum capacity and resolution of the scale. 8.5. -
Page 19: Configuration Options Menu
9. CONFIGURATION OPTIONS MENU Press the "M" key to access the setup option menu. The display shows the message NEnu for ½ second to indicate that from this moment the indicator will go on to show the different options to be selected. -
Page 20: Beep
The option is protected by an access pin to prevent unwanted accidental changes. If you have several forklifts equipped with a BULL scale working in the same area, each scale must use a different network name (SSID). 9.3. TLU Tare memory registration. -
Page 21: High (Overload Alarm)
9.4. HIGH (Overload alarm) Enter the desired value using the arrow keys ß à to change to the next digit and the keys ↑↓para modify the value of each digit. Press the key ¿ to validate the display contents. The color of the display backlighting changes to red when the weight exceeds the entered set point. -
Page 22: Error Messages
10. ERROR MESSAGES ADC failure in fork F1: No F-1 fork failure. Consult E02 F1 response from ADC ADC failure in fork F2: No ADC F2 fork failure. Consult E02 F2 response E03 F1 Sensor input signal out of range Breakdown in one of the in fork F1 or fork F2 forks. -
Page 23: Notes
11. NOTES _______________________________________________________________ _______________________________________________________________ _______________________________________________________________ _______________________________________________________________ _______________________________________________________________ _______________________________________________________________ _______________________________________________________________ _______________________________________________________________ _______________________________________________________________ _______________________________________________________________ _______________________________________________________________ _______________________________________________________________ _______________________________________________________________ _______________________________________________________________ _______________________________________________________________ _______________________________________________________________ _______________________________________________________________ _______________________________________________________________ _______________________________________________________________ _______________________________________________________________ _______________________________________________________________ _______________________________________________________________ _______________________________________________________________ _______________________________________________________________ _______________________________________________________________ _______________________________________________________________ _______________________________________________________________... - Page 24 01/22122020...
Need help?
Do you have a question about the BULL and is the answer not in the manual?
Questions and answers