Table of Contents
Advertisement
Available languages
Available languages
Quick Links
OPERATOR'S MANUAL
MANUEL D'UTILISATION
MANUAL DEL OPERADOR
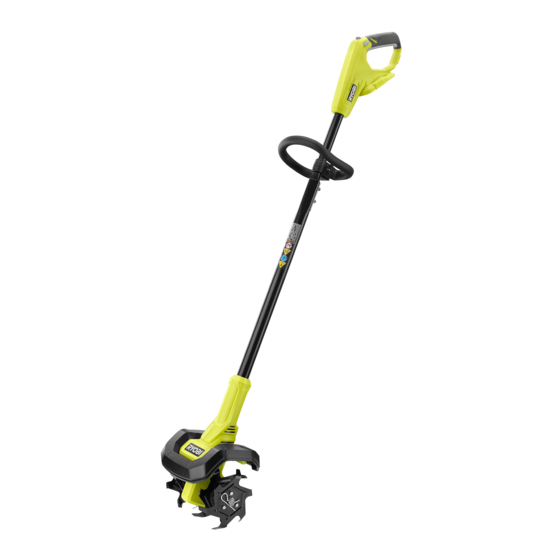
18 VOLT CULTIVATOR
CULTIVATEUR DE 18 V
CULTIVADORA DE 18 V
P2705
TABLE OF CONTENTS
Important Safety Instructions .......... 2-3
Symbols ..............................................4
Features ..............................................5
Assembly ............................................5
Operation ........................................ 6-7
Maintenance .......................................8
Troubleshooting ..................................8
Parts Ordering/Service ........ Back Page
WARNING:
To reduce the
risk of injury, the user must read and
understand the operator's manual
before using this product.
SAVE THIS MANUAL FOR
FUTURE REFERENCE
TABLE DES MATIÈRES
concernant la sécurité .................... 2-3
Symboles ............................................4
Caractéristiques ..................................5
Assemblage ........................................5
Utilisation ........................................ 6-7
Entretien ..............................................8
Dépannage ..........................................8
Commande de pièces/
réparation .......................... Páge arrière
AVERTISSEMENT :
réduire les risques de blessures,
l'utilisateur doit lire et veiller à bien
comprendre le manuel d'utilisation avant
d'employer ce produit.
CONSERVER CE MANUEL
POUR FUTURE RÉFÉRENCE
ÍNDICE DE CONTENIDO
Instrucciones de seguidad
importantes ..................................... 2-3
Símbolos .............................................4
Características ....................................5
Armado ...............................................5
Funcionamiento .............................. 6-7
Mantenimiento ....................................8
Corrección de problemas ...................8
Pedidos de piezas/
servicio ........................... Pág. posterior
Pour
ADVERTENCIA:
el riesgo de lesiones, el usuario debe leer
y comprender el manual del operador
antes de usar este producto.
GUARDE ESTE MANUAL
PARA FUTURAS CONSULTAS
Para reducir
Advertisement
Table of Contents

Related Manuals for Ryobi P2705


Summary of Contents for Ryobi P2705
-
Page 1: Table Of Contents
OPERATOR’S MANUAL MANUEL D’UTILISATION MANUAL DEL OPERADOR 18 VOLT CULTIVATOR CULTIVATEUR DE 18 V CULTIVADORA DE 18 V P2705 TABLE OF CONTENTS TABLE DES MATIÈRES ÍNDICE DE CONTENIDO Instructions importantes Instrucciones de seguidad Important Safety Instructions ..2-3 concernant la sécurité... - Page 2 Fig. 2 See this fold-out section for all the figures referenced in the operator’s manual. Voir que cette section d’encart pour toutes les figures a adressé dans le manuel d’utilisation. Vea esta sección de la página desplegable A - Phillips screwdriver (tournevis phillips, para todas las figuras mencionó...
- Page 3 Fig. 5 Fig. 7 Fig. 9 PROPER OPERATING POSITION REGULAR TINE PATTERN POSITION D’UTILISATION CORRECTE DISPOSITION NORMALE DES LAMES DENTÉES POSICIÓN CORRECTA DE FUNCIONAMIENTO PATRÓN DE ASPAS REGULAR A - Latches (loquets, pestillos) Fig. 10 Fig. 6 NARROW TINE PATTERN DISPOSITION ÉTROIT DES DENTS PATRÓN DE ASPAS ESTRECHO Fig.
-
Page 4: Important Safety Instructions
IMPORTANT SAFETY INSTRUCTIONS Do not operate the equipment while barefoot or when WARNING! wearing sandals or similar lightweight footwear. Wear protective footwear that will protect your feet and improve When using electric gardening appliances, basic safety your footing on slippery surfaces. precautions should always be followed to reduce the risk Do not overreach - Keep firm footing and balance. - Page 5 IMPORTANT SAFETY INSTRUCTIONS Stop the unit and disconnect the power source when not switch trigger is pulled. The tines continue to rotate until in use. Carry the unit with the motor stopped. the switch trigger is released. Do not operate the machine without wearing adequate Store out of the reach of children.
-
Page 6: Symbols
SYMBOLS The following signal words and meanings are intended to explain the levels of risk associated with this product. SYMBOL SIGNAL MEANING DANGER: Indicates a hazardous situation, which, if not avoided, will result in death or serious injury. WARNING: Indicates a hazardous situation, which, if not avoided, could result in death or serious injury. CAUTION: Indicates a hazardous situation, that, if not avoided, may result in minor or moderate injury. -
Page 7: Features
FEATURES PRODUCT SPECIFICATIONS Motor ..............18 V DC Speed Low ............ 0-200/min (RPM) Width Capacity ..............8 in. Medium ..........0-250/min (RPM) Depth Capacity..............4 in. High ............ 0-300/min (RPM) KNOW YOUR CULTIVATOR LOCK-OUT BUTTON See Figure 1. The lock-out button prevents accidental starting. The safe use of this product requires an understanding of REAR HANDLE WITH OVERMOLD the information on the tool and in this operator’s manual as... -
Page 8: Operation
ASSEMBLY ATTACHING THE FRONT HANDLE Push the two sections together until the upper end stops. Turn each of the two screws until securely tightened. See Figure 3. Loosen and remove the wing nut and bolt from the handle. WARNING: ... - Page 9 OPERATION OPERATING THE CULTIVATOR INSTALLING/REMOVING BATTERY PACK See Figures 7 - 11. See Figure 5. Insert the battery pack into the product as shown. WARNING: Make sure the latches on each side of the battery pack snap in place and that battery pack is secured in the Always hold the cultivator away from the body keeping product before beginning operation.
-
Page 10: Maintenance
OPERATION If the tines become obstructed: Replace the tines in the order that they were removed and secure with hitch pin. Remove the battery pack. Repeat these steps to clean the other side of the tine Remove obstruction from the tines. shaft. -
Page 11: Troubleshooting
TROUBLESHOOTING PROBLEM POSSIBLE CAUSE SOLUTION Tines will not rotate Tines are clogged by dirt and Remove the battery pack, then remove any debris. obstruction from the tines. Vines, grass or other debris Remove the battery pack, then clean the tine shaft. wrapped around tine shaft. -
Page 12: Instructions Importantes Concernant La Sécurité
INSTRUCTIONS IMPORTANTES CONCERNANT LA SÉCURITÉ Ne pas forcer appareil – Un produit approprié exécutera le travail AVERTISSEMENT ! mieux et de façon moins dangereuse s’il fonctionne dans les limites prévues. Lors de l’utilisation d’outils de jardinage, toujours suivre Ne pas faire fonctionner l’équipement pied-nu ou en portant les consignes de sécurité... - Page 13 INSTRUCTIONS IMPORTANTES CONCERNANT LA SÉCURITÉ Ne pas faire fonctionner l’équipement sans porter des vêtements Ranger l’produit en s’assurant qu’il est débranché et qu’il est appropriés. Éviter les vêtements ou bijoux lâches qui pourraient hors de la portée des enfants. se coincer dans des pièces en mouvement de l’équipement ou Ne pas suspendre l’produit d’une façon qui enclencherait la de son moteur.
-
Page 14: Symboles
SYMBOLES Les termes de mise en garde suivants et leur signification ont pour but d’expliquer le degré de risques associé à l’utilisation de ce produit. SYMBOLE SIGNAL SIGNIFICATION Indique une situation dangereuse qui, si elle n’est pas évitée, aura pour DANGER: conséquences des blessures graves ou mortelles. -
Page 15: Caractéristiques
CARACTÉRISTIQUES FICHE TECHNIQUE Moteur ..............18 V c.c. Vitesse Basse ..........0 à 200/min (RPM) Largeur de coupe ........203,2 mm (8 po) Moyen ..........0 à 250/min (RPM) Profondeur de coupe ........ 101,6 mm (4 po) Rapide ..........0 à 300/min (RPM) APPRENDRE À... -
Page 16: Utilisation
ASSEMBLAGE INSTALLATION DE LA POIGNÉE Poussez les deux sections ensemble jusqu’à ce que le extrémité supérieur soit appuyé. AVANT Tournez les deux vis jusqu’à ce qu’elle soient serrées Voir la figure 3. fermement. Desserrer et retirer le boulon et ecrou à oreilles de la poignée. - Page 17 UTILISATION UTILISATION DU CULTIVATEUR AVIS : Voir les figures 7 à 11. Avant chaque utilisation, inspecter au complet le produit afin de s’assurer qu’aucune pièce (vis, écrous, boulons, AVERTISSEMENT : chapeaux, etc.) n’est endommagée, manquante ou Toujours tenir le cultivateur distance de soi en maintenant desserrée.
-
Page 18: Entretien
UTILISATION Remettre les dents en place dans l’ordre où elles ont été NOTE : L’équipement ne fonctionne pas correctement si les lames ne sont pas installées correctement. En cas retirées et les fixer avec l’axe d’attelage. de problème d’utilisation de l’équipement de t ravail du Répéter ces étapes pour nettoyer l’autre côté... -
Page 19: Dépannage
DÉPANNAGE PROBLÈME CAUSE POSSIBLE SOLUTION Les dents seront immobiles Les dents sont obstruées par de Retirer le bloc-piles puis retirer tous les débris coincés la saleté et des débris. sur les dents. Lorsque des vignes, de l’herbe Enlever le bloc-piles, et ensuite nettoyer l’arbre à ou d’autres débris se trouve dents. - Page 20 INSTRUCCIONES DE SEGUIDAD IMPORTANTES efectúa mejor y de manera más segura el trabajo, si además se ¡ADVERTENCIA! maneja a la velocidad para la que está diseñada. No fuerce la herramienta – Es más eficaz y presenta menos riesgo Al utilizar herramientas eléctricas para el cuidado del jardín, con de lesiones a la velocidad de trabajo para la que fué...
- Page 21 INSTRUCCIONES DE SEGUIDAD IMPORTANTES comienzan a girar una vez que se presiona el botón de bloqueo y Apague la unidad y desconecte el suministro de corriente cuando se aprieta el gatillo interruptor. Las aspas seguirán girando hasta no esté en uso. Traslade la unidad con el motor apagado. que suelte el gatillo interruptor.
- Page 22 SÍMBOLOS Las siguientes palabras de señalización y sus significados tienen el objeto de explicar los niveles de riesgo relacionados con este producto. SÍMBOLO SEÑAL SIGNIFICADO Indica una situación peligrosa, la cual, si no se evita, causará la muerte o PELIGRO: lesiones serias.
- Page 23 CARACTERÍSTICAS ESPECIFICACIONES DEL PRODUCTO Motor ..............18 V c.c. Velocidad Baja ............ 0-200/min (RPM) Capacidad de ancho ......203,2 mm (8 pulg.) Media ..........0-250/min (RPM) Capacidad de profundidad ....101,6 mm (4 pulg.) Alta ............. 0-300/min (RPM) FAMILIARÍCESE CON LA CULTIVADORA BOTÓN DEL SEGURO Vea la figura 1.
- Page 24 ARMADO MONTAJE DEL MANGO DELANTERO Presione las dos secciones para unirlas, hasta que el extremo superior haga tope. Vea la figura 3. Ajuste los dos tornillos hasta que queden firmes. Afloje y retire el perno y tuerca de mariposa del mango. ...
- Page 25 FUNCIONAMIENTO Pueden aplicarse las siguientes pautas para determinar AVISO: la velocidad correcta para diferentes trabajos: Antes de cada uso, inspeccione todo el producto para Las velocidades BAJAS son ideales cuando se cultiva detectar partes dañadas, faltantes o sueltas, como en terrenos duros, ásperos o irregulares.
- Page 26 FUNCIONAMIENTO Si el eje de las aspas se obstruye: NOTA: Puede usar un cultivo menos profundo de menos de 50,8 mm (2 pulg.) para cortar hierbas y oxigenar el Retire el paquete de baterías. suelo, sin lastimar las raíces de las plantas cercanas. Retire el pasador de enganche y las aspas de un lado del Para cultivos estrechos, retire los pasadores de enganche eje.
- Page 27 CORRECCIÓN DE PROBLEMAS PROBLEMA CAUSA POSIBLE SOLUCIÓN Las aspas no giran Las púas estás atascadas por Retire el paquete de baterías y luego retire cualquier suciedad o residuos. obstrucción de las púas. Hay hojas de enredadera, Retire la batería y luego limpie el eje de las aspas. césped u otra suciedad alrededor del eje de las aspas.
- Page 28 NOTES / NOTAS...
- Page 29 NOTES / NOTAS...
- Page 30 1-800-525-2579. RYOBI is a registered trademark of Ryobi Limited and is used pursuant to a license granted by Ryobi Limited. • PIÈCES ET SERVICE : Avant de faire la demande de service ou l’achat de pièces de remplacement, veuillez obtenir le numéro d’article, le numéro de fabrication et le numéro de série à...
Need help?
Do you have a question about the P2705 and is the answer not in the manual?
Questions and answers