Garmin GPSMAP 176 Owner's Manual
Chartplotting receiver
Hide thumbs
Also See for GPSMAP 176:
- Owner's manual and reference manual (86 pages) ,
- Quick start manual (17 pages) ,
- Specifications (2 pages)
Table of Contents
Advertisement
Advertisement
Table of Contents

Related Manuals for Garmin GPSMAP 176


Summary of Contents for Garmin GPSMAP 176
- Page 1 GPSMAP 176/176C ® chartplotting receiver owner’s manual...
- Page 2 Information in this document is subject to change without notice. Garmin reserves the right to change or improve its products and to make changes in the content without obligation to notify any person or organization of such changes or improvements. Visit the Garmin Web site (www.garmin.com) for current updates and supplemental information concerning the use and operation of this and other Garmin products.
-
Page 3: About This Manual
You can also find warranty and FCC information in the Appendix. Read the Safety Information to learn how to install and use your Garmin GPSMAP 176/176C safely and responsibly. An Index is provided at the end of the manual for reference. -
Page 4: Care Information
NFORMATION Care Information Cleaning the Unit The GPSMAP 176/176C is constructed of high quality materials and does not require user maintenance other than cleaning. Clean the unit using a cloth dampened with a mild detergent solution and then wipe dry. Avoid chemical cleaners and solvents that may damage plastic components. -
Page 5: Table Of Contents
User Waypoint List ... 20 User Waypoints List Options ... 21 Proximity Waypoint List ... 22 Recent Waypoint List ... 23 GPSMAP 176/176C Owner’s Manual NTRODUCTION Going to a Destination ... 24 Selecting a Go To Graphically ... 25 TracBack Navigation (Navigating a Track) ... 26 MOB ... - Page 6 Navigation Terms ... 84 Messages ... 86 LORAN TD System ... 88 Optional Accessories ... 90 Software License Agreement ... 91 Product Registration ... 91 Limited Warranty ... 92 FCC Compliance ... 93 Safety Information ... 94 Index ...95 GPSMAP 176/176C Owner’s Manual...
-
Page 7: Getting Started
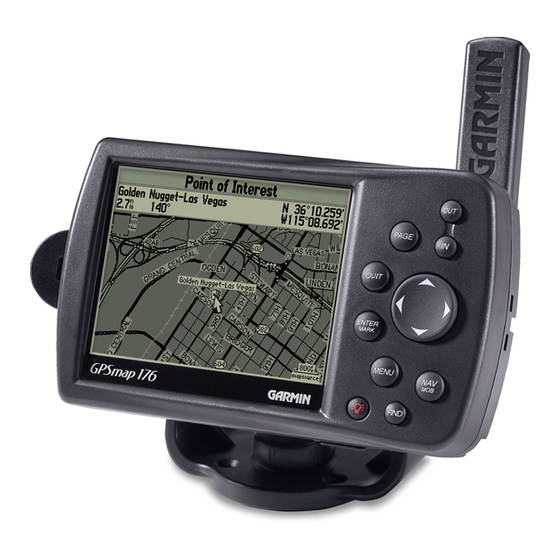
ETTING TARTED Unit Basics Antenna 12-Level Gray scale LCD Display External Power and Computer Data Port with Backlight (GPSMAP 176) 16 color Transflective Display with Backlight (GPSMAP 176C) Battery Compartment Backlit keypad for easy night operation Optional Data Storage Card Port... - Page 8 ETTING TARTED ASICS The GPSMAP 176/176C uses 4 AA batteries, which can be Alkaline, rechargeable, Lithium, or Ni-Cad. Immediately after installing new batteries, turn the unit on to ensure that the unit’s power indicator shows a full charge. Replace all batteries at the same time. Do NOT mix new and used batteries.
- Page 9 2. Rotate the antenna to approximately a seven o’clock position. The alignment notches in the casing must line up with the notches on the antenna. 3. Pull the antenna away from the GPSMAP 176/176C. GPSMAP 176/176C Owner’s Manual ETTING Alignment Notches...
-
Page 10: Interface Keys
NAV/MOB Key • Press and release at any time to view the Find Menu page. • Press and hold for MOB. FIND Key • Press to search for points such as user waypoints, cities, and services. GPSMAP 176/176C Owner’s Manual... -
Page 11: Basic Operation
PERATION Initializing the GPS Receiver The GPSMAP 176/176C must be initialized before it can be used for navigation. The GPS receiver only needs to be initialized the first time the unit is used or if it has been stored for several months. This process is automatic and should only take a few minutes. -
Page 12: Initialization Options
NITIALIZING THE ECEIVER Initialization Options If the GPSMAP 176/176C is unable to determine its location, an options menu appears. Depending on the situation, select the appropriate option to help the unit acquire satellites. Start Simulator—turns the GPS receiver off for use indoors or practice. -
Page 13: Using The Map Pointer
NOTE: When the pointer reaches the edge of the map, the unit may pause as it loads new map data. Position the pointer over an item on the map to highlight it. GPSMAP 176/176C Owner’s Manual ASIC PERATION As you move the pointer, the distance and bearing from your present location to the pointer are displayed in the data window, along with the pointer’s location coordinates. - Page 14 Information tabs for BlueChart data (Chart tab shown). Select Show Notes to view additional notes about the chart or Map List to view the list of maps on your data card through the Data Card Information screen. GPSMAP 176/176C Owner’s Manual...
-
Page 15: Selecting Map Zoom Ranges
GPSMAP 176/176C Owner’s Manual ASIC PERATION The GPSMAP 176/176C has a built-in worldwide database. More detailed coverage is available through optional BlueChart or MapSource data. The GPSMAP 176/176C displays cartography as long as chart information is available for the range you select. -
Page 16: Creating And Using Waypoints
SING AYPOINTS Creating and Using Waypoints The Garmin GPSMAP 176/176C stores up to 3,000 alphanumeric waypoints with a user-defined icon, comment, and depth available for each waypoint. Waypoints can be created using three basic methods: • ENTER/MARK Key—used primarily for marking your... -
Page 17: Creating Waypoints Graphically
When you move the pointer over a map item, you see a highlighted description of that item. The GPSMAP 176/176C uses the map item text shown on the cartography as the default name and symbol for the new waypoint. -
Page 18: Entering Coordinates
4. To change the name, symbol, or enter comments, depth or elevation, highlight the appropriate field and press ENTER/ MARK. Make your changes and press ENTER/MARK. 5. Use the ROCKER to highlight OK and press ENTER/MARK to save the waypoint. GPSMAP 176/176C Owner’s Manual... -
Page 19: Projecting Waypoints
Start by accessing the New Waypoint page or the New Map Waypoint page. Select a point from which to project a new waypoint. GPSMAP 176/176C Owner’s Manual ASIC PERATION REATING AND To create a new waypoint by projecting its location: 1. -
Page 20: Waypoint Menu Options
To append a new waypoint to a route: 1. Select Append To Route from the options menu. 2. The Select Route screen appears. Highlight the desired route or select New Route and press ENTER/MARK. 3. Highlight OK press ENTER/MARK to save the waypoint. GPSMAP 176/176C Owner’s Manual... -
Page 21: Reviewing And Editing Waypoints
Once the changes have been made, highlight OK (Waypoint Review page) or Next (Waypoint Edit page) and press ENTER/MARK to save them. GPSMAP 176/176C Owner’s Manual ASIC PERATION REATING AND Select OK to exit/save changes and return to the Map page. - Page 22 MARK. With OK highlighted, press ENTER/MARK again to confirm the deletion. Waypoint Review page for a waypoint located on multiple map features. The tabs only appear when BlueChart data is being used. Moving a waypoint on the map. (BlueChart map data shown.) GPSMAP 176/176C Owner’s Manual...
-
Page 23: Waypoint Lists
ASIC PERATION Waypoint Lists The GPSMAP 176/176C’s Main Menu page features three submenus of the Points tab, User, Proximity, and Recent, that let you manage a large number of waypoints quickly and efficiently. The submenu tabs also provide a continuously updated proximity waypoint alarm that can be used to define an alarm circle around points such as submerged... -
Page 24: User Waypoint List
4. Repeat this until the name appears. Press ENTER when you see the name. 5. Highlight the name on the list and press ENTER to review the waypoint. When done, highlight OK and press ENTER. Name Field GPSMAP 176/176C Owner’s Manual... -
Page 25: User Waypoints List Options
NOTE: Once a waypoint is deleted from the list, it cannot be recovered from the unit. It is advisable to backup important waypoints to a computer using the optional PC cable and interface software or write them down by hand. GPSMAP 176/176C Owner’s Manual ASIC PERATION REATING AND To delete an individual waypoint from the User list: 1. -
Page 26: Proximity Waypoint List
3. With OK highlighted, press ENTER to confirm. The distance field is now highlighted. 4. Press ENTER to begin entry of the proximity radius. 5. Use the ROCKER to enter a distance (up to 99.99 units) and press ENTER. GPSMAP 176/176C Owner’s Manual Circle... -
Page 27: Recent Waypoint List
ASIC PERATION Recent Waypoint List The GPSMAP 176/176C also contains a recent waypoint list. This list records your recent waypoint finds along with the bearing and distance from your current location. Pressing MENU activates a submenu allowing you to remove one or all of the entries in this list. -
Page 28: Going To A Destination
OING TO A ESTINATION Going to a Destination The GPSMAP 176/176C provides four ways to navigate to a destination: Go To Point, Navigate Route, Navigate Track (TracBack), and MOB (Man OverBoard) navigation. Once you are actively navigating, a straight line that always runs from your current location to the destination appears on the Map page. -
Page 29: Selecting A Go To Graphically
If you are selecting a map item as a destination, the GPSMAP 176/176C automatically uses the name of the map item, but the point is not stored in the waypoint list. -
Page 30: Tracback Navigation (Navigating A Track)
The Save feature allows you to store up to 15 track logs from certain times and dates. Total number of points Changes the display color of the track. (GPSMAP 176C only) Highlight Save and press ENTER to save an active track log. GPSMAP 176/176C Owner’s Manual... - Page 31 You must first save a track before using the Navigate Track option. If there are no saved tracks, the Navigate Track option is disabled. Once a TracBack has been activated, the GPSMAP 176/176C takes the track currently stored in memory and divides it into segments called “legs.”...
-
Page 32: Mob
MOB point. The MOB waypoints are stored in the waypoint list and may be deleted like any other waypoint. To stop navigation to the MOB location, press NAV, highlight Stop Navigation, and press ENTER. GPSMAP 176/176C Owner’s Manual... -
Page 33: Creating A Route
Creating a Route The last way to navigate to a destination is to create a user-defined route. The Garmin GPSMAP 176/176C lets you create and store up to 50 reversible routes with up to 50 waypoints each. Routes can be created in two ways. - Page 34 3. Press MENU, select Edit as Text, and press ENTER. 4. Use the ROCKER to highlight the first blank field under the word Waypoint and press ENTER. Choose the type of point to add to the route. GPSMAP 176/176C Owner’s Manual...
-
Page 35: Following A Route
ENTER to add the point to the route. 7. Repeat steps 4-6 until you finish adding route points. Press QUIT to return to the Route List page. GPSMAP 176/176C Owner’s Manual ASIC Following a Route The NAV key activates the route for navigation. You can navigate the route in the same sequence as it was originally created, or inverted and navigated from the end waypoint back to the beginning waypoint. -
Page 36: Route List Page
REATING A OUTE Route List Page The GPSMAP 176/176C Route List page, the Route tab of the Main Menu, displays all the routes currently stored in memory, along with a descriptive name for each route. By pressing the MENU button on the Route List page, the following menu options appear: Navigate, Go To Point, Navigate Route, Navigate Track, and Stop Navigation. -
Page 37: Route Review Page
1. From the Route List, press MENU. 2. Highlight Delete All and press ENTER. Highlight OK and press ENTER again to confirm. GPSMAP 176/176C Owner’s Manual ASIC Route Review Page Once you have created a route, you can edit a selected route from the Route Review page. - Page 38 REATING A OUTE The Route Review page allows you to enter a 15-character name for any listed route. The GPSMAP 176/176C creates a default route name using the first and last waypoint names. To enter a custom route name: 1. From the Route Review page, highlight the name field and press ENTER to begin editing.
-
Page 39: Route Review Menu Options
Add Waypoint—allows you to insert a waypoint or point from the Find Menu before a waypoint that is highlighted on the route list, or add a point(s) onto the end of the route. GPSMAP 176/176C Owner’s Manual ASIC Remove Waypoint—allows you to remove a point (waypoint or map item) from a route. - Page 40 4. If you are not inserting an existing waypoint, press ENTER to confirm the new waypoint. 5. Repeat steps 3 and 4 to insert additional waypoints, or press QUIT to finish. Highlight the route leg on which you wish to insert a waypoint and press ENTER. GPSMAP 176/176C Owner’s Manual...
- Page 41 4. Press QUIT to return to the Route Review page. Drag the route leg to an existing waypoint (shown), map item, or a blank spot on the map to create a new route point. GPSMAP 176/176C Owner’s Manual ASIC PERATION To insert a point into the route or add a point to the end: 1.
- Page 42 3. To enter planning information, from the Route Review page only, press MENU and select Plan Route. Enter the figures for Speed, Fuel Flow, Departure Time, and Departure Date. Press QUIT to return to the Route Review page. then press ENTER GPSMAP 176/176C Owner’s Manual...
-
Page 43: Active Route Page
Active Route Page Whenever you have activated a route in the GPSMAP 176/176C, the Active Route page shows each point (waypoint or map feature) of the active route. It also shows the point name, Distance, Course, ETA, Fuel to point, Leg Distance, Leg Fuel, Leg Time, Sunrise and Sunset at point location, and Time To point for each point from your present location. - Page 44 Map, viewing notes on a MapSource or BlueChart map, viewing a tide chart, viewing the list of maps on your data card, and viewing the next item in the search results list. GPSMAP 176/176C Owner’s Manual...
-
Page 45: Main
AGES The GPSMAP 176/176C contains five main pages: Map, Compass, Highway, Active Route/Go To, and Numbers. You can access these pages by pressing PAGE to cycle forward through the pages or QUIT to cycle backward until the page you wish is displayed. - Page 46 The map setup option uses a file tab feature, organizing the various settings for ease of use. Declutter On/Declutter Off—toggles between showing spot soundings and map outlines for easier viewing. GPSMAP 176/176C Owner’s Manual...
- Page 47 4. Press QUIT to finish. GPSMAP 176/176C Owner’s Manual Pointer To setup the page layout: 1. From the Map page, press MENU. Highlight Setup Page Layout and press ENTER.
- Page 48 2. Use the ROCKER to highlight the desired file tab, highlight the setting you want to change, and press ENTER. 3. Press Up or Down on the ROCKER to highlight to the desired setting and press ENTER. 4. To exit, press QUIT. GPSMAP 176/176C Owner’s Manual...
-
Page 49: Compass Page
NOTE: The bearing pointer and compass ring may point in various directions when you are stationary or at very low speeds. Once you start moving, the pointer is correct. GPSMAP 176/176C Owner’s Manual Compass Page Options The Compass page features a menu page that provides access to layout and data field options. -
Page 50: Highway Page
The data window layout may also be changed to display additional data fields and change the actual size of the data displayed. Press MENU to display the GPSMAP 176/176C Owner’s Manual Data Fields Zoom... - Page 51 Next, Route, or Other Waypoints are displayed on the Highway page. Highway Page Options Menu GPSMAP 176/176C Owner’s Manual To setup the page layout: 1. Highlight the Setup Page Layout option and press ENTER. 2. Select the desired option from the following and press ENTER.
-
Page 52: Active Route Page
OUTE AND UMBERS Active Route Page Whenever you have activated a route in the GPSMAP 176/176C, the Active Route page shows each waypoint of the active route, along with various, user-selectable types of data. For additional information about the Active Route page, see page 39. -
Page 53: Main Menu Page
Main Menu Tabs Main Menu Page GPSMAP 176/176C Owner’s Manual To select a menu tab from the Main Menu page: 1. Press the ROCKER Up or Down to highlight the tab you want to view. The information for the highlighted tab automatically appears to the right. -
Page 54: Gps Tab
• Dark signal strength bars—the receiver has collected the necessary data and the satellite(s) are ready for use. As soon as the GPSMAP 176/176C has collected the necessary data from the best satellites in view to calculate a fix, the status field indicates 2D or 3D status. - Page 55 WAAS system, its satellite positions and current state of development, visit the FAA Web site: http://gps.faa.gov. Since WAAS requires CPU resources of the GPSMAP 176/176C to From the Main Menu System tab, highlight the WAAS field and press ENTER to Enable or Disable WAAS.
- Page 56 2D mode and a D shows on the strength bar of satellites being corrected. • 3D GPS Location—at least four satellites with good geometry have been acquired and your position is now being calculated in latitude, longitude, and altitude. 3D Differential appears when you are receiving DGPS corrections in 3D mode and a D shows on the strength bar of satellites being corrected.
- Page 57 NOTE: If a DGPS receiver is attached to the unit and Garmin DGPS, RTCM In/NMEA Out, or Other DGPS is enabled on Port 2, WAAS is automatically disabled (WAAS Off). It is not possible for the GPSMAP 176/176C to receive WAAS and DGPS corrections at the same time.
-
Page 58: Trip Tab
The Route tab contains a list of available routes. For detailed information on routes, see pages 32-35. Points Tab The Points tab contains the User, Proximity, and Recent waypoint lists. For detailed information on the Points tab, see pages 19-23. GPSMAP 176/176C Owner’s Manual... -
Page 59: Track Tab
The Active tab displays information about the active track log (the log currently being recorded). It displays track memory used and current settings. Track Menu—Active Tab GPSMAP 176/176C Owner’s Manual For the Active tab, the following settings are available: • Record Mode—lets you select one of three track recording options: Off: No track log is recorded. -
Page 60: Saved Tab
2. Follow <track name> automatically appears highlighted. Press ENTER. 3. Choose either Original, which navigates you from the end to the start of your trip, or Reverse, which navigates you from the start to the end of your trip, and press ENTER. GPSMAP 176/176C Owner’s Manual... -
Page 61: Alarm Tab
Enter a value in the distance field and use the control field to turn the alarm on and off. GPSMAP 176/176C Owner’s Manual System • Clock—provides an alarm for the system clock. Enter a time in the time field and turn the alarm on and off from the control... -
Page 62: Celestial (Celes) Tab
(STA) appearing at the bottom. Daytime (light bar) and nighttime (dark bar) show across the time range, and the time progressing from left to right (local GPSMAP 176/176C Owner’s Manual Station Name Date... - Page 63 The four data fields below the chart indicate event times and levels at which the tide changes. GPSMAP 176/176C Owner’s Manual Searching for Tide Stations To view the chart for a tide station near your current location: 1.
- Page 64 Information page for the chart. This shows the station’s distance and bearing from the selected map location, and the station’s position coordinates. 5. Highlight Show Chart and press ENTER to view the chart. GPSMAP 176/176C Owner’s Manual...
-
Page 65: Sun & Moon Tab
3. To return to the current time, press MENU and select Stop Moving Cursor. GPSMAP 176/176C Owner’s Manual Sun & Moon Tab The Sun & Moon tab displays celestial data for Sun and Moon rise/set, Moon phases, and approximate skyview location of the sun and moon. -
Page 66: Hunt & Fish Tab
1. Highlight the Location field and press ENTER. 2. The Find window appears. Make a selection and press ENTER until the information for that location is displayed on the Hunt tab. See page 39 for more information on using the Find feature. GPSMAP 176/176C Owner’s Manual... -
Page 67: Map Tab
In Land Mode, land appears light and water is dark. If using optional BlueChart data, Water Mode is recommended. GPSMAP 176/176C Owner’s Manual AutoZoom—On/Off: when On the map automatically adjusts the zoom range to a lower range as you approach you destination point. -
Page 68: Waypoint Tab
• Text—Off, Small, Medium, and Large: controls the screen size of the name. • Zoom—Auto, Off, 20 ft–800 mi: sets the maximum range at which the feature appears on the screen. Some types of data are only displayed at certain zoom ranges. GPSMAP 176/176C Owner’s Manual... -
Page 69: Navaids Tab
• Auto: BlueChart maps are drawn using symbols similar to the NOAA/NIMA standard. Non-BlueChart maps are drawn using traditional Garmin symbols. Garmin: maps are drawn using traditional Garmin symbols. • • NOAA: maps are drawn using the NOAA/NIMA symbol set. -
Page 70: Track Tab
• Text—Off, Small, Medium, and Large: controls the screen size of the name. • Zoom—Auto, Off, 20 ft–800 mi: sets the maximum range at which the contours appear on the screen. Some types of data are only displayed at certain zoom ranges. GPSMAP 176/176C Owner’s Manual... -
Page 71: City Tab
• Zoom—Auto, Off, 20 ft–800 mi: sets the maximum range at which the cities appear on the screen. Some types of data are only displayed at certain zoom ranges. GPSMAP 176/176C Owner’s Manual Road Tab The Road tab contains Text and Zoom settings that control how Freeway, Highway, Local Road, and Local Road Names are displayed on the Map page. -
Page 72: Other Tab
1. From the Map setup page, highlight the desired tab or setup feature you want to restore settings for and press MENU. 2. Highlight Defaults (highlight All Map Defaults if you want all tabs restored) and press ENTER. Data Card Information Screen Options GPSMAP 176/176C Owner’s Manual... -
Page 73: Setup Tab
ENTER. Highlight Next or Map List to return to the map list. 5. Press QUIT when finished to return to the Map setup page. GPSMAP 176/176C Owner’s Manual Setup Tab The Setup tab contains general unit options for the basic unit features. -
Page 74: Time Tab
Press MENU for the following options: • Defaults—restores settings on System page to default values. • All Unit Defaults—restores all settings to Garmin’s original setup values for the entire unit. • System Information—displays the unit’s software, basemap version, and electronic serial number. -
Page 75: Units Tab
If you are using a map or chart in conjunction with your GPS, make sure the settings under the Location tab of the GPSMAP 176/176C match that of the map or chart. This information should be displayed somewhere on the map or chart. - Page 76 • Taiwan Grid • Loran TD • User Grid • W Malayan RSO WARNING: Selecting the wrong map datum can result in substantial position errors. When in doubt, use the default WGS 84 datum for best overall performance. GPSMAP 176/176C Owner’s Manual...
- Page 77 Enter a magnetic variation. GPSMAP 176/176C Owner’s Manual To enter a user-defined magnetic variation: 1. With the Heading field set to User Mag Var, highlight the Magnetic Variation field and press ENTER.
-
Page 78: Interface Tab
Request Almanac, Request Proximity, Request Routes, Request Tracks, Request Waypoints, Send Almanac, Send Proximity, Send Routes, Send Tracks, and Send Waypoints. • Garmin DGPS—used to connect the GPSMAP 176/176C with a Garmin DGPS beacon receiver. • NMEA In/NMEA Out—supports the input/output of standard NMEA 0183 version 2.3 data and sonar NMEA input support... - Page 79 The information is used to tune the beacon receiver. To have the unit automatically scan for a frequency: 1. With the unit set to Garmin DGPS or RTCM In/NMEA Out, use the ROCKER to highlight the Beacon field and press ENTER.
- Page 80 DGPS receiver uses. To manually enter a frequency and bit rate: 1. With the unit set to Garmin DGPS or RTCM In/NMEA Out, use ROCKER to highlight the Beacon field and press ENTER.
- Page 81 NMEA Interface If you are going to interface the GPSMAP 176/176C with another piece of equipment (such as a radar or autopilot), the unit needs to be set to output NMEA data. The NMEA data can be customized to shorten the update time from the unit. If too many NMEA sentences are activated, the unit may take longer than two seconds to update.
-
Page 82: Appendix
Fuse: AGC/3AG - 2.0 Amp Alkaline batteries lose a significant amount of their capacity as the temperature decreases. Use lithium batteries when operating the GPSMAP 176/176C in below freezing conditions. Extensive use of screen backlighting significantly reduces battery life. Different battery brands vary in useful life. -
Page 83: Connecting The Power/Data
Connecting the Power/Data The power/data cable connects the GPSMAP 176/176C to a 8–35 volt DC system and provides interface capabilities for connecting external devices. The color code in the diagram below indicates the appropriate harness connections. Replacement fuse is a AGC/3AG - 1.5 Amp fuse. -
Page 84: Satellite Information
The Satellite Strength Indicator Bars not only show the strength of the signal being received, they also show the status of the signal. The bars are either shaded or filled. The gray bar means the GPS is Inner ring- 45°... -
Page 85: What Is Waas
3 vertical meters throughout the majority of the continental U.S. and portions of Alaska. For more information, go to http://gps.faa.gov/Programs/WAAS/waas.htm. NOTE: If you are using the GPSMAP 176/176C outside of the U.S., we recommend that you turn off WAAS for the most accurate location fix. -
Page 86: Map Datums
NAD27 Canal Zn North American 1927- Canal Zone NAD27 Caribbn North American 1927- Caribbean (Barbados, Caicos Islands, Cuba, Dominican Repuplic, Grand Cayman, Jamaica, Leeward and Turks Islands) NAD27 Central North American 1927- Central America (Belize, Costa Rica, El Salvador, Guatemala, Honduras, Nicaragua) GPSMAP 176/176C Owner’s Manual... - Page 87 Ord Srvy GB Old Survey Great Britain- England, Isle of Man, Scotland, Shetland Isl., Wales Pico De Las Nv Canary Islands GPSMAP 176/176C Owner’s Manual Potsdam Potsdam-Germany Prov S Am ‘56 Prov So Amricn ‘56- Bolivia, Chile, Colombia, Ecuador, Guyana, Peru, Venezuela Prov S Chln ‘63...
-
Page 88: Navigation Terms
Course—The desired course between the active from and to waypoints. Depth—the depth below transducer. This field is only active if there is a transducer connected to the GPSMAP 176/176C. Distance (Dist)—The distance from current location to a destination. Dist to Destination—The distance from current location to a Goto destination, or the final waypoint in a route. - Page 89 Voltage—Current voltage reading being received by unit. Water Speed—the speed through the water. This field is only active if the GPSMAP 176/176C is receiving speed readings from a NMEA device. Water Temp—the water temperature. This field is only active if the GPSMAP 176/176C is receiving speed readings from a NMEA device.
-
Page 90: Messages
Narrow the search using the city or postal code. Database Error—Internal problem with the unit. Contact your dealer or Garmin Product Support to have the unit repaired. Deep Water—The water is deeper than the amount set in the Deep Water Alarm. - Page 91 This is only displayed when the track recording setting is set to “Stop When Full.” GPSMAP 176/176C Owner’s Manual Track Truncated—A complete uploaded track will not fit in memory. The oldest track log points have been deleted.
-
Page 92: Loran Td System
The LORAN TD (Time Delay) feature eases the transition from using LORAN to using GPS. The GPSMAP unit automatically converts GPS coordinates to LORAN TDs for those who have a collection of LORAN fixes for favorite fishing spots and other waypoints recorded as TDs. - Page 93 TD coordinate anywhere in the world. You must know your GRI chain number and secondary stations to create a LORAN TD position. For more information please read our LORAN TD Position Format Handbook, available at the Garmin Web site (www.garmin.com/support/userManual.jsp.) PPENDIX...
-
Page 94: Optional Accessories
MapSource CD-ROMs to a data card, either directly through your GPSMAP 176/176C using the PC Interface Cable, or with the Data Card Programmer. USB Data Card Programmer—Programs blank data cards at high speed through a PC. -
Page 95: Software License Agreement
Product Registration link on our Home page. Use this area to record the serial number (8-digit number located on the back of the box) in case your GPSMAP 176/176C unit is lost, stolen, or needs service. Be sure to keep your original sales receipt in a safe place or attach a photocopy inside the manual. -
Page 96: Limited Warranty
Garmin retains the exclusive right to repair or replace the unit or software or offer a full refund of the purchase price at its sole discretion. SUCH REMEDY SHALL BE YOUR SOLE AND EXCLUSIVE REMEDY FOR ANY BREACH OF WARRANTY. -
Page 97: Fcc Compliance
The Garmin GPSMAP 176/176C has no user-serviceable parts. Should you ever encounter a problem with your unit, please take it to an authorized Garmin dealer for repairs. The GPSMAP 176/176C is fastened shut with screws. Any attempt to open the case to change or modify the unit in any way will void your warranty and may result in permanent damage to the equipment. -
Page 98: Safety Information
WARNING: For use in vehicles, it is the sole responsibility of the owner/ operator of a vehicle with the GPSMAP 176/176C installed to place and secure the device so it will not interfere with the vehicle operating controls and safety devices, obstruct the driver’s view of driving conditions, or cause or personal... -
Page 99: Index
AutoZoom 63 Correction Signals 81 Average Location 16 Course Line 65 Course Up 63 Creating Routes 29 GPSMAP 176/176C Owner’s Manual Data Card 63, 69 FCC Compliance 93 Data Fields 42 Features 6 Data Transfer 74 Find Key 6, 39... - Page 100 TracBack 26 Route Tab 54 Activate 27, 56 Track Safety Information 94 Delete 56 Satellite Location 80 Track Log Satellite Sky View 80 Active 55 Setup Map Options 68 Clear 26 Navigating 26 Save 27, 56 GPSMAP 176/176C Owner’s Manual...
- Page 101 Creating 12 Creating Graphically 13 Delete 21 Editing 17 Entering Coordinates 14 Find 40 Insert 35 Lists 19 Menu Options 16 Move 19 Naming 17 Projecting 15 Proximity 22 Symbol 17 User List 20 View 19 GPSMAP 176/176C Owner’s Manual NDEX...
- Page 104 For the latest free software updates (excluding map data) throughout the life of your Garmin products, visit the Garmin Web site at www.garmin.com. © Copyright 2002-2005 Garmin Ltd. or its subsidiaries Garmin International, Inc. 1200 East 151 Street, Olathe, Kansas 66062, U.S.A.
Need help?
Do you have a question about the GPSMAP 176 and is the answer not in the manual?
Questions and answers